How To: Loop through a list from a SQL stored procedure
In most instances, when you configure the Loop Step with a reference, it works as you expect, allowing you to use information about each item in each Next Item iteration of the loop. You only need to follow the instructions in this topic if your reference's list method does not contain an input property to retrieve a single record, and all record information in the reference is returned as a concatenated string in each loop iteration.
When you use a SmartObject method in the Loop step, the method must have an input property to load a particular record in the reference, typically an ID, autonumber or GUID, but it could also be a non-key field that acts as a filter on the method. This means that you’re passing a key or filter field as an input to the method, and that the field selected in the Create Reference step is the same as the input on the SmartObject method that you use in the Loop step. If you don’t match these or there is no input property on the method, all rows are returned and concatenated for each iteration of the loop.
The Loop step is designed to use the references to get each referenced item's values from the SmartObject when it starts each loop. When there are no more items in the reference, the loop completes.
Service object methods, such as the GetContacts method for SQL stored procedure, do not always contain an input field. You can still configure looping in your workflow using the service object methods by creating a Loop Index and then using this index as the identifier .
This example is for scenarios where you cannot modify the stored procedure to contain a unique identifier.
Before you begin
This How To assumes that you are familiar with SQL stored procedures and K2.
Runtime Example

Scenario
You want to use a stored procedure that returns a list of customers in a workflow and send a notification email of available specials.
This scenario uses a SQL database called My SQL Database with a table called ContactDetails. The table contains four columns - ID, Company, Name, and Email. It also contains a stored procedure called GetContacts. A SQL service instance for this database and associated SmartObjects exist in your K2 environment. For more information about creating a service instance, see the Service Instances topic.
You use the Loop Index reference as the identifier that calls each item in the list.
Steps
In this step you assign a primary key to the ID field.
- Open Microsoft SQL Server Management Studio and connect to your SQL server. Locate the ContactDetails table, right click it and select Design.

- Select ID, right click it and select the Set Primary Key option.

- Save changes made to the table.
- Right click the ContactDetails table and select Edit Top 200 Rows. Add contact details as shown below, using the same email address such as administrator@denallix.com for each customer.

- Next, create a stored procedure called GetContacts.

- Execute a query on the GetContacts stored procedure. This returns the three records you added.

SELECT
ID,
Company,
Name,
FROM
DBO.ContactDetails
In this step you create a SQL service instance and SmartObjects.
- Using K2 Management, expand the Integration node and select Service Instances. Click Add.

- On the Configure Service Instance page, type the Display Name as My SQL Database. From the Authentication Mode menu, select ServiceAccount.

- Still on the Configure Service Instance page, locate the Service Keys section and type My SQL Database in the Database field. Click OK.

- The service instance is created. Click OK.

- From the Service Instance node, select the My SQL Database service instance and click Generate SmartObjects.

- On the Generate SmartObjects page, click Select All and then OK to generate the SmartObjects.

In this step you create the Loop Index to use the ID you configured in step 1.
- Usingthe K2 Designer, select the Monthly Specials workflow and click Edit.

- Select the Loop step and expand / collapse the configuration panel. Expand Options, locate the Index section and click Create to create an index reference.

- The Loop Index reference stores the current loop index. At runtime the selected loop index is used to loop through the list and send the email.

- Click the expand / collapse toggle to expand the Configuration Panel. Notice the new Loop Index variable.

In this step you configure the Send Email step to use the loop index variable in the address, subject and body of the mail.
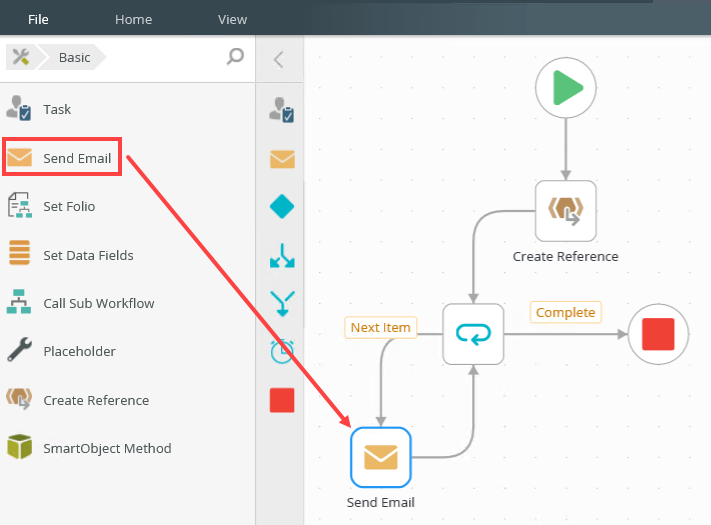
- From the Toolbox click the Basic category, then drag the Send Email step onto the canvas. Connect the step to the Next Item path of the Loop step.
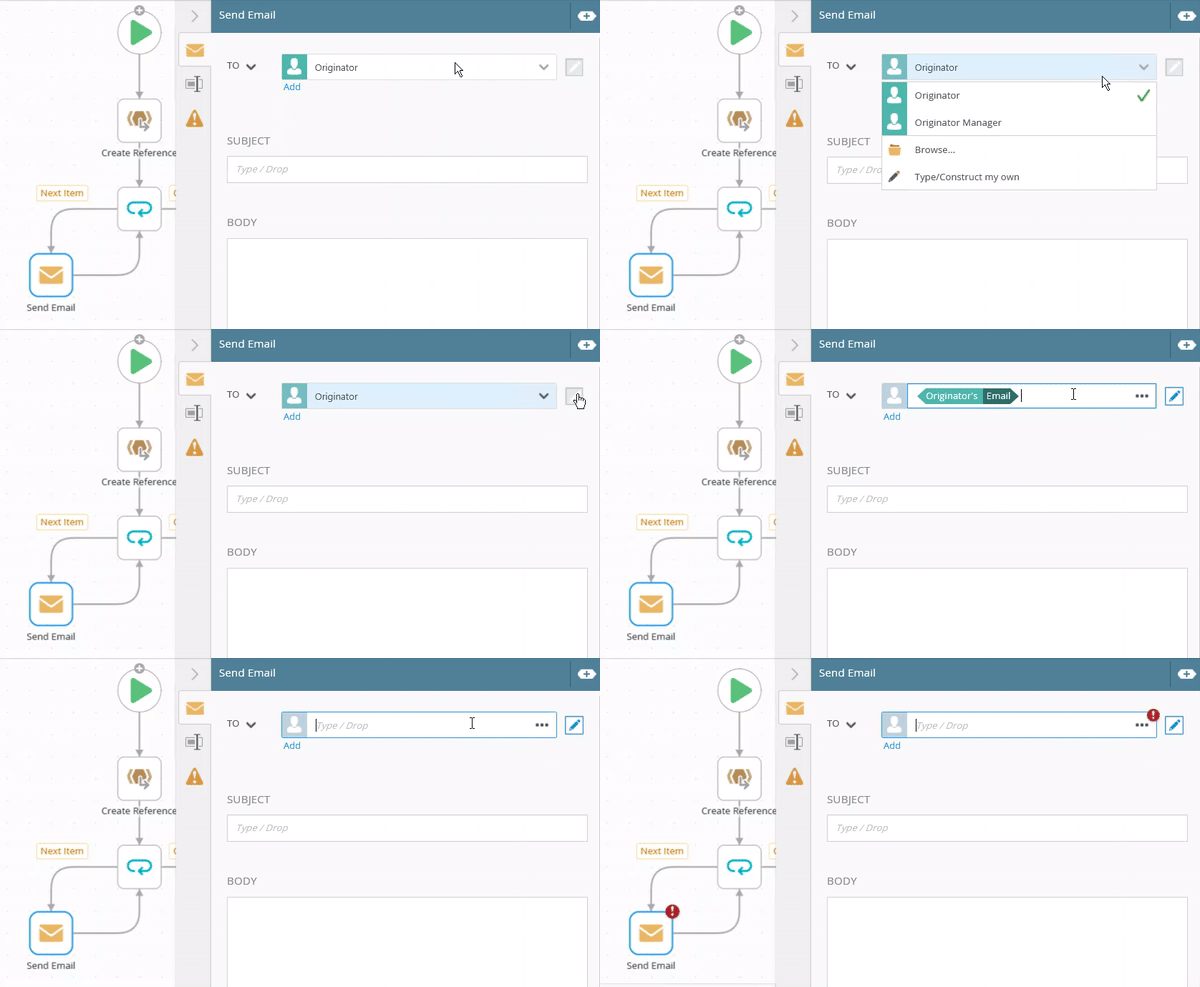
- Select the step and click the expand / collapse toggle to expand the Configuration Panel. You can also double click the step to expand the panel. Select the Email tab, click the toggle button, and delete Originator from the To field.
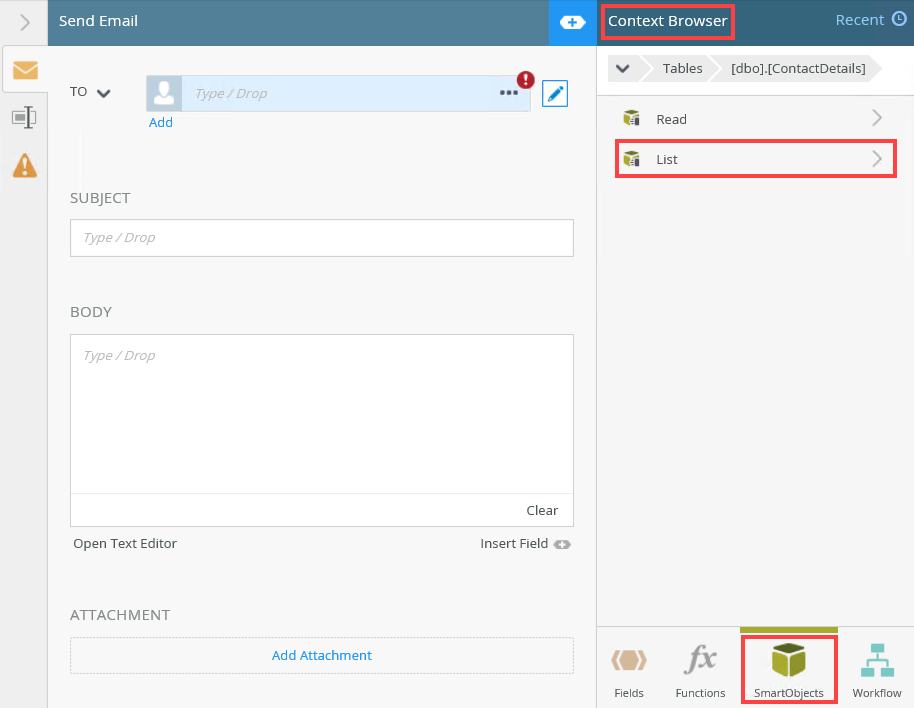
- Configure the To address to add the customer email address. From the Context Browser, select SmartObjects. Browse to the Contact Details SmartObject (SQL Server Service > My SQL Database > Tables > dbo.ContactDetails) and select the List method.
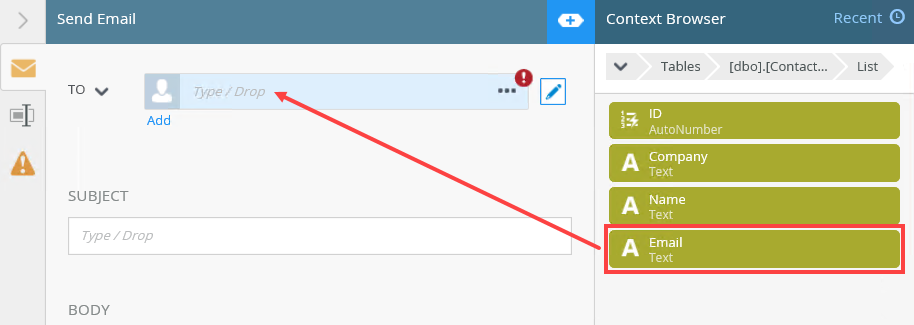
- From the List method, select the Email property and drag it into the To field.
- The Smartfield Composer shows. From the drop down menu, select ID.
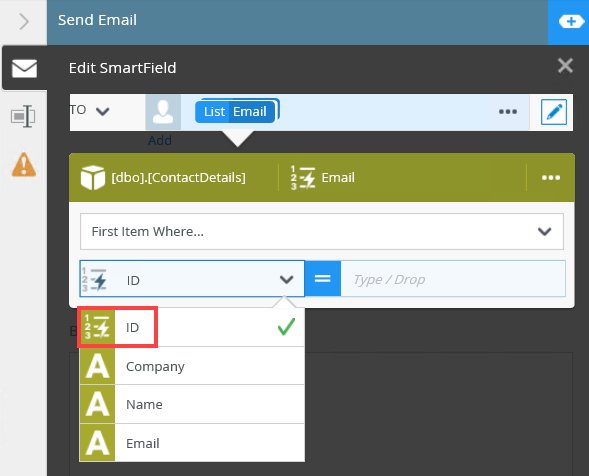
- From the Context Browser, select Fields and drag the Loop Index variable into the ID property field.
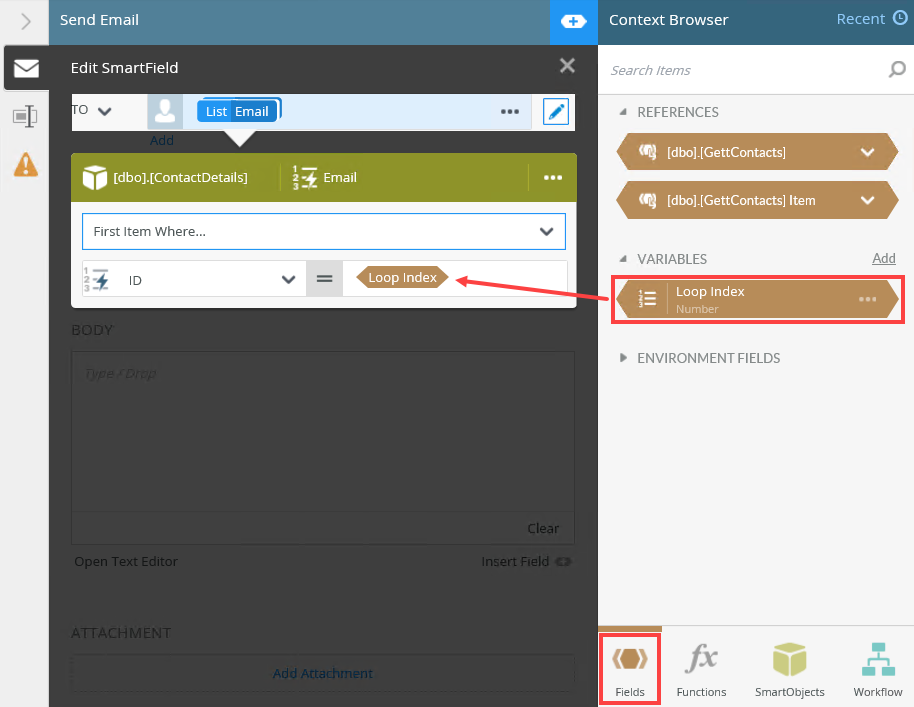
- Click X to close the Smartfield Composer.
- Configure the Subject and Body sections. In the Subject field type Monthly Specials. In the Body field type Hi, Please visit our website to view this month's specials..
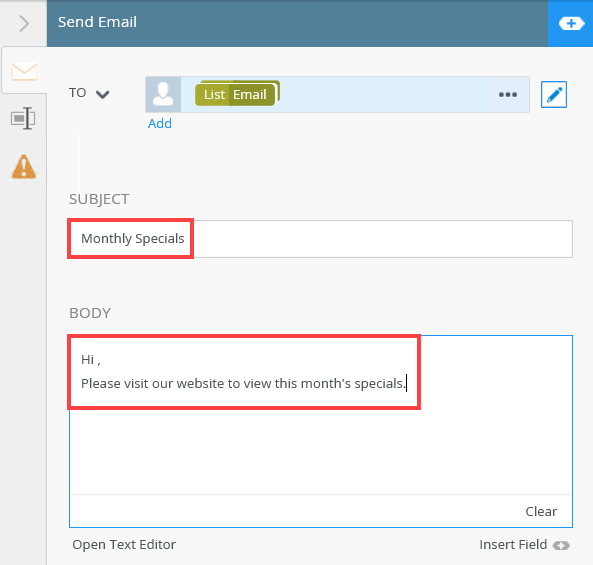
- From the Context Browser, select SmartObjects. Browse to the Contact Details SmartObject (SQL Server Service > My SQL Database > Tables > dbo.ContactDetails) and select the List method.

- From the List method, select the Name property and drag it into the body of the email.

- The Smartfield Composer shows. From the drop down menu, select ID.

- From the Context Browser, select Fields and drag the Loop Index variable into the ID property field.

- Click X to close the Smartfield Composer. The Send Email step configured as shown below.
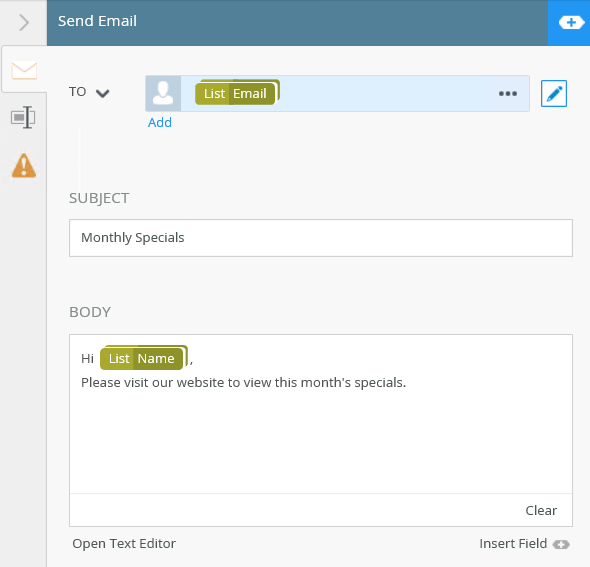
In this step you add the Send Email step and configure the email that you receive as confirmation that the loop completed.
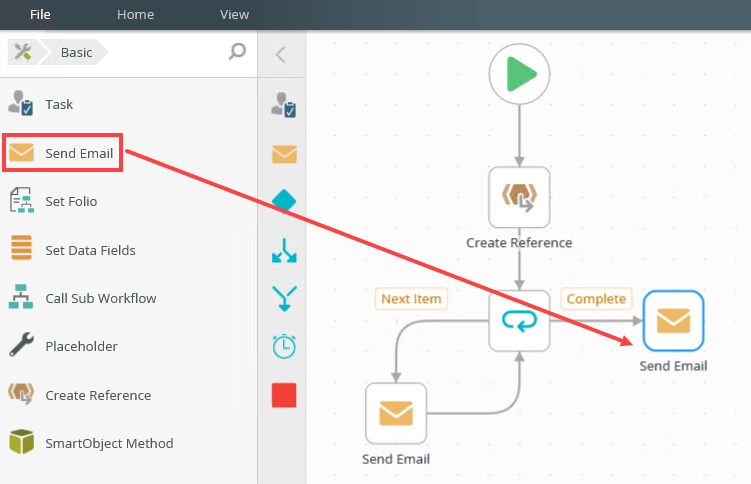
- From the Toolbox click the Basic category, then drag the Send Email step onto the canvas. Connect the step to the Complete path of the Loop step.
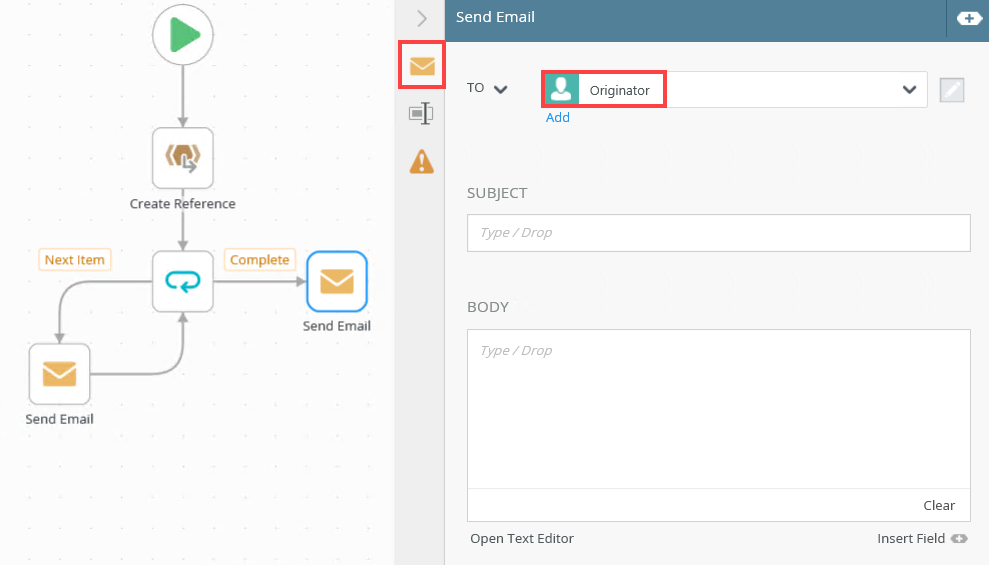
- Select the step and click the expand / collapse toggle to expand the Configuration Panel. You can also double click the step to expand the panel. Select the Email tab and ensure the Originator is configured in the To address field.
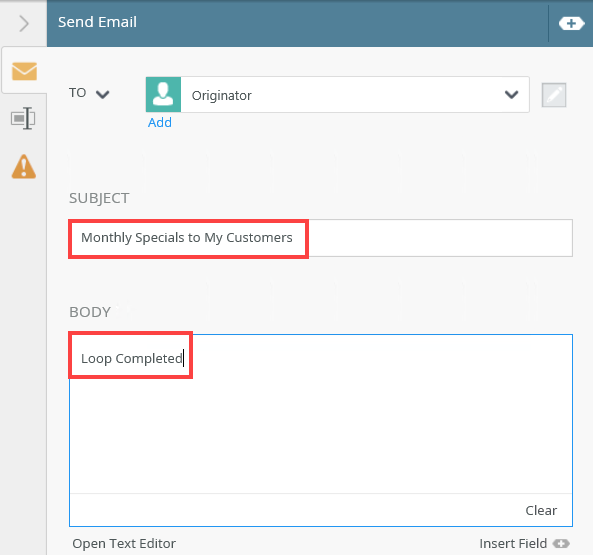
- Configure the Subject and Body sections. In the Subject field type Monthly Specials sent to My Customers. In the Body field, type Loop Completed.
In this step you add the End step to the workflow.
- From the Toolbox, click the Logic category and drag the End step onto the canvas. Connect the step to the Send Email step.
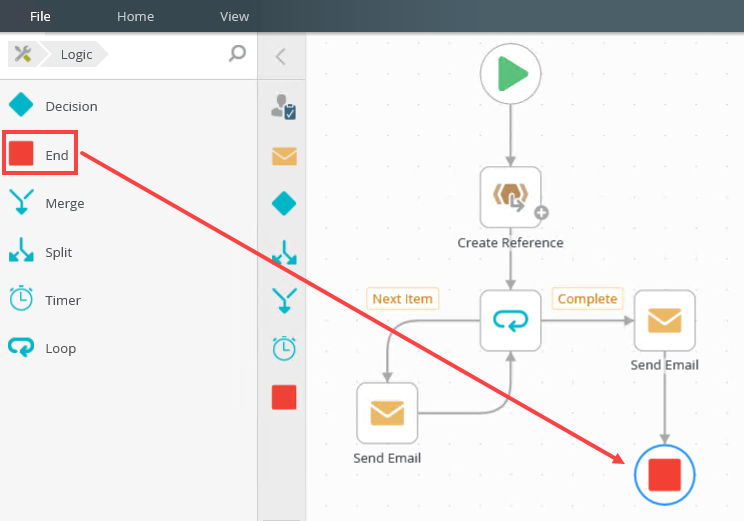
- Your workflow configuration is done and ready to be deployed.
In this step, you deploy your workflow.
- Select File and click the Deploy option.

- Deployment successful.

- Select File and click Close to close the workflow.
In this step, you start the workflow manually to start the loop and send the emailto your customers.
- Using K2 Management, manually start an instance of the Monthly Specials workflow.

- The workflow loops through the list and sends an email to each of the names on the list. Using the Loop Index as an input property for the ID ensures that the customized name property (and email address) is used correctly.
In this example, the list contains three customers (Peter, Daniel, and Sarah).
