Rules
You can create rules to respond to and control user interaction with controls, views and forms. Use rules to create basic and complex business logic in views and forms. The different components of a rule define when (event) something happens on the view or form, if (condition) it should occur, and what (action) happens. One example is to populate a control when a view initializes (opens).
When you create or edit a rule, the Rule Designer opens with templates to define the events, conditions and actions that make up your business logic.
As you define the rule, the definition is shown on the right of the designer. Items that are underlined are configured and items that have a dotted line still need configuration.

The following sections detail the specific steps involved when you create a rule.
| Steps | What it is |
|---|---|
| Events | Events, such as when someone clicks a button or data is changed |
| Conditions | Conditions determine if and when a rule or part of a rule executes in other words when the rule will execute |
| Actions | Actions defines what occurs, such as setting properties of controls, showing a message, transferring data or closing the view or form |
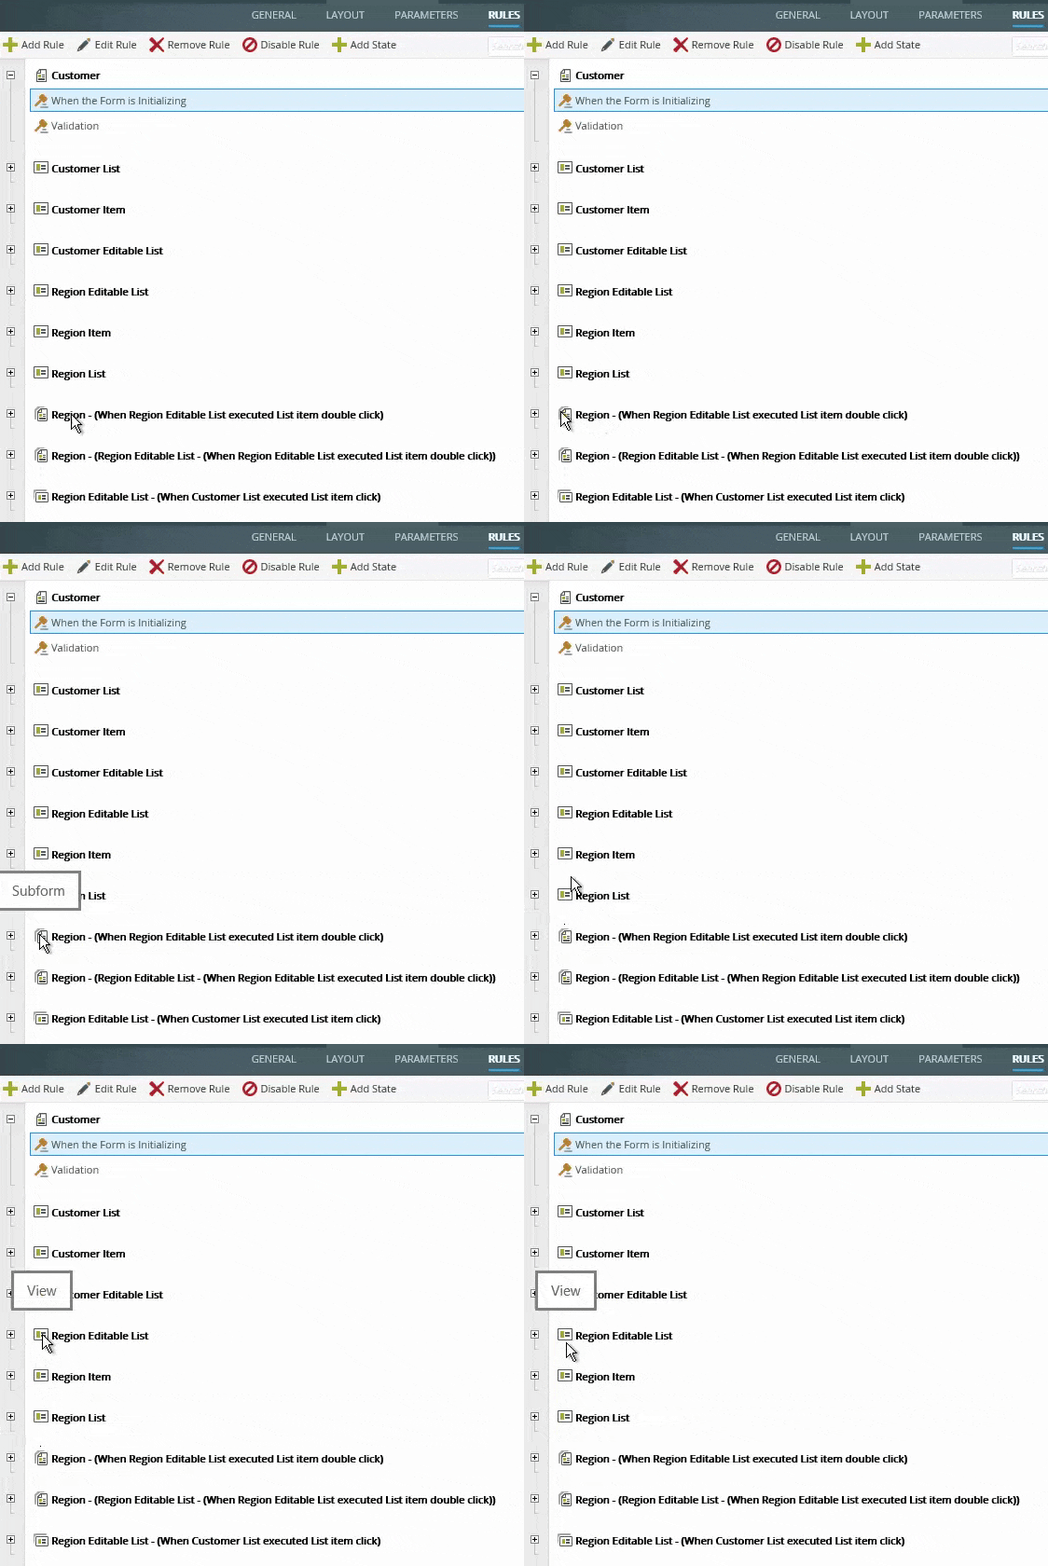
The rule grid groups rules together according to views, forms, subviews, subforms and unbound rules. You can create rules without events but that contain an action, called unbound rules. Hover over a rule to see the type of rule.

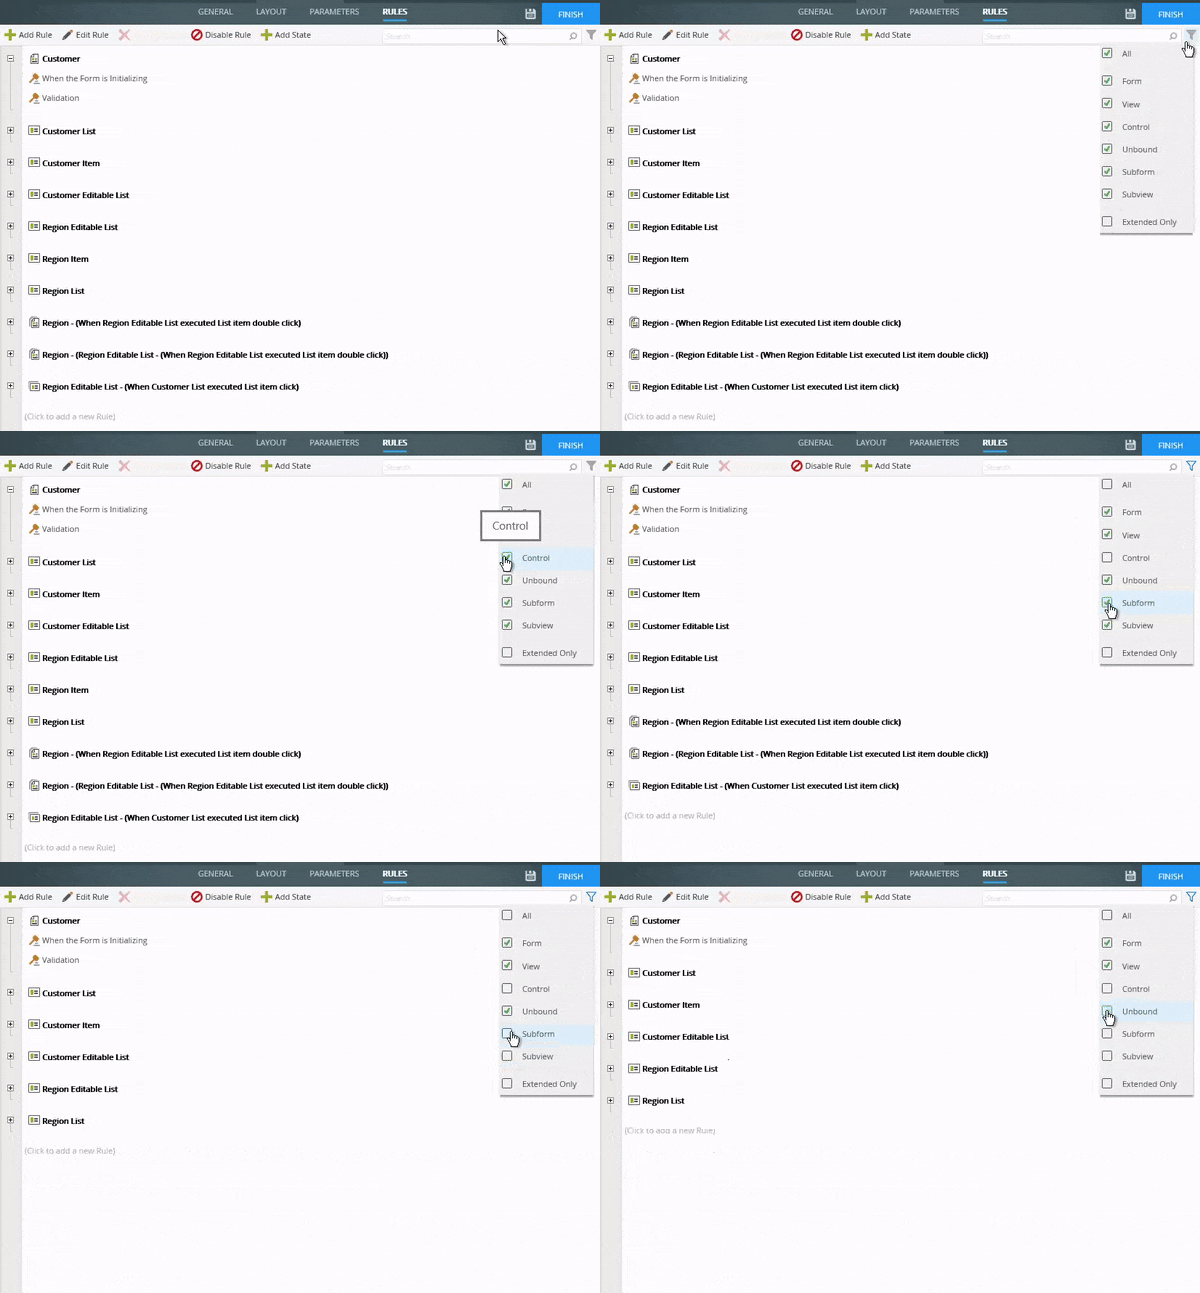
You can filter rules to only see specific ones. Click the filter icon and then select or deselect the type of rules you want to see. 
- Form - Form-based rules, for example if a form is initialized.
- View - View-based rules, for example when a view method is executed.
- Subview - Subview-based rules, for example when a subview is initialized.
- Subform - Subform-based rules, for example when a method is executed on a subform.
- Control - Control-based rules, for example when a control on a view is clicked.
- Unbound - Unbound rules where no events are configured. These types of rules must be executed from other rules.
- Extended Only - Inherited rules that are extended.
The Extended Only rule filter applies to inherited rules. Below is an example of the Customer form which inherits a view rule. Note the icon of the view rule. 
You extend the rule if you enable, disable, add, or remove rule actions or conditions. Note the rule icon of an extended rule.
Another example is when you integrate a workflow with a form, some rules are automatically extended. In the images below, the Base State is configured to start the workflow. The On Region Item, when Save Button is Clicked rule is extended in this case.


You can use search criteria to filter what you see in the rules list. When navigating back and forth between screens, and selecting another state in a form, your search criteria is maintained. Clear the search by clicking the Cancel Search and Filter icon. If you have many rules, you can use the filter and search features together to filter the results even further.

When you configure a rule on a view or form, it applies to that view or form. If you create a rule in a view and you use the view on a form, the form inherits the rule and displays it as a view rule in the Rule Designer. You can modify the view rule in the form and enable or disable a rule definition, but you cannot remove a rule definition from the rule. You can only remove rule definitions using the designer for that item. When you edit the inherited rule in the form and change the rule, the changes apply to the form and are not saved to the rule in the view, so there is no backwards inheritance. Follow the steps below to see how inheritance applies to view and form rules:
- Create a SmartObject called Customer.

- Generate an Item view from the SmartObject.
- Edit the view and navigate to the rules.
- Edit the When Create Button is Clicked rule. The rule definition looks like this:

- Generate a form from the view.
- Edit the form and navigate to the rules.
- Note the inherited view rules.

- Edit the On Customer Item when Create Button is Clicked rule and add an action to hide a view control.

- Save the rule and note the new icon. The icon shows that you extended the rule.
- Finish the form.
- Edit the view and navigate to the rules.
- Edit the When Create Button is Clicked rule.
- The action that you added to the rule on the form does not show. Add a Close the browser window action.

- Click OK then finish the view.
- Edit the form, navigate to the rules, and edit the On Customer Item when Create Button is Clicked rule. The extended rule now shows the
action you added to hide the Delete button and the close the browser window action.
