Error Console and Indicators
When you build a workflow, add and configure rules, create references and map to SmartObjects, there may be many dependencies between these steps. Example: If you drag a Task step onto the canvas, you need to add task actions. If you add recipients to this task, you need to configure them. If you add a Recipients Rule, you need to configure the rule by adding conditions. Your workflow will not deploy successfully if one or more of these dependencies are missing or not configured correctly.
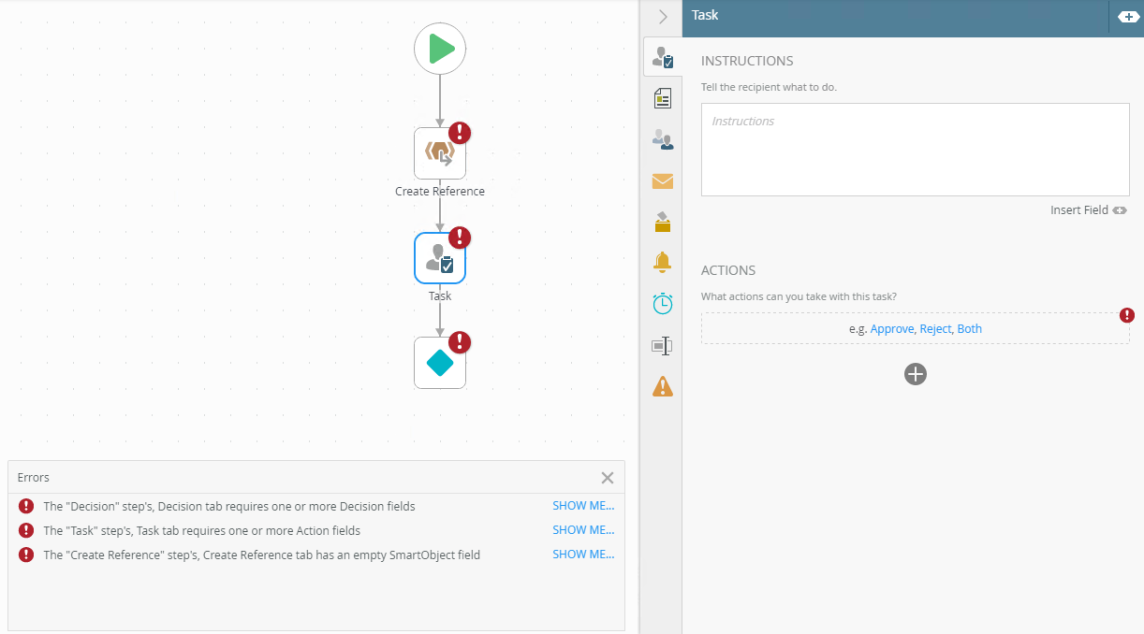
The workflow designer has a built in Error Console that checks these dependencies, as you build your workflow. The error console makes sure your configurations are correct. If not, a visual indicator (red exclamation mark or red dot) shows. Open the error console to see a detailed description of the error and use the Show Me link to navigate to the step where the error occurs.
Example of the Error Console

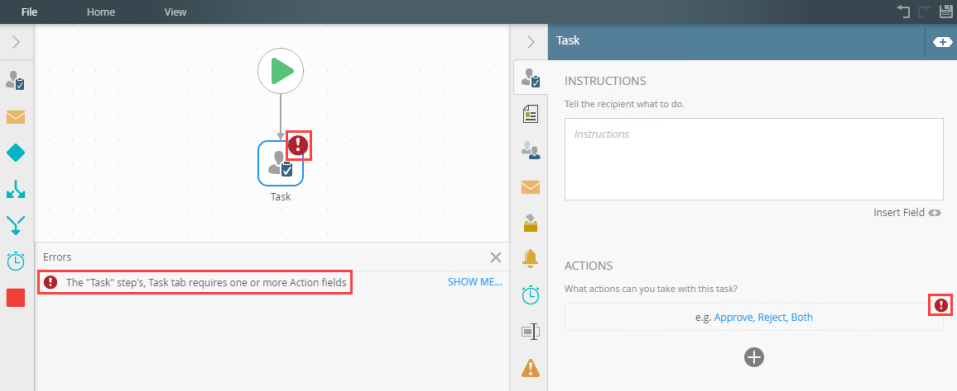
The error console makes sure your configurations are correct. If not, a visual indicator (red exclamation mark) shows. The following table explains the different types of error indicators:
| Indicator | Example |
|---|---|
| Main Indicator |
In this example, a main indicator on the Task step pointing out the missing Action fields on the Task tab.
 |
| Mini Indicator | In this example, a mini indicator showing a missing variable on the Send Email step.
 |
When building a workflow, indicator shows on the steps dragged on to the canvas. The indicator shows missing requirements and you cannot deploy your workflow until you correctly configure them. The indicators guides you to were the outstanding information is required. You can use the error console to see detailed information on what is required.
- Create a workflow and start dragging steps on the canvas. In this example, the Create Reference, Task, Set Data Fields, Send Email and Update List Items are dragged on the canvas.

- Select the Create Reference Step. Notice the indicator on the SmartObject field. This indicator shows that this is a required field and needs configuration.

- Select a SmartObject. Notice the indicator on the Method field. This indicator shows that this is a required field and needs configuration.

- Select a method from the drop down menu. Notice the indicator on the Identifier field. This indicator shows that this is a required field and needs configuration.

- Select an identifier from the drop down menu. Notice the indicator on the Create Reference step no longer shows.

- Another way to work through the indicators is to open the error console. Click the red indicator located at the bottom right of the canvas.
The error indicator shows the number of step errors.

- The error console opens.

- In here, you find a description of the error and on which step the error occurs. In this example, the Set Data Fields step has an empty Data Field field.

- Click on the Show Me... link. This link takes you directly to the step where the error occurs. This is especially useful when your workflow contains a large amount of steps.

- Notice the indicator on the Pick Field. This indicator shows that this is a required field and needs configuration.

- Add a variable and select it from the drop down menu. Notice the indicator on the Set Data Field step no longer shows.

- Clear the remaining indicators. You can now deploy your workflow.

- You cannot deploy a workflow until all indicators are cleared
- The Error Console window displays five error messages. To see more you need to scroll down.
- At this stage, indicators are added to the workflow designer and only tracks required properties configurations
- At this stage, no indicators on Create Item Reference controls
- Indicators only displays on the step if there are outstanding configurations on the steps' configuration panel
- Click the Show Me link to go to the step containing the error. The link does not navigate to the tab were the error occurs