7. Add a Reminder to the Manager Approval Step
In this step you will add a reminder to the Manager Approval step. When a recipient has not responded in the time allotted, the reminder action will execute. Reminders can be as simple as an email reminder, or more complex, such as redirecting the task to another user. Reminders can repeat themselves. For example, sending an email reminder every three days. Reminders are an effective tool for keeping workflows moving along and on time.
- In the Configuration Panel, add an email reminder for the Manager Approval step. Access the settings from the Reminders tab. You want the reminder to fire if the manager has not responded to the Manager Approval task two days prior to the Leave Start Date. You can use the Subtract Days function from the Functions > Date and Time menu in the Context Browser to accomplish this. This reminder should send an email to the workflow originator (leave requester) and the approving manager.
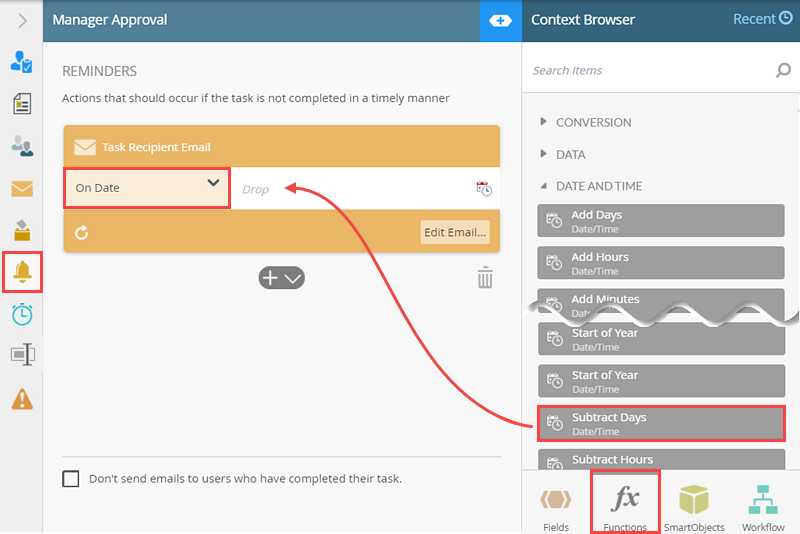
- If the approving manager has not responded to the Manager Approval task two days prior to the leave start date, you want to send them an email reminder. You will include the leave requester as well, so that they can follow up with the manager if necessary. You can configure reminders from the Reminders tab in the Configuration Panel for the Task step.
Select the Manager Approval step. Expand the Configuration Panel, then click the Reminders tab. Click the link to Add an Email Reminder.The easiest way to remind a recipient of an unactioned task is to send an email. You can configure the email to send just once, or periodically, such as every other day. A more complex method to handling unactioned tasks is to redirect the task to another user. You can also use a combination of the two. For example, sending three email reminders, then redirecting the task to another user. You may also hear the term "escalation". Reminders and escalations are the same thing.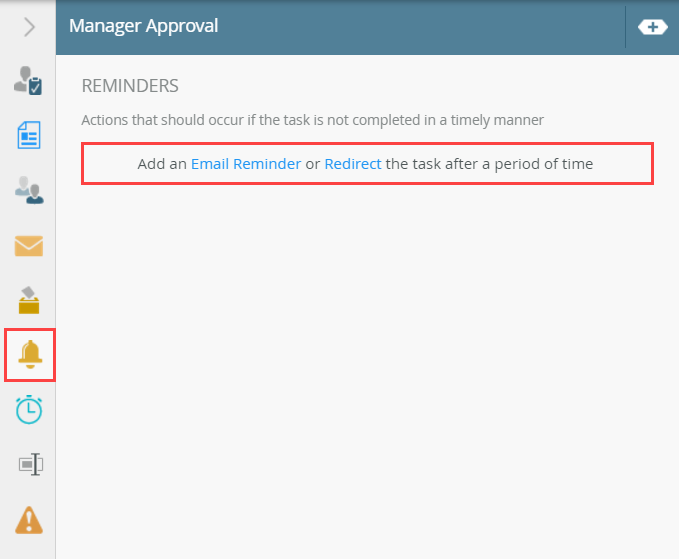
- Change the reminder date to On Date. You will configure the reminder to fire two days prior to the Leave Start Date. Expand the Context Browser. Click the Functions tab. The function you are adding will create a new (reminder) date by taking the Leave Start Date, minus two days. Expand the DATE AND TIME node. Drag a Subtract Days function into the Drop box.

- The Edit SmartField pane opens. Click the Fields tab and expand the Leave Request SmartObject reference. Drag the Leave Start Date into the Date and Time field. For the Days value, enter
2
then exit the SmartField editor. (Click the "X" in the upper right corner of the editor to exit it.) In this step, you configured a function that takes the Leave Start Date and subtracts two days from that date. (Remember this is the Subtract Days function, which is why you enter a number for the days to subtract.) This creates a "new" date for the reminder to execute.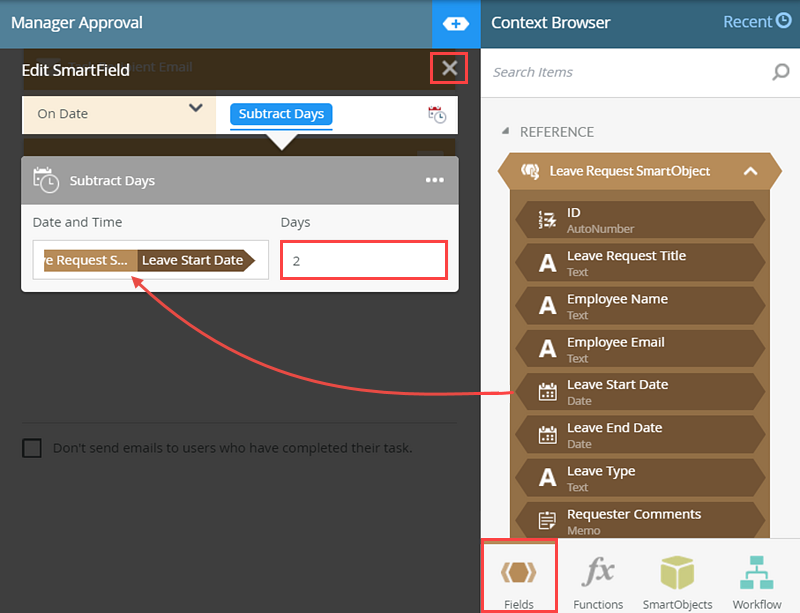
- If the approving manager has not responded to the Manager Approval task two days prior to the leave start date, you want to send them an email reminder. You will include the leave requester as well, so that they can follow up with the manager if necessary. You can configure reminders from the Reminders tab in the Configuration Panel for the Task step.
-
Configure the reminder recipients as the workflow originator and task participants. The reminder email routes to the requester and the requester's manager. The requester can follow up with the manager to keep the workflow process flowing. For the subject line and message body, use variables from the Context Browser to personalize the reminder message.
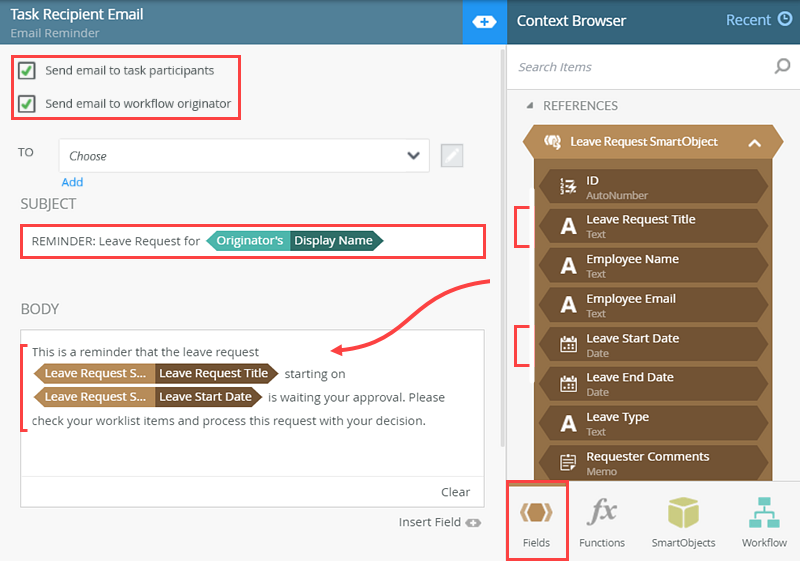
- You will send the reminder email to the requester (originator) and the approving manager. This way, the requester can follow up with the manager to keep the workflow moving.
Still on the REMINDERS screen, click the EDIT EMAIL link.
- CHECK the box to Send email to workflow originator. The box to Send email to task participants is already checked by default. The reminder email now routes to the leave requester (originator), in addition to the originator's manager.

- For the subject line, enter
REMINDER: Leave Request for [Originator Name]
then click the Workflow tab and expand the ORIGINATOR node. Drag the Display Name to the end of the subject line. Once again, this is a system value. Information about the current user, such as name, email, manager, etc. are stored as system values that you can use through the workflow configuration.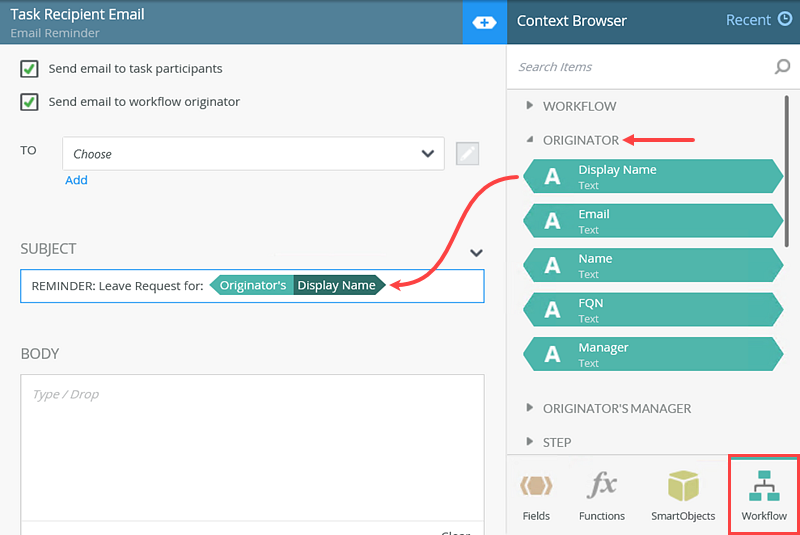
- For the message body, use Leave Request SmartObject references to personalize the email. The references are found within the Fields tab. Message body:
This is a reminder that the Leave Request [Leave Request Title] starting on [Leave Start Date] has not yet been approved. Please check your worklist items and process this request with your decision.
- Collapse the Escalation Email pane, then collapse the Configuration Panel.
- You will send the reminder email to the requester (originator) and the approving manager. This way, the requester can follow up with the manager to keep the workflow moving.
Review
In this step, you added an reminder that sends an email reminder to the requester and the approving manager. The reminder fires two days before the Leave Start Date if the manager has not responded to the request. You personalized the email to include details about the request for the recipient's convenience. reminders are an effective tool for keeping your workflows running smoothly and on time. Be careful about sending too many reminders as you do not want to crowd the recipient's in-box!