Leave Request (Basic Version): Application Design
The Leave Request (Basic Version) application is a simple, yet complete, application that demonstrates how to combine data (SmartObjects), forms (SmartForms), and workflow into a cohesive and fully-functional application. In this tutorial, you will build a Leave Request Approval application that stores the leave request data as a SmartObject in a SmartBox, that uses SmartForms to allow users to submit, view and approve leave requests, and a workflow that controls the leave request approval process.
Let's look at each of the components you will build in a little more detail.
Data
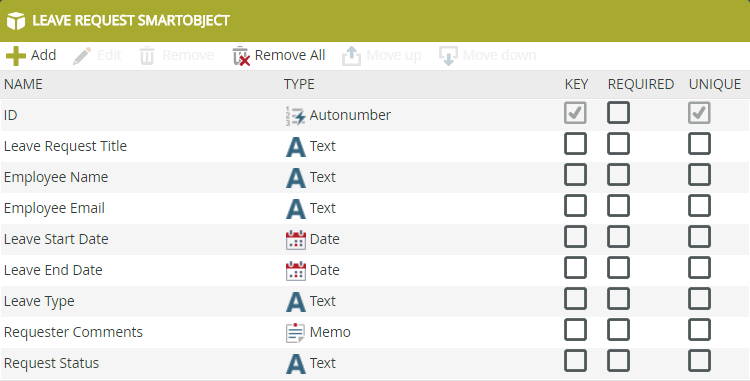
There are no pre-existing data sources for the Leave Request Basic application, so you will create a SmartObject to store leave request data in SmartBox. You will define, or add, the properties necessary to capture the leave request details, and rely on the default methods added to create and update the data.
The Leave Request (SmartBox) SmartObject

Forms
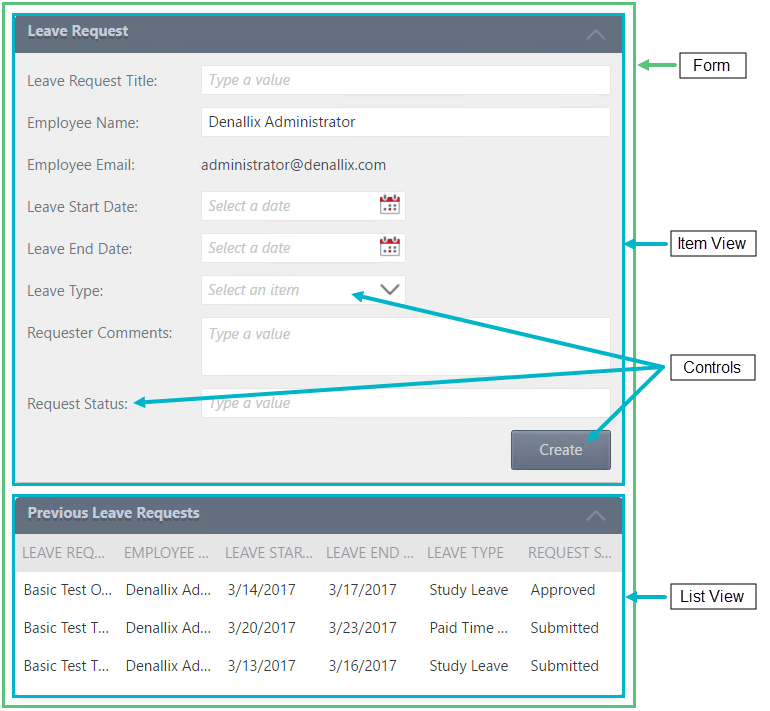
The Leave Request Form contains two views: the Leave Request Item View and the Leave Request List View. The item view is the user interface for creating new or editing existing leave requests. The list view displays the current user's past requests and their status. (The list view is a read-only view). We will be using this form to allow users to submit, view and approve leave requests.
The Leave Request Form

Workflow
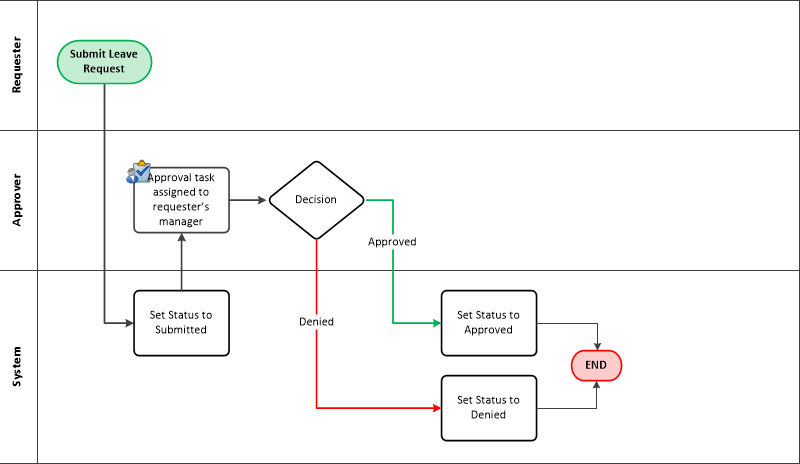
Let's consider the design of the workflow component of our leave request application. In the image below, there are two swim-lanes for user tasks. The first lane represents the requester, or the person who submits the leave request. The second lane represents the person who will make the approval decision. The third lane represents system tasks, or tasks that are managed behind-the-scenes. Notice that along the way, the workflow may move from one lane to another.
The Leave Request Workflow represented as a swim-lane flowchart

Leave Request Workflow
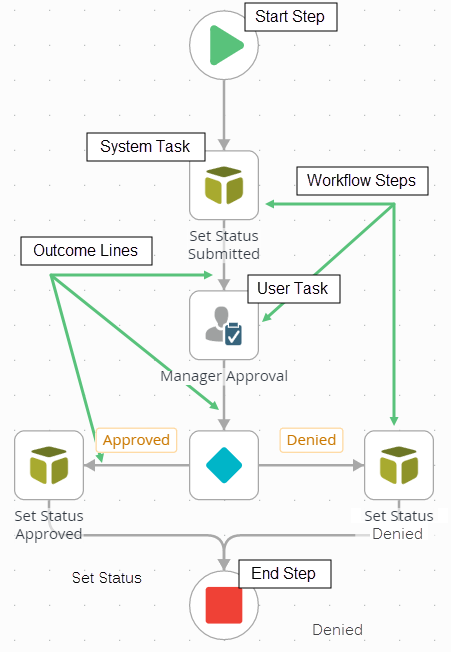
The Leave Request Workflow begins with a Start step (the green triangle). The next step is a SmartObject Method (system task) called Set Status Submitted. In this step, the K2 server updates the Request Status property of the Leave Request SmartObject.
The next step is a Task (user task) called Manager Approval. This is the step that requires the task recipient to decide whether to approve or deny the leave request. A Decision step follows and this step creates the outcomes, or lines, for each of the possible manager decisions. Each outcome has a SmartObject Method step that once again updates the request status property. Finally, there is a single End step, which provides a visual indicator that the workflow has completed.
The completed Leave Request Workflow
