27. Complete the Finance Processing Tasks
At this point, you have submitted two expense claims. One is at the Claim Approval step and the other is at the Finance Processing step. You will take action on the Finance Processing task which reflects the form's configuration and behavior for the Finance Processing State. You elected to configure the state and rules manually, so the form's format and behavior is somewhat different than the previous two topics. Recall that you assigned the Finance Processing Role as the task recipient for the Finance Processing step. When you created the role, you added just one member. You will now log in as that member, then process the finance task.
| TEST TWO
Expense claim submitted that is less than $100. |
|---|
| Form Check |
|
| Workflow Check |
|
| What this demonstrates |
| This step demonstrates the format and behavior when the worklist item rules are integrated manually. The rules first check to make sure the current step is the Finance Processing step (or activity), then they open the worklist item on the server. This prepares it so it can be actioned with a decision. Your rules now show the Finance Processing View and Finance Button Table. The view and table take the place of the Workflow task view that is added when you use the wizard to configure the worklist item rules. |
- Log into the users'email client.If you used your own account in the Finance Processing Role, you don't need to open the user's email client. Instead, you can action the task from your own email client.
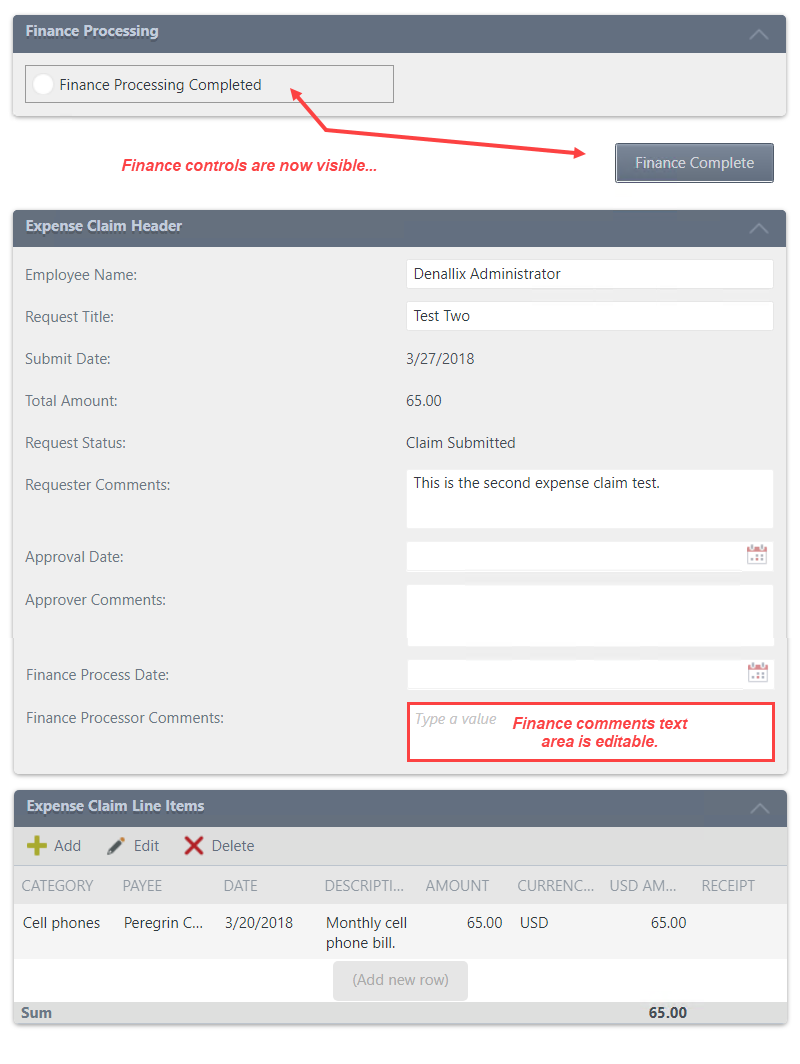
- You should see a task notification email. Use the worklist item link in the email to launch the Expense Claim Form. The form configuration should reflect the following:
- Finance Processing View is now visible at the top of the form
- Finance Button Table is now visible and contains one button: Finance Complete
- Add fields are read-only except the Finance Processor Comments text area
- There is a single radio button with Finance Processing Completed as its label. This reflects the single action configured for the Finance Processing task step.
- Click the open worklist item link in the email to launch the Expense Claim Form.
- Review the form. Notice the Finance Processing View and Finance Button Table are now visible. The Finance Processing View contains a single radio button, Finance Processing Completed. Recall that this is the only action you added for the Finance Processing task step. If you add additional actions, addition radio buttons appear, one for each action. The form is read-only with the exception of the Finance Processor Comment text area.

-
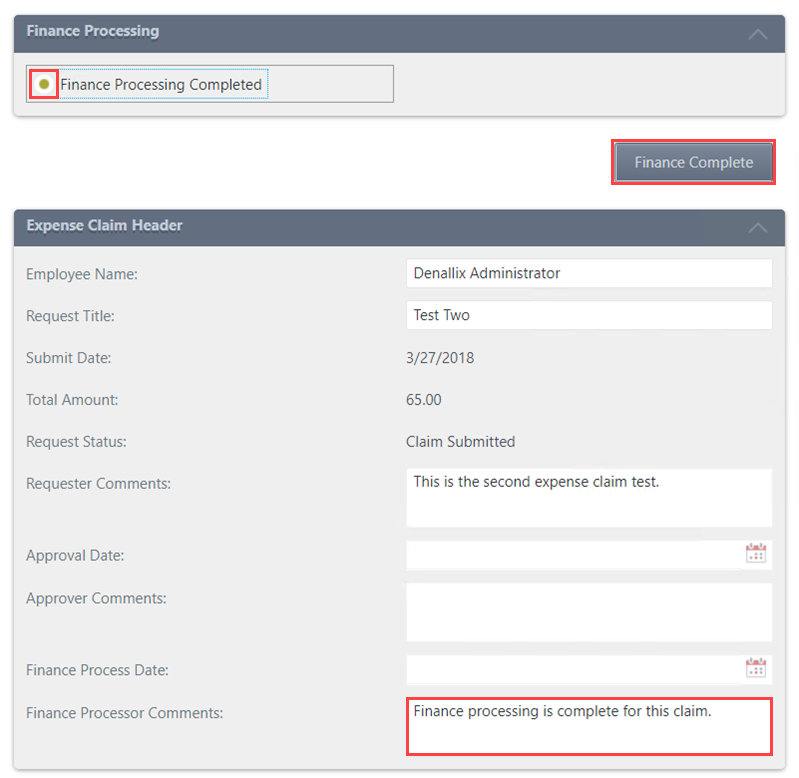
Now, you will action this task step, then submit the form. Enter some comments into the Finance Processor Comments text area. Select the Finance Processing Completed radio button, then click Finance Complete to complete the finance task. Confirm you see a confirmation message.
- To complete this task, begin by entering some comments in the Finance Processor Comments text area. Select the Finance Processing Completed radio button, then click the Finance Complete button. You should see a confirmation message. Click OK.

- To complete this task, begin by entering some comments in the Finance Processor Comments text area. Select the Finance Processing Completed radio button, then click the Finance Complete button. You should see a confirmation message. Click OK.
-
Confirm the originator, or requester, received the final email indicating the claim processing is now complete.
- Return to your email. You should see a final confirmation email that says finance processed your claim.

- Return to your email. You should see a final confirmation email that says finance processed your claim.
Review
At this point, you have tested the Expense Claim application and experienced each of the four states: Originator State, Claim Approval State, Originator Rework State, and Finance Processing State. Each state corresponds to a task step in the workflow. For each state, you manipulated editable and read-only fields to fit the need to the task recipient. The final state, Finance Processing State, is significant in that you manually added this state and the rules behind it. You used your own view and buttons instead of the Workflow task view that is added when you create the rules from the task wizard. Using the wizard is a quick and convenient way to integrate a SmartForm with a workflow. However, manually configuring your own states and rules give you 100% control over the configuration and behavior of the user experience. In the next step, you will learn about reports and how you can create your own report using data from the workflow instance, along with system data generated by Nintex K2.