Rules Designer
Use the Rules Designer to create custom business logic to direct the flow of the workflow. You can also use rules to create custom logic to choose recipients for a task.
You configure rules at the step level. This means if you need to configure the Recipients Rule, you need to do so on the Task step. Same applies to the Merge Rule on the Merge step. For more information on the different rule types, see the Rule Types section in this topic.
Navigate the Rules Designer

The table below describes the options available within the Rules Designer:
| Area | Description |
|---|---|
| Rule Header |
Displays the type of rule being built. In this example, the displayed rule is the Recipient Rule which forms part of the Task step. 
|
| Expand / Collapse toggle |
Use this button to expand or collapse the Context Browser. 
|
| Rule |
The rule itself. This is an example of a rule containing blocks, conditions and outcomes on the Design Canvas. 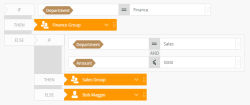
|
| Condition Block |
Rule conditions are added to the condition block. 
|
| Condition |
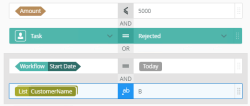
Use conditions to refine the rule criteria. You can add and group different types of conditions together in a condition block. Types of conditions include:

|
| Outcomes |
Outcomes allow you to select and specify outcomes for the rule, and are orange. Types of outcomes include:

|
| Design Canvas |
Use the design canvas to design the rule. |
| Rules Toolbar |
Use the Rules Toolbar to drag conditions, outcomes, IF/THEN statements onto the canvas to build the rule. 
|
| Quick Insert Toolbar (QIT) |
The Quick Insert Toolbar consists of corresponding outcomes and condition blocks. Click an item to instantly add the block to the rule you are working on (you don't drag-and-drop actions from the QIT). 
|
| Trash bin |
Use the Trash bin to delete any unwanted conditions dragged onto the canvas. 
|
You build rules using blocks to connect actions and conditions to outcomes. There are two block types and you use each type build logic using the rules designer. The block types are:
The table below contains descriptions of the available structure blocks:
The table below contains descriptions of the available outcomes blocks:
| Block Type | Description |
|---|---|
| Outcome blocks | |
| Outcome |
Use the orange outcomes to control what happens when an action is made. In this example, who the task is sent to. For more information on recipients, see the Recipients tab topic. 
|
The table below contains descriptions of the available condition blocks:
| Block Type | Description |
|---|---|
| Condition blocks | |
| Basic condition |
Use this condition to build up the If This Then That conditions. 
|
| Task condition |
Use this condition to split the workflow, based on the outcome of a user task, or to merge a workflow based on completion of specific steps. 
|
| Response Count condition |
Use this condition to create voting logic based on the number of responses. Use this to configure the following:
The condition options are:

|
| Responses |
Use this condition to create logic to determine the outcome or the task based on the responses. The condition options are:

|
Rule types
The Rules Designer contains the following rule types. Click the rule links to see more information:
| Rule Type | Description | Access it from |
|---|---|---|
| Recipient Rule | Customize this rule to define conditions to determine which recipients receive the task. This enables you to choose which path is followed. | The rule is located in the Task step on the Recipients tab. |
| Results / Voting Rule | Customize this rule to define conditions to determine which outcome is used. This enables you to choose which voting rule is followed. | The rule is located in the Task step on the Task Result Rule tab. |
| Decision Rule | Customize this rule to define conditions to determine which decision path is followed. This rule is set by default as soon as the Decision step is linked to the Task step. | The rule is located in the Decision step on the Decision tab. |
| Split Rule | Customize this rule to define conditions to determine which paths are followed when the split is evaluated. | The rule is located in the Split step on the Split tab. |
| Merge Rule |
Customize this rule to define conditions to determine whether the workflow should continue based on which steps have been started or have completed. |
The rule is located in the Merge step on the Merge tab. |
| Smartfield Composer | Use the Smartfield Composer to configure nested inline functions and SmartObjects methods, to change values used in SmartField-enabled controls (shown with the Type / Drop watermark). | For more information see the Smartfield Composer topic. |
- Select the Custom / Edit Rule option to customize and configure the selected rule.

- The rules panel displays as follows:

- For this example, accounting tasks should to go to the Finance department, and any task assigned to the Sales department where the amount is more than 5000 should go to the Sales group. All other tasks should go to a particular user.
- Click the expand / collapse toggle to expand the Configuration Panel and ensure the Fields tab is selected. For the first part of the rule, type or drag the Department field into the task IF condition.

- Type or drag a field to specify the condition, in this case if Department is equal to Finance.

- From the recipients menu, because it is a financial task, it is sent to the Finance Group (a recipient group you created earlier that contains the Finance department approvers).

- The second part of building the rule is to add the conditions for the sales tasks. Use a condition block to add the user and amount conditions.
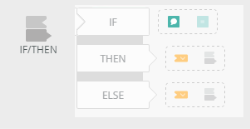
- From the Rules Toolbar click and drag an IF/THEN condition onto the ELSE block.

- Notice the added If / Then / Else block added to the ELSE block.

- Click the Condition icon on the Quick Insert Toolbar (QIT) to add a condition block.

- Type or drag a field to specify the condition for the sales tasks.

- To add another condition, in this example for the Amount, click and drag a condition from the Rules Toolbar onto the IF block. The new condition displays within the condition block.

- Type or drag a field to specify the condition.

- Click the operator drop-down menu to select a operator for this condition, in this case select > Greater Than to assign the sales tasks with a value of more than 5000.

- Click AND. From the menu you can select between AND or OR to control how multiple conditions are logically related. You can also add conditions or task conditions using this menu.

- Type or drag a field to specify the condition and click the Recipient Outcome icon from the Quick Insert Toolbar (QIT).

- From the recipients menu select who is to receive this task. In this example, any sales tasks above 5000 are sent to the Sales Group.

- Add a Task Condition from the Rules Toolbar by dragging it into the condition block.

- Click the task condition menu. Available workflow tasks are available on the menu.

- Select your outcome from the Outcomes menu. In this example, the task is sent to the Sales Group if the department is Sales, the value is greater than 5000, and HR approved a different task in the workflow.
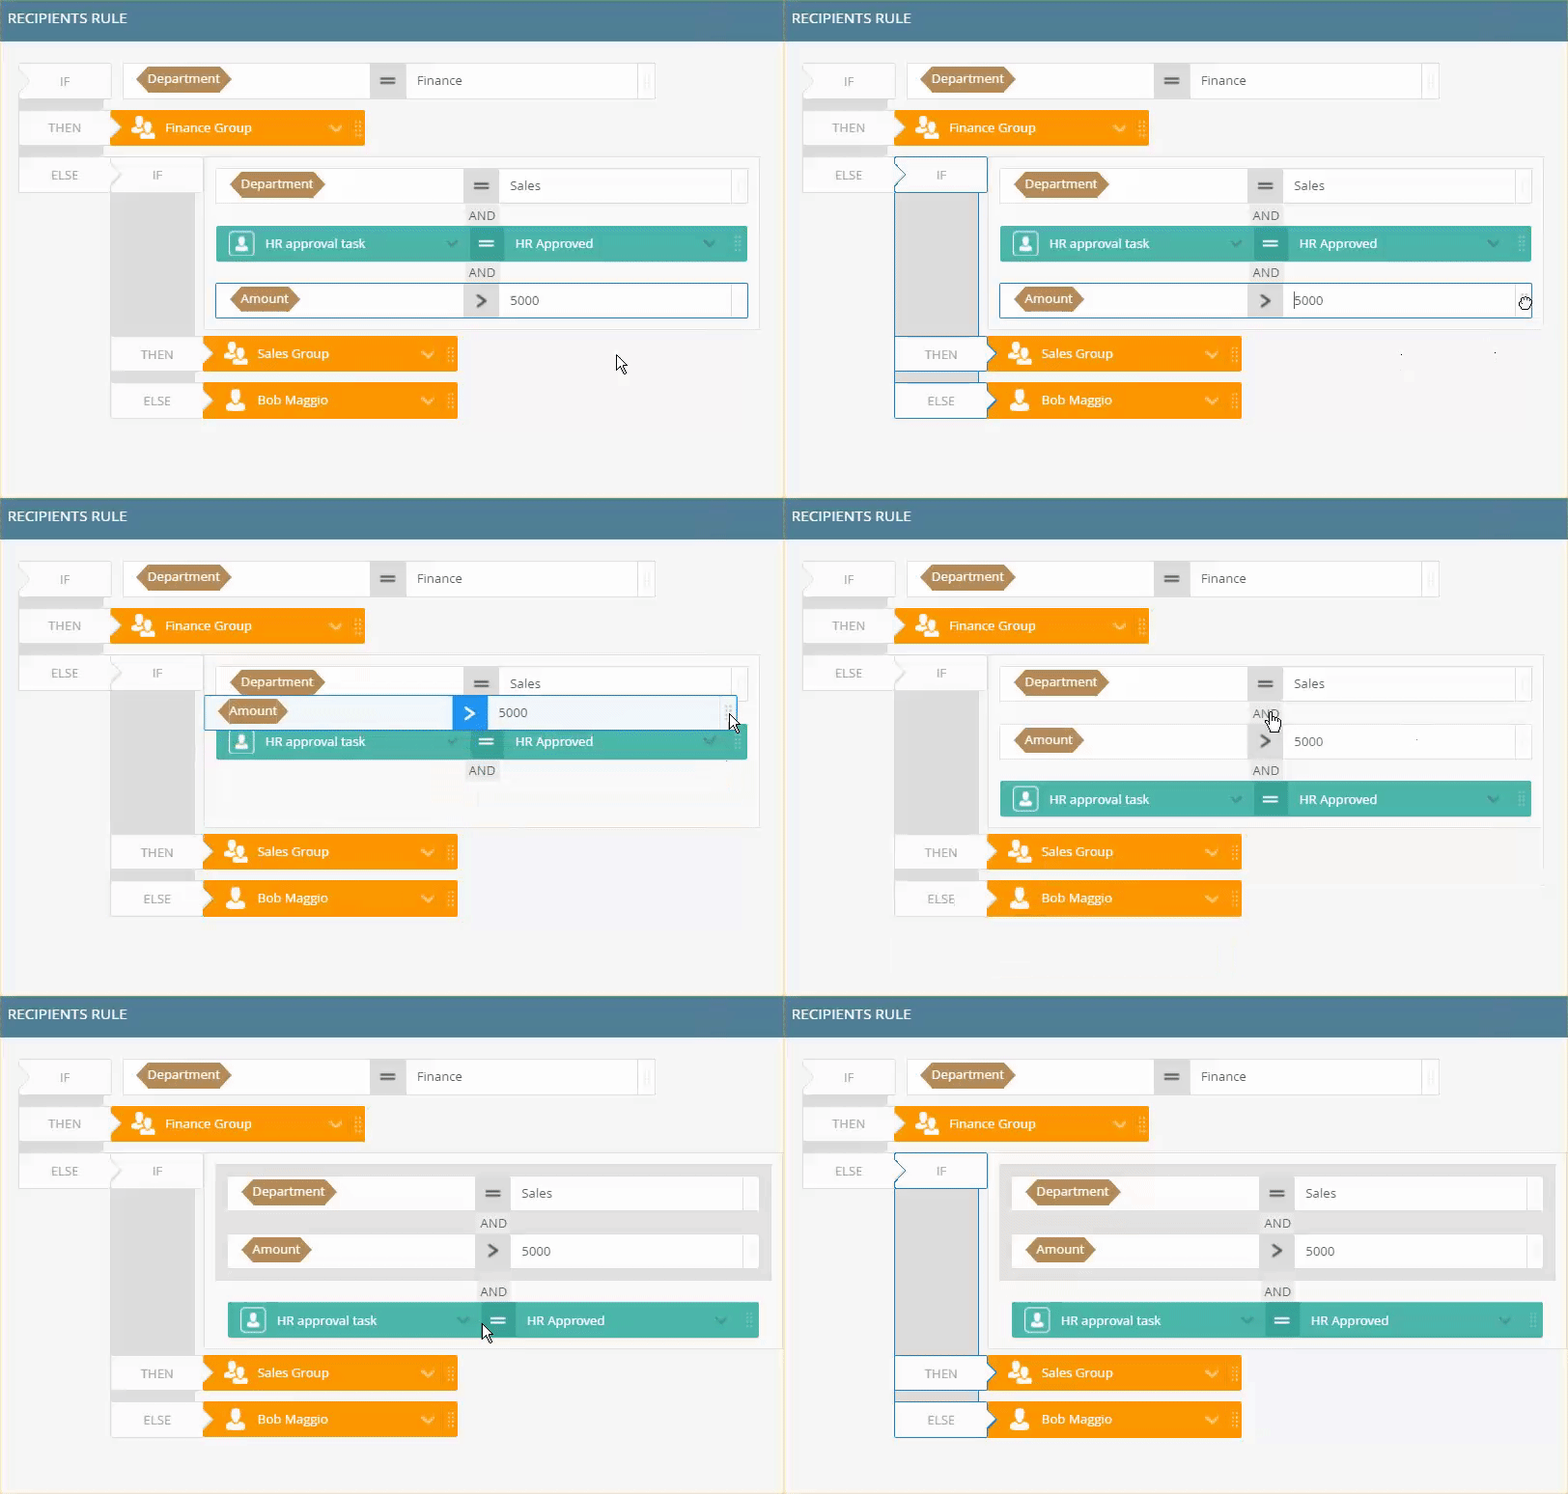
- You can group conditions together within a condition block. Doing so ensures that certain conditions always run together, and even in order. To group conditions, click the AND button between the conditions. Select Group Conditions.

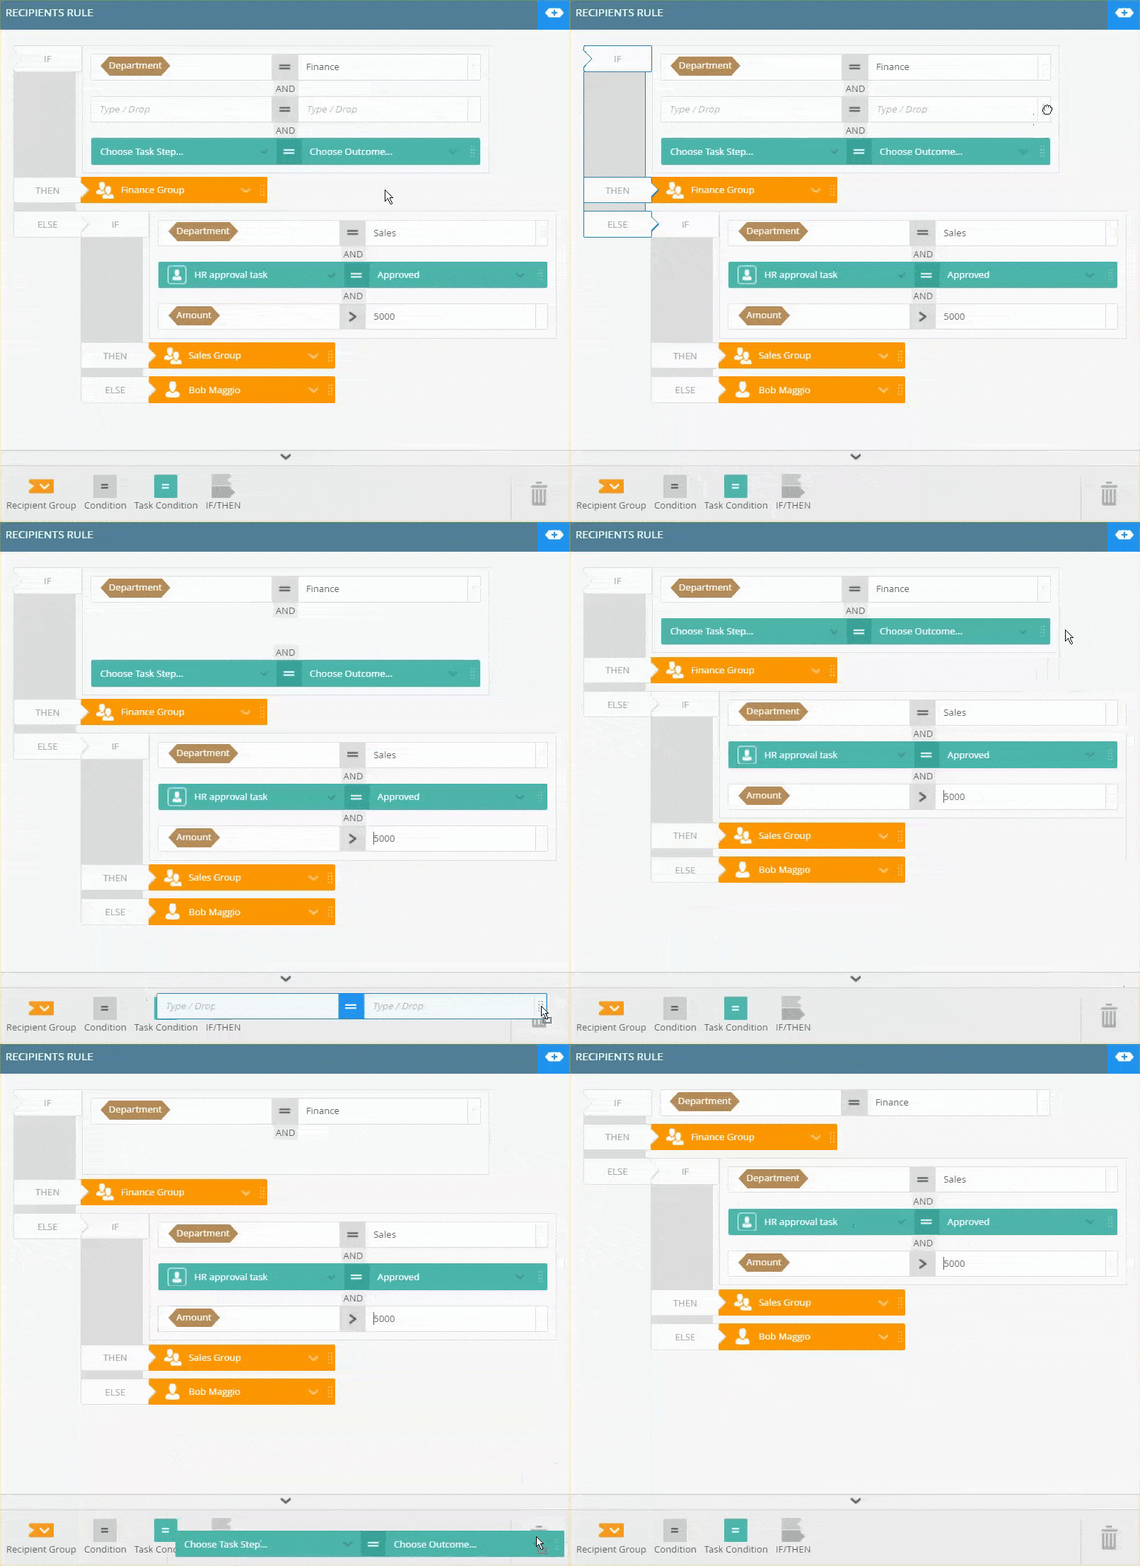
- You can move conditions up or down. Below is an example on moving and grouping conditions.
- Your final step of configuring the recipient rule is to specify what happens to the tasks that did not meet the requirements, basically configuring the final Else statement. In this example, all any remaining tasks are sent to Bob. From the recipients menu select Bob Maggio.

- To delete any conditions, click and drag them from the design canvas to the Trash bin.
- Changes / configurations made to the rules designer are automatically saved.
The same process is used to create a custom rule, however some images might differ depending on the type of rule you're building. In this example, the Recipients Rule is used.
The following table explains the options available in the Recipients Rule panel:
| Option | Description | How to Use |
|---|---|---|
| Recipient properties | Specify which recipient or group receives the task. | Click the Add button to add recipients or recipient groups. |
| Recipients Rule | Use this to choose which path is followed. | Select the Certain Recipients, based on a rule option and click the Edit Recipients Rule button. |
| Design Canvas |
Use the design canvas to design the rule. |
|
| Rules Toolbar | Use the Rules Toolbar to drag conditions, outcomes, IF/THEN statements onto the canvas to build the rule. | Click and drag conditions onto the design canvas. |
| Trash bin |
Use the Trash bin to delete any unwanted conditions dragged onto the canvas. |
Click and drag items from the canvas to the trash bin to remove them. |
| Expand / Collapse toggle |
Use this button to expand or collapse the Context Browser. |
Click the toggle button to expand the Context Browser. |
| Quick Insert Toolbar (QIT) |
The Quick Insert Toolbar consists of corresponding outcomes and condition blocks. Click an item to instantly add the block to the rule you are working on (you don't drag-and-drop actions from the QIT). |
Click and drag conditions onto the design canvas. |
The Originator is configured by default. Remember to uncheck this option if you don't need the task assigned to the originator.
When working with the Rules Designer keep the following considerations in mind:
- Rules cannot be configured on workflow lines.
- Task Conditions can be added to all the rule types.
- Response conditions can only be added to the Results / Voting Rule.
- When dragging conditions between If / Or / Else block, the condition will be removed from where it is dragged from.
