Administer List Collaboration Apps
This section covers the administration of List Collaboration apps. The List Collaboration app has two administrative sections: Main Details and Reporting and Draft Items. As the K2 App administrator, you approve (or decline) new apps.

This page provides a working copy of your list, along with a section that indicates draft items. If you added a new contact, then saved it as a draft, this notification appears. Your list is fully functional from this page.
You may want to share your list with other users. You can share the list and grant the level of control you want to share. By default, all users have full control over lists in the app. You may want to change this to View Only so people cannot change items added by others. Or, perhaps you want to grant one other user full control. To set up list sharing and permissions, click the Reporting and Draft Items link at the top of the page. You have three options plus a section for draft items:
- Administration: Share your list with other users and grant permission levels. See Administer App for detailed information on authorization and information.
- Reporting: Allows you to export your list data to CSV format. See Report on List Collaboration Apps for detailed information exporting your list data.
- Add New Entry: Opens the new list item form.
- Draft Items: If you saved a list item as a draft, the item appears in this section. You can edit and submit the item when you are ready to commit them to the list.

Authorization
By default, all users have full control over the list. This means all users can view the list, and add, edit, or delete all list items. To change the default authorization, highlight the level in the list, then click Set As Default Authorization.
Changing the default access to view only
Administrators and Settings
From this page, you can invite users to share your application, save the application to the Favorites menu and add, edit or delete application administrators.
Invite Users
You can send an email to select users inviting them to use your app. This lets them know the app is live and ready for use. To begin, click Invite Users.
Edit the email subject line and message body. Select the request form link you want to appear in the email message. For the message recipients, enter a user name, then click Resolve. Click Add. Repeat this for each user you want to receive an invitation. When ready, click Send Notification.

Each message recipient receives an email with a link to the request form.

You can also use the Specify An Email Address field to type an address. You can use this feature to send app invites distribution groups in your organization.

Favorites Menu
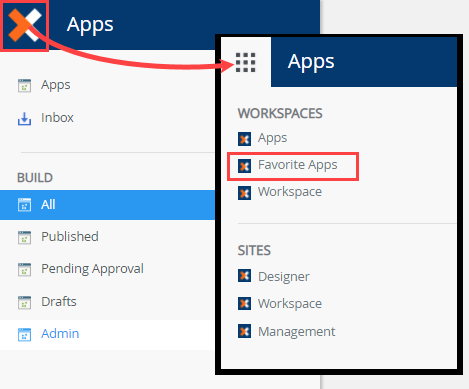
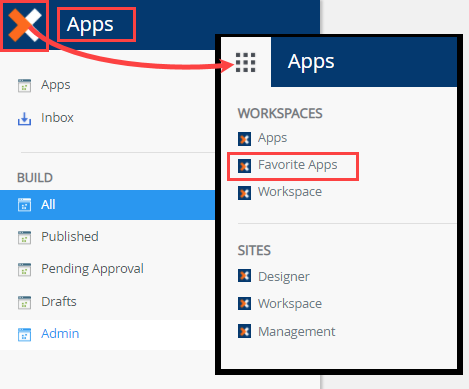
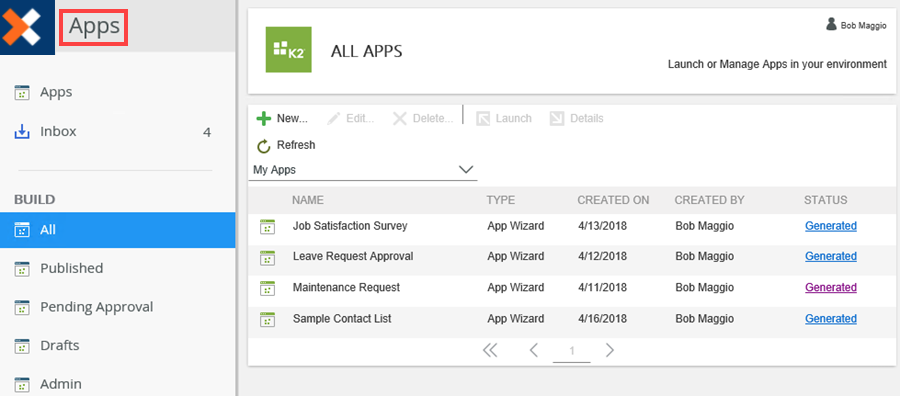
You can add apps to the Favorites section for quick access. The Favorites section appears on the Favorite Apps workspace. By default, the Favorite Apps workspace is hidden which means you have to make it visible to see the apps you've marked as favorites in this workspace. Note that the Favorite Apps workspace is a separate workspace from the Apps workspace, but you can easily toggle between the two by clicking the K2 logo and select the one you want.
-
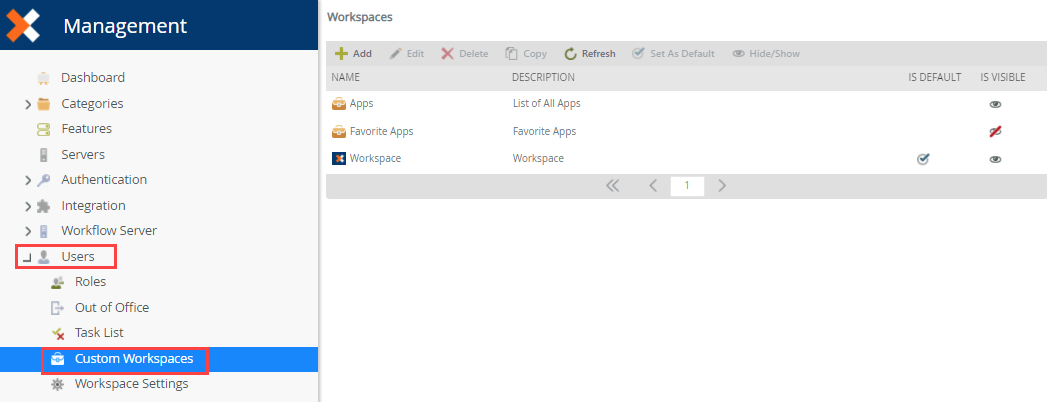
From K2 Management, browse to Users and select Custom Workspaces.
-
Select Favorite Apps and click Hide/Show.

-
The Favorite Apps workspace is now visible.

- To see the Favorite Apps workspace, click the K2 logo from App workspace.
Follow these steps to add apps to the Favorite section.
- From the Administrators and Settings page, type the name for the favorite link. Click the Add To Favorites button.

- Click the K2 logo from App workspace and make sure you select the Favorites App workspace.

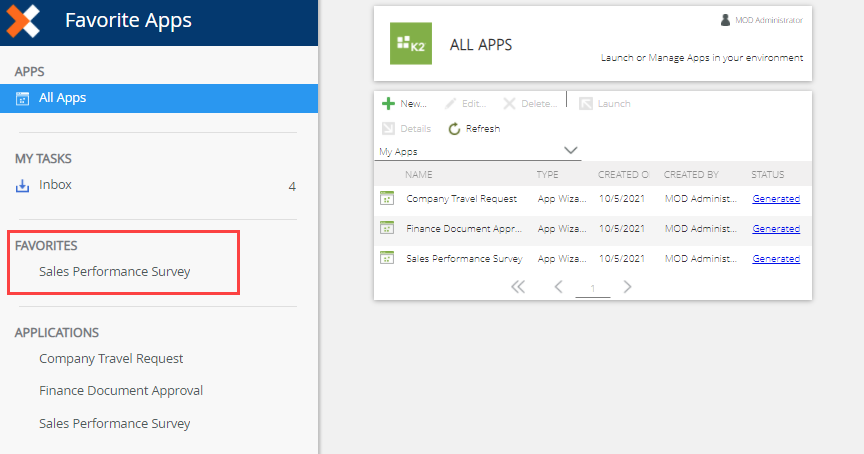
- The added favorites link shows in the Favorites section on the Favorite Apps workspace.
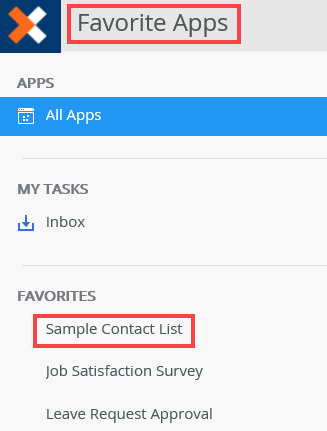
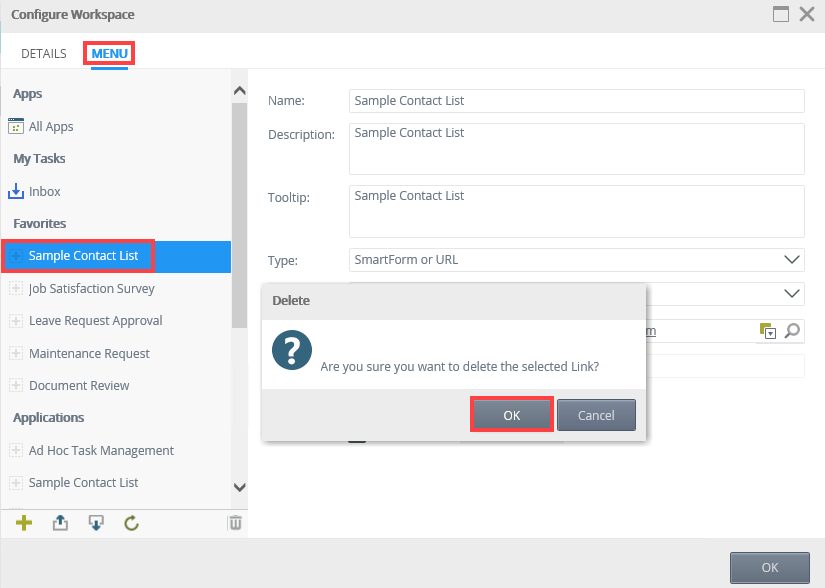
To remove an app from the Favorites section, you need to remove it from the Custom Workspaces section in K2 Management. Follow these steps to remove an app from the Favorite section on the Favorite Apps workspace.
- From K2 Management, browse to Users and select Custom Workspaces.

- Select Favorite Apps and click Edit.

- From the Configure Workspace page, click the Menu tab. Select the favorite you want to remove and click the trash bin and click OK to confirm.
Follow these steps to toggle between the App and Favorite App workspaces.
- From the Apps workspace click the K2 logo and select Favorite Apps workspace.
- The Favorite Apps workspace shows.
- To return to the Apps workspace, click the K2 logo and select Favorite Apps workspace.
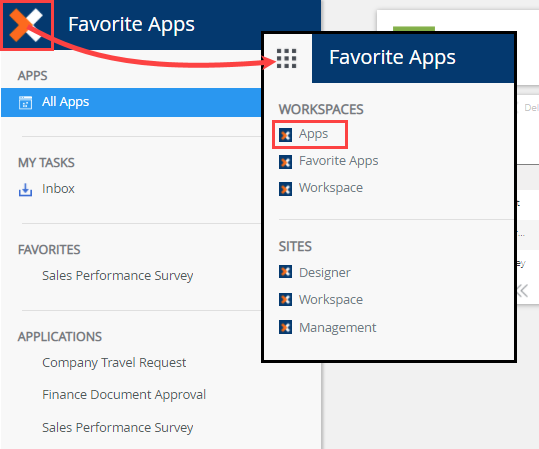
- The Apps workspace shows.
Application Administrators
You can add additional app administrators to give them ownership of the app. In the Administrators section, click Add. Enter the user name, then click Resolve. Click Save.
When someone creates a new app, the app enters an approval queue. However, if they are a member of the Builders group, they bypass the approval process. When members of this group generate a new app, the app is ready for use.All other new apps must get approval from one member of the K2 Apps Administrators group.
Approving New Apps
As the administrator, you receive task notifications when an new app is submitted. You can see your task notifications via the workspace Inbox located in the left column of your workspace.

The email subject line displays Review Request.
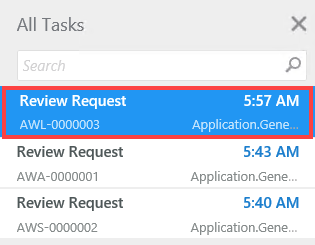
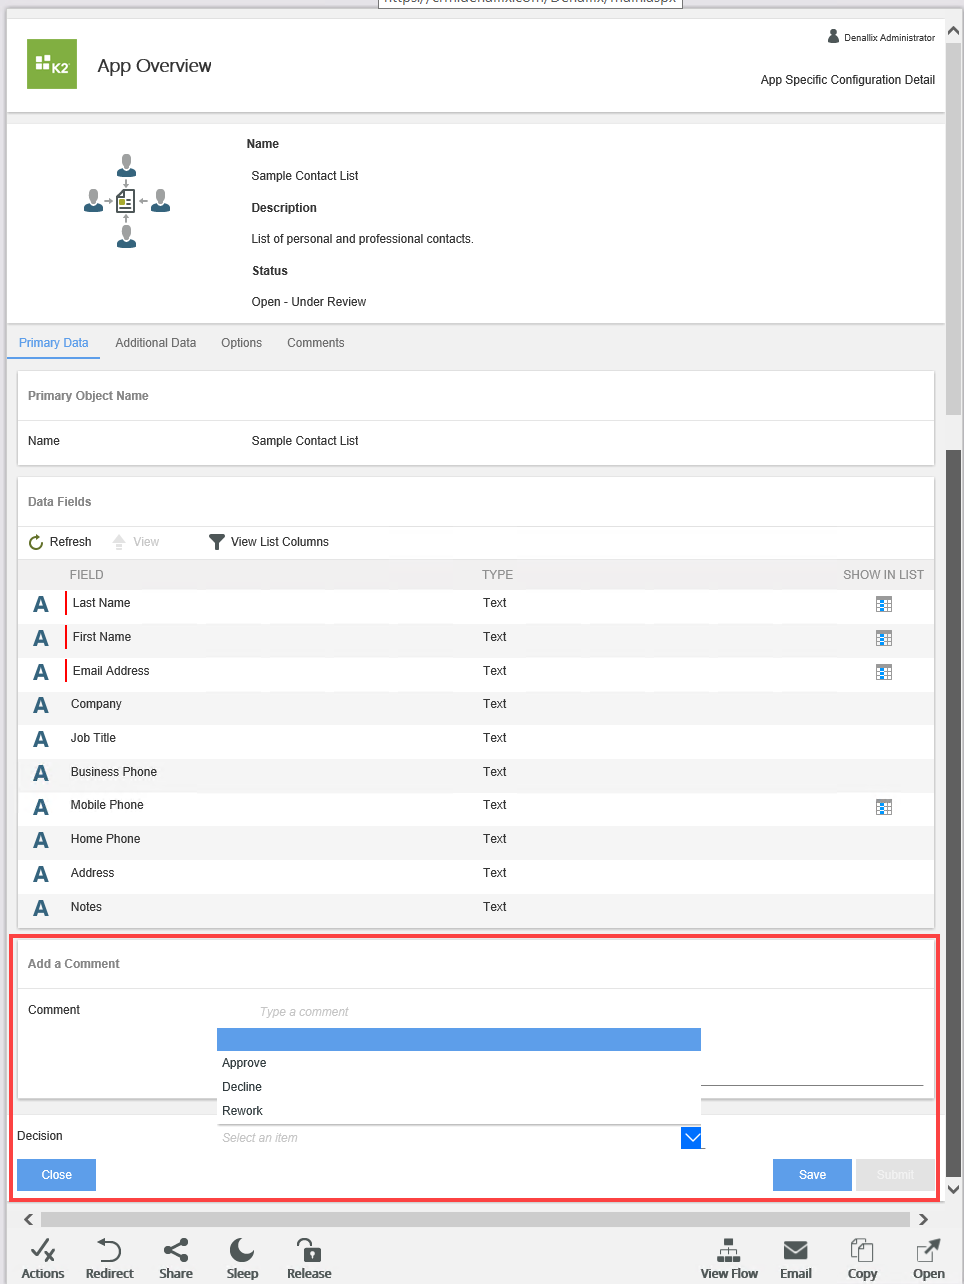
When you click the Review Request title, the app details appear in the central pane. Review the details. After you review the request, add a comment (optional), then select your decision action: Approve, Decline or Rework.
- Approve: Completes the app creation and the app is ready to use
- Decline: You do not approve the app. The process is complete and the app is no longer active
- Rework: Sends the app back to the owner for rework, then resubmit. They can view their rework task email from their workspace Inbox
