Actioning my Tasks
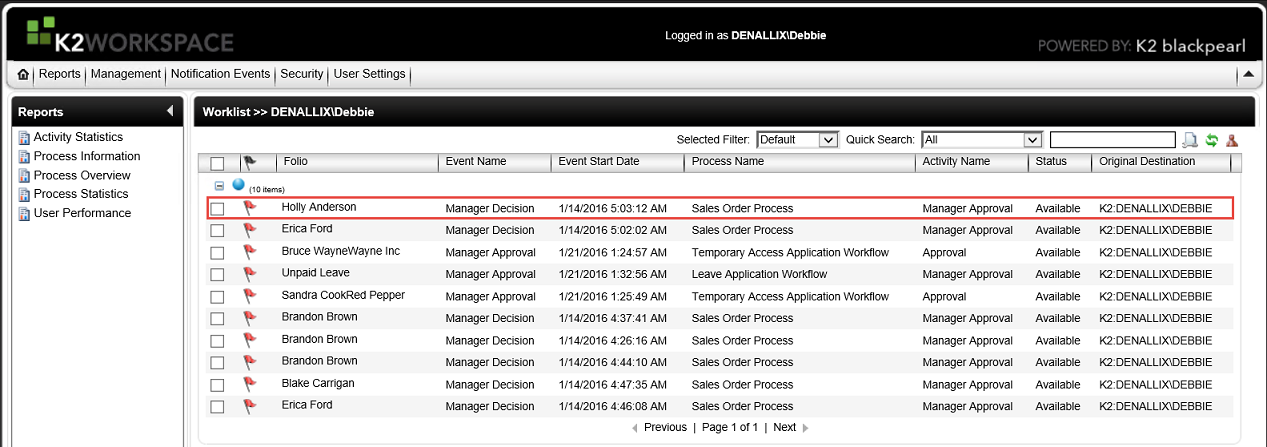
The K2 Workspace Worklist enables a user to action their work items (tasks) in one central space.
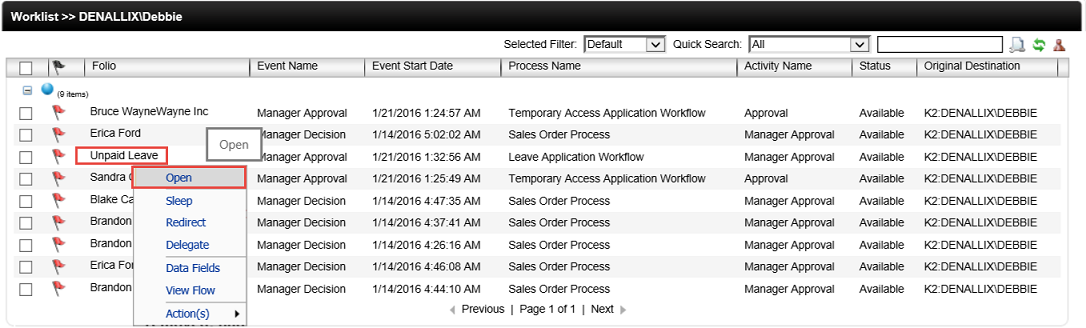
- From the K2 Workspace Worklist find a work item to be actioned.
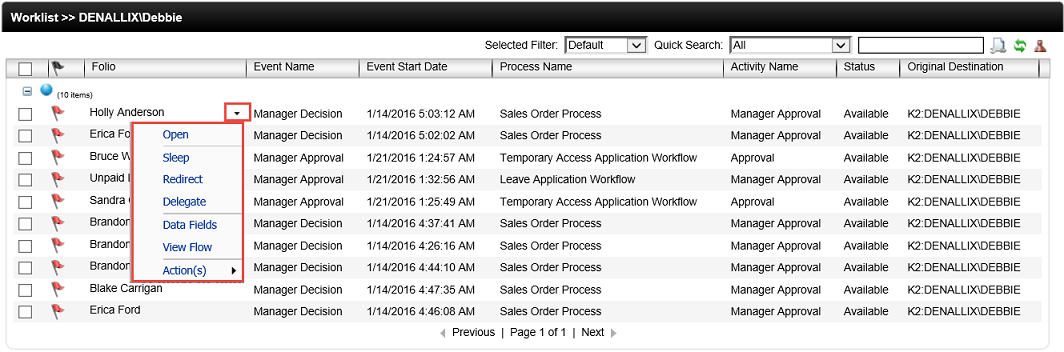
- The context Actions menu drop down arrow is visible when a your mouse hovers in-line with the task item. Left click on the arrow to open the Action menu containing task list options. This drop down menu contains both default system actions and actions which are created by the workflow designer.
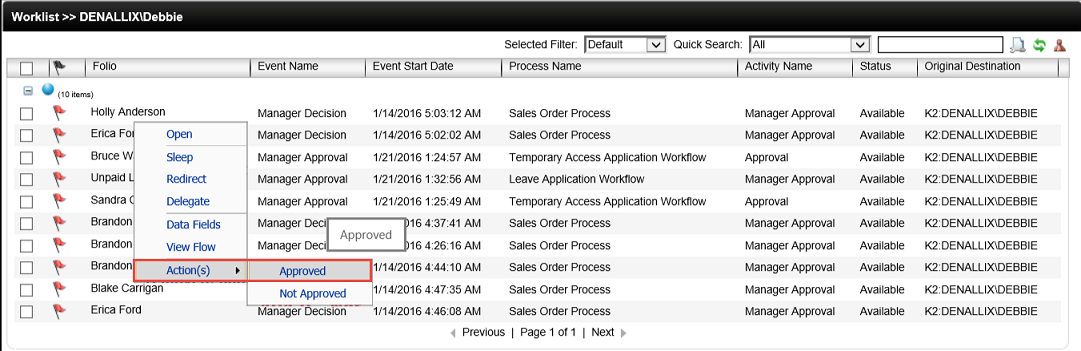
- From the Action menu click Action(s) and select Approved.
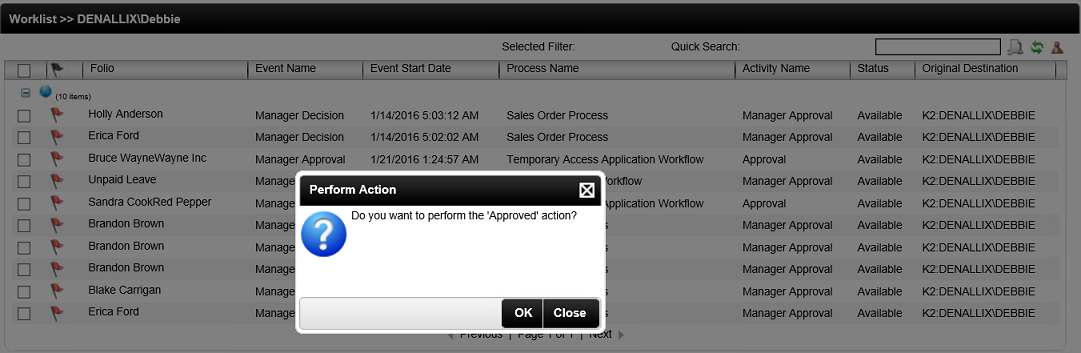
- Click OK to confirm the selected Action.
- Select another work item to be actioned. From the Action menu click Open.
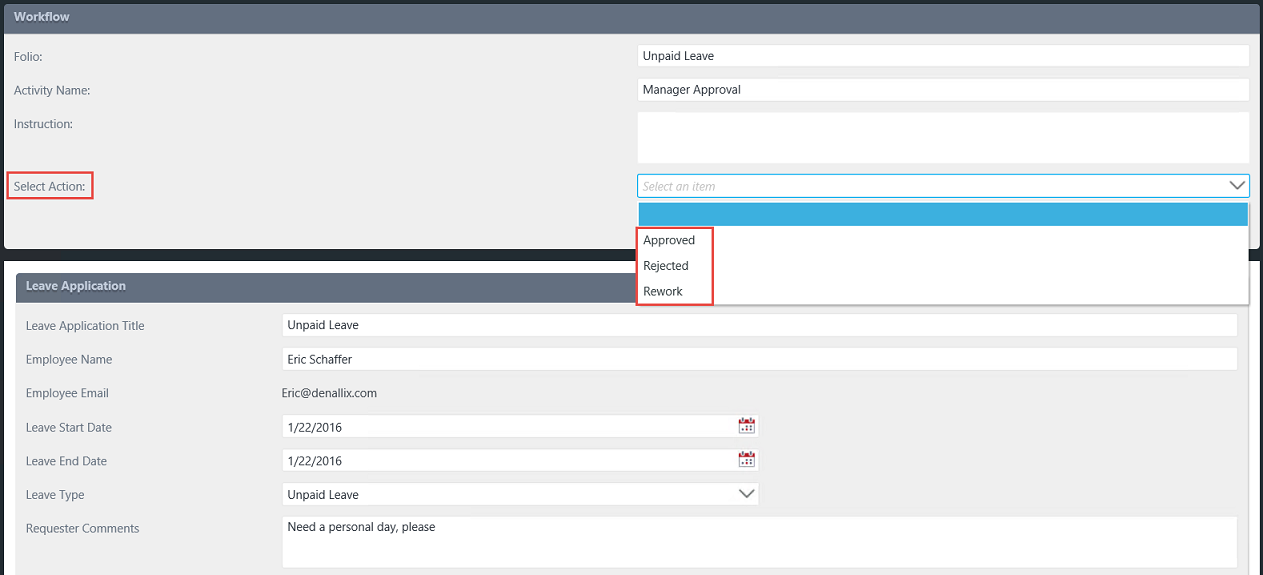
- The associated user form displays. Select required Action and click Submit.
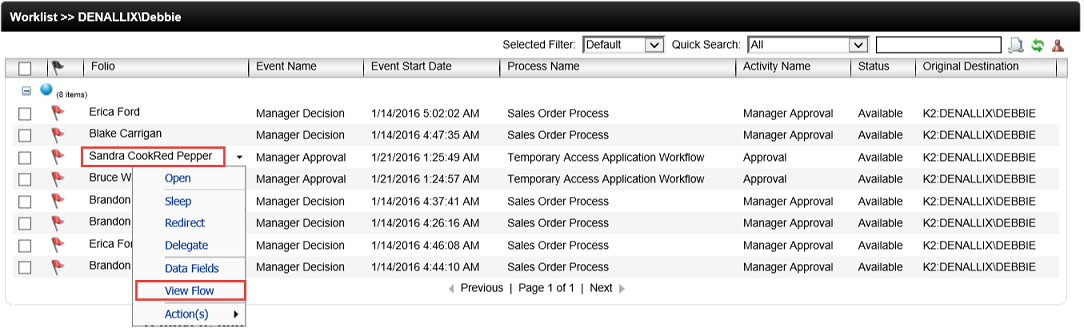
- Select another work item to be actioned. From the Action menu click View Flow.
- A visual representation of the workflow displays.
The table below explains the available fields:
| Feature | Description | Sample Value |
|---|---|---|
| Open | This option opens the selected work item in the selected forms technology such as SmartForms, InfoPath or an ADO.NET form. | Click Open to display the user form. |
| Sleep | This option pauses or suspends a work item for a period of time. It is visible but cannot be actioned. | Click Sleep to pause or suspend the work item. |
| Redirect | This option redirects the task to a different user. It enables you to send the selected work item to a specific workflow participant to process. The work item is removed from the current user's worklist and will appear in the selected user's worklist. | Click Redirect and search for a user to redirect the task to. |
| Delegate | This option delegates the task to a different user. It enables you to allocate a work item to a different user for processing. You can determine which actions the delegated user can perform. The work item will appear in both your and the delegated user's worklist. The first user to select the work item will process the item. | Click Delegate and search for a user to delegate the task to. |
| Data Fields | Allows you to view the Data Fields of the selected work item. | Click Database Fields to display available data fields. |
| View Flow | This option opens and displays a visual representation of the workflow in it's current state. It provides a detailed view of the actions taken during the workflow. | Click View Flow to open a visual representation of the workflow. |
| Actions | Displays a list of actions to select and apply to the task. The actions are determined by the workflow as set up at design time. | Click Actions and select the required action from the provided list. |

For additional information see the topic on Actions.
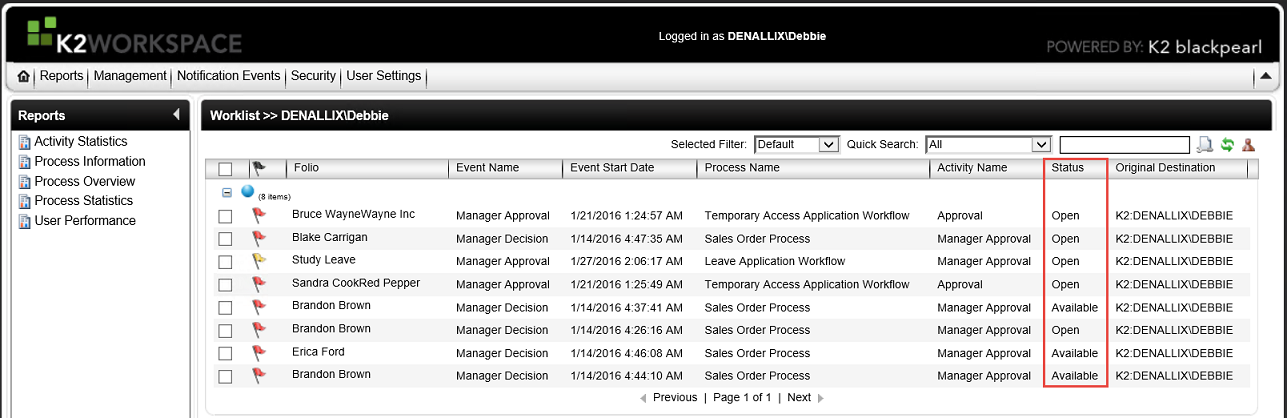
When working with work items on the worklist the following statuses are available: Open and Available.
| Status | Description |
|---|---|
| Available | A worklist item with Available status indicates that the item still needs to be actioned. |
| Open | A worklist item with Open status indicates the item is currently being worked on. |
Scenario:The Expense Claim Approval process requires two managers to approve the claim request.
Setup: During the Expense Claim workflow, the approval task is sent to five managers. In order for the workflow to progress two out of the five managers will have to action the task by approving it.
Outcome: The worklist task will appear in all five of the manager's worklists and the status will display as Available. The first two managers that click on the work item and select the Actions option will change the status to Open, indicating that the work item is being worked on. After their Action has been submitted the workflow will continue and the worklist item will be removed from their worklist as well as from the remain three managers.
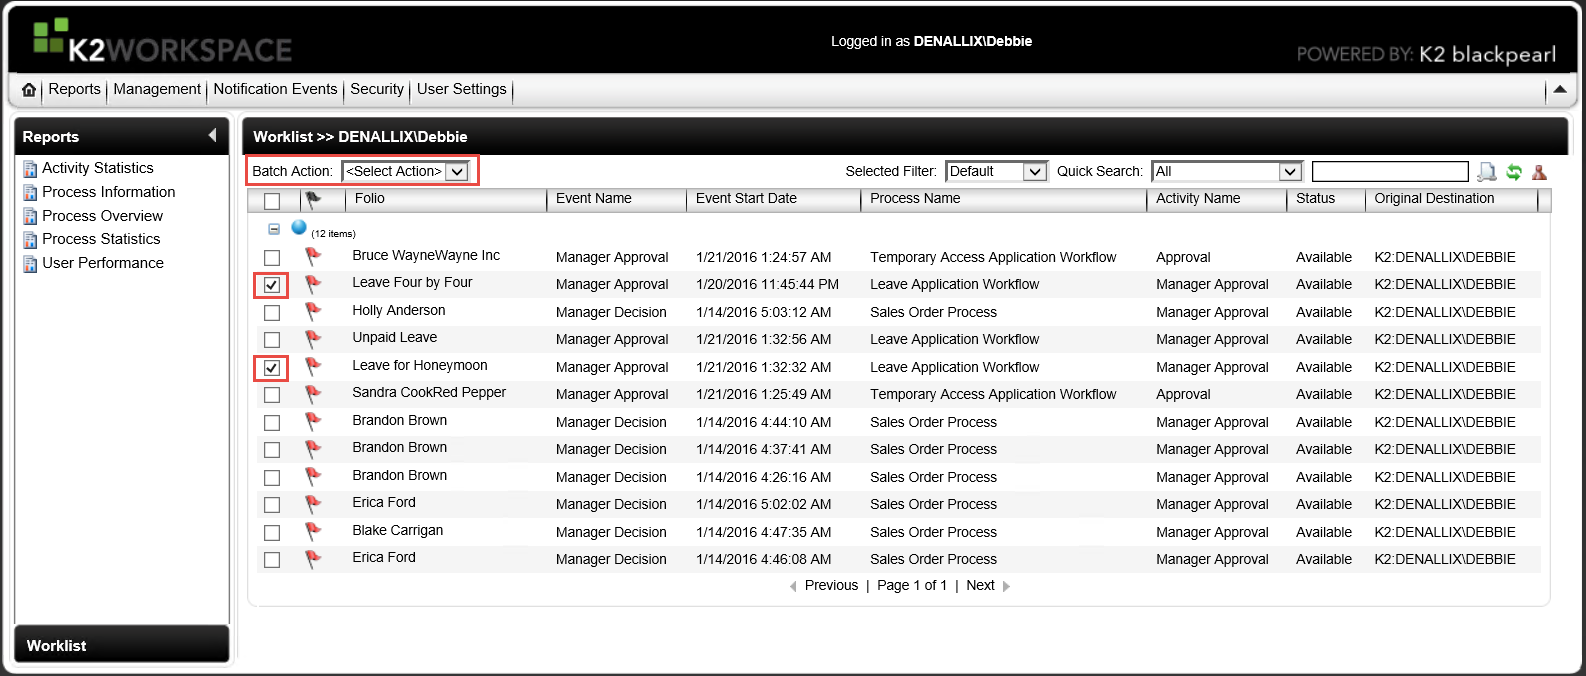
Batch processing allows you to process multiple task items at once.
- From the K2 Workspace Worklist, select the work items check box you want to process. By selecting more than one work item, the Batch Action menu becomes available.
- Click the Batch Action drop down list.
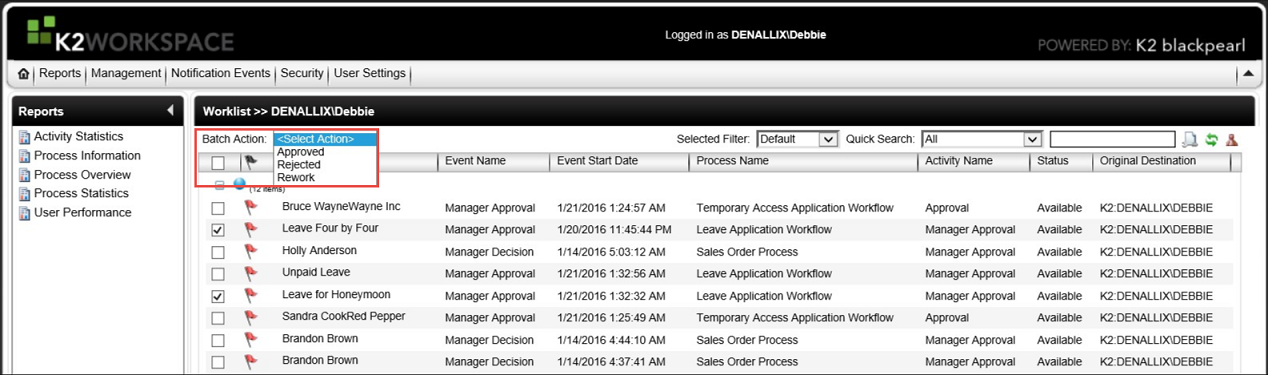
- The Batch Action drop down menu contains available actions for selected work items. The actions that can be selected are created at design time.
- The same action is applied to all the selected work items. i.e. if Approve action is selected, it is applied to all selected work items. Select the required Action from the drop down menu.
- Click OK to apply the selected Batch Action.
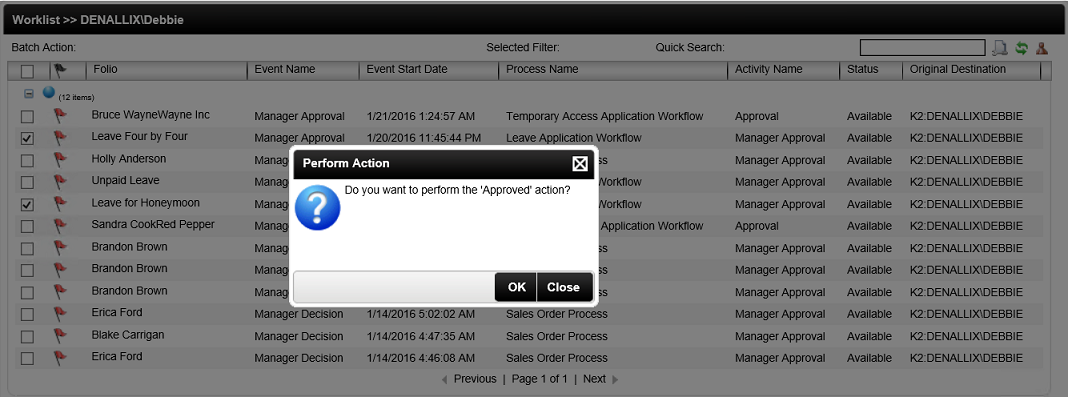
The Batch Action drop down menu only appears when the Batch Action check box is checked or when one or more work items have been selected.