Actions
The context Actions menu drop down arrow is visible when your mouse hovers in-line with the task item. Left click on the arrow to open the Action menu containing task list options. Available actions are:
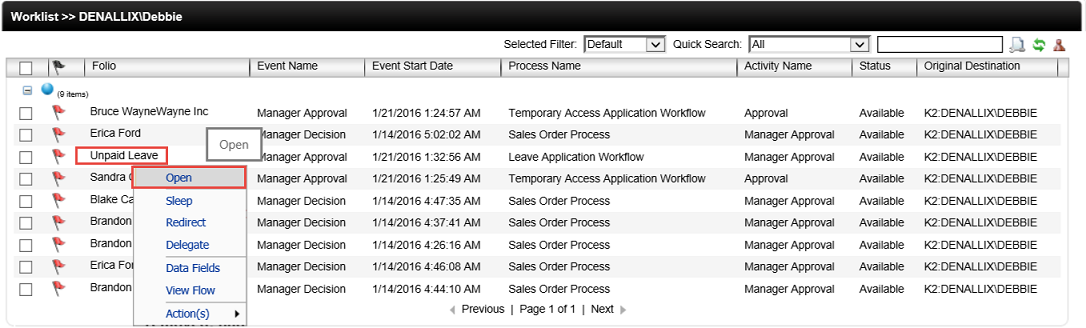
Use this option to open the work item in the selected forms technology.
- From the K2 Workspace Worklist select a work item to be opened.
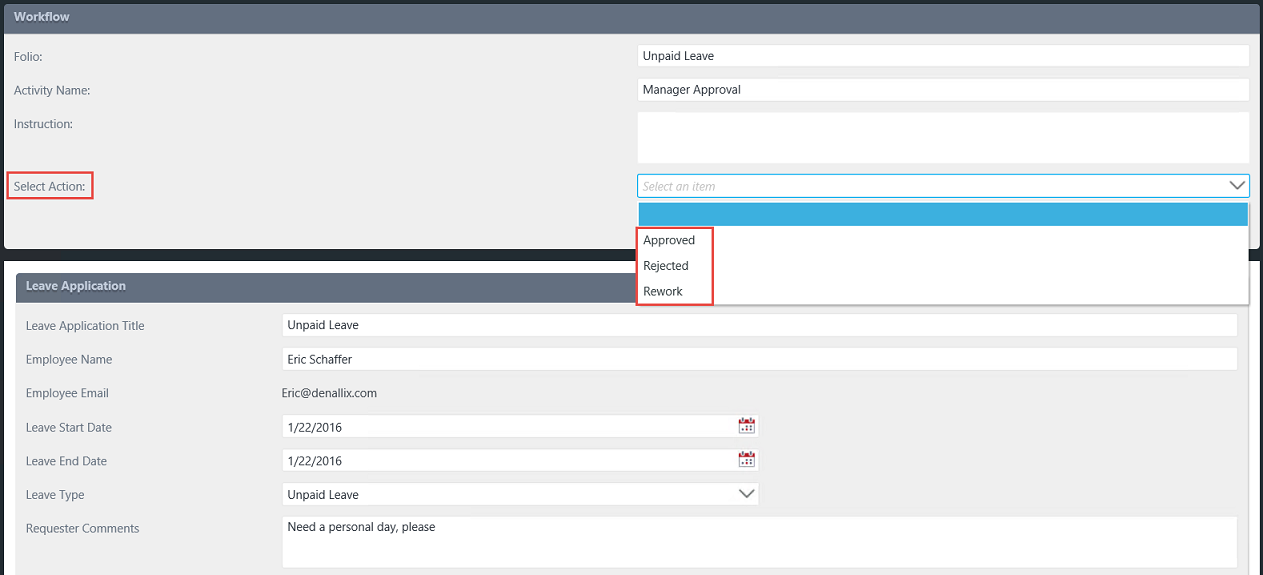
- The associated user form displays. Select required Action and click Submit.
- The associated user form displays. Select the required Action and click Submit.
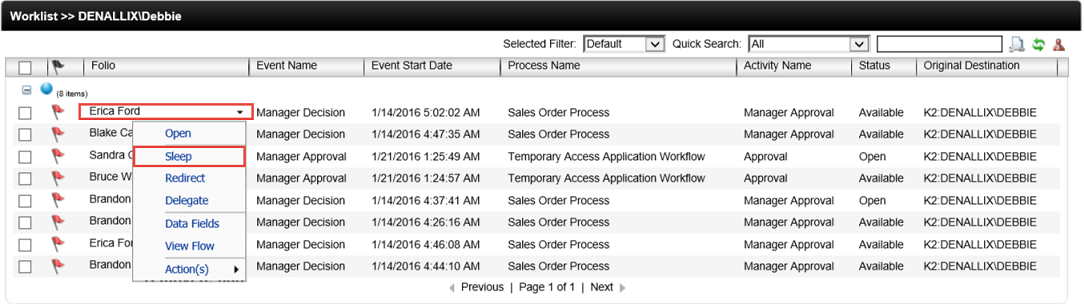
Use this option to pause or suspend a work item.
- From the K2 Workspace worklist select a work item to be actioned.
- From the Action menu select Sleep. The Perform Action - Sleep screen displays.
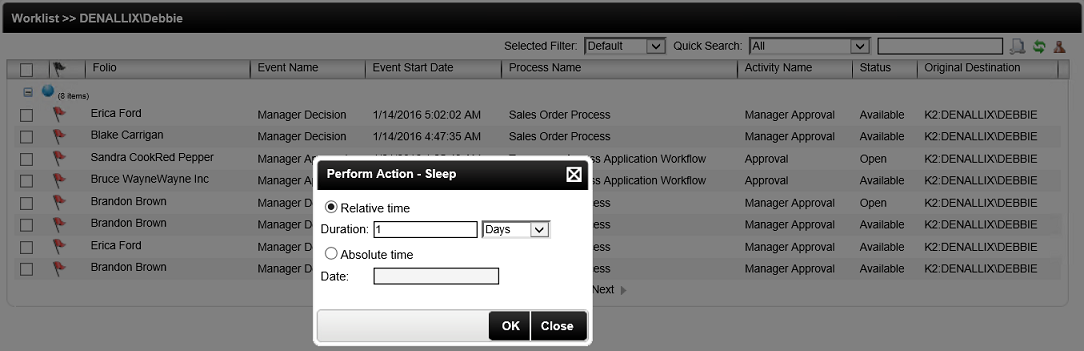
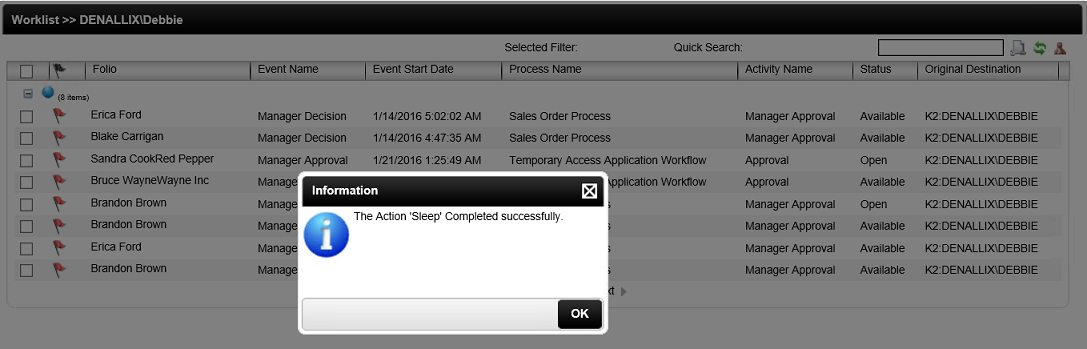
- Select required Sleep duration and click OK.
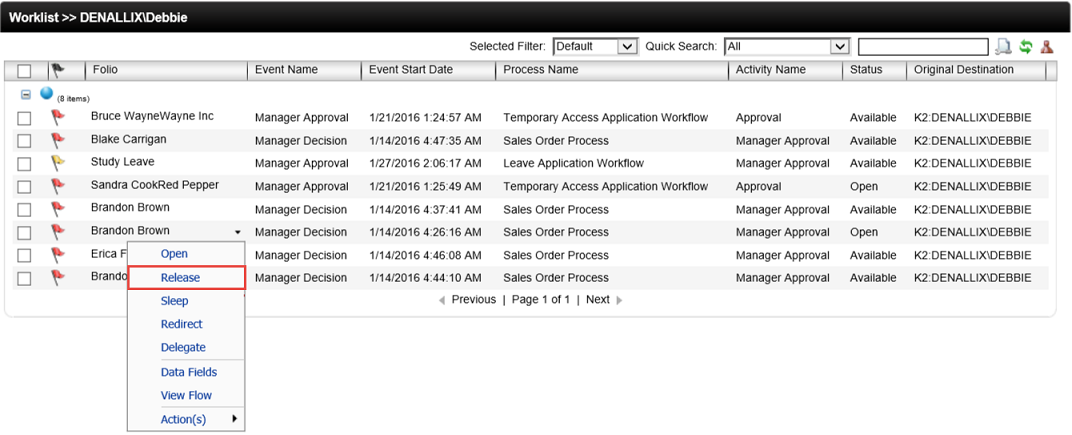
- A work item can be Released from the Sleep status by selecting this option from the Action menu. The status is changed to Available.
The table below explains the available fields:
| Feature | Description | Sample Value |
|---|---|---|
| Relative time | Use this option to specify a date or time, using the current time and date as the starting point. | Select the Relative time radio button to enable this option. |
| Duration | Use this option to specify the duration of the Sleep period by selecting the time in days, hours, minutes or seconds. | Enter a value in the Duration field. |
| Absolute time | Use this option to specify a date or time irrelevant of the current time and date. | Select the Absolute time radio button to enable this option. |
| Date | Use this option to specify a date, from the calendar, for the work items to Sleep until. | Click the Calender and select required date. |
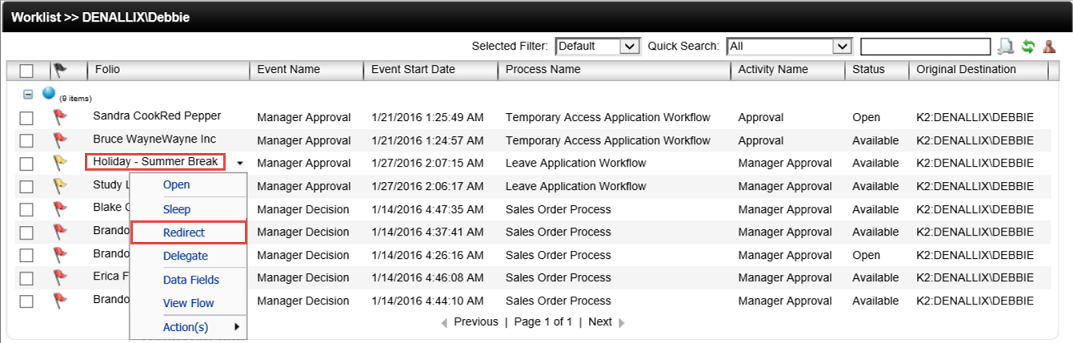
This feature allows you to send the selected work item to a specific workflow participant to process. The Redirect action is a server action that moves a worklist item from one user to another. The item status is left unchanged.
- From the K2 Workspace worklist select a work item to be actioned.
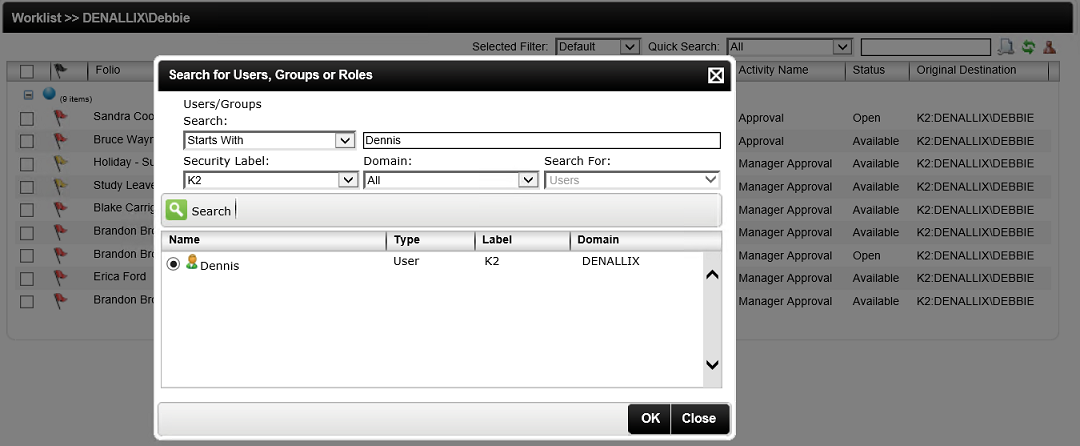
- From the Action menu select Redirect. The Search for Users, Groups or Roles screen displays.
- Search and select the user / group to redirect the work item to. Click OK.
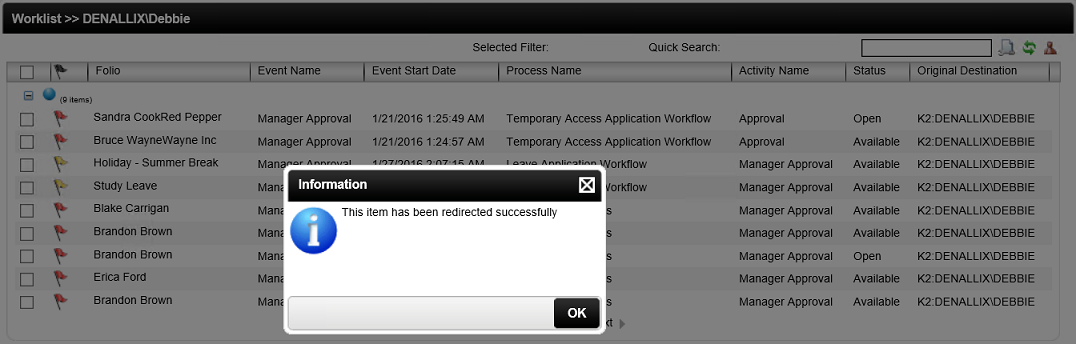
- The work item is removed from your worklist and appears on the assigned user's worklist.
The table below explains the available fields:
| Feature | Description | Sample Value |
|---|---|---|
| User / Groups | Allows you to only search for the available Users. | Default selection. |
| Search drop down menu | The drop down menu contains search related options to use within the search. Available options are: Starts With, contains, Ends With and Equal To. The default value is Starts With. | Select applicable search option from the drop down menu. |
| Search Text Box | Allows you to enter the search text string. | Enter required search text. |
| Search Label | This drop down menu contains security label related options to use within the search. | Select applicable security label option from the drop down menu. |
| Domain | This drop-down menu contains domain option to use within the search. | Select applicable domain option from the drop-down menu. |
| Search | The Search button will take into consideration all criteria specified and return matching information. | Click Search to find the required user. |
| Select All | Selects all users returned in the user search. | ClickSelect All to select all users returned in the user search. |
| Clear All | Clear all selected users. | Click Clear All to clear all selected users returned in the user search. |
This feature represents a Slot ownership transfer. The data will be intact as it is stored as part of the slot. If the item status is Open, it will remain open on the destination user's worklist. This means User 3 will be able to see the changes in data / XML fields made by User 1. If the status of the item is Available, it will remain available on the worklist of User 3 . By redirecting an item, there is no additional slot allocated, so the rule stay the same if the item is Available or Allocated based on the Available slots. All rights assigned to the original user is moved to the redirected user.
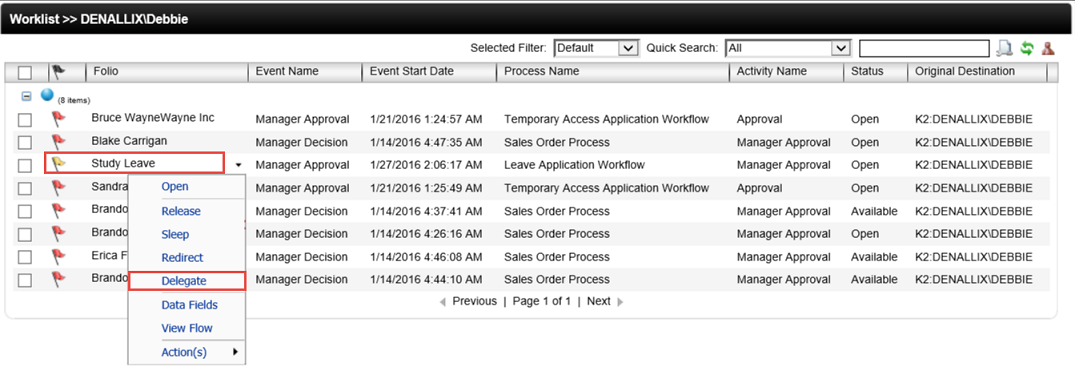
This feature enables you to allocate a work item to a different user for processing.
- The Delegate action represents sharing of a worklist item. No ownership transfer will be performed.
- The work items still belong to the original user.
- Delegation is purely based on rights. The users can only perform the Actions that have been delegated to them.
- Only actions that are available to the original user can be delegated.
- The original user can still complete the task which will remove the rights of the delegated user as well , and visa versa.
- From the K2 Workspace Worklist select a work item to Delegate.
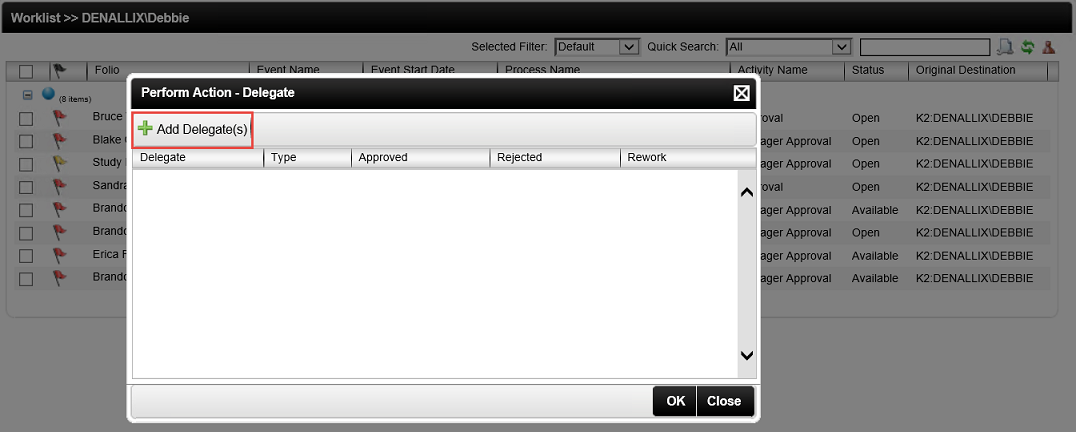
- From the Action menu select Delegate. The Perform Action - Delegate screen displays.
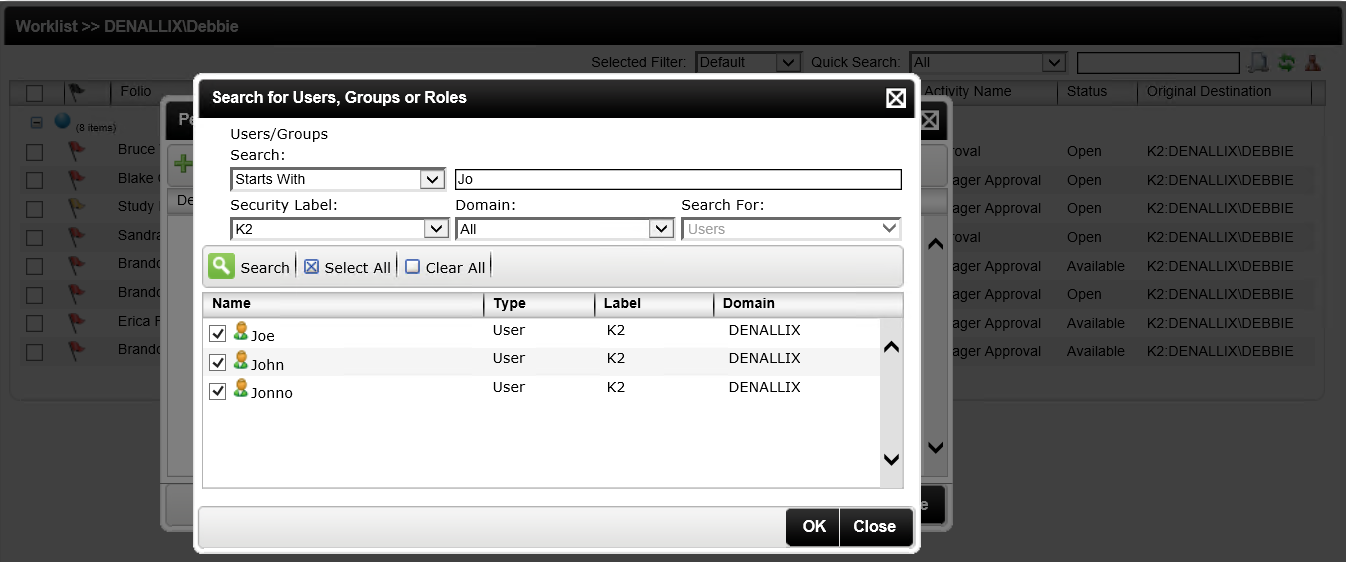
- Click on Add Delegate(s). The Search for Users, Groups or Roles screen displays.
- Search and select the user / group to delegate the work item to. Click OK.
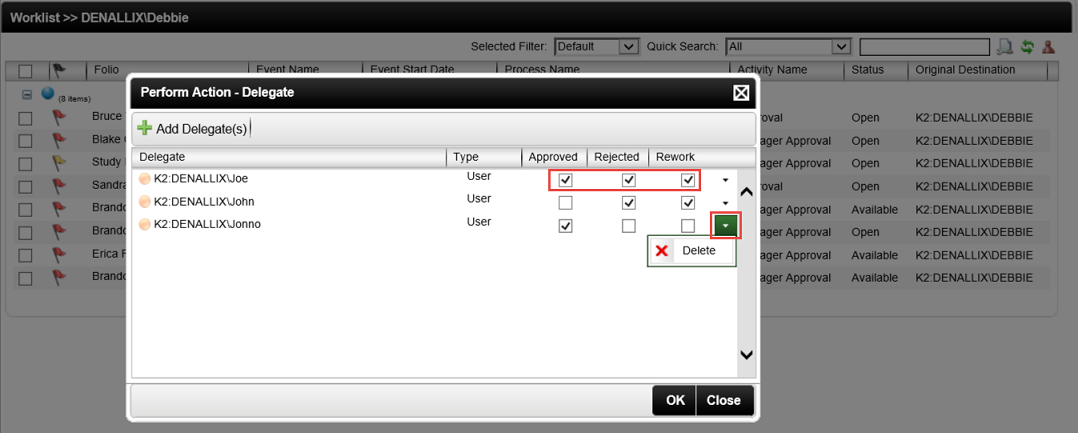
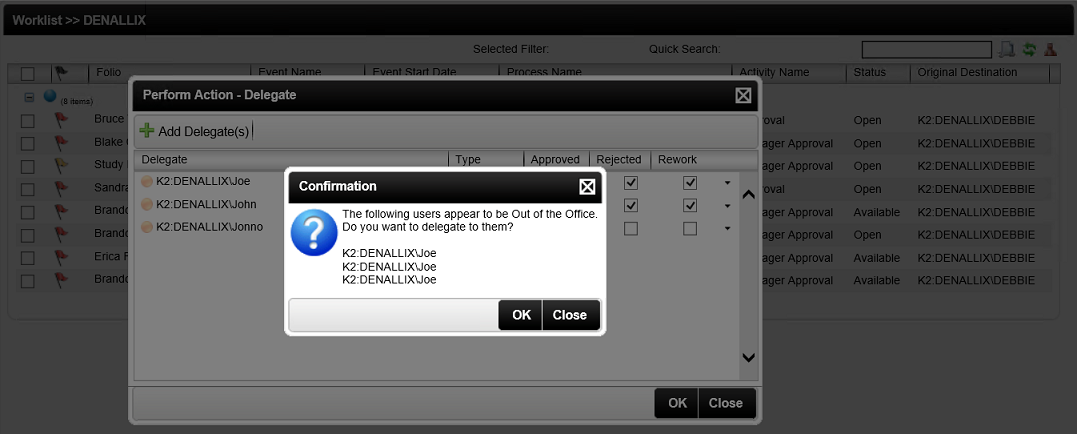
- Assign Action Rights to the selected user by checking the required check boxes. To remove a user, click the down arrow and select Delete. Click OK.
- The work item has been delegated.
The table below explains the available fields:
| Feature | Description | Sample Value |
|---|---|---|
| User / Groups | Allows you to only search for the available Users. | Default selection. |
| Search drop down menu | This drop down menu contains search related options to use within the search. Available options are: Starts With, contains, Ends With and Equal To. The default value is Starts With. | Select applicable search option from the drop down. |
| Search Text Box | Allows you to enter the search text string. | Enter required search text. |
| Search Label | The drop down contains security label related options to use within the search. | Select applicable security label option from the drop down. |
| Domain | The drop down contains domain options to use within the search. | Select applicable domain option from the drop down |
| Search | The Search button will take into consideration all criteria specified and return matching information. | Click Search to find required user. |
| Select All | Select all users returned in the user search. | Click Select All to select all users returned in the user search. |
| Clear All | Clear all selected users. | Click Clear All to clear all selected users returned in the user search. |
The table below explains the available fields:
| Feature | Description | Sample Value |
|---|---|---|
| Delegate | Displays a list of users the work item has been delegate to. | Display only. |
| Approved | Specify which actions can be performed by the delegate by selecting the check box under each option. | Check the applicable check box. |
| Rejected | Specify which actions can be performed by the delegate by selecting the check box under each option. | Check the applicable check box. |
| Rework | Specify which actions can be performed by the delegate by selecting the check box under each option. | Check the applicable check box. |
| Delete | Use this option to remove a delegated user from the list. | Click Delete to remove user. |
| Add Delegate(s) | Use this option to add a delegated user to the list. | Click Add Delegate(s) to add a user to the list. |
This feature enables the user to view the Data Fields of the selected work item.
- From the K2 Workspace Worklist select a work item to view the Data Fields.
- From the Action menu select Data Fields. The Data Fields screen displays.
- Click OK.

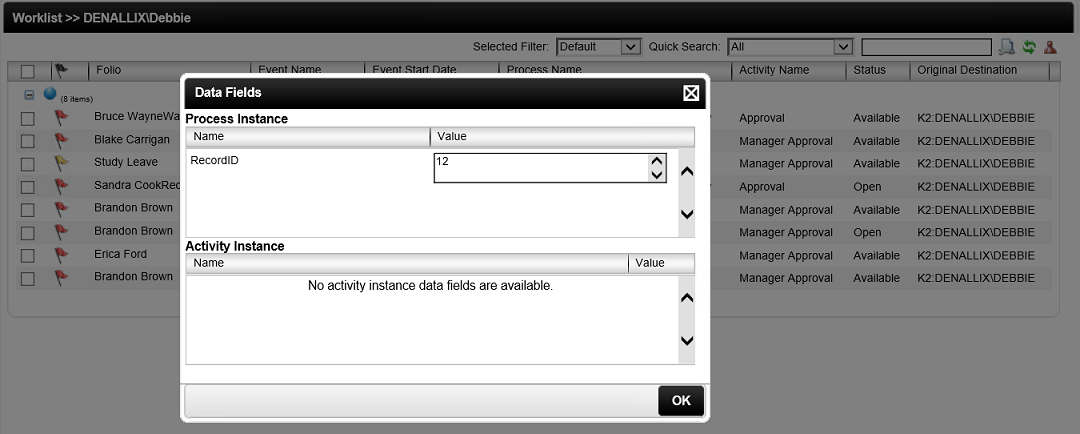
The table below explains the available fields:
| Feature | Description |
|---|---|
| Process Instance | Displays the data fields and the value created for the workflow process instance. |
| Activity Instance | Displays the data fields created for the workflow activity instance. |
XML fields can be displayed and the Value will be displayed as a hyperlink. The hyperlink can be clicked to open the XML document or the XPATH node.
This feature provides a detailed view of the actions taken during the workflow.
- From the K2 Workspace Worklist select a work item to view the View Flow on.
- A visual representation of the workflow displays.
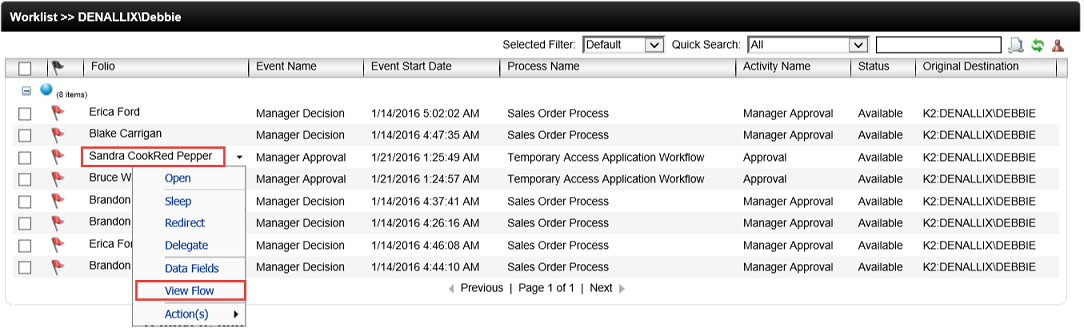

For more information see the View Flow Report topic.
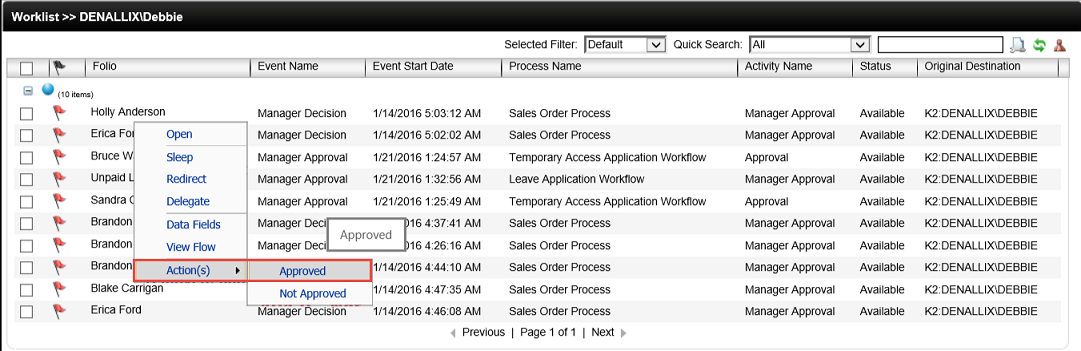
This option displays the actions available on the work item such as Approved, Declined, Rework or Canceled.
- From the K2 Workspace Worklist select a work item and select Action(s).
- From the Action menu click Action(s) and select Approved.
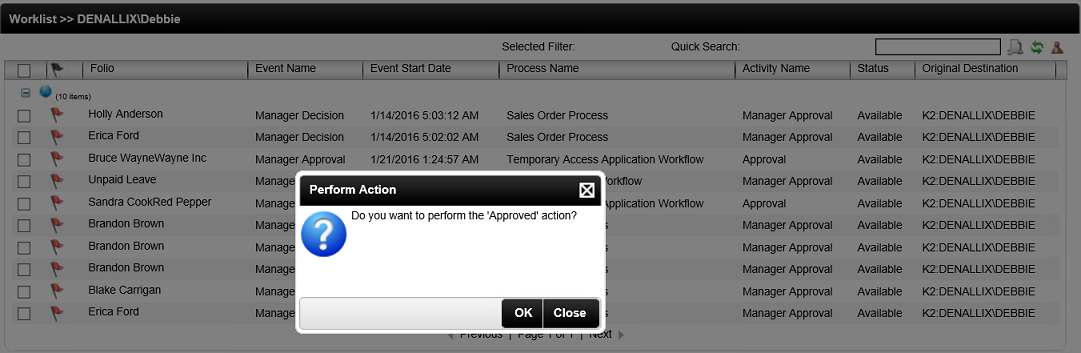
- Click OK to confirm the selected action.