
Deliver an output document by Salesforce email. The Email Delivery Option sends documents by email with Salesforce email servers (in contrast to SMTP Delivery which uses a non-Salesforce SMTP service to email documents). You configure the standard delivery options, then select an (optional) Salesforce template or an HTML template. When you generate documents with a Salesforce Email Delivery, you make final adjustments to the email before you send.
Tip: Why use Salesforce Email? Your end users have an opportunity to edit some options in the email (address fields, subject header, etc.) before they send it.
This feature is supported in the DocGen Lightning Component.
Add or edit Salesforce Email Delivery
You can add an Salesforce Email delivery from the DocGen Package Wizard or the Delivery Options related list on a DocGen Package. The wizard offers access to the most common options for deliveries. Additional options are available by editing the delivery from the related list, such as adding additional email addresses to the To, CC or BCC lines, limiting availability for Mass DocGen Package, and turning on Tracking in Microsoft Word documents.
To add Salesforce Email Delivery Option from the DocGen Package Wizard
-
From the Force.com app menu, select Nintex DocGen, and then click DocGen Packages.
Tip: You can also select this from Lightning with the
 App Launcher.
 -
Select New.
-
From Basics, enter required information in these fields:
-
DocGen Package Name
-
Type
-
DocGen Package Starting Object.
For more information, see Create new DocGen Packages with the DocGen Package Wizard.
-
-
From Delivery Options, in Type, select Salesforce Email.
-
In Name, type a name (that the user running the DocGen Package will see) and then configure any remaining fields for standard options.
For more information on the standard options, see Delivery Options.
-
On DocGen Package Templates, select or upload a template and click Save.
To add or edit Salesforce Email Delivery Option from the Delivery Option related list
-
From the Force.com app menu, select Nintex DocGen, and then click DocGen Packages.
Tip: You can also select this from Lightning with the
App Launcher. -
Select a DocGen Package from which you want to add or edit a Salesforce Email Delivery Option, and on the Delivery Option related list, take one of the following actions.
-
Click New Delivery Option, from Type of new record, select Emailand then click Continue.
-
From an existing Email Delivery Option, click Edit .
-
-
In Name, type a name (that the user running the DocGen Package will see) and then configure any remaining fields for standard options.
For more information on the standard options, see Delivery Options.
-
(Optional) Select Internal Email to allow for internal routing of email by removing the associated contact or lead email reference.
-
(Optional) In Additional To, type any additional email addresses for the To line.
Tip: You can type tags to dynamically add addresses during document generation.
-
(Optional) In CC type any additional email addresses for the CC line.
Tip: You can type tags to dynamically add addresses during document generation.
-
(Optional) In BCC type any additional email addresses for BCC line.
Tip: You can type tags to dynamically add addresses during document generation.
-
(Optional) Select Use Box Links. Enable this option and add a Box link tag from the field tagger to your template.
-
Click Save.
Tip: The Delivery Option Detail page opens where you can (optionally) select an email template. For more information, see (Optional) Add or edit a template.
(Optional) Add or edit a template
You can assign a template to the email you send with Salesforce Email delivery. When you generate documents, data from your organization replaces the tags or merge fields in the email templates.
You have two options:
-
Select from Salesforce text only templates
-
Create a custom template with Microsoft Word and the app will convert it into HTML during document generation. For more information, see Email templates.
To assign or edit a Salesforce template
-
From the Force.com app menu, select Nintex DocGen, and then click DocGen Packages.
Tip: You can also select this from Lightning with the
App Launcher. -
From a DocGen Package that has a Salesforce email delivery, on the Delivery Options related list, click Name for the delivery option.
-
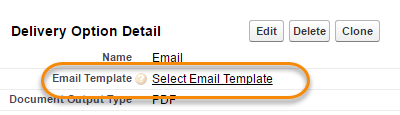
On Delivery Option Detail, click the Select Email Template link to choose an existing Salesforce Template.
-
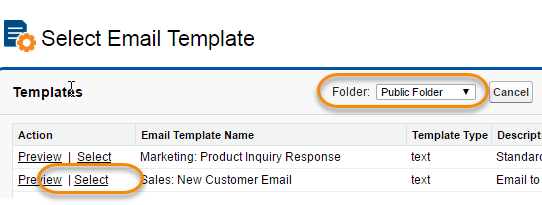
Choose the folder where the templates are stored, and then choose the Salesforce Template by clicking Select.
(Optional) Add a field for a subject line to the Salesforce Delivery Option edit page
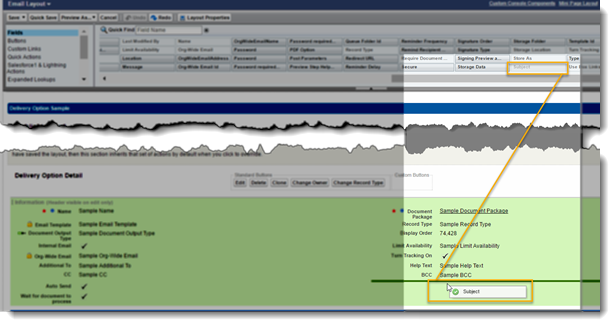
The subject field is available on the layout, but you have to drag the field onto the page layout to make it available. If you add a field for a subject line, you can enter a default subject that will appear in every Salesforce email your users deliver. If you don't enable the Auto Send option, the user will have the option to edit the default subject line before the email is sent.
To add a field for a subject line
-
From Setup, type Objects in the Quick Find box, then click Objects for a list of custom objects in your organization.
-
Click Delivery Option.
-
Click Page Layouts.
-
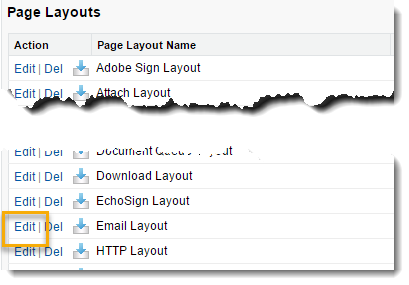
In the Page Layouts related list, click Edit for Email Layout.
-
From the Field picker, select Subject and drag it onto the page layout.
-
Click Save.
Use Salesforce Email delivery
Once you add the Salesforce Email Delivery Option to your DocGen Package, users whose profiles are in the Security Section of the DocGen Package can delivery documents by email.
To test the Salesforce Email Delivery
-
From the Force.com app menu, select Nintex DocGen, and then click DocGen Packages.
Tip: You can also select this from Lightning with the
App Launcher. -
Open a DocGen Package with a Salesforce Email Delivery. .
-
Click Select Record , select the record, contact, and then select the Salesforce Email Delivery. For more information, see DocGen Package object testing
-
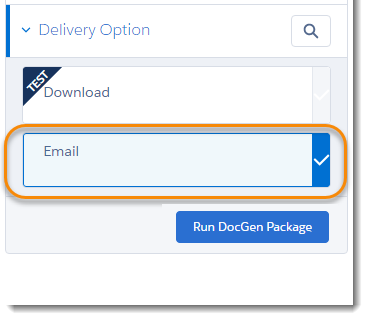
Select Run DocGen Package.
-
Select Compose Email.
-
Edit the email using any of the following options:
-
To - Main recipient of the email. The email of the contact selected in section 1 of the run DocGen Package page will be inserted here.
-
Related To - The object and record will automatically populate here depending on where the Generate Documents DocGen Package button is selected.
-
Additional To - Emails entered into the "Additional To" field on the Delivery Option will be defaulted here. More email address can be added in the interface.
-
CC: - Emails entered into the "CC" field on the Delivery Option will be defaulted here. More email addresses can be added in the interface.
-
BCC: - Emails entered into the "BCC" field on the Delivery Option will be defaulted here. More email addresses can be added in the interface.
-
Subject - The subject of the SF Email Template selected in the Delivery Option will be defaulted here. If no Salesforce Email Template is selected, the subject will appear blank. The subject can be edited in the interface.
-
-
Click Send.
Below is the output from the selected Salesforce Email Template on the Delivery Option. If no template is selected within the Email Delivery Option, the body of the email will default blank.
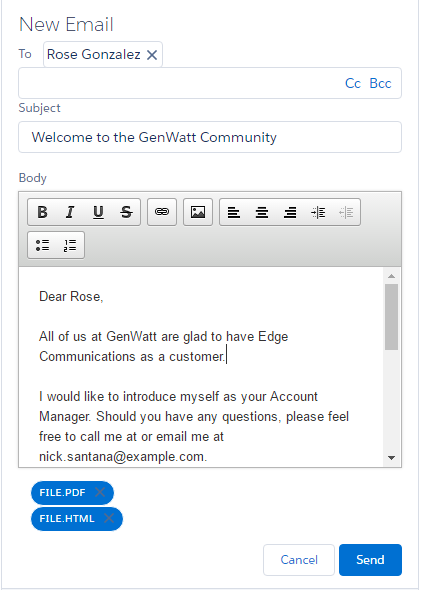
At the bottom of the Salesforce Email interface, you will have access to the output file the app produced. In the Classic Experience for generating documents, you can attach additional files by clicking Attach File.