Category Tree
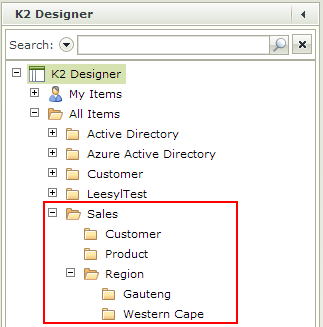
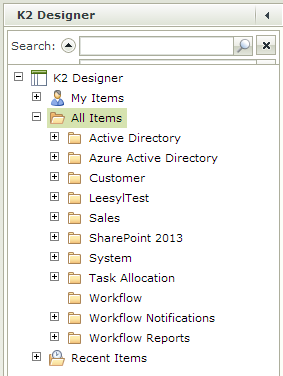
The category tree is located in the left panel of the K2 Designer. The category tree consists of My Items, All Items and Recent Items. This includes all SmartObjects,
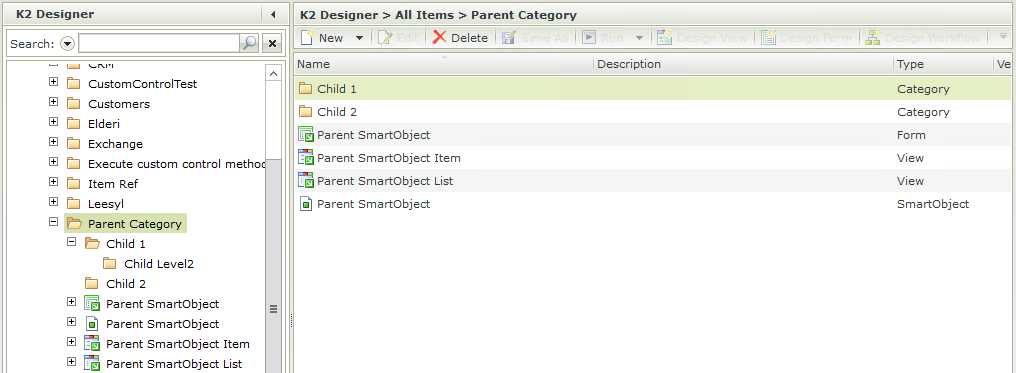
Categories can be added to the All Items folder to customize the tree folder structure by right-clicking and selecting the New Category option and entering the category name . The My Items folder is specific to a user, while the All Items folder is applicable to all users with the correct permissions. Categories can be added on different levels, for example, the Sales category can have Customer, Product, and Region categories.
The following icons are used to distinguish between the different items:
| SmartObject |

|
| View |

|
| Form |

|
| Workflow |

|
| Checked out Form |

|
| Checked out View |

|
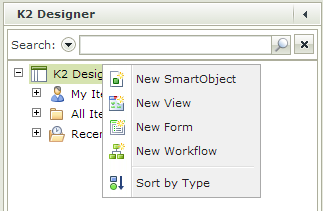
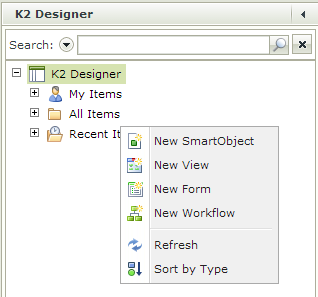
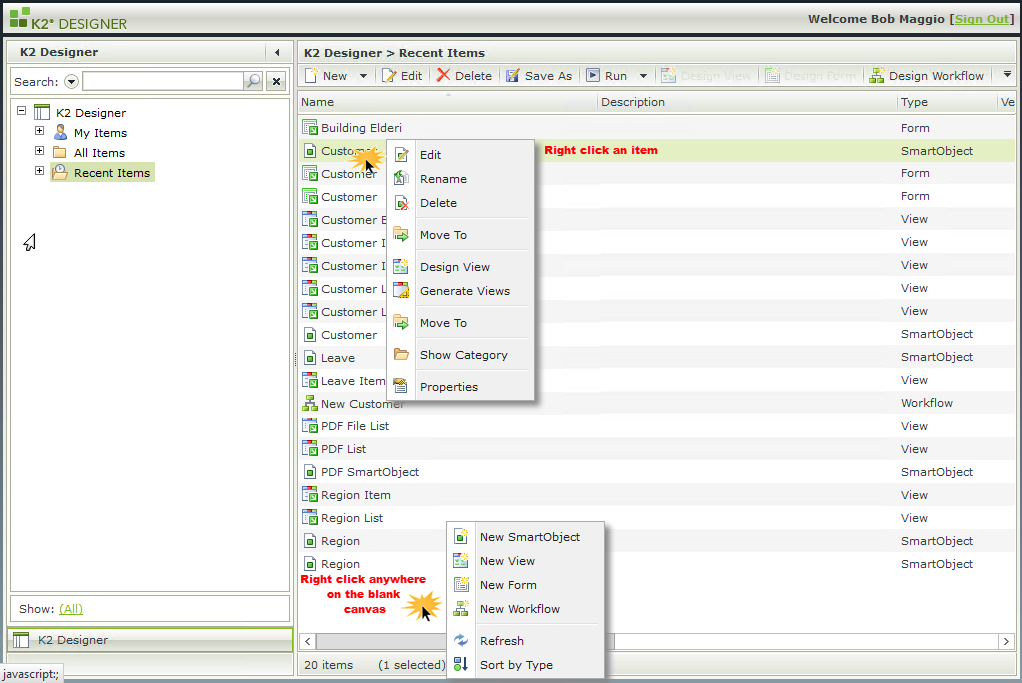
New items can be added through the category tree by right clicking on the specific node.
The K2 Designer node presents the user with the option to add a new SmartObject, View, Form, or Workflow. It also provides the ability to sort by type.
The My Items node presents the user with the option to add a new SmartObject, View, Form or Workflow and the ability to refresh the node or sort by type.

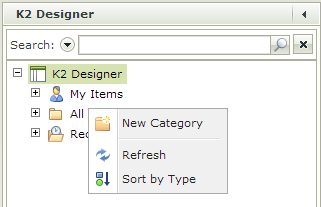
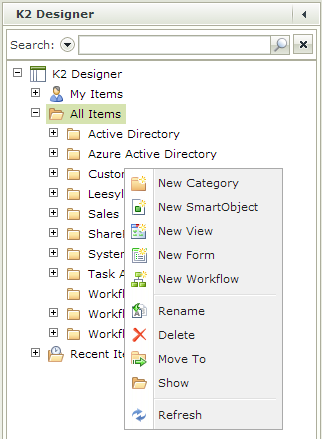
The All Items node presents the user with the option to add a new category, refresh the node, or sort by type. Categories are used to group items together.
The Recent Items node presents the user with the option to add a new SmartObject, View, Form or Workflow and the ability to refresh the node or sort by type.
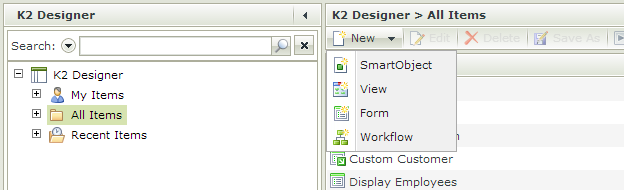
New items can also be created by clicking on the arrow next to New and selecting the item from the drop down. This Form becomes available when clicking on the My Items, All Items or Recent Items node in the category tree or alternatively when selecting Show from the menu when right clicking a category.
Categories can be renamed, deleted, moved or shown on the K2 Designer landing page. To perform one of these actions, right-click on the category and select the required action.
Items such as SmartObjects, Views, Forms, and Workflows can be added to a category. See Adding Items on how to add these items to a category.
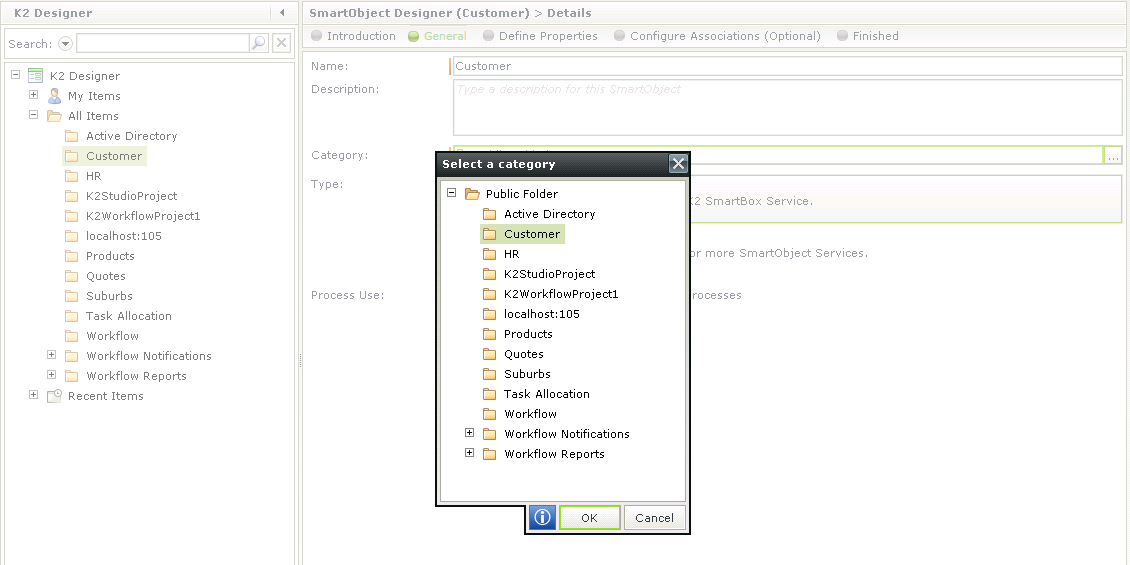
When creating SmartObjects, Views, Forms, and Workflows, the category can be selected from the wizard.
The category tree has a search functionality allowing the users to easily find the category they want to work with or a filter can be applied to manage the display of categories.
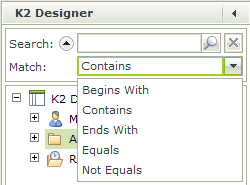
The search function can be used to search for any item in the category tree. Select the drop down arrow next to Match.
| Feature | Description | How to use it |
|---|---|---|
| Search | Returns items as per the search criteria specified | Type a letter or word to refine the search and click on the magnifying glass to execute the query. The results will be reflected in the category tree. Click on the x to clear the search criteria |
| Begins With | Returns items that begin with the letter or word typed in the search box | Type a letter or word that begins with the phrase to search for and click on the magnifying glass to execute the query. The results will be reflected in the category tree. Click on the x to clear the search criteria. |
| Contains | Returns items that contain the letter or word typed in the search box | Type a letter or word that contains the phrase to search for and click on the magnifying glass to execute the query. The results will be reflected in the category tree. Click on the x to clear the search criteria. |
| Ends With | Returns items that end with the letter or word typed in the search box | Type a letter or word that ends with the phrase to search for and click on the magnifying glass to execute the query. The results will be reflected in the category tree. Click on the x to clear the search criteria. |
| Equals | Returns items that are an exact match for the letter or word typed in the search box | Type a letter or word that are an exact match for the phrase to search for and click on the magnifying glass to execute the query. The results will be reflected in the category tree. Click on the x to clear the search criteria. |
| Not Equals | Returns items that do NOT match the letter or word typed in the search box | Type a letter or word that does NOT match the phrase to search for and click on the magnifying glass to execute the query. The results will be reflected in the category tree. Click on the x to clear the search criteria. |
Views and Forms have a display name and a system name as is applicable to SmartObjects. The display name is reflected in the category tree and the tooltip when hovering over the item will show the following for Views and Forms:
System name: Item System Name
Description: Item Description
And for Workflows:
Fully Qualified Name: Item FQN
Description: Item Description
The description is displayed in the tooltip only if it contains a value. If there is no description the tooltip will only display the system name (or fully qualified name) of the item. This change is applied everywhere the SmartObject, View or Form is present.
Validation is performed on the display name to check for duplicate names.
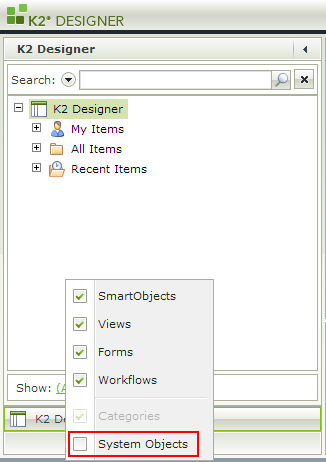
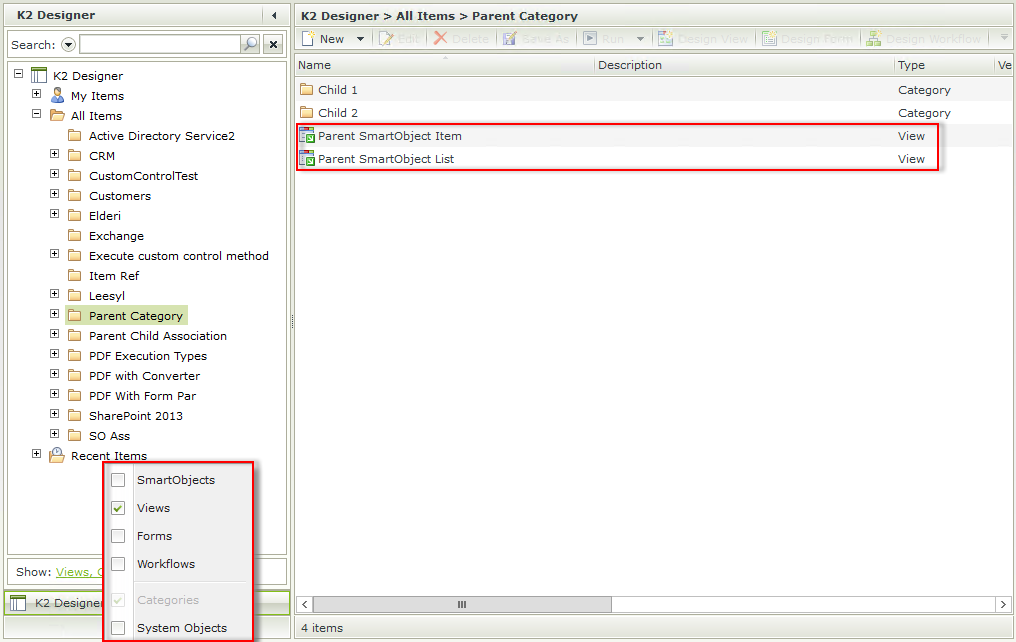
A setting is available in the category tree to enable the system objects to be shown or hidden. The setting is deselected by default meaning the system objects won't be reflected. The setting is saved as the user's preference on the user profile.
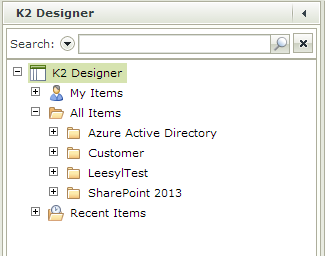
- Open the K2 Designer.
- The category tree shows no system objects.
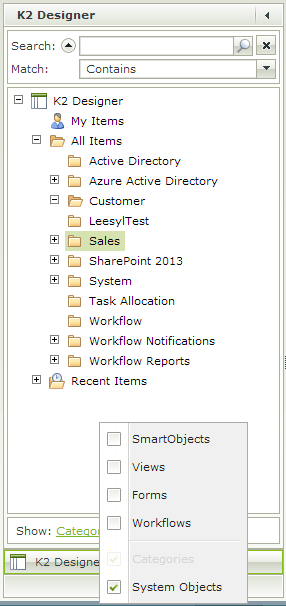
- Click on the All link in the filter section and select System Objects.
- The following categories are reflected containing system objects:
- Active Directory
- System
- Task Allocation
- Workflow
- Workflow Notifications
- Workflow Reports
This setting is not available in releases prior to K2 smartforms 1.0.8, system objects are shown by default. When installing K2 smartforms 1.0.8 or later, this setting is deselected by default, hiding the system objects. To show the system objects, select the setting.
The Category Tree on the left of the screen provides you with the ability to customize the tree folder structure and perform certain actions. See the Category Tree topic for more detail on the customization and the application of the grid. The following additional resources are available on each grid and can be accessed by clicking on the My Items, All Items or Recent Items nodes in the Category Tree:
- Right click anywhere in the blank grid or on an item to execute context menu actions.
- Use Ctrl + A keyboard buttons to select all items in the grid.
- Delete all selected items in the grid using the keyboard delete button or the Delete toolbar button.
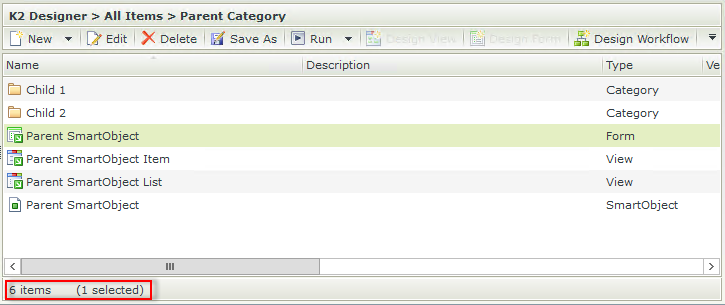
- Select the parent category in the Category Tree on the left to view all child items in the grid on the right.
- Use the Search feature in the Category Tree to select multiple items and perform context menu actions on all items selected.

- Filter the grid using the Category filter.
- Use the status bar to see how many items are selected.