23. Deploy the Expense Claim Workflow
In this step, you deploy the final version of your workflow. Deploying a workflow publishes it to the K2 server and makes it available for use. If you make changes to the workflow, you must deploy it again so that the K2 server has the latest version. After you deploy the workflow, you assign "start" and "view" rights for all authenticated users. Users can start your workflow (by submitting an expense claim) and view reports on their workflow instances.
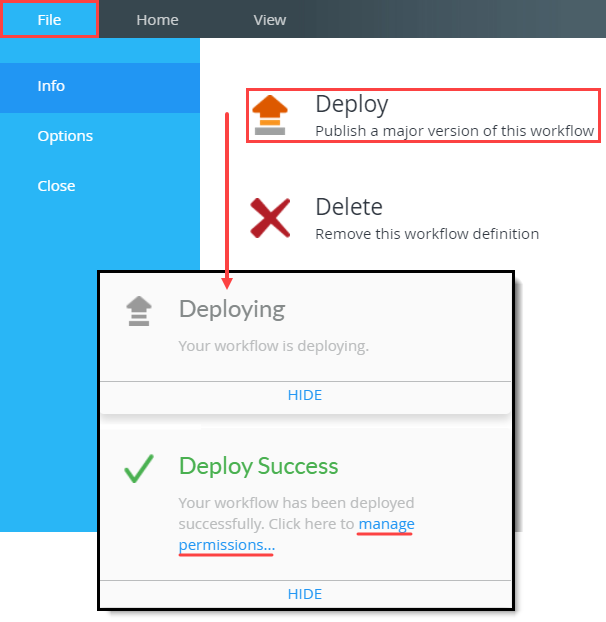
- Deploy the workflow. Do not close out of the success message as you grant permissions next.
- Click File, then Deploy.
- Click File, then Deploy.
- Assign "everyone" start and view rights to the Expense Claim Workflow.
- Next, you set permissions so that all authenticated users can start the workflow and view reports on workflow instances. Users can only view reports on workflows they started or on workflows where they were a task recipient.
After you see the success message, click the manage workflow permissions... link. The K2 Management site opens in a new browser tab. Expand the Workflow Server node and click Workflows.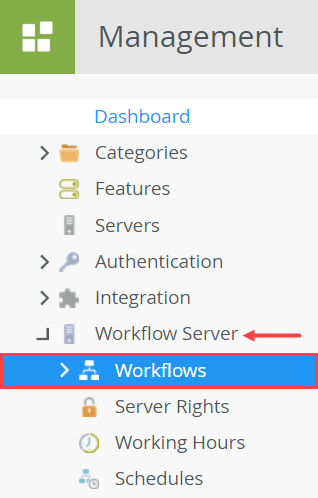
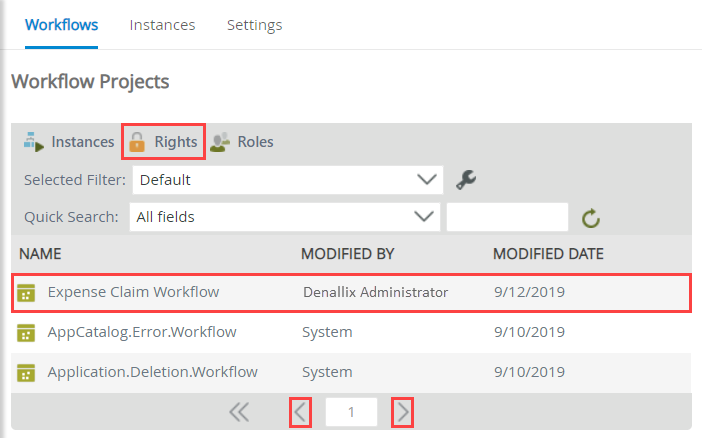
- In the central pane, find and select the Expense Claim Workflow. Click the Rights button. (Use the left and right arrows to scroll through the list if you need to in your environment.)
- On the Workflow Rights screen, click Add. On the Add Users and Groups screen, confirm the Search Scope is set to All and the Label is set to K2. In the search text box, enter
everyone
then click the Search button.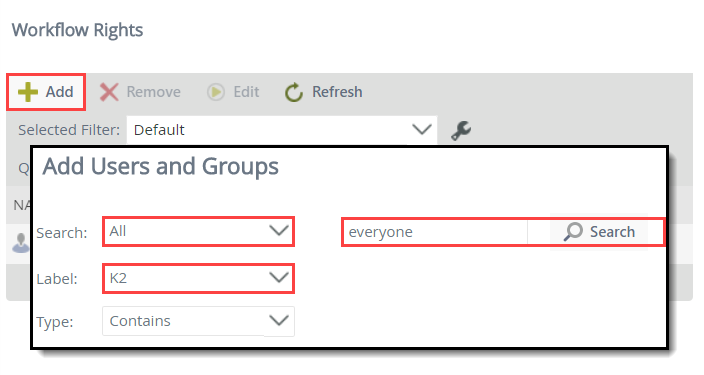
- You should see "everyone" appear in the results pane. Select the Everyone row, then click Add. Click Next to continue.
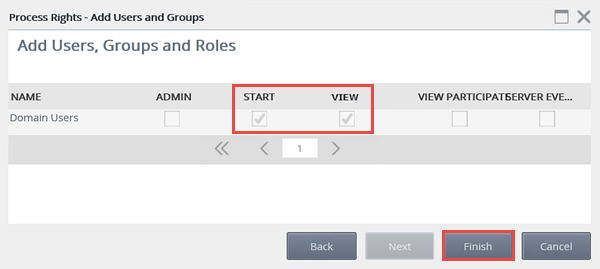
- CHECK the boxes for START and VIEW, then click Finish. Start rights allows you to start an instance of a workflow. View rights allow you to view reports for workflow instances you are associated with.
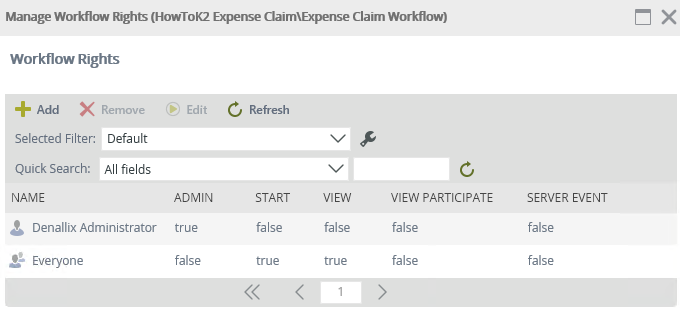
- You should see "Everyone" listed for permissions to this workflow. (If you are not working on a K2-provided VM, you will not see the Denallix Administrator entry, you may see another entry instead.) Close the workflow rights window. Close the K2 Management site browser window.
- Back on the K2 Workflow Designer, close the workflow by clicking File > Close.
Breaking down this step. First, you search for the user, group, or role you want to assign permissions to. Your search results appear in the first pane, the search results pane. In some cases, you may have more than one result returned. You then select the result you want, then click Add once again to add it to the process rights pane, or list of users you are granting rights to. The Everyone group includes all authenticated users from all associated systems (such as SP, CRM, AD, AAD).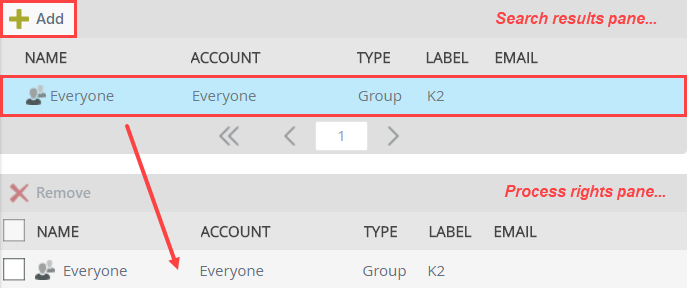
- Next, you set permissions so that all authenticated users can start the workflow and view reports on workflow instances. Users can only view reports on workflows they started or on workflows where they were a task recipient.
Review
In this step, you deployed the Expense Claim Workflow and assigned workflow permissions. In the next step, you return to editing form rules. After you complete the rule configurations, your application is ready to test!