20. Add a Task Step to Rework the Expense Claim
In this step, you add and configure the rework outcome steps. You add a task step and assign it to the claim originator. The originator can "rework" the claim and resubmit it or cancel the claim entirely. The resubmit outcome connects back to the Set Status Submitted step at the beginning of the workflow. This creates a looping effect between the Approve Expense Claim and Rework Expense Claim steps. The loop can repeat itself as many times as necessary until the approvers or the originator select a different outcome. To complete the rework steps, you update the status for the canceled outcome. (You don't need to update the status for resubmit since it flows back to the Set Status Submitted step.)
- Add a Task step to the workflow with the following configuration:
- Instructions: Please modify and resubmit this claim, or cancel it entirely.
- Actions: Resubmit, Cancel
- Form: SmartForm > Edit Expense Claim
- References: Keep default settings
- Open Task: Help me configure it
- Workflow View: Use an existing State: Workflow Task
- Open Task Rule Action: Keep default settings
- After submit: Keep default settings
- Summary: Save and Finish
- Recipients: Originator
- Email Alert: Customize the notification to include Context Browser references.
- Properties: Rename the step: Rework Expense Claim
- From the K2 Application elements page, edit the Expense Claim Workflow.
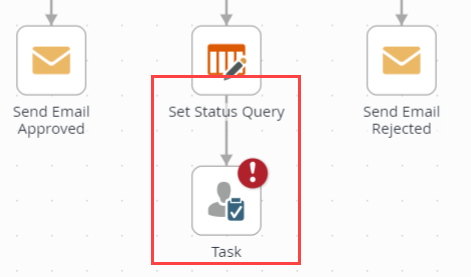
- From the Toolbox > Basic node, drag a Task step below the Set Status Query step. Connect the two steps.
- Select the Task step, then expand the Configuration Panel. Click the Task tab. For the INSTRUCTIONS, enter
Please modify and resubmit this claim, or cancel it entirely.
Then add two actions: Resubmit and Cancel.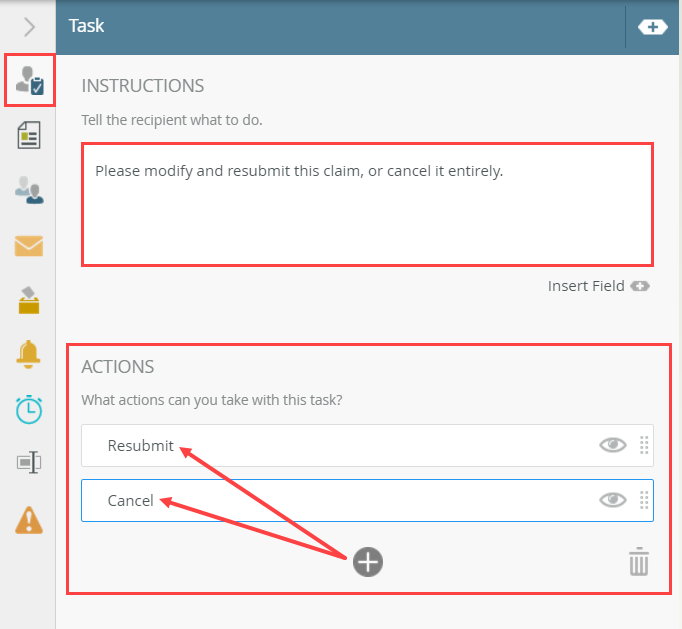
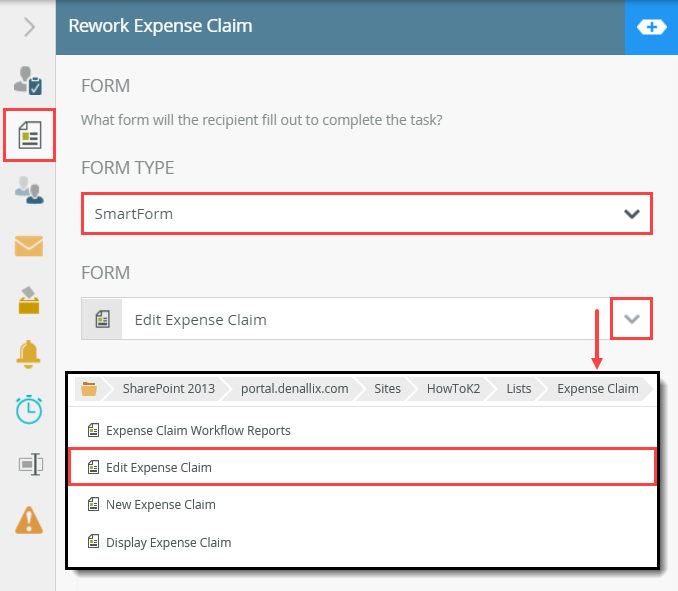
- Click the Form tab. For the FORM TYPE, select SmartForm. For the FORM, browse to and select the Edit Expense Claim form. Here, you want the user to make the necessary modifications, so they need the editable form. (Your browse sequence may be different than the image below, depending on your SharePoint site or subsite name.)
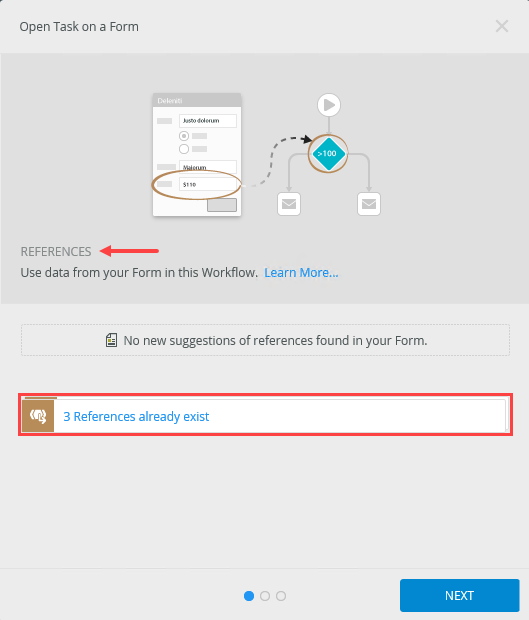
- On the REFERENCES page, it should indicate references have already been found and there are no new suggestions. (The number of references may be different in your environment. It is OK to continue.) Click NEXT.
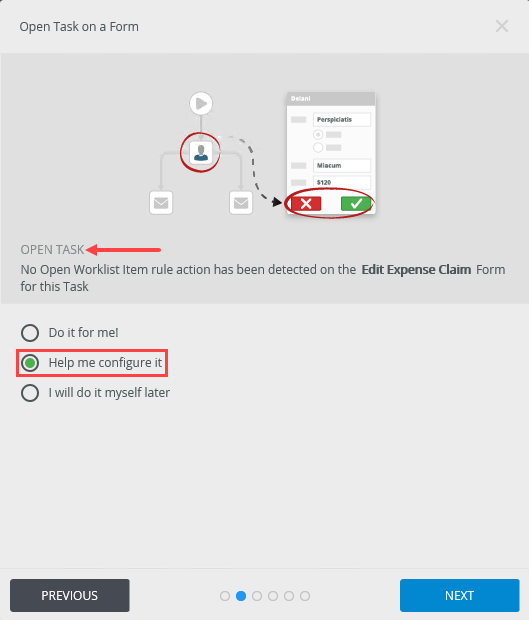
- On the OPEN TASK page, select Help me configure it, then click NEXT.
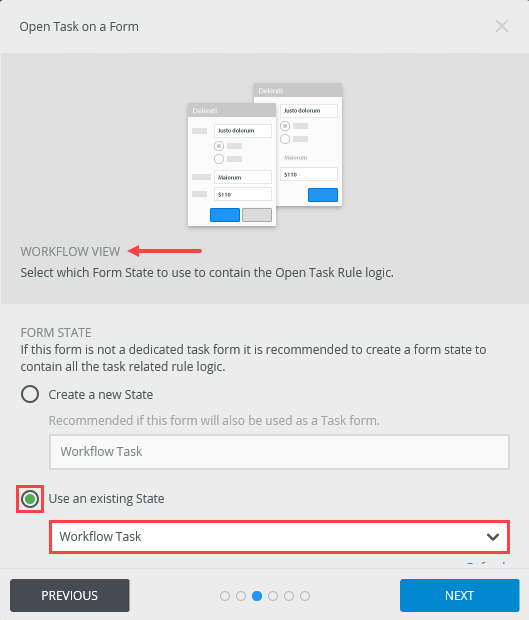
- On the WORKFLOW VIEW, select Use an existing State, then select the Workflow Task state. Click NEXT.
If the Workflow Task state does not exist as an existing state, choose Create a new State, with Workflow Task as the state name.
- There are no changes to the OPEN TASK RULE ACTION settings, click NEXT.
- There are no changes to the AFTER SUBMIT ACTION settings, click NEXT.
- Review the Summary settings, then click SAVE AND FINISH. When you see the success check, click OK.
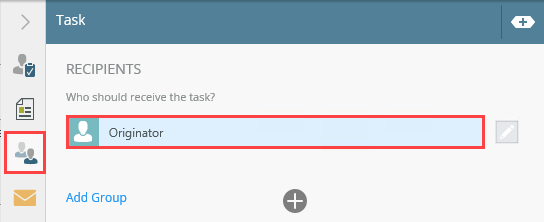
- Click the Recipients tab. Confirm the recipient is Originator.
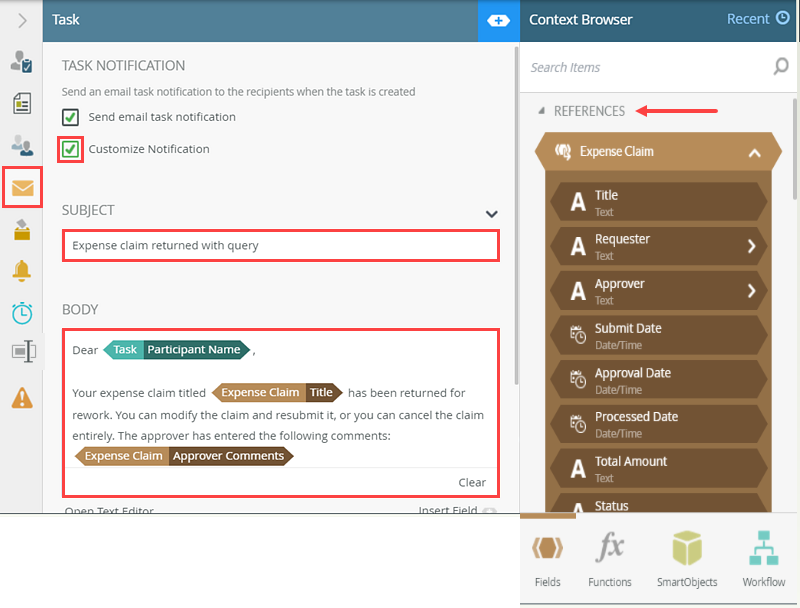
- Click the Email Alert tab. CHECK the Customize Notification box. For the SUBJECT line, enter
Expense claim returned with query. - Customize the BODY with any content you choose. Use references from the Context Browser to personalize the message. Be sure to keep the default variables in the email (from the default email template).
- Click the Properties tab. Change the name of the step to
Rework Expense Claim
then collapse the Configuration Panel.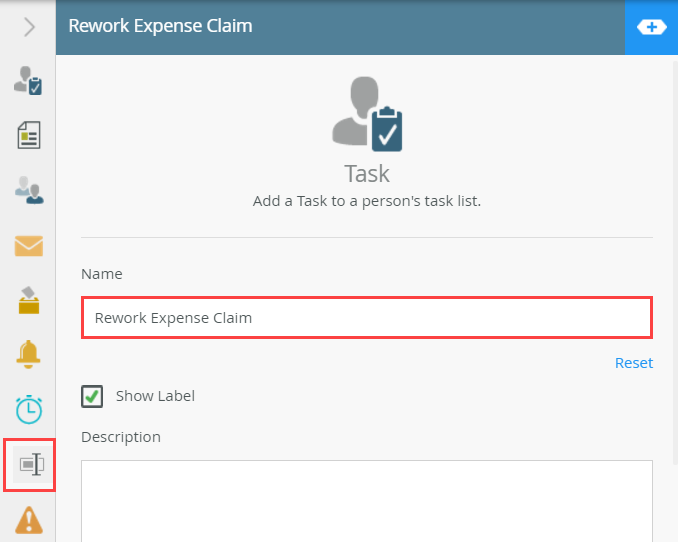
The Open Task on a Form wizard launches.
- Add a Decision step and connect it to the Rework Expense Claim step.
- From the Toolbox > Logic node, drag a Decision step below the Rework Expense Claim step. Connect the two steps.
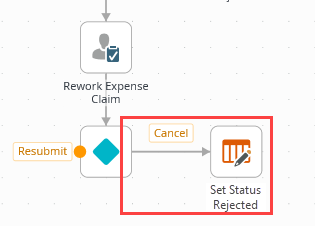
- Copy, then paste, the Set Status Rejected step. Align it with the Cancel outcome, then connect the line to the step. Edit the step and change the Status value to Claim Canceled, then rename the step Set Status Canceled.
- For the cancel outcome, update the status. Select the Set Status Rejected step. Copy and paste the step. (Home > Copy, Home > Paste). Align it with the Cancel outcome, then connect the outcome to the step.
- Select the duplicated Set Status Rejected step, then expand the Configuration Panel. From the Update List Item tab, change the Status value to
Claim Canceled.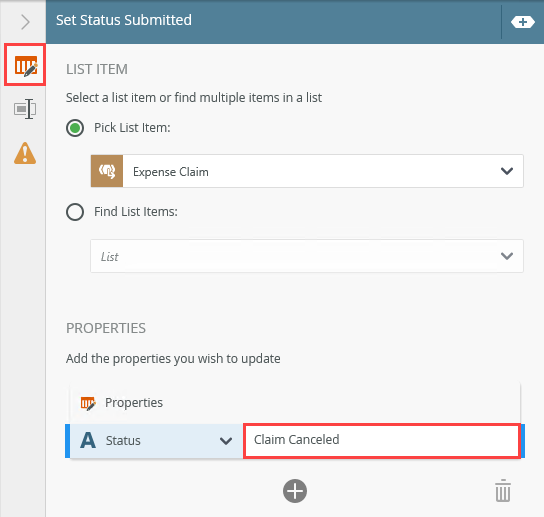
- Click the Properties tab. Change the step name to
Set Status Canceled
then collapse the Configuration Panel.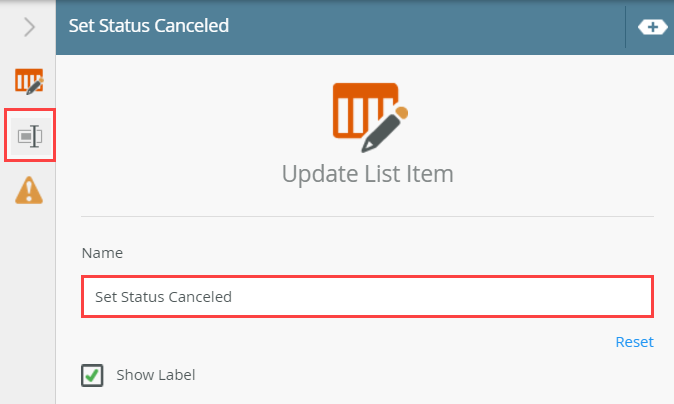
- For the cancel outcome, update the status. Select the Set Status Rejected step. Copy and paste the step. (Home > Copy, Home > Paste). Align it with the Cancel outcome, then connect the outcome to the step.
-
Connect the Resubmit outcome to the Set Status Submitted step to start the approval process over again.
Your workflow should look like the image below at this point.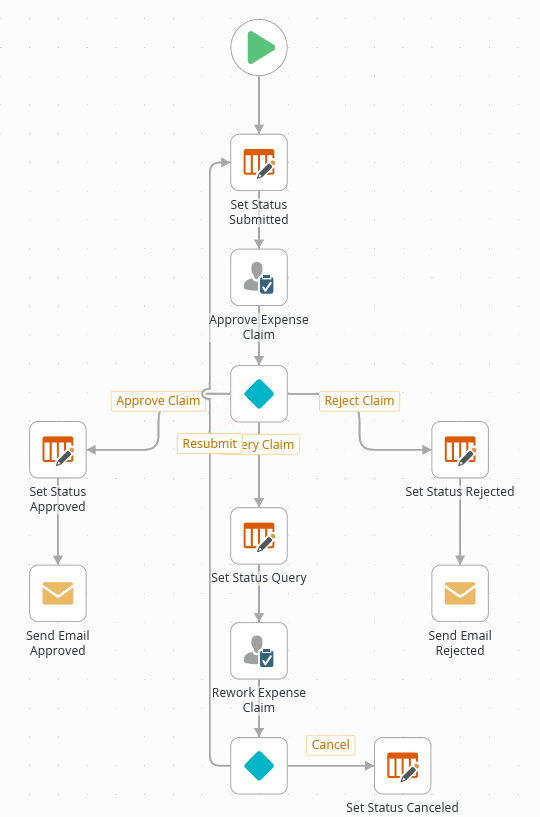
- Next, connect the Resubmit outcome to the Set Status Submitted step. This starts the entire approval process over again. It creates a looping effect between the approval and rework task steps. This loop can repeat itself over and over, until the claim is either approved, rejected, or canceled.
Connect the Resubmit outcome to the Set Status Submitted step.
Your workflow should look like the image below.
- Next, connect the Resubmit outcome to the Set Status Submitted step. This starts the entire approval process over again. It creates a looping effect between the approval and rework task steps. This loop can repeat itself over and over, until the claim is either approved, rejected, or canceled.
Review
In this step, you completed the rework section of the workflow. You added a task step and assigned the task to the claim originator. Once again, you copied an existing step, then reconfigured it to update the status for the canceled outcome. You connected the resubmit outcome back to the Set Status Submitted step. This creates a looping effect, which can repeat itself as many times as necessary until either the approvers or the originator selects a different outcome. In the next step, you add and configure the Finance Processing task step.