15. Edit the Edit Expense Claim Form
In this step, you edit the form used in the rework step (Edit Expense Claim Form). The requester uses this form to adjust their claim if the approver requests it. First, you add the editable line items view to the form, then add an action to retrieve the child records. Finally, you add an action to transfer the Sum Data Label amount to the Total Amount Data Label. It's entirely possible the requester makes adjustments their line items, so you want the header view (Total Amount Data Label) to reflect the adjusted amount from the details view (Sum Data Label).
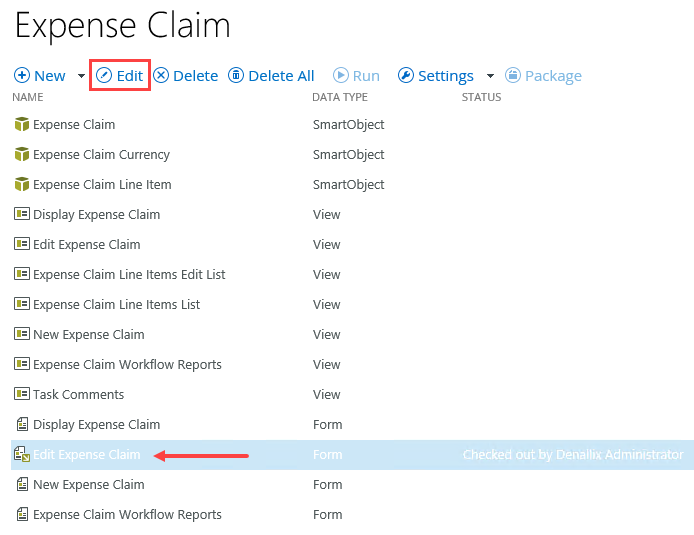
- Check out and edit the Edit Expense Claim form. Set the form's width to 90%.
- Check out and edit the Edit Expense Claim form.
- From the Properties pane, set the form's width to
90%.
- Check out and edit the Edit Expense Claim form.
- Add the Expense Claim Line Items Edit List view to the form and change the view title to Expense Claim Items.
- From the Views tab, drag the Expense Claim Line Items Edit List onto the form and change the view title to:
Expense Claim Items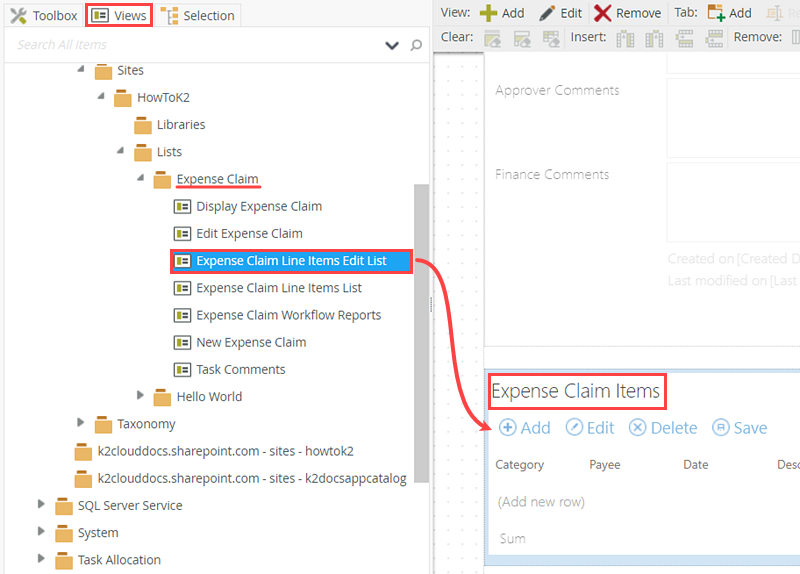
- From the Views tab, drag the Expense Claim Line Items Edit List onto the form and change the view title to:
- Edit the form initializing rule. Add an action to call the Get List method for the Expense Claim Items Edit List view (Execute a View method). Pass the form's Parameters > ID to the Input Property > Expense Claim ID. If you see a red warning badge next to the RULES tab, you must fix the issues before proceeding. Access the RULES screen, then edit the offending rule. UNCHECK the Validate boxes for the unnamed Controls. Refer to the caution box found at the beginning of the Show me how... steps below for more detailed instructions, if necessary.Additionally, you may see another red warning badge next to a transfer data action. If you do, edit the transfer data action. UNCHECK the box for the ItemID parameter.
- Next, you edit an existing rule and add an action that retrieves the records for the list item view.
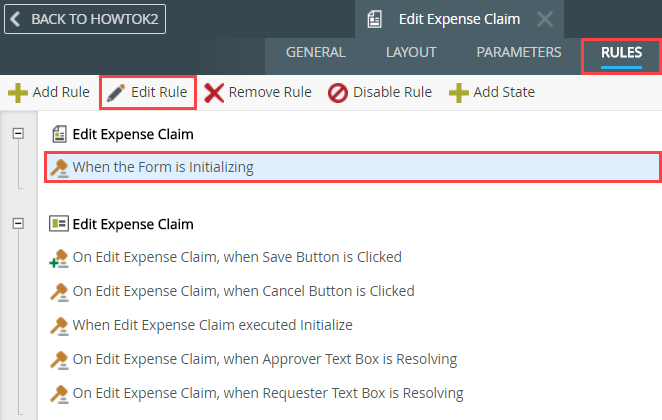
Click the RULES tab. If you see a red warning badge next to the tab, you must fix the issues before proceeding. Follow the steps in the caution box below. - Continuing on, edit the When the Form is Initializing rule.
- Add a rule action to Execute a View method and configure the rule to call the Get List method of the Expense Claim Line Items Edit List view.
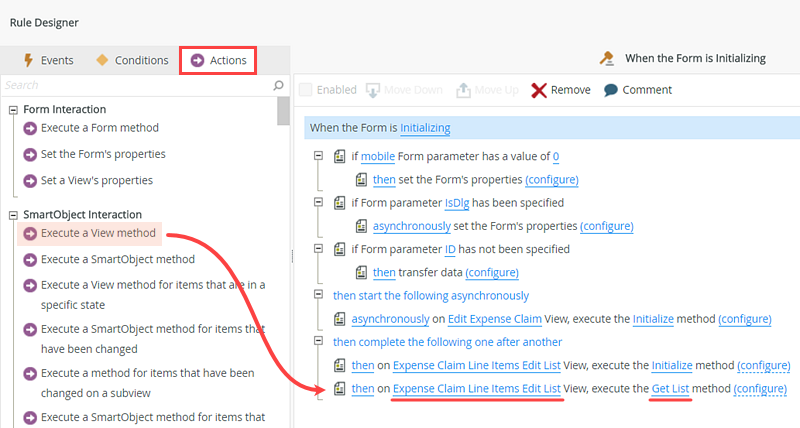
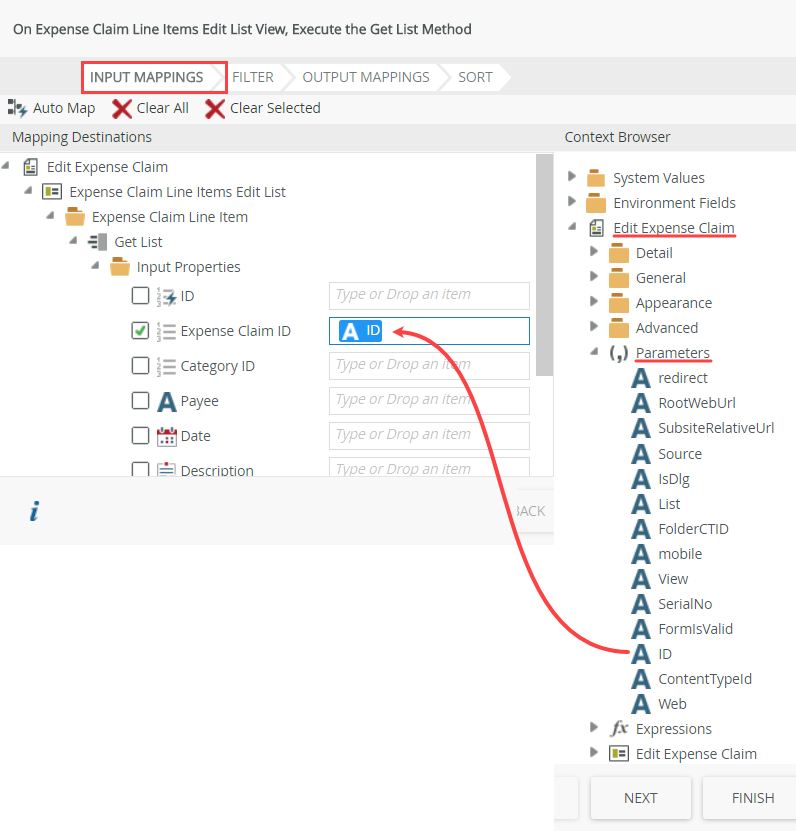
- Click (configure). On the Input Mappings screen, drag the ID parameter for the Edit Expense Claim form to the Input Property > Expense Claim ID. Once again, you are mapping the header ID to the child records. Click FINISH then OK to exit the rule designer. The form loads the list of expense claim line items associated with the parent form.
After making a control on a view invisible or deleting a control on a view, the associated form may display a red warning badge on the RULES icon. You must correct the issues before continuing. On the RULES screen, the rule associated with invisible or deleted controls also shows the red warning badge.
NOTE: This Caution Box uses images from a Hello World application. Your screen shots may not match exactly if you are building a different application. The steps for removing orphaned control references are the same, however.

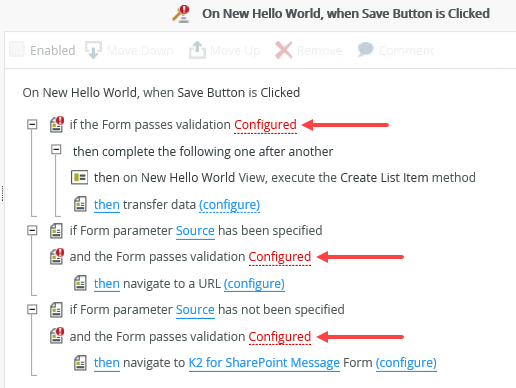
Edit the rule, then locate the red configure links (there may be more than one). You need to edit each action that has a red configure link.
UNCHECK the Validate boxes that have unnamed Controls. (There may be more than one.) Click OK.
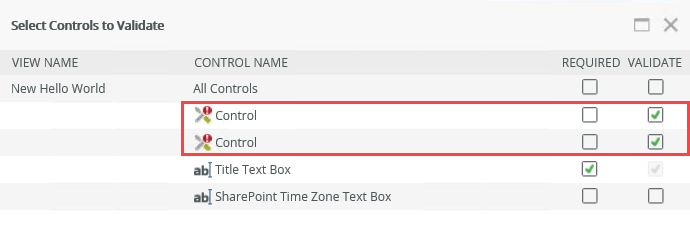
This removes the validation errors and any red warning badges. You can continue with the tutorial.
 Additionally, while editing the offending rule actions, you may see a red warning badge next to a transfer data action. If you do, click configure, then UNCHECK the ItemID parameter box. Click OK. This resets the action and the warning disappears.
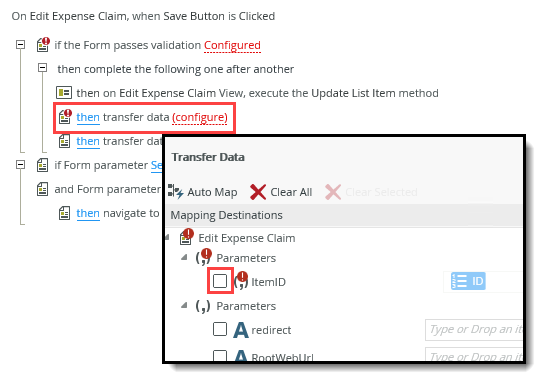
- Next, you edit an existing rule and add an action that retrieves the records for the list item view.
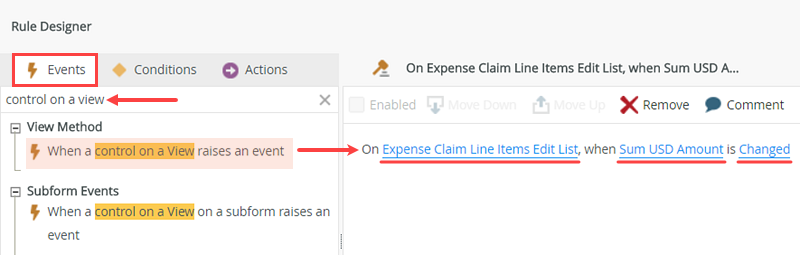
- Add a rule to transfer the Sum USD Amount value to the Total Amount Data Label on the New Expense Claim view whenever the value of the Sum USD Amount changes. Change the rule title to Update Total Amount
(When a control on a View raises an event).- Because this is the edit form, it is very likely you will add, edit, or delete line items. You set up a rule for this form that transfers the Sum USD Amount aggregation value (from the details view) to the Total Amount Data Label (in the header view). This is the same configuration you made earlier for the New Expense Claim form.
Click Add Rule once again. - For the event, select When a Control on a View raises an event and configure the rule to execute when the Sum USD Amount control on the Expense Claim Line Items Edit List view is Changed.
- On the Actions tab select Transfer data.
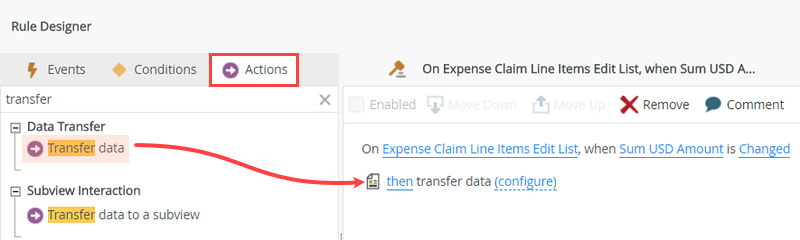
- Click (configure). On the Transfer Data screen, drag the Sum USD Amount from the Footer of the Expense Claim Line Items Edit List view to the Total Amount Data Label for the Edit Expense Claim view. Click OK.

- Change the new rule title to
Update Total Amount
and click OK to complete setting up the rule.
- Because this is the edit form, it is very likely you will add, edit, or delete line items. You set up a rule for this form that transfers the Sum USD Amount aggregation value (from the details view) to the Total Amount Data Label (in the header view). This is the same configuration you made earlier for the New Expense Claim form.
- Finish the form. Check in the Edit Expense Claim form and any other forms and views that are still checked out.
- Click FINISH to save and exit the form designer. Check in any views and forms currently checked out.
Review
In this step, you worked with the "edit" form that you use for reworking expense claims. You added the editable list view to the form, then added an action to an existing rule that retrieves the child records. You also added a new rule to update the Total Amount Data Label (in the header view) with the Sum USD Amount (from the details view). In the next step, you create the Expense Claim Workflow and begin adding steps.