6. Create the Expense Claim Currency SmartObject
In this step, you create the final data source for the Expense Claim application. This advanced data source uses the K2 Tutorial Currency Web Service - service instance created earlier. This data source has two functions: providing values for the currency code drop-down list and performing calculations that convert expense claim amounts to US dollars.
-
From the K2 Application elements page, add a new SmartObject. Use the table below for configuring the general properties.
Field Value Notes Name Expense Claim Currency Description Currency look-up methods for expense claims. Category (Leave default value unchanged.) Type Advanced SmartObject You point this SmartObject to the web service, service instance that you created earlier. - From the K2 Application elements screen, click New and select SmartObject.
- On the GENERAL settings page, configure the new SmartObject using the table below as a guide. Click CREATE.
Field Value Notes Name Expense Claim Currency Description Currency look-up methods for expense claims. Category (Leave default value unchanged.) Type Advanced SmartObject You point this SmartObject to the web service, service instance that you created earlier. 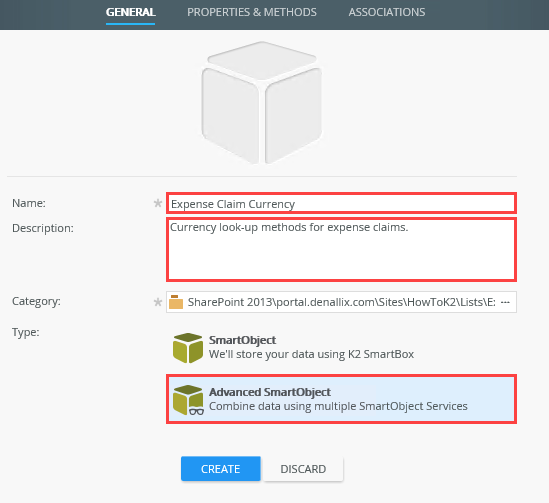
-
Next, you add the first of two methods. The first method returns a list of currency codes that populates a drop-down list on the expense claim form.
Add a method called ListCurrencies that points to the following service object method: K2 Tutorial Currency Web Service > ExchangeRates Objects > ListCurrencies() > List, then save the returned currency codes to a SmartObject property called CurrencyCode.- Begin by selecting a method from the K2 Tutorial Currency Web Service - service instance.
On the PROPERTIES & METHODS screen, click the Methods tab and click Add. Recall that you registered a new service instance of the Endpoints WebService earlier. K2 discovered the objects found in the web service and returned the properties and methods. Because the web service already has properties, you do not need to define them (which is why you are skipping over the Properties tab). In your application, you map the list method from this service instance.

- On the Add Method screen, select the following service object method:
K2 Tutorial Currency Web Service > ExchangeRates Objects > ListCurrencies() > List, then click NEXT.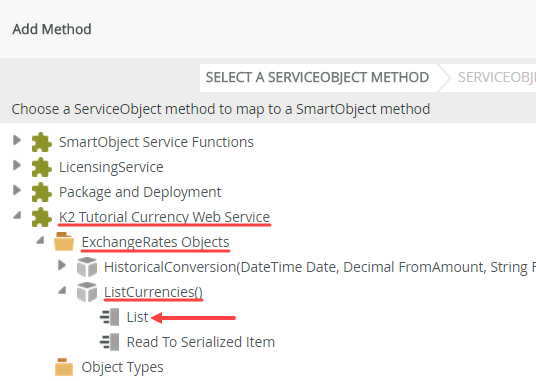
- Change the name of the method from 'List' to
ListCurrencies
and select the Default list method checkbox. (ListCurrencies gives you a little more information about what the method does.) Click NEXT to continue.ServiceObjects can have more than one list method. For example, an Active Directory ServiceObject might have a GetUsers list method that returns all user accounts. The ServiceObject might also have a method that returns all users in a specific group. By selecting the default list method option, K2 knows which list method to use throughout your application.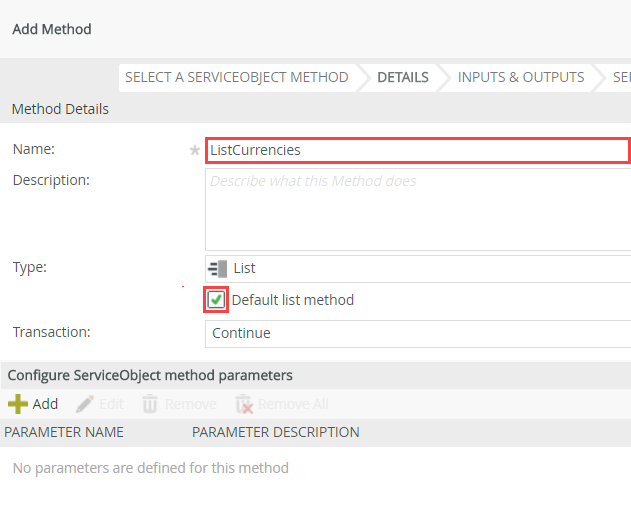
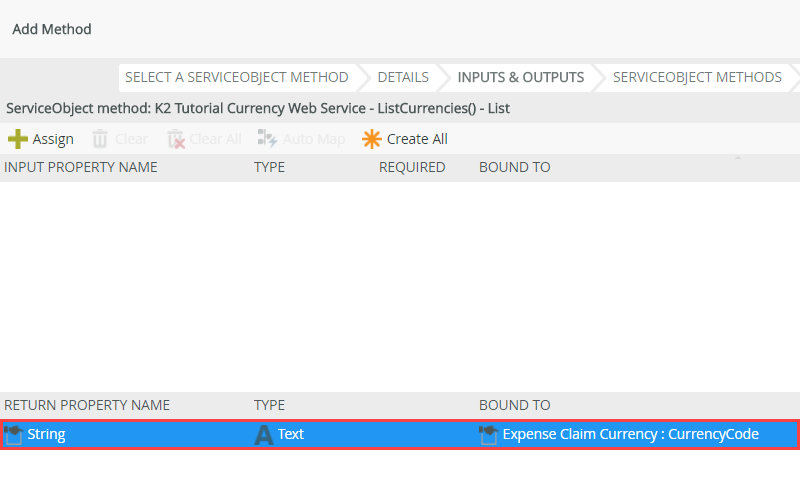
- You are now on the INPUTS & OUTPUTS screen. Double-click the String RETURN PROPERTY NAME. You create a property in your SmartObject that is mapped to this string return property.
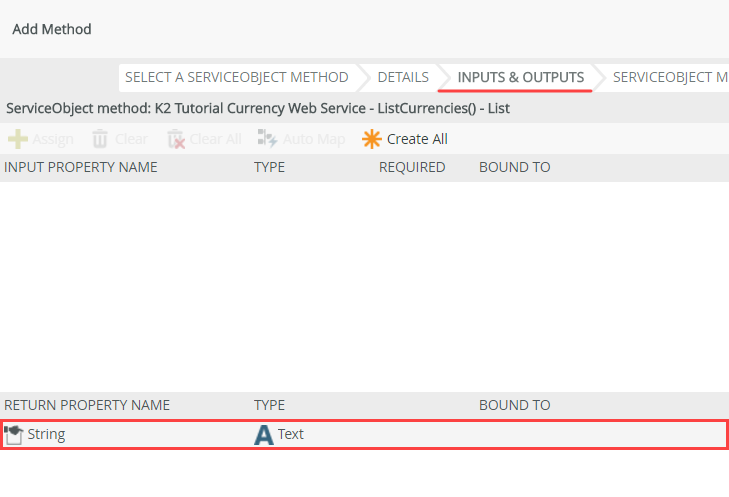
- You are creating a new SmartObject property that displays the value from the returned string property. In the resulting dialog box, click the CREATE button to create a new property called
CurrencyCode
then click OK and OK again to return to the mapping screen.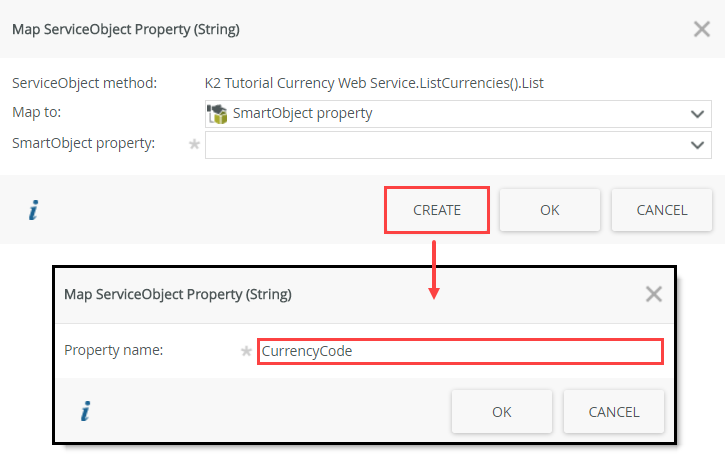
- You should see the service method return property is now mapped to the new SmartObject property, CurrencyCode. Click NEXT, then FINISH to complete the wizard.
- Begin by selecting a method from the K2 Tutorial Currency Web Service - service instance.
On the PROPERTIES & METHODS screen, click the Methods tab and click Add.
-
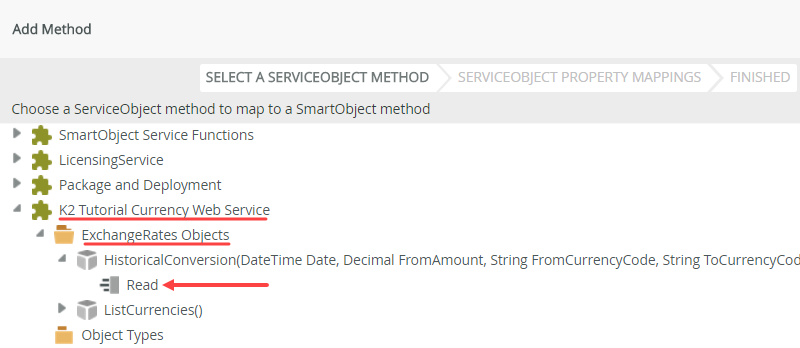
Add a second method called Calculate USD Amount to the SmartObject that points to the service object method K2 Tutorial Currency Web Service > ExchangeRates Objects > HistoricalConversion() > Read, then configure the input parameters and return property as follows:
- You have added the first method to the SmartObject, which returns a list of currency codes. Next, you add a method that calculates the exchange rate amount for a given date, amount, and currency.
Once again, click Add to add another method to the SmartObject.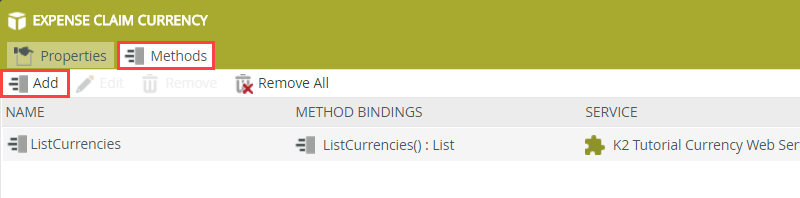
- On the Add Method screen, select the following ServiceObject method: K2 Tutorial Currency Web Service > ExchangeRates Objects > HistoricalConversion() > Read, then click NEXT.
- Rename the method to
Calculate USD Amount - Date - currency rates change from day-to-day.
- FromCurrencyCode - the starting currency type, British pound for example.
- Amount - the amount to be converted.
- ToCurrencyCode - the ending currency type, US dollar for example.
- On the bottom half of this window, click the Add button to add a new parameter called
FromCurrencyCode
that is a Text (type). Click OK.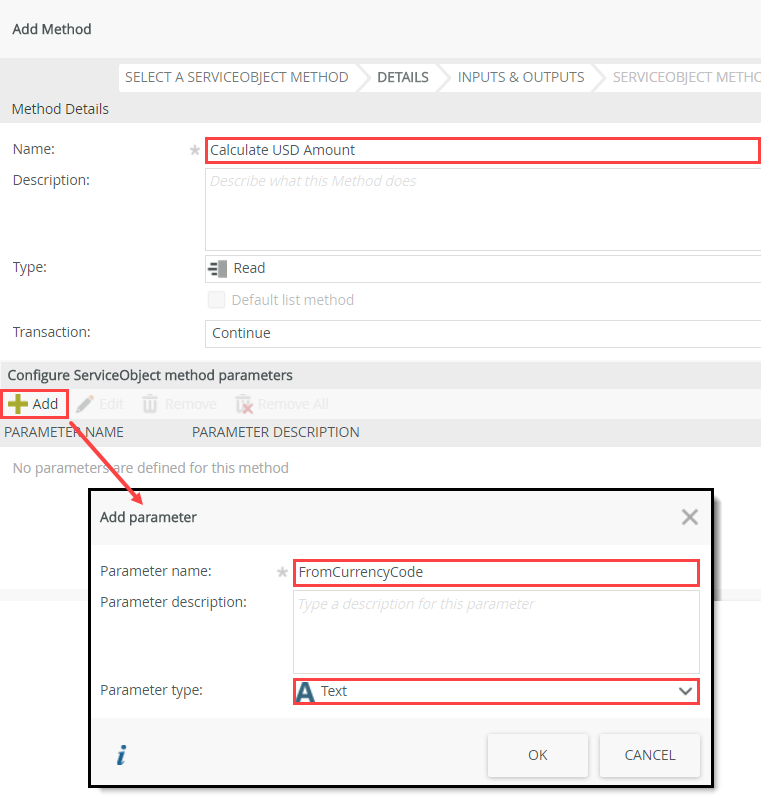
- Add another (Decimal) parameter called
Amount
then click OK.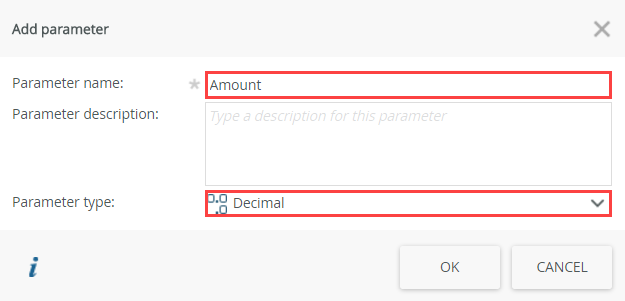
- Add another (Date/Time) parameter called
Date
then click OK.
You should see your three input parameters listed at the bottom of the screen. Click NEXT.
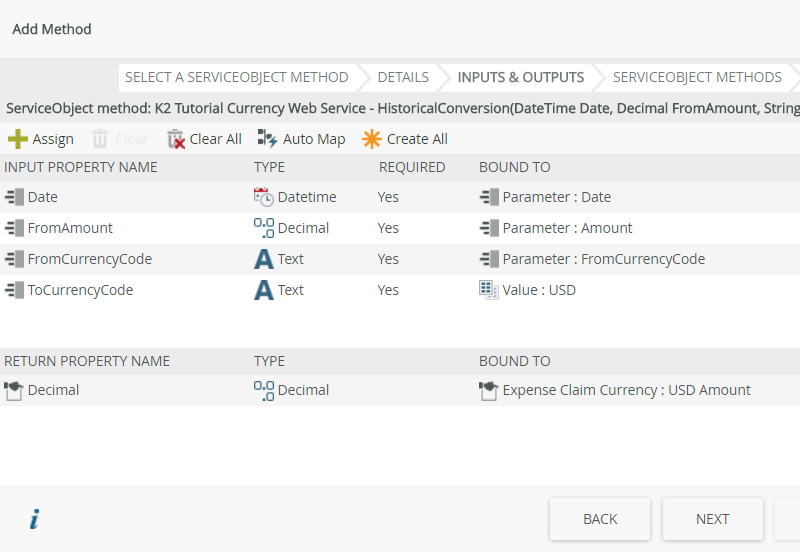
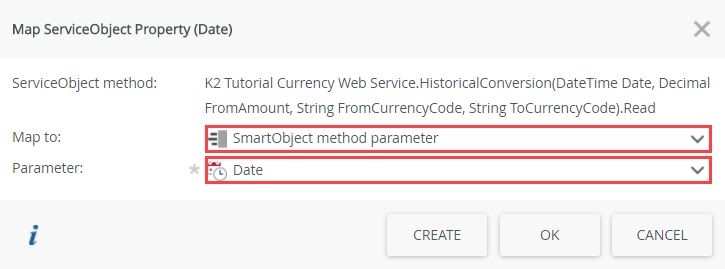
- Select the Date parameter, then click the Assign button.
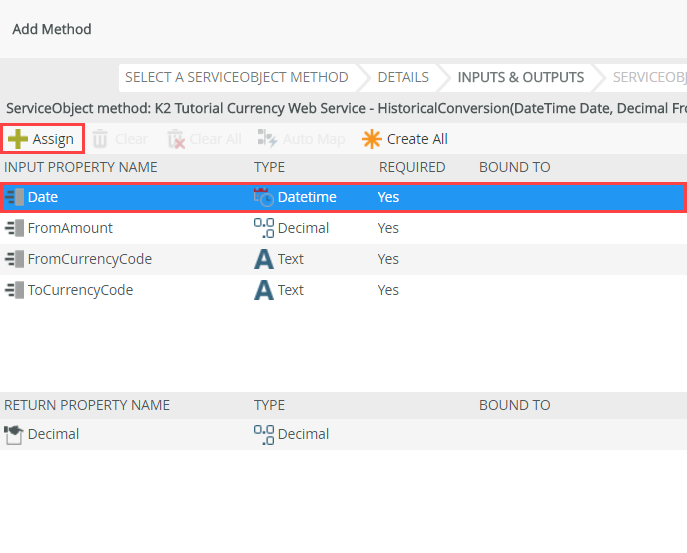
- In the dialog box, select SmartObject method parameter from the Map to drop-down list, then Date in the Parameter drop-down list and click OK.
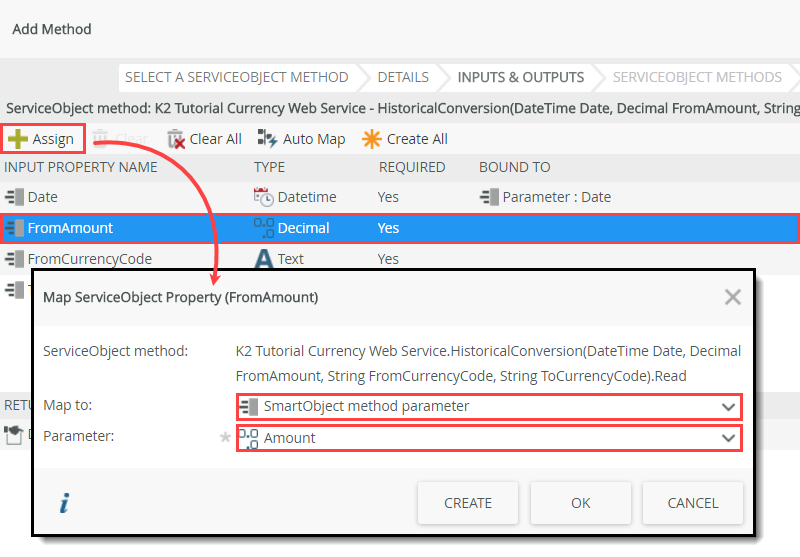
- Select the FromAmount web method parameter and use the same step to map it to the Amount SmartObject method parameter that you created earlier. Click OK.
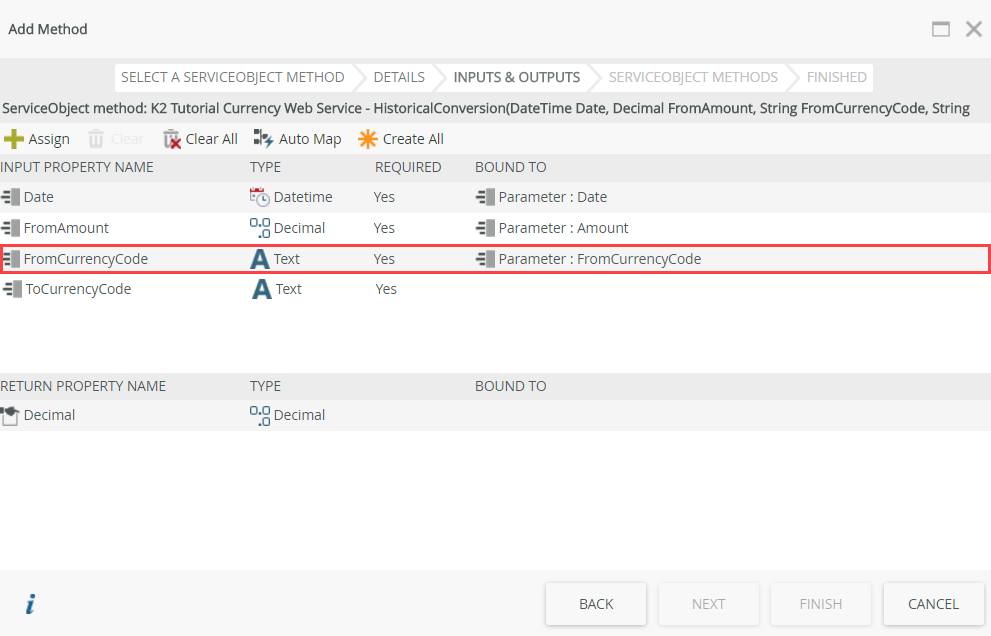
- Repeat the step again and map the FromCurrencyCode web method parameter to the FromCurrencyCode SmartObject method parameter.
- Last, you hard-code the ToCurrencyCode property and Assign it to a Specific value. For the value, enter:
USD.
(For this tutorial, you always convert currencies back to US dollars, which is the static value you are entering in this step.) Click OK.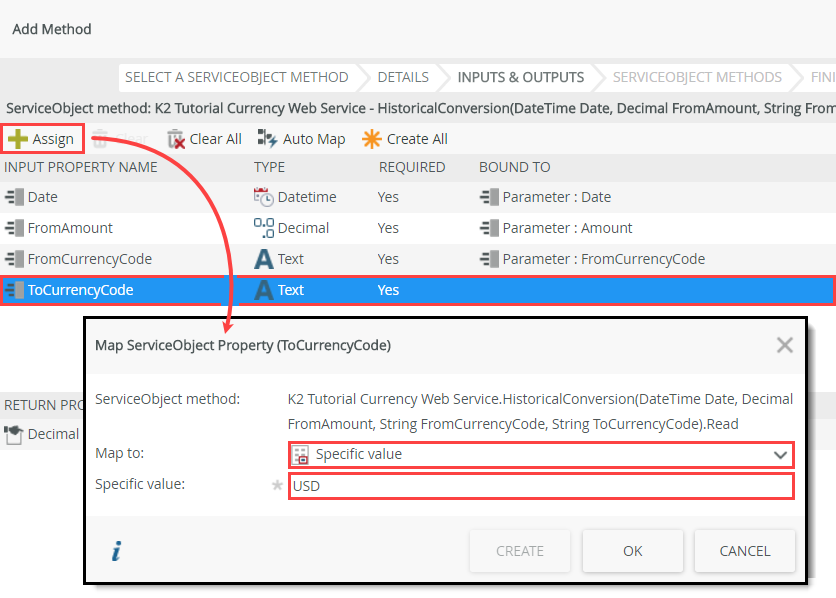
- Select the Decimal return property on the bottom half of the screen and Assign it to a new SmartObject Property that you Create called:
USD Amount
then click OK and OK once again.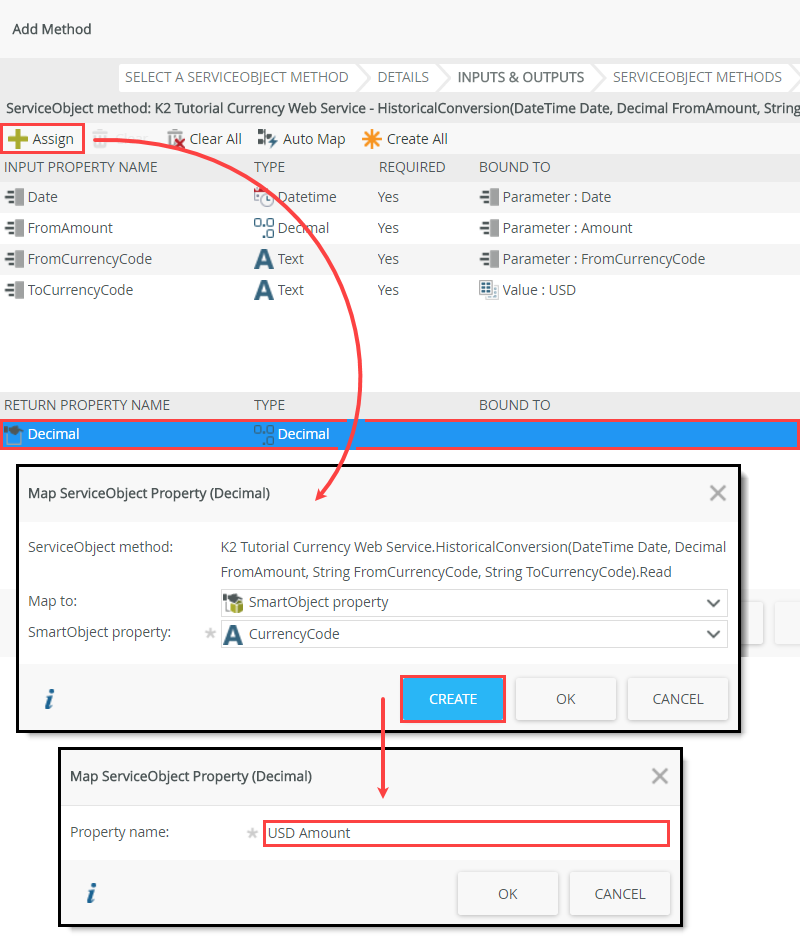
- Your mapping screen should look like the image below. Click NEXT, then FINISH to complete the method wizard.
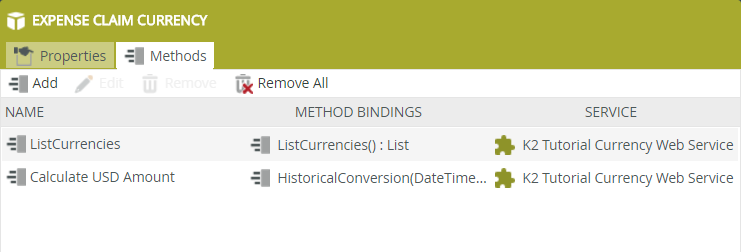
- You should now have two methods for the advanced SmartObject. Click FINISH to complete the SmartObject configuration.
This method requires input parameters to perform the conversion calculation, then return a result. There are four parameters necessary for the conversion process: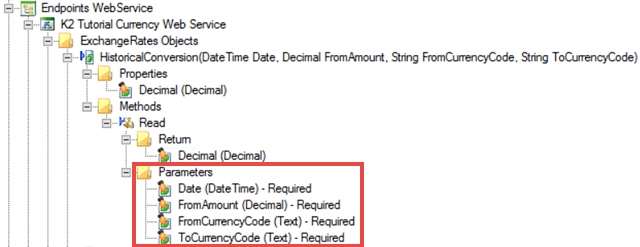
On the next screen, notice the four ServiceObject method input parameters. You map them to the three parameters that require values at runtime for the conversion to take place. The fourth parameter is the ToCurrencyCode parameter and you are going to hard-code that value so that it is always USD.
Now, you are reversing the process a bit. Once the currency conversion is complete, the HistoricalConversion method returns the value to its Decimal property. (Notice the Decimal property in the Return Properties pane.) Like the ListCurrencies method, you create a new SmartObject property for the returned value in your Expense Claim Currency SmartObject. In a later step, you map the new property to a form field, that displays the converted value on your form.
- You have added the first method to the SmartObject, which returns a list of currency codes. Next, you add a method that calculates the exchange rate amount for a given date, amount, and currency.
-
Test the new SmartObject from the K2 Management site by executing the ListCurrencies method and Calculate USD Amount (read) method.
- You should be on the K2 Application elements page. Confirm you can see the new Expense Claim Currency SmartObject.
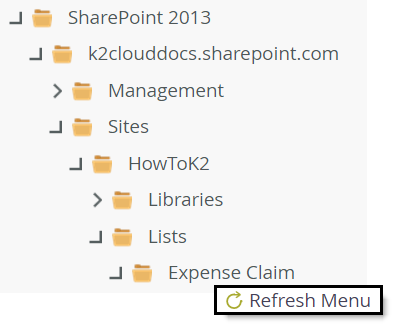
Test your new SmartObject from the K2 Management site. Launch the K2 Management site if it is not already open.If you are unsure of how to launch the K2 Management site, see Accessing K2 Sites. - Expand the Categories node, then navigate to the Expense Claim Currency SmartObject. (Your menu may not be the same as the image below, depending on where you built your SharePoint list.) Click the Expense Claim Currency SmartObject to expose its properties and methods in the central pane. Scroll down to the Methods section, select the ListCurrencies method and click Execute.If you do not see the Expense Claim Currency SmartObject, right-click the Expense Claim List and select Refresh Menu.

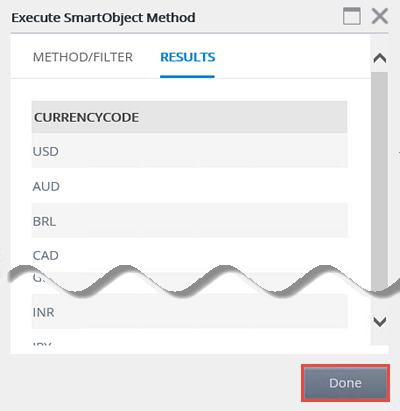
- You don't need any filters for this method, so click Execute once again. Confirm you have results returned displaying currency codes. Click Done to exit the results screen.
- Now test the currency calculation method. Select the Calculate USD Amount method, then click the Execute button. This time, because it's a read method, you must provide input parameters. In this case, the starting currency type, date, and amount. Technically, the target currency type is also required, but remember you hard-coded it for US dollars, so you don't need to provide that input manually.
- For the FromCurrencyCode value, enter
GBP
then for the Amount, enter
100
and finally, for the Date, enter today's date and click Execute. Confirm you have a result returned. Click Done to exit the results screen.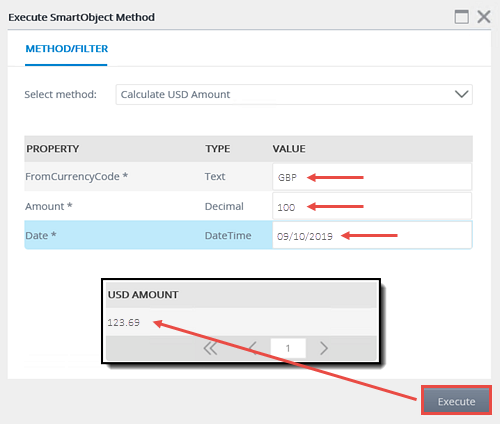
- You should be on the K2 Application elements page. Confirm you can see the new Expense Claim Currency SmartObject.
Review
In this step, you created an advanced SmartObject using the Endpoints WebService - service instance. You configured two methods. The first returns a list of currencies, which you use to populate a drop-down list. The second calculates the USD equivalent for a given currency and source amount, for a specific date. You use this method to convert amounts entered with a non-US country code. This makes it easier for you to submit travel expenses since you don't have to do the currency conversion by hand.
Remember, K2 can generate SmartObjects for you from a service instance or you can create SmartObjects from scratch, as you did in this step. This allows full control over the methods exposed and property names. This completes the data components for this application. In the next step, you begin working with views and forms.