17. Test the Document Review and Approval Application
In this step, you test the two workflows: Document Review Workflow and Document Approval Workflow. You upload documents to the Documents to Review and Approve library, then manually start the workflows.
Upload two documents and start the Document Review Workflow
- Upload a new document to the Documents to Review and Approve library. You can use any document you like. Set the properties of the document as follows:
- Upload a new document to the Documents to Review and Approve library. You can use any document you like. Set the properties of the document as follows:
- Check in both documents.
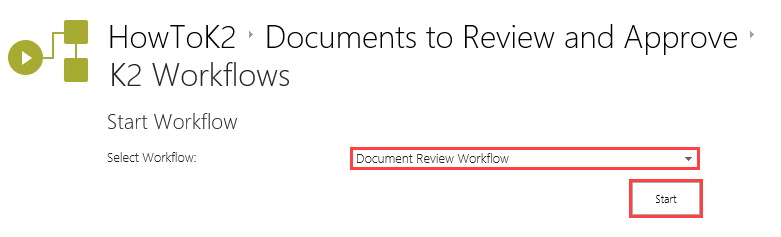
- Start the Document Review Workflow for both of the documents you uploaded. To access the K2 Workflows page, click the ellipses on the library toolbar and select K2 Workflows.
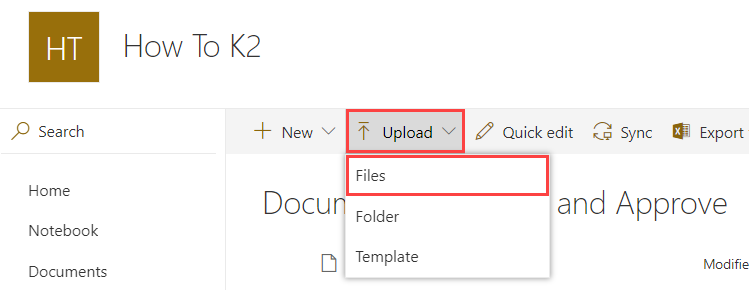
- Browse to the Documents to Review and Approve library and click the Upload > Files link to upload a new document.
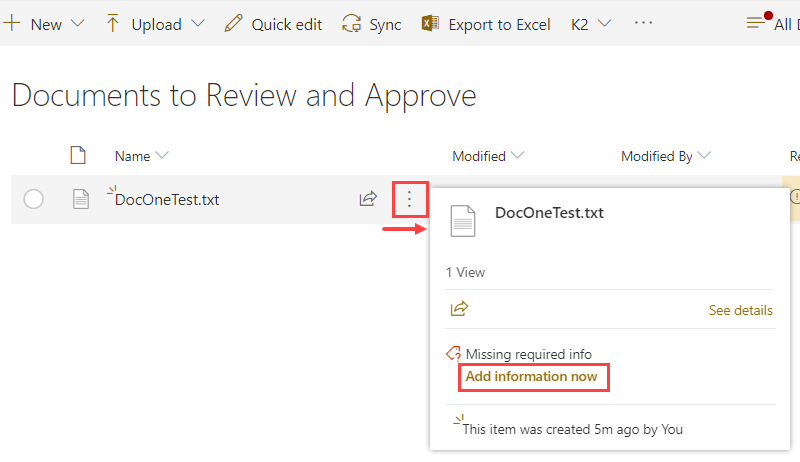
- Upload any document you like. Edit the document properties by hovering over the row and clicking the ellipses when it appears. Click Add information now when you see the details dialog.
- Use the table below as a guide for entering the document properties. Click Save when you are ready to continue. (The order of properties on your screen may not match the table order, depending on your environment.)
Property Value Notes Name Keep the default. This value is the file name of the document you uploaded. Title Test One Doc Review and Approval Specify a title for the document for testing purposes. Reviewers To simplify testing, enter your own account as the reviewer. This will be the reviewer(s) for the document. In the image below, Administrator has been entered as the reviewer for the document. Review Status (leave blank) The workflow updates this field. Approvers To simplify testing, enter your own account as the approver. This will be the approver(s) for the document. In the image below, Administrator has been entered as the reviewer for the document. Approval Status (leave blank) The workflow updates this field. 
- Upload another document and configure the properties for the second document using the table below as a guide.
Property Value Notes Name Keep the default. This value is the file name of the document you uploaded. Title Test Two Doc Review and Approval Specify a title for the document for testing purposes. Reviewers To simplify testing, enter your own account as the reviewer. This will be the reviewer(s) for the document. Review Status (leave blank) The workflow updates this field. Approvers To simplify testing, enter your own account as the approver. This will be the approver(s) for the document. Approval Status (leave blank) The workflow updates this field. - Select the first document, then click the ellipses in the menu bar to expand the menu options. Click K2 Workflows.
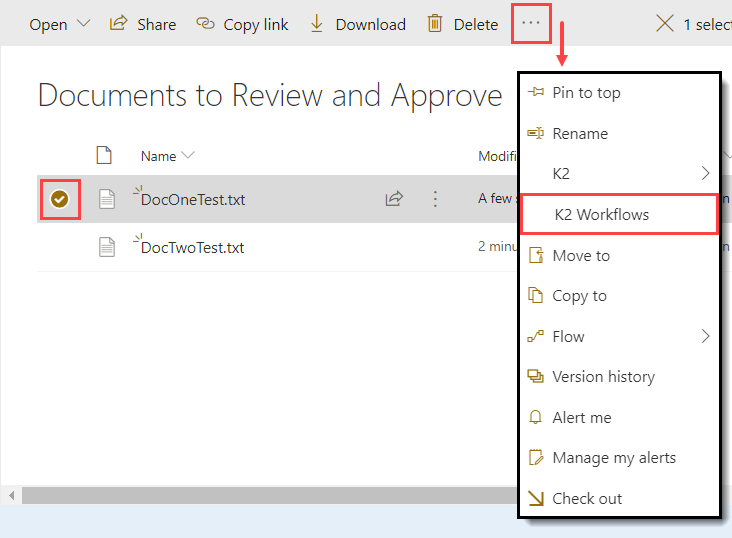
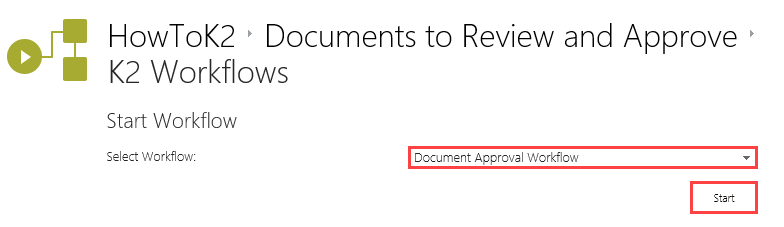
- From the K2 Workflows page, select the Document Review Workflow, then click the Start button.
- You can check the workflow progress from the K2 Workflows page (the same page you started it from). Select the first document once again and click the ellipses in the menu bar, then K2 Workflows. (You may see the K2 Workflows option in the recent section of your menu bar as well.)
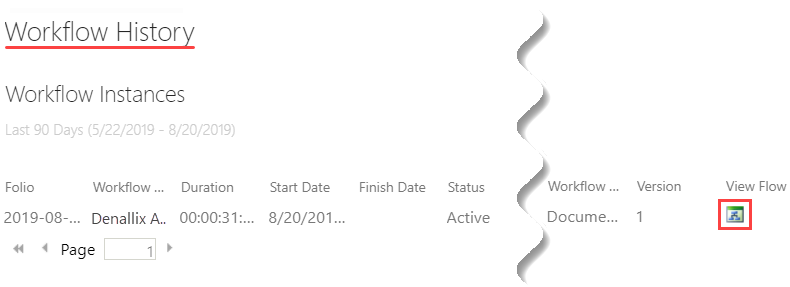
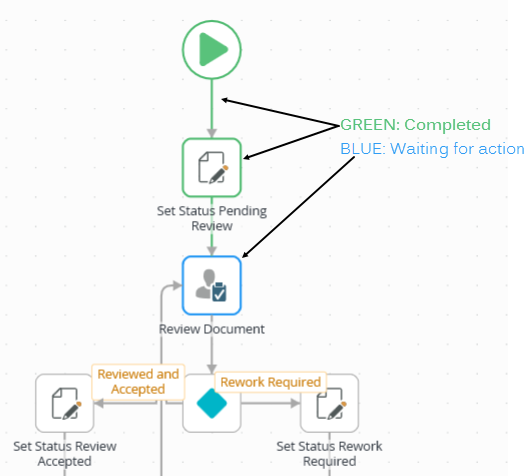
- Locate the Workflow History heading. The first test workflow now appears in the Workflow Instances list. If time allows, open the View Flow report to verify that the workflow is waiting for the reviewer to action their task.
- Return to the document library and launch K2 Workflows for the second test document.
- Start the Document Review Workflow for the second document.
You are now ready to start the first workflow, Document Review Workflow.
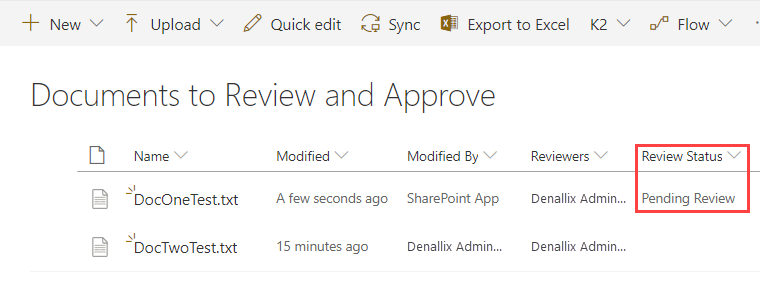
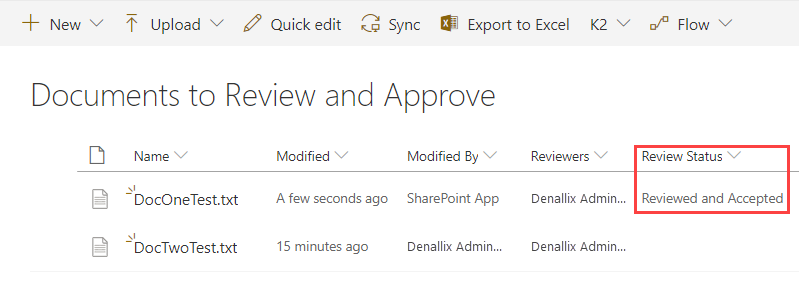
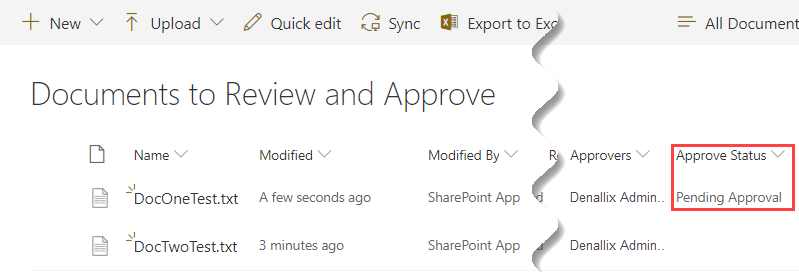
You are returned to the Documents to Review and Approve library. You should see that the Review Status column has been set to Pending Review (if not, wait a few seconds, then refresh the page). This is a visual indication to you that the workflow started.
- Browse to the Documents to Review and Approve library and click the Upload > Files link to upload a new document.
- Open the first document reviewer’s email and locate the task notification email. (If you just added yourself alone as the reviewer, open your email client.) Open the attached document, then reply to the email with Reviewed and Accepted.
- Verify that the first document's review status is set to Reviewed and Accepted, then open the K2 Workflows page for the first document. Verify that the Document Review Workflow completed.
- Review the second document and send the document back for rework.If you selected another user as the reviewer for the submitted documents, that user will need to perform these steps. Otherwise, if you just selected yourself, you can action the workflows.
- Open the email client for the first reviewer (this might be you). Locate the email that says 'Document submitted for your review: Test One Doc Review and Approval'. Open the email and notice your first document is attached. You can open the document and review it. Reply to the email and enter
Reviewed and Accepted
as the message body. Click Send.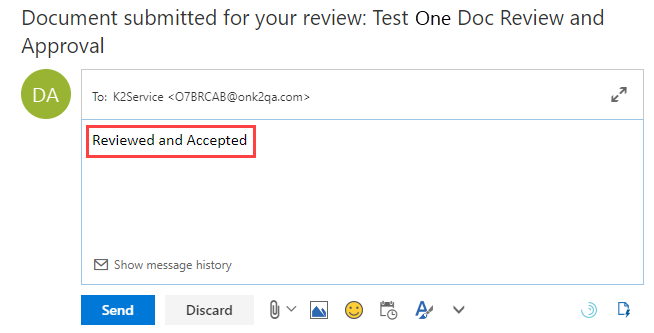
- Return to the Documents to Review and Approve library, and verify that the first document’s status displays Reviewed and Accepted.
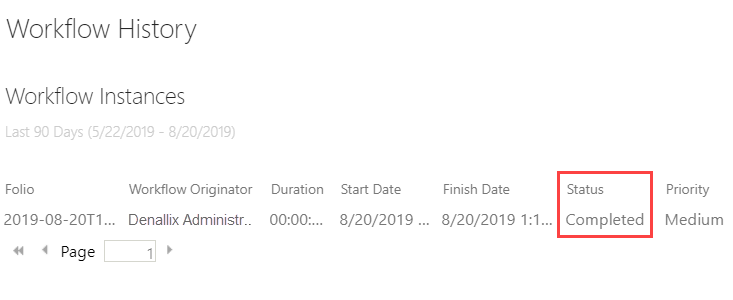
- Navigate to the K2 Workflows page for the first document. The workflow history now displays Completed.
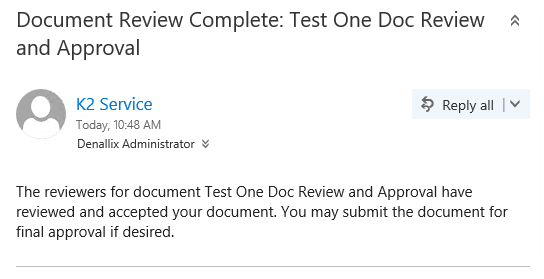
- Return to your email. Confirm you have a notification saying the reviewers accepted the document. (You may need to refresh your email.) You have now completed testing for the first document.
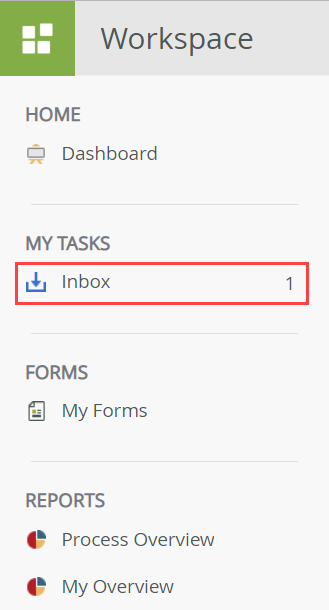
- Next, you take action for the second test document. Open K2 Workspace. Click Inbox to view the tasks assigned to you.If you do not know how to access K2 Workspace, see Accessing K2 Sites.
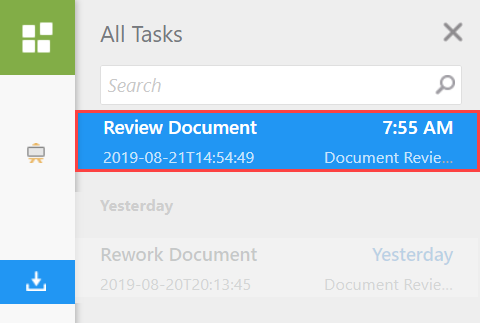
- On the All Tasks screen, click the Review Document task.
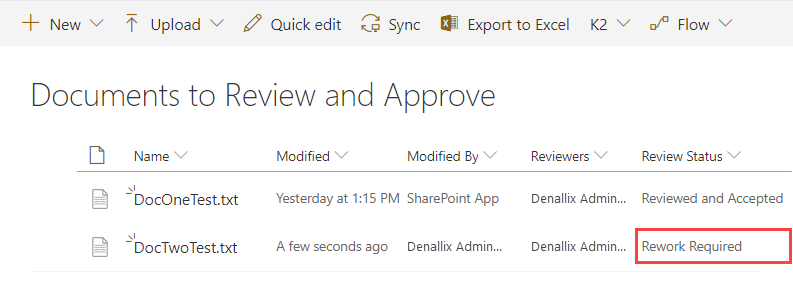
- The Display Document form opens, along with the K2-generated Workflow view. K2 adds this view when using the form to action a task. Notice you cannot change the values on the display form. (Recall that you configured the Review Document step to use the display form and not the edit form.) Select the Rework Required action and Submit the form. Click OK when you see the success dialog.

- Return to the Documents to Review and Approve list and confirm the second document status reflects Rework Required.
- Open the email client for the first reviewer (this might be you). Locate the email that says 'Document submitted for your review: Test One Doc Review and Approval'. Open the email and notice your first document is attached. You can open the document and review it. Reply to the email and enter
-
Still in K2 Workspace, open the Rework Document task and submit it with the Resubmitted action. (Optional: you can open the document and make changes before resubmitting the task, however, you must save the updated document in the library and check it back in so the changes are saved.)
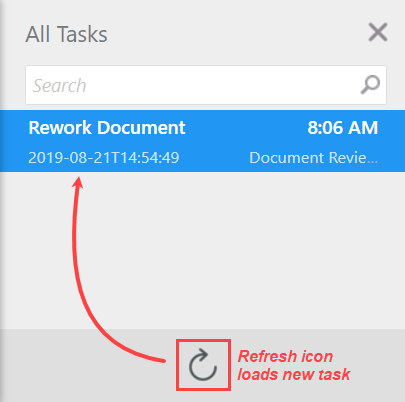
- In K2 Workspace, click the Refresh icon to load the Rework Document task.
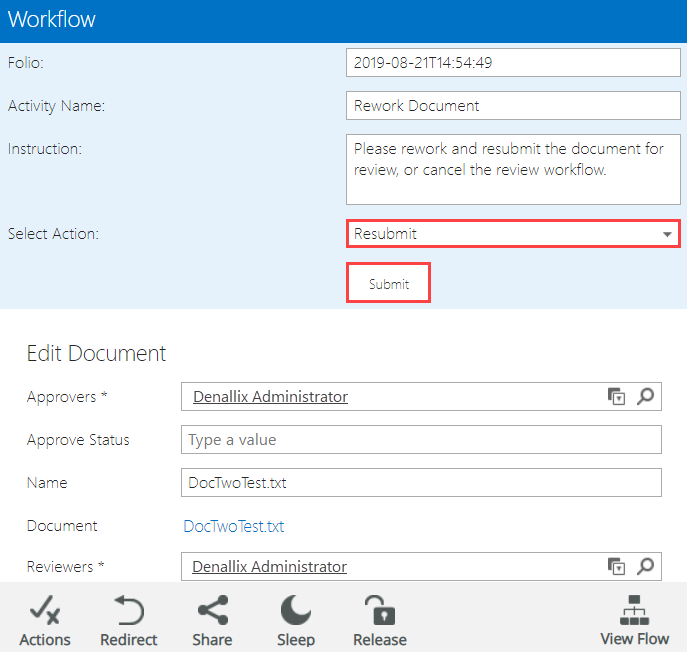
- Click the Rework Document task to open the form.
- Select the Resubmit action and click Submit. Click OK for the confirmation dialog, then close the browser window. If you decide to edit the attached document, be aware that you must save it in the library and re-check it in. Otherwise, the changes are not saved with the attachment.
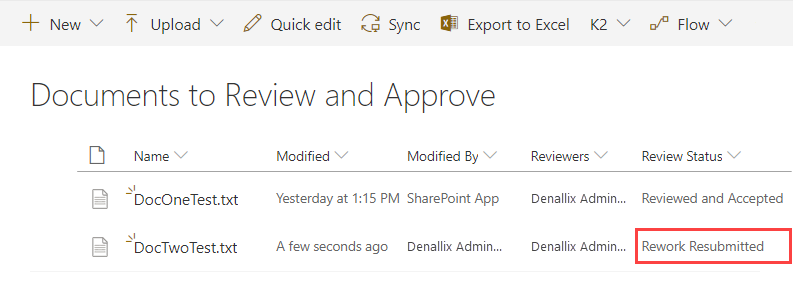
- In the Documents to Review and Approve library, confirm the document review status for the second document now displays Rework Resubmitted.
- In K2 Workspace, click the Refresh icon to load the Rework Document task.
- Open the email client for the second document's reviewer (if it is not you - otherwise, return to your email). Review the document, then reply to the email with the Reviewed and Accepted decision.
- On the Documents to Review and Approve library, confirm the Review Status displays
Reviewed and Accepted for the second document.
- Open the email client for the second document's reviewer (if it is not you - otherwise, return to your email). Review the document, then reply to the email with the
Reviewed and Accepted
decision. Click Send. - Return to the Documents to Review and Approve library and confirm the review status now reflects Reviewed and Accepted.
- Open the email client for the second document's reviewer (if it is not you - otherwise, return to your email). Review the document, then reply to the email with the
- From the K2 Workflows page, submit the first document to the Document Approval Workflow.
- Ask the document approver to review the task notification email, then reply to the email to reject the document.
- Confirm the document Approval Status displays Rejected.
- Review the workflow history for the first document. You should see two workflows listed, one for the Document Review Workflow and the other for the Document Approval Workflow. Use the View Flow reports to investigate the history for each of the workflows.
- In the Documents to Review and Approve library, open the K2 Workflows page for the first test document. (Select the document, click the ellipses, and select K2 Workflows.)
- Start the Document Approval Workflow.
- Return to the document library and confirm the document Approval Status displays Pending Approval.
- Ask the document approver (it could be you) to open their email client and review the document approval task. Reply to the email with
Rejected.
- Verify that the document’s Approval Status displays Rejected.
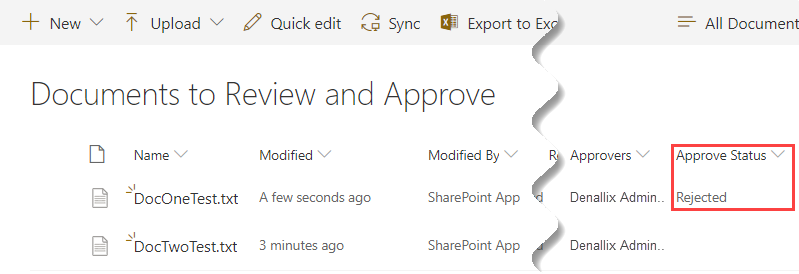
- Open the Approved Documents library. Confirm the first document is not displayed, because it was not approved and therefore, it was not moved to the approved library.
- In the Documents to Review and Approve library, open the K2 Workflows page for the first test document. (Select the document, click the ellipses, and select K2 Workflows.)
- From the K2 Workflows page, submit the second document to the Document Approval Workflow.
- Ask the document approver to approve the document either by replying to the task notification email, or from K2 Workspace.
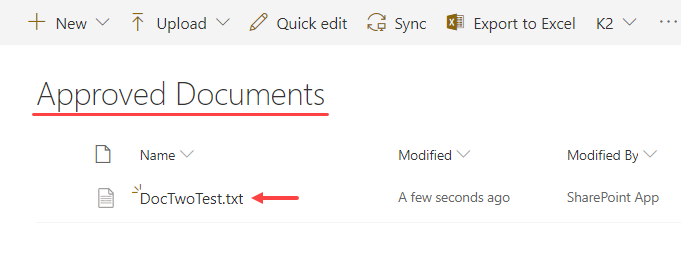
- Confirm the first document moved to the Approved Documents library.
- In the Documents to Review and Approve library, open the K2 Workflows page for the second document.
- Start the Document Approval Workflow.
- Ask the document approver to approve the task either by replying to the email or from K2 Workspace.
- Open the Approved Documents library. Confirm K2 moved the document to the new library. (It may take a minute or so - refresh the page if necessary.)
- In the Documents to Review and Approve library, open the K2 Workflows page for the second document.
| Property | Value | Notes |
|---|---|---|
| Name | Keep the default value. | This field should already indicate the file name of the document you uploaded. |
| Title | Test One Doc Review and Approval | Specify a title for the document for testing purposes. |
| Reviewers | To simplify testing, enter your own account as the reviewer. | This will be the reviewer(s) for the document. |
| Review Status | (leave blank) | The workflow updates this field. |
| Approvers | To simplify testing, enter your own account as the approver. | This will be the approver(s) for the document. |
| Approval Status | (leave blank) | The workflow updates this field. |
| Property | Value | Notes |
|---|---|---|
| Name | Keep the default. | This field should be set to the file name of the document you uploaded. |
| Title | Test Two Doc Review and Approval | Specify a title for the document for testing purposes. |
| Reviewers | To simplify testing, enter your own account as the reviewer. | This will be the reviewer(s) for the document. |
| Review Status | (leave blank) | The workflow updates this field. |
| Approvers | To simplify testing, enter your own account as the approver. | This will be the approver(s) for the document. |
| Approval Status | (leave blank) | The workflow updates this field. |
Review the documents
Resubmit the document for review
Process the second document reviewer user task
Submit the first document to the Document Approval Workflow, then reject the document
Submit the second document to the document approval workflow, then approve the document
Review
In this step, you tested two workflows that integrate with SharePoint libraries. Some of the more interesting concepts include:
- Working with documents
- Building workflows with rework loops
- Including documents as email attachments
- Starting workflows on-demand for library items (manually)