Save Workbook
This article provides information on the following topics:
Note: The Actions Quick Reference provides a complete list of actions that you can print for easy reference.
What is the Save Workbook Action?
The Save Workbook Action saves an Excel workbook.
Creating a Save Workbook Action
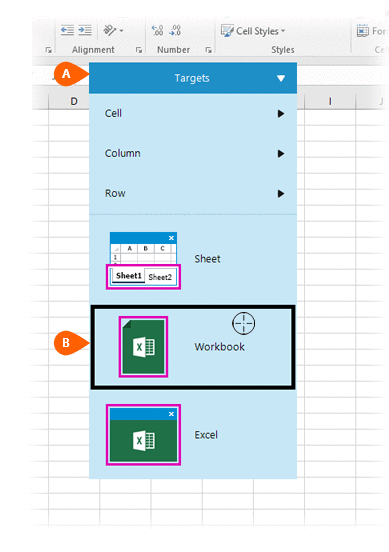
Drag and drop the Target Selector
onto the Targets ![]() list in the target workbook to display the available target options. Continue
to drag the Target Selector to the Workbook
list in the target workbook to display the available target options. Continue
to drag the Target Selector to the Workbook
 option. As an alternative, you may also
target the Select All button.
Note: The Select All button in an Excel workbook is located in the top-left corner (just left of the Column A column header, and just above the Row 1 row header).

If this is the first time the workbook was targeted, Nintex RPA LE will attempt to create a workbook connection automatically. (For more information about Microsoft Excel workbook connections, read the Excel Connections article.)
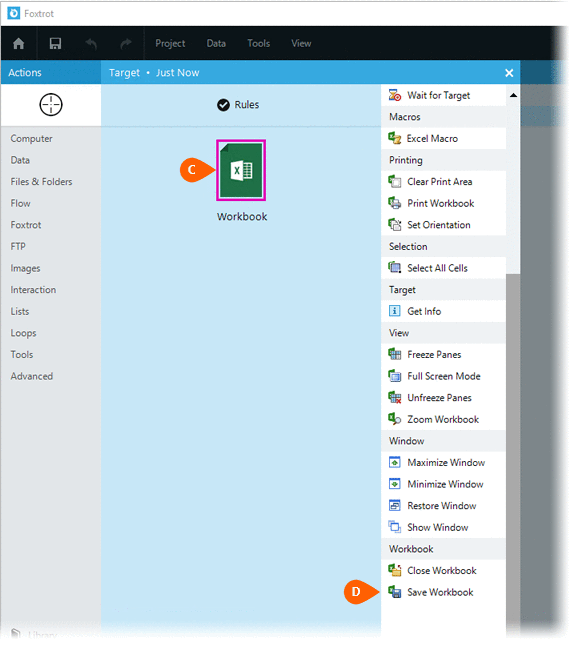
A preview of the target
 is displayed. Select the Save
Workbook Action
  from the Actions list

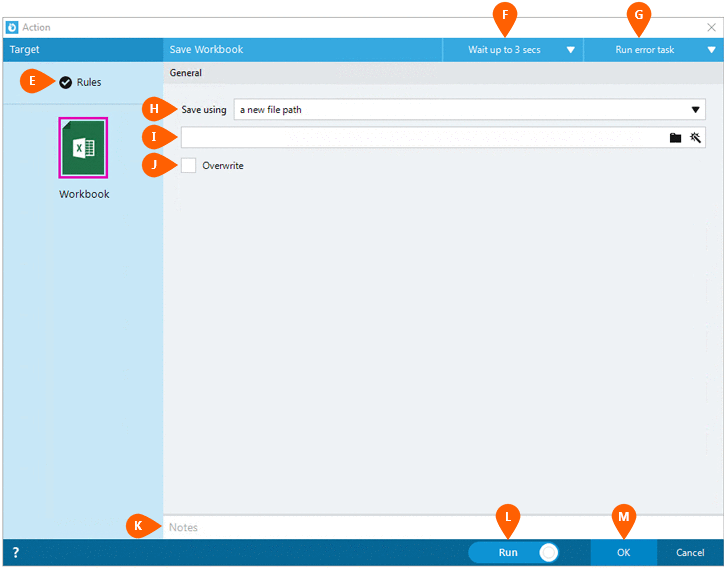
Select the Rules
 to change the Connection for this Action. Both
the Timing
  and
Error
  settings
for this action may be configured to fine tune the how the Action will
run.
Note: For more information about the timing and error settings, go to Action Builder.
You will then have the option to save the workbook using a new file path or its
existing file path. If saving the workbook to a new file path, you
will be required to provide the file
path
  . Choose Overwrite
 option to overwrite the file if it already exists.

Optionally add Notes
 to the Action to document any special instructions
or functionality. When the Run Switch
 is set to Run, the action
will be executed after clicking OK.
Note: The run switch is set to Run by default. To create or modify this action without executing it, click the slider to change the option to Don't Run. For more information, go to Action Builder.
Click the OK
button  to
save the Action.