Open List
The Open
List imports data from a file into a list
in a .
The Open List action works similar to the Open Data action and supports the same file types for import.
Using the Open List action, you can open a list to:
- Cross reference information from several different databases.
- Prepare to consolidate information from several different sources.
Some examples of using the Open List action with lists are:
Add an Open List action to a botflow
This example provides the steps necessary to add an Open List action to a botflow.
To add an Open List action to a botflow:
- On the Actions List, click Lists and then click Open List from the List list.
The Action Builder window for Open List displays.
- Set the Open List settings:
- Overwrite: Check the box to overwrite a list with the same name.
- Import: Click to start the Data Source Data Wizard.
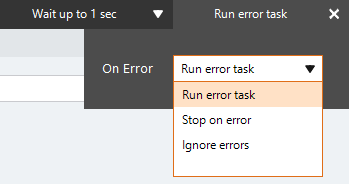
- If needed, adjust the Run Error Task settings to fine tune how the action runs.
- If needed, adjust the Run Switch setting to create the action without running it.
- Optionally, add an action note.
- Click OK to add the Open List action to the botflow.
Open List Action Builder field and button descriptions
Open List Options/Settings |
General
- File: Enter a file name in the File field, select a file using the folder, or use the Expression Builder to build the action settings using variables or other token values. The Import option displays to supply the fields needed to import the file data into the required list.
- List: Enter a name in the List field or use the Expression Builder to build the action settings using variables or other token values.
- Overwrite: Check the box to overwrite a list with the same name.
Options
- Import: Click to start the Data Source Data Wizard.
- Data Source: The type of data source selected will affect the screens displayed during the data source import.
- File: Displays the entered or selected file name.
- Records: Displays the number of records selected for import.
- Template: Optionally, enter a template file name in the Template field or click the ellipses to select a template file.
- Parsing Definitions:
- Start:
- Beginning: Begins the import from the beginning of the selected data file.
- Exact Row: Begins the import from the exact row specified in the selected data file.
- End:
- End: End the import at the end of the selected data file.
- Exact Row: Ends the import at the end of an exact row specified in the selected data file.
- End Excluding: Imports the selected data file excluding specified rows.
- Use included field names: Select to use included field names. Only displays when the data source file have field names.
- Fields: Select available fields for import.
- Import Template Creation: Optionally, enter a template file name in the Import Template field or click the disk icon to select a template file.
- Done: Click Done and the bottom of Import Template Creation to complete the Data Wizard.
|
Run error task |
- Click Run error task.
- Open the On Error drop-down list and select the required setting:
- Run error task: A botflow containing an error task automatically runs the error task in the event of an error. If the botflow does not contain an error task, the botflow stops in the event of an error.
- Stop on error: The botflow stops in the event of an error.
- Ignore errors: The action is skipped in the event of an error and the botflow attempts to execute the next action.
- Click X to close the drop-down and save the setting.
|
Note |
(Optional) Type a Note to document
any special instructions or functionality.
|
Run Switch |
The Run Switch toggle controls how Nintex Bot runs an
action when adding or editing an action in a botflow.
- Run: To run the action automatically when you click OK, switch the toggle to Run.
- Don't Run: If you do not want to run the action automatically when you click OK, switch the toggle to Don't Run.
|
OK/Cancel |
Click OK to save the action or click Cancel to discard the action or any changes. |