Configure Risk and Compliance Module settings
![]() Promasters A Nintex Process Manager system administrator who administers a Nintex Promapp site and has rights to view and edit all areas of a Nintex Promapp site. and Risk Managers A user who is responsible for managing risk portfolios. Risk Managers can view, edit and also receives escalation notifications when a risk sign-off is overdue or flagged as non-compliant. can configure the required settings for the Risk and Compliance Module. Go to Admin > Risks and configure the required settings as described in the sections below.
Promasters A Nintex Process Manager system administrator who administers a Nintex Promapp site and has rights to view and edit all areas of a Nintex Promapp site. and Risk Managers A user who is responsible for managing risk portfolios. Risk Managers can view, edit and also receives escalation notifications when a risk sign-off is overdue or flagged as non-compliant. can configure the required settings for the Risk and Compliance Module. Go to Admin > Risks and configure the required settings as described in the sections below.
Once you understand the roles involved in the Risk and Compliance framework, you must understand the best strategy to maintain the Risk and Compliance Module for your organization and reduce risks. One way to do this is to host and leverage a Risk and Compliance forum to:
- Regularly meet with the Enterprise Risk Manager, Risk Portfolio Manager A user responsible for assigning incidents for investigations, approving actions plans, and closing risk and compliance items for a portfolio.s, and Risk Owners
- Review risk and compliance registers
- Review existing treatments
- Review sign-offs, items marked as 'non-compliant' and treatment changes
Risk portfolios are categories of common risk or compliance items. You can have an unlimited number of Risk portfolios in Nintex Process Manager. Risk portfolios are unique to your organization and can be differentiated in a number of ways, including by function, department or compliance requirement.
There are three types of Risk portfolio stakeholders:
| Risk portfolio stakeholder | Description | Permissions |
|---|---|---|
| Portfolio Manager | A user responsible for assigning incidents for investigations, approving actions plans, and closing risk and compliance items for a portfolio. |
|
| Portfolio Editor | Users that can create and edit risks and treatments within their designated portfolio. |
|
| Portfolio Viewer | Users that can view the portfolio's risks but cannot edit any details. |
|
- Go to Admin > Risks > Portfolios.
- Click Add Portfolio.
- Type a Portfolio name.
- Select Stakeholder Type from the drop-down list.
You must add at least one Portfolio Manager for each portfolio. - To add a user, do one of the following:
- In the Add by name field, type the first 2 characters, select the user and click
 .
. - Select the role/responsibility from the add by Role/Responsibility drop-down list and click Add.
- In the Add by name field, type the first 2 characters, select the user and click
- Type the required risk criteria details in the Likelihood and Severity sections. The Likelihood and Severity details can be configured in the Default Rating Criteria section.
- Click
 .
.
- Go to Admin > Risks > Portfolios.
- Click
 and make the required changes.
 - Click .
- Go to Admin > Risks > Portfolios.
- To reorder the portfolios and arrange them in the order you require, click Re-order Portfolios.
- Hover on the left of the portfolio name and use the icon to drag and drop the portfolios in the required order.
- Once you have reordered the portfolios, click .
Note: The portfolios will be displayed in this order on the Risks summary page, filters and the Portfolio drop-down lists.
- Go to Admin > Risks > Portfolios.
- Click and then click
 .
.
Note: Portfolios with associated risk and compliance items cannot be deleted.
Classifications are used to further categorize risk and compliance items.
For example, you might want to look at city risks classified by the following risk types:
- Operational
- Project
- Strategic
Within each classification, you can be more specific and add unlimited options.
Portfolios align with risk or compliance ownership. Classifications are based on the types of reporting required.
- Go to Admin > Risks > Classifications.
- Click Add Classification.
- Type a Classification title. The Active check box is selected by default.
- Click . Once you add the classification, the Add Option button is displayed.
- Click Add Option to add the required option(s).
- Type a Name.
- Click .
- Go to Admin > Risks > Classifications.
- Click and make the required changes.
- Click .
If you want to retain the risk classification history but make the classification unavailable when creating a new risk, you can do the following:
- Go to Admin > Risks > Classifications.
- Click and clear the Active check box.
- Click .
- Go to Admin > Risks > Classifications.
- Click and then click .
- Click Yes to confirm.
Note: Deleting a classification or option will remove the classification or option from all associated risks.
- Go to Admin > Risks > Other Configurations to configure the following settings as required for your organization.
| Setting | Description |
|---|---|
| Risk schedule signoff becomes due how many days in advance (Default: 7) |
Determines how far in advance of a signoff, risk treatment items become due:
|
| Enable risk reviews (Default: Off) | Enables risk reviews and displays the Review Frequency field for the Score Range. For example, you may want to review high risks on a quarterly basis where as medium or low risks are reviewed annually. |
| Custom treatment label (Default: Treatment) |
Specify a custom label for risk treatments. For more information, see create or edit a risk treatment.
|
| Enable treatment signoff reminder emails (Default: Off) | Once enabled, this configuration will send an email to risk treatment signoff stakeholders once their signoff becomes due. A second reminder email shall be sent to users once the risk treatment signoff becomes overdue. |
| Risk Dashboard default filter to show how many days of future signoffs due (Default: 30) |
Risk treatment items where signoff date is within the number of days specified, displays on treatment stakeholders My Dashboard > My Risks page.
|
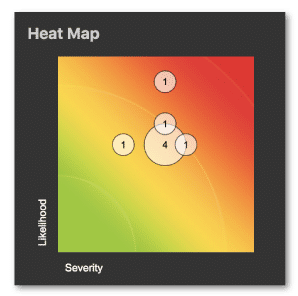
The Risks Register shows risk requirements identified by your organization. By default, these are sorted from highest to lowest residual risk score The effectiveness of treatments applied to a risk are rated and multiplied by the inherent risk score to calculate the residual risk score.. Usually, both the inherent risk score The rating of the risk before any treatments have been applied. and residual risk scores are presented but this will depend on the risk scoring scheme you have configured.
To configure how risks scores are rated, the Risk Manager or promaster can select one of the following three options from Admin > Risks > Scoring Schemes: Basic, Calculated Residual (default), and Manual Residual.
|
If the scoring scheme is configured to Basic:
|
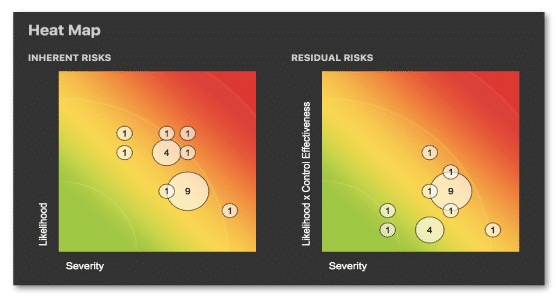
This is the default option selected. If the scoring scheme is configured to Calculated Residual:
|
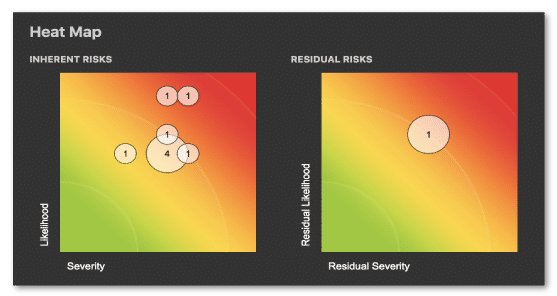
If the scoring scheme is configured to Manual Residual:
|
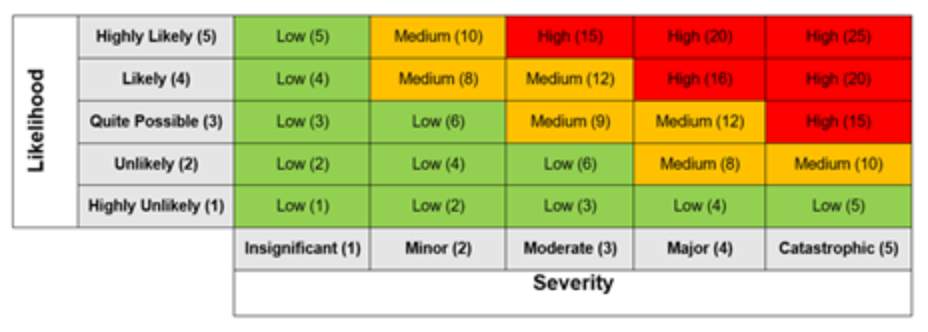
Scores and Escalations allow you to determine the score ranges for your risk and compliance items, i.e. if the risk should be scored as High, Medium, or Low risk. The names of the ranges can be customized to meet your organization requirements and there is no limit to the number of score ranges you can add. For each score range, you can also determine who the overdue sign off notifications are escalated to and if a sign-off and escalation description is required when an item or escalated item is signed off.
The risk score is calculated according to the risk ratings selected when creating the risk and compliance item.
- Go to Admin > Risks > Scores & Escalations.
- Click Add Score Range.
- Type a Label.
- Click to select a Color.
- Type a Description.
- If an escalation is required, select from the Escalate to drop-down list.
- If you require more details for sign-off or escalation sign-off, select the following check boxes:
- Sign off explanation required
- Escalated sign off explanation required
By default, an escalation description is always required when a sign off is marked as Non-Compliant. In addition, you may always want an escalation explanation to be provided when a sign off is overdue as Risk Managers and Auditors will want to know why the sign off was overdue.
- Go to Admin > Risks > Scores & Escalations.
- Click and make the required changes.
- Click .
- Go to Admin > Risks > Scores & Escalations.
- Click and then click .
- Click Yes to confirm.
The Default Rating Criteria is the default criteria based on which the risk score is calculated. The Scoring Schemes selected will determine which of the four Default Rating Criteria are available and which Default Rating Criteria you will be required to complete as part of creating a risk record.
Important: The number of Default Rating Criteria cannot be modified but you can add any number of required ratings for each Default Rating Criteria.
The risk scoring scheme you select will determine the required fields when you create a new risk. Once you have determined the scoring criteria this must be completed when you add a risk record.
- Go to Admin > Risks > Default Rating Criteria.
- Click and make the required changes.
- Click .
- Go to Admin > Risks > Default Rating Criteria.
- Click Add Rating.
- Type a Name.
- Type a score value. The score value will be used in the calculation of the risk score.
- Type a Description. The description should be used to describe the circumstances under which this rating will apply and if there are several ways of describing the rating then all these circumstances should be included in the description.
Example: Fatality occurs or Financial Loss is greater than $10 m.
- Click .
- Go to Admin > Risks > Default Rating Criteria.
- Click and make the required changes.
- Click .
- Go to Admin > Risks > Default Rating Criteria.
- Click and then click .
- Click Yes to confirm.
| Report Name | Description |
|---|---|
| Overdue / Non-Compliant Risks | Displays overdue risk items, filtered by the selected Portfolio and Signoffs due in field values. |
| Risks with Signoffs Due | Displays risk items with signoffs due, filtered by the selected Portfolio and Signoffs due in field values. |
| Risks with Treatment Changes to Review | Displays risk items with treatment changes requiring review filtered by the selected Portfolio and Signoffs due in field values. |
| Top 10 Risk Scores | Displays the top 10 risk scores. |