MariaDB and MySQL Manual Configuration
MariaDB - Manual Installation
Nintex Process Discovery supports the Windows version of MariaDB 10.3.7 (or higher). If you are installing MariaDB manually, you can download the software from here: https://downloads.mariadb.org/.
You should use the default options for each screen in the MariaDB installation wizard, with the following important exceptions:
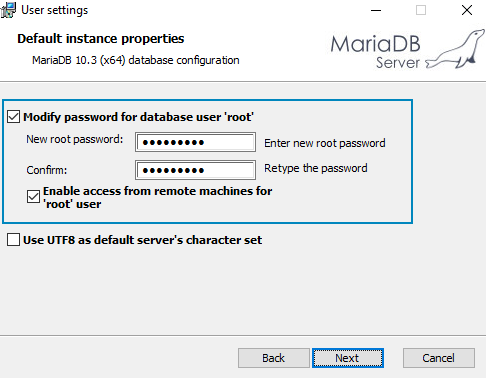
Root password:
-
Select the option to modify the root password, and enter and make note of the changed password
-
If you want the Nintex Process Discovery Server installation package to use the default password value, enter
Kryon2022!as the password -
If you choose to use a different password here, be sure to make note of it.
-
-
Be sure to select the option to Enable access from remote machines for 'root' user
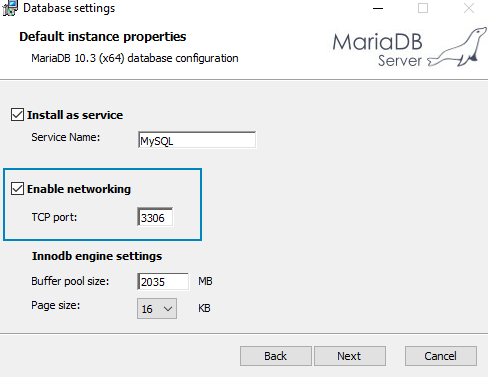
TCP port:
-
You can choose to change the default TCP port – 3306– if you wish. But if you do so, be sure to make note of it.
-
Complete the installation using the default options for each screen in the MariaDB installation wizard.
-
If you are doing a regular installation, you're done! For a silent installation, continue on.
Process Discovery uses two hard coded usernames:
-
root: The Root username for adminatrative logins -
pdbdev: the Pdbdev username for viewing the database
Configure the database configuration file (recommended)
-
Open the database configuration file
my.iniand set the following parameter values to improve database performance: -
Save the file
-
Restart the database service
Update the installation configuration file (for silent installation)
For a silent installation, change the following values in the JSON file provided with the installation package, PDServer64BitSetup.exe.json:
-
Open the JSON file provided with the installation package, PDServer64BitSetup.exe.json with a text editor
-
Edit the MariaDB
rootpassword : change the value of theDB_ROOT_PASSWORDparameter with the password you gave for therootabove -
The installation creates an additional application user,
Pdbdevwith default passwordKryon2022!. If you want to change this user name and password:(optional) Edit the value of theDB_USER_NAMEwith your preferred user name and edit the value of theDB_USER_PASSWORDparameter with a new password -
Save the JSON file. You're done!
MySQL - Manual installation
If you choose to use MySQL for the application databases, it must always be manually installed prior to Discovery Server installation.
Run the installation package, and install with the following options:
Process Discovery uses two hard coded usernames:
-
root: The Root username for adminatrative logins -
pdbdev: the Pdbdev username for viewing the database
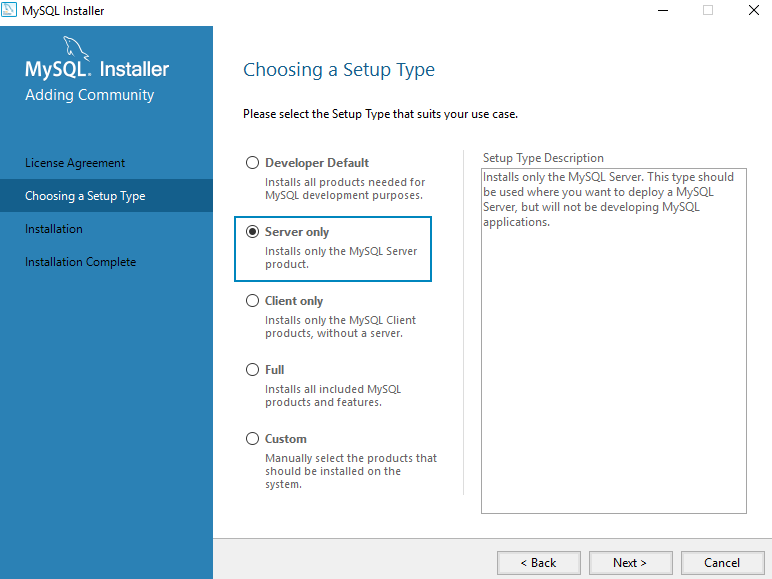
Choosing a Setup Type
-
Select Server only, then click the Next > button.
-
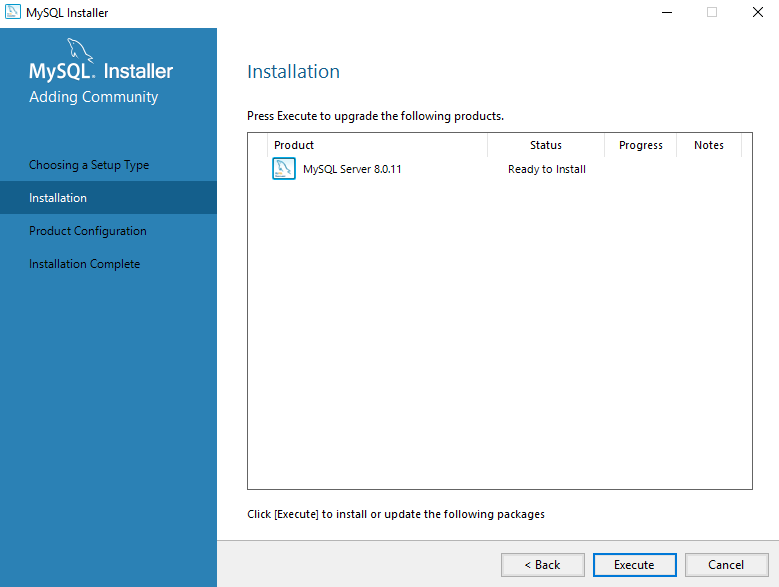
On the next screen, click the Execute button, and the package will be installed.
-
You will then be prompted to configure the package.
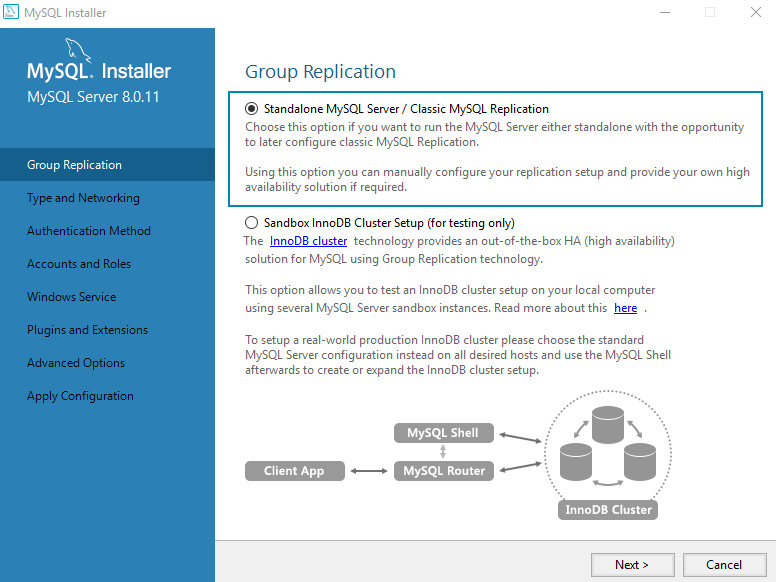
Group Replication
-
Select Standalone MySQL Server / Classic MySQL Replication
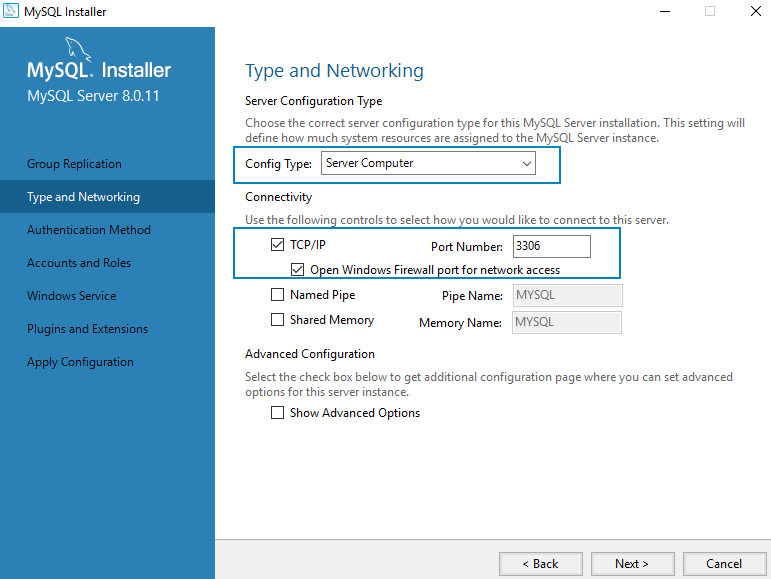
Type and Networking
-
From the Config Type drop-down list, select Server Computer
-
In the Connectivity section:
-
Select the option for TCP/IP
-
Select the option to Open Windows Firewall port for network access
-
Port Number: You can choose to change the default Port Number– 3306– if you wish. But if you do so, be sure to make note of it. You will need to specify it as an installation parameter during Discovery Server installation.
-
Authentication method
-
Select Use Legacy Authentication Method (Retain MySQL 5.x Compatibility)

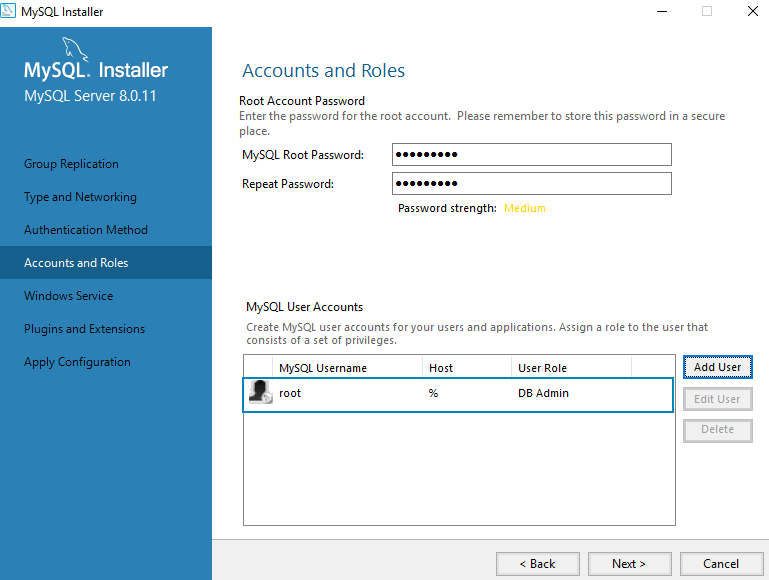
Accounts and Roles

-
In the Root Account Password section, enter and make note of the changed password.
-
If you want the Discovery Server installation package to use the default password value, enter
Kryon2022!as the password. -
If you choose to use a different password here, be sure to make note of it. You will need to specify it as an installation parameter during Discovery Server installation.
-
-
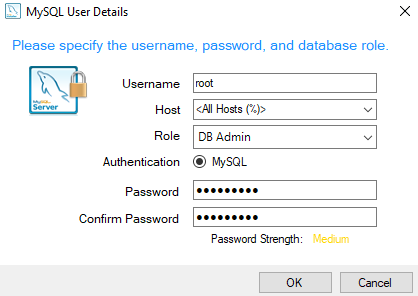
In the MySQL User Accounts section, click the Add User button, and create a user with the following properties:
-
Username: root
-
Host: <All Hosts (%)>
-
Role: DB Admin
-
Authentication: MySQL
-
Password: same password as you entered in step 1 above
-
-
Then click the OK button to return to the Accounts and Roles screen, which should look like this after the user has been created:
-
Repeat steps 2 - 3, creating an additional user
pdbdev.
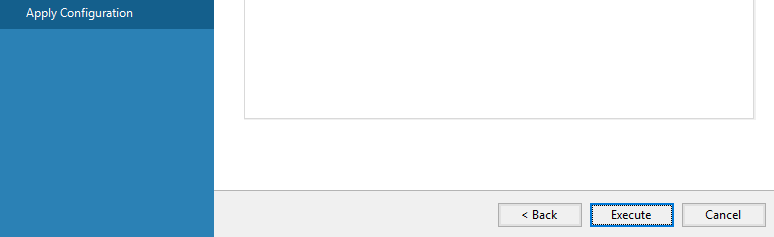
Apply configuration
-
At the end of the configuration process, you will be prompted to apply the configuration. Click the Execute button, and you're done installing MySQL!
Configure the database configuration file
-
Open the database configuration file
my.ini, and add the following line: -
We recommend the following settings to improve database performance. Set the following parameter values in
my.ini: -
Save the file.
-
Restart the database service.
|
|
default-time-zone='timezone' where 'timezone' represents the UTC time zone of the server, for example, default-time-zone='+00:00' (the format 'system' is not supported).