Create document templates
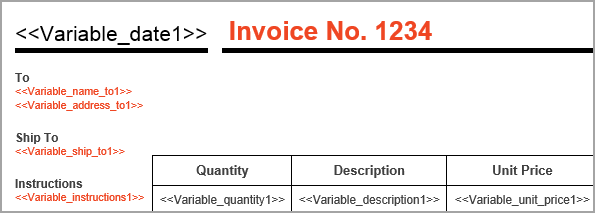
Document templates are Microsoft Word, Microsoft PowerPoint, and Microsoft Excel documents that include placeholder tags from your workflow. Placeholder tags allow the workflow to insert variable values and images exactly where you want them in the generated document. Before you run the workflow containing your Generate document action, you need to copy the tags from the Nintex Document Tagger and paste them into your document templates where you want the variable values or images to appear.
Jump to:
Get tags for document templates
Nintex Document Tagger allows you to copy the variable tags you need for adding placeholders to your templates to your clipboard.
-
Add the Generate document action to the workflow and open the action configuration panel. For more information, see Add an action to the workflow.
-
Click Open Nintex Document Tagger.
Nintex Document Tagger opens in a separate browser window and shows all tags for the workflow you are editing.
- To copy a tag:
- Select Word, PowerPoint, or Excel.
- Click a workflow reference data type (such as Start event variables) to show related tags.
- Click a variable tag (such as Name) to copy it to your clipboard.

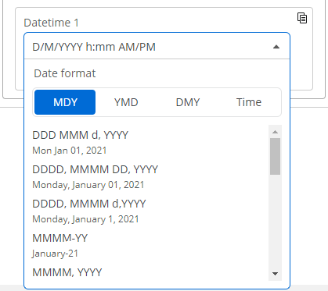
If a tag is for a Date variable, select the date format that you want the value to be printed in.
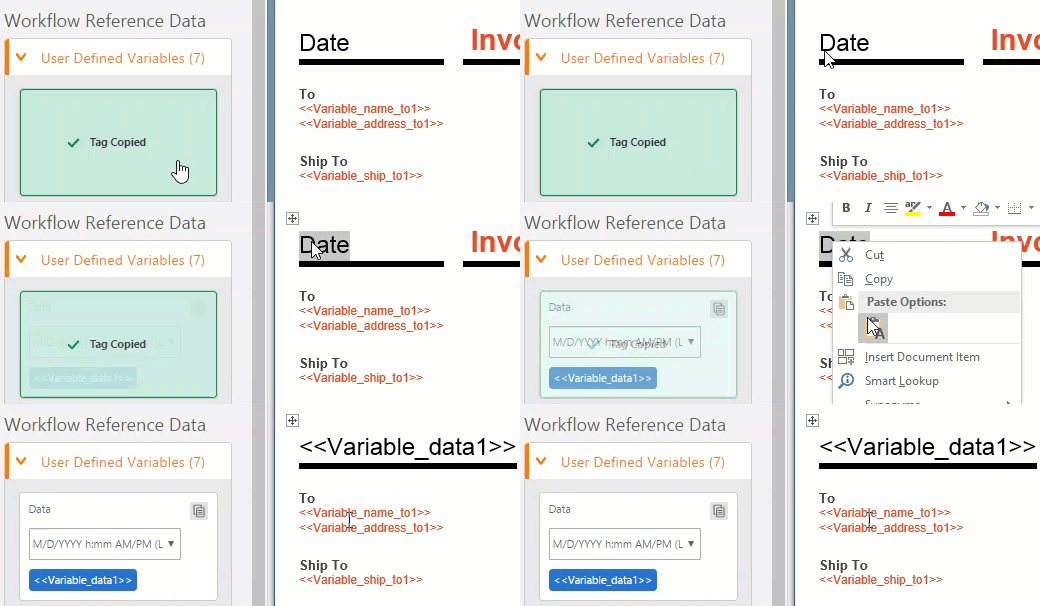
After you copy a tag, paste it into a document template where you want the variable value to appear. See Add variable tags to document templates and Add image tags to document templates.
Nintex Document Tagger fields by section
Add variable tags to document templates
When the workflow runs, the Generate document action identifies the tags in the document templates and inserts the corresponding values from your workflow into the documents it generates.
- Copy the variable tag from the Nintex Document Tagger.
- In the designer, click the Generate document action.
- Click Open Nintex Document Tagger.
The Nintex Document Tagger opens in a separate browser window displaying all the tags for the workflow you are editing. - Select show tags for Excel, and choose the required workflow reference data type, for example, Start Event Variables.
The related variable tag(s) are displayed. - Click a variable tag to copy it to your clipboard.
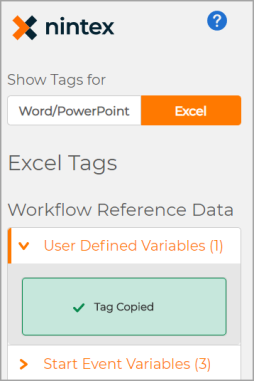
- Paste the tag you copied from the Nintex Document Tagger into the Microsoft Excel template.
- Open the Microsoft Excel document.
- Right-click the cell or range of cells that you want to tag.
- Click Define Name. A New Name window is diplayed.
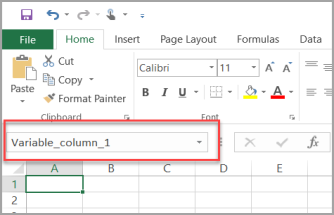
- Paste the variable tag and click OK. The updated variable tag is displayed in the Name Box.
- Save the Excel document.
Add image tags to document templates
When the workflow runs, the Generate document action identifies the image tags in the document templates and inserts the corresponding images from your workflow into the documents it generates.
You can render your image in the generated document using the
- Current dimensions of the image.
- Custom dimensions of a placeholder image.
To add image tags to document templates
- Open the Microsoft Word or Microsoft PowerPoint file.
Note: To add image tags to Microsoft Excel files, see To add resized image tags to document templates.
- Select the area in the document template where you want the image to appear.
- Paste the image tag you copied from the Nintex Document Tagger .
- Save the Word document or PowerPoint file.
When the document is generated, the image will be inserted in the document at the same size as the original image.
To add resized image tags to document templates
To add an image to a generated document at a different size to the original image, you need to add a placeholder image of the size you want to the document template, and then label that placeholder image with an image tag. When your workflow runs, the Generate document action replaces the placeholder image in the document template with the image from the tag, but resizes it to the dimensions of the placeholder image.
- Open the Microsoft Word, Microsoft PowerPoint, or Microsoft Excel document.
- Insert a placeholder image of the size you want into the document template. For instructions on inserting images, see the Insert pictures Microsoft article.
- Click the placeholder image in the document template.
- Click the Format tab in the ribbon of the document template.
- Click Selection Pane.
- Copy the image tag from Nintex Document Tagger that you want to add to the document template. See Get tags for document templates.
- Paste the copied image tag into the image label field.
- Save the Word document, PowerPoint file, or Excel document.
