Deploying a Package
Use the Deploy Package function to deploy a package file (.kspx) to another environment.
Review the Version Considerations before starting your deployment.
Deploy a package
Open Package and Deployment from the Start menu or Windows Search.
Select Deploy Package from the Actions pane on the right.

Use the Browse button to locate and load the package file into the Select Package dialog.

The following table explains the available check boxes and radio buttons:
| Check box / Radio button | Explanation |
|---|---|
| Package Configuration |
The Continue deploying packaged items if one or more items cannot be deployed check box:
The Remember my settings check box:
The Automatically map matching SharePoint lists and libraries when deploying check box:
|
| Packaged Items |
The Automatically select all items radio button:
The Manually select specific items radio button:
|
| Analyze | The Analyze check box:
|
Click Next.
If you have SharePoint related artifacts in your package, the Map Service Instances page allows you to automatically bind all items in the package to a site and list or library on the target. If a match cannot be found, the Status column tells you that you need to manually map the connections. Click the ellipsis button [...] of the Service Instance (Target) column to open the Select SharePoint list or library dialog.

You have the choice of deploying your package as an update to an existing application or as a new instance. Select Update an existing solution to continue deploying by updating existing artifacts, or Create a new instance of this solution to deploy the package as a new application. You can also use the Create a new instance of this solution option to deploy your SharePoint artifacts to a new location in SharePoint.
When you choose the update option, only artifacts that have changed between the source and target show the Create New Version action. Artifacts in the package that have not changed use the Use Existing action.

When you are updating with changes to a target Site or list or library name, all artifacts show as Create New Version.
If you select to update an existing solution and there is no matching solution on the target, the Status column shows as Ready but with a warning icon, notifying you that there is nothing to update on the target. If you continue the package is essentially deployed as a new instance of the application.

Selecting a target SharePoint Site/List/Library
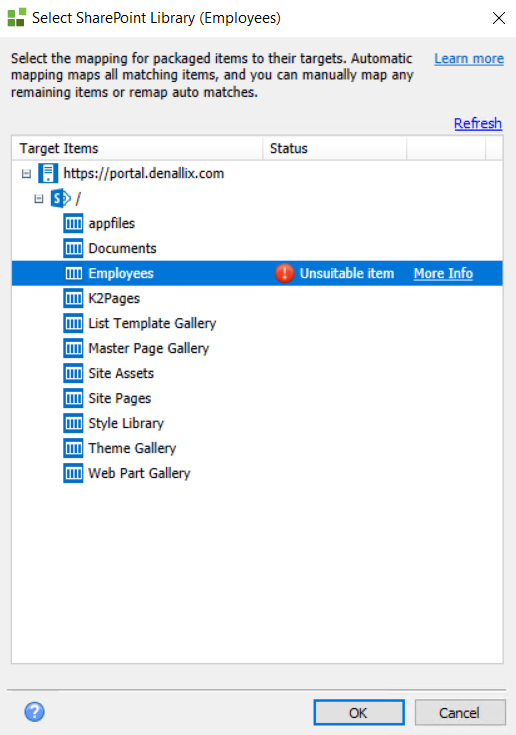
If your package contains a SmartObject based on a SharePoint List or Library, you may need to select the target SharePoint site and the list or library that matches the associated SmartObject in the package. In other words, you need to instruct the product which List/Library the SmartObject should use in the target environment. Click OK after you select the correct list or library.

Missing or non-matching target items show Action required in the Status column.

Click the ellipses [...] button to open the Map SharePoint Items page.

Click the artifact's Target Items link and manually select the SharePoint item that matches the packaged artifact. If it is a match, the OK status shows. If the item is incompatible, the Unsuitable item status shows.

Make changes in your target SharePoint site so that the item matches the source site (such as adding or removing columns, changing the type of column to match the source list or library) and then click the Recheck link. If you have successfully modified the target SharePoint item, the status shows as OK and you can continue with your deployment.
If you need to know what the issues are, click the More Info link for a description of the problem. Read through the list of issues to know what you need to change in your target SharePoint list or library.

You must resolve all Action required items before you can continue with your deployment.
- Click OK to close the More Info page.
- Click OK to complete the selection.
- Click Next
Analysis
Analysis helps prevent you from deploying a broken package. The package is analyzed against the target to make sure there are no missing references. You are warned when artifacts that are dependent on other artifacts don't exist. For example, where a property or method has been removed from a SmartObject which is referenced in a view or workflow. Automatically re-analyzing each artifact after a change in the deployment may be slow, depending on how big the package is, so this option is not selected by default. A full analysis of the package is performed before the Deploy Package options page shows. The analysis is triggered again if artifacts need to be re-mapped to other items.
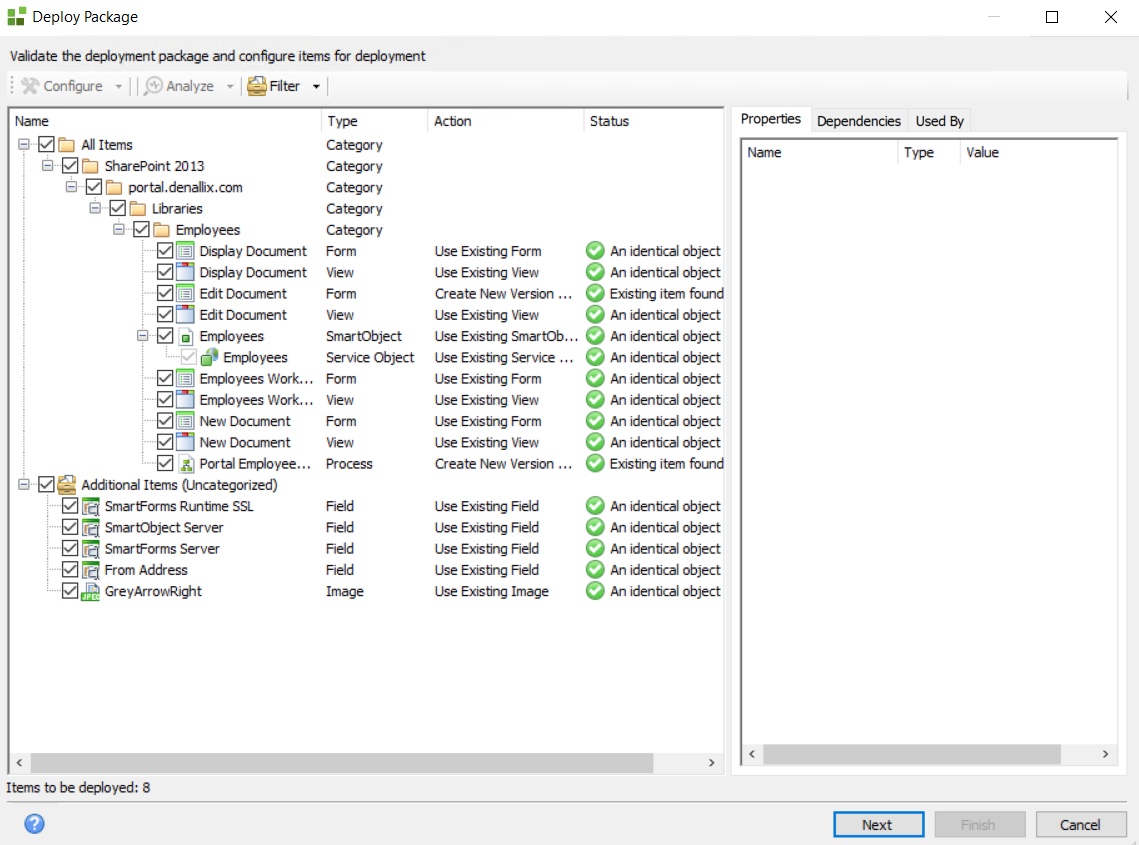
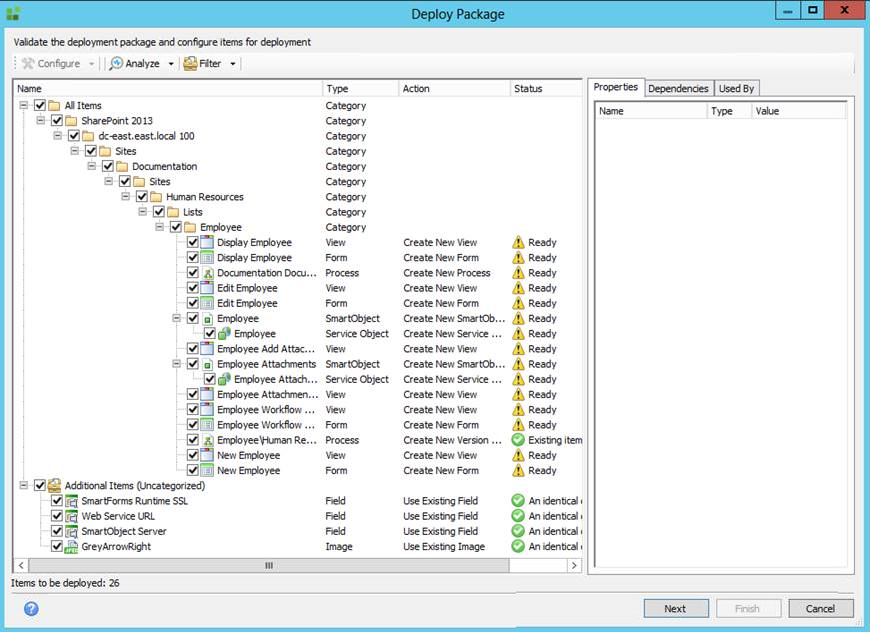
The Deploy Package window opens. You must assign variables, resolve conflicts, and solve dependency issues at this point. (See the Assigning Variables section in Create a Package for more information on Variables). If your site and list or library have the same name and structure, you should not see any missing references or conflicts.

Right-click the artifact to show the options menu.
All conflicts must be resolved before the package can be deployed to the new environment. If a conflict cannot be resolved, the artifact or dependency causing the conflict must be excluded. See Conflict Resolution for more details. Once all conflicts have been resolved or artifacts excluded, run the Analyze option to update the status of each item.
The following items show as missing references and you must remap them if your site or list or library names are different:
- Service Objects: The SharePoint list or library show as a missing reference and must be mapped to the matching SharePoint list or library in the target environment. If, for example, the source environment is https://portal.denallix.com and in the target environment you map it to https://sales.denallix.com, the service instance missing reference also needs to be mapped to the service instance for https://sales.denallix.com. In the Properties column, right-click the missing reference, select Configure, then expand the tree to open the SharePoint environment objects page to select the object to map that property to in the target environment
- When selecting the list or library to map to, all lists and libraries on the site where the app has been deployed display
- When resolving conflicts at deployment time, only the following items (shown as missing references) can be resolved:
- The list or library which opens the SharePoint List/Library dialog
- The service instance
- Note that you cannot remap fields although they are shown as missing references. They are only displayed so that you know there are missing fields . When you have fixed a List or Library with missing fields and re-analysed it, the correct field's missing references will automatically be matched and will disappear
System artifacts should already exist in the target environment. If they show as a missing reference, configure them to use existing artifacts. For example, if your CRM Server shows as a missing reference, double click on it and select the CRM Server from the target environment.
- Ensure that you check all necessary artifacts and dependencies in the deployment package. The total number of items to be deployed appears in the lower left corner of the window.
- You must resolve all conflicts before you can deploy the package to the target environment. If you cannot resolve a conflict, you can exclude the artifact, but only if you are sure that you will be able to fix the solution on the target at a later time. Once you have resolved all conflicts, click Analyze in the toolbar to update each item's status.
You must manually remap artifacts in the package that are not directly related to the SharePoint list or library. These may include:
- SmartBox SmartObjects
- Managed Metadata SmartObjects
- SmartObjects for other lists and libraries that are referenced by the application
- SmartObjects referenced in site columns
For these artifacts, the only action option is Use Existing. The other lists and libraries must exist on the target environment, and must be appified in order for the SmartObjects to exist. If the SmartObjects do not exist, you appify those lists and libraries and then return to this page.
- Click Next. Package and Deployment analyzes the artifacts in the package and compares them to the target environment.
- The Deploy Package – Deploying loads on successful analysis. This is a list of the packaged items and their readiness status. The time it takes to deploy the artifacts and dependencies is shown in the right-hand column once deployment is complete. A green check mark to the left of a deployed item shows that it has been successfully deployed.

Deployment times vary depending on the size of packages to be deployed and the responsiveness of your environment. To avoid work interruptions, you should deploy large packages after hours.
- If an artifact fails to deploy, a red exclamation mark is displayed next to that artifact.

- When a deployment failure occurs, double-click the artifact to see an explanation for the failure:

- When the deployment failure issue has been resolved, click the Retry or Retry All link next to the artifact or dependency to retry deployment.
If the server is restarted during deployment, the retry option will not work.
- If you need to save the deployment log, click the Save Log button. The Save As window opens, allowing you to save the log file.
- Close the Deploy Package – Deploying window.
-
When deploying a package with the Designer-based artifacts to a clean environment, the GUIDs in the SmartObjects, forms, and views stay the same.
-
When deploying a package with SharePoint-based artifacts to a clean environment, the GUIDs are refactored on the target environment.
Deployment of Microsoft SharePoint Event Processes
You can package and deploy workflows that use SharePoint events to start. However, you cannot package the SharePoint lists and libraries associated with these SharePoint event processes, and must manually created them in the target environment before deploying application.
If you attempt to deploy SharePoint event process lists and libraries using the Package and Deployment tool, deployment of the lists and libraries to the target environment may appear to succeed, but the workflow will not run. It will fail with a message stating that "the list and/or library was not found."
Deploy SharePoint event processes by following these steps:
- Create the lists and libraries on the target environment manually.
- Package and deploy the associated SharePoint processes from the source environment to the target environment using Package and Deployment.
Deployment of Nintex K2 connect SmartObjects
If you need to package and deploy Nintex K2 connect SmartObjects, keep in mind the following prerequisites:
- The Nintex K2 connect application must be installed on both the source and target environments
- The Nintex K2 connect installation on the target environment must include a Nintex K2 connect service instance (this is typically created during the Nintex K2 connect installation)
You can package and deploy Nintex K2 connect SmartObjects using Package and Deployment, but the Nintex K2 connect service objects (in *.SVD file format) associated with these SmartObjects do not get packaged and deployed.
You must manually create the Nintex K2 connect service objects in the target environment before the SmartObjects can be deployed.
Deploy Nintex K2 connect SmartObjects using the following steps:
- Create the *.SVD service objects in the target environment by manually copying them from the source environment (on the local machine) to the target environment.
- Open the Nintex K2 connect service objects in a new Visual Studio project and publish them.
- Package and deploy the Nintex K2 connect SmartObjects associated with the service objects from the source environment to the target environment using Package and Deployment.
