7. Edit the Hello World workflow
In this step, you edit the Hello World Workflow. First, you add an additional task recipient to the Respond to Greeting task. You configure the outcome rules so that both recipients must respond to the greeting for the workflow to follow the Say Hello outcome. If one recipient (or both) ignores the greeting, the workflow follows the Ignore outcome. You also update the task step so that it uses the Hello World SmartForms (and not the basic form). Last, you add a reminder to the task step that sends an email if the task recipients do not respond in a specified time frame.
-
Edit the Hello World Workflow. Edit the Respond to Greeting step. Change the form type to use the Display Hello World SmartForm. Create a new state called Workflow Task. (This must be the default.)
- On the Application page, select the Hello World Workflow, then click the Edit button. The workflow designer launches. CLOSE the Welcome (helpful hints) dialog.
- First, you change the forms from the basic form to SmartForm. Select the Respond to Greeting step and expand the Configuration Panel. Click the Form tab. Select SmartForm from the FORM TYPE drop-down menu. Browse to and select the Display Hello World form from the FORM menu. Click OK. Your menu structure may be different than the image below. The image below reflects: SharePoint Site > (subsite) > Lists > Hello World > Display Hello World form.

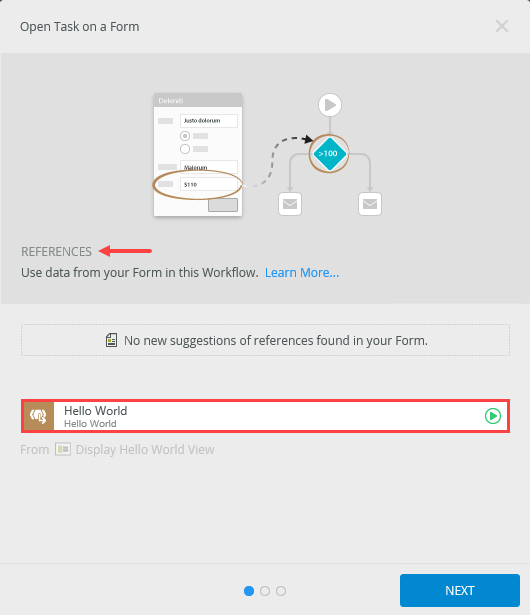
- On the REFERENCES screen, notice the product discovered one data source. This is the Hello World list in SharePoint. Click NEXT.
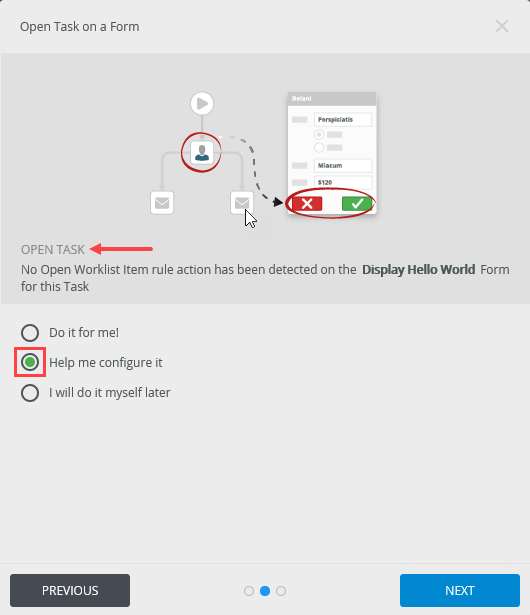
- On the OPEN TASK screen, select the option to Help me configure it. Click NEXT.
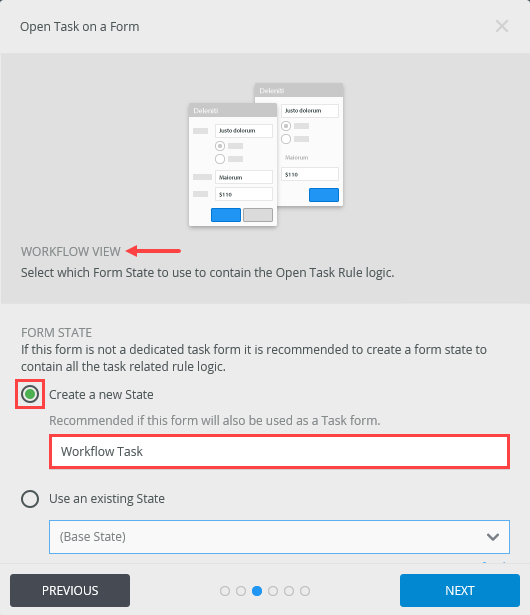
- On the WORKFLOW VIEW screen, confirm the default option, Create a new State, and the state name, Workflow Task. Click NEXT.
A state represents the configuration and behavior of a form for a specific use. States are generally configured for a (user) Task step. For example, a request approver's form may have form fields disabled because as the approver, they do not need to change any form field values. A form used for rework will have the same fields enabled, because the workflow originator needs to update those form field values. Rather than creating two separate forms, you can use different states for each step, then use rules to control how the same form should behave in each of those two states.
- On the OPEN TASK RULE ACTION screen, accept the default settings, then click NEXT.
- On the AFTER SUBMIT ACTION screen, accept the default settings, then click NEXT.
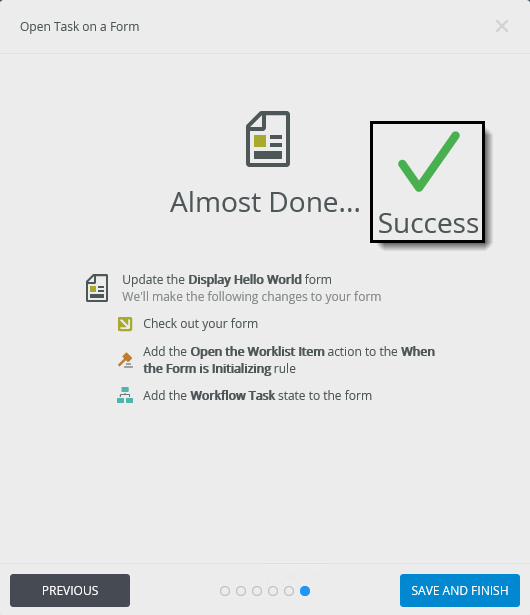
- On the Summary screen, review the changes that the product will make, then click SAVE AND FINISH. Click OK when you see the success check.
The Open Task on a Form wizard launches.
-
Add a second recipient to the task. You can use any user you like, just be aware that the user needs to complete the task as well.If you are building this tutorial in your own environment or a shared environment, select a co-worker’s account so that they can action the task when testing the application.
- Now, you will add a second task recipient. You configure the outcome rules so that both recipients must select "Say Hello" for the workflow to follow the Say Hello outcome. If one or both recipients selects "Ignore", the workflow follows the Ignore outcome.
Click the Recipients tab. Click the Add (+) icon under the RECIPIENTS heading.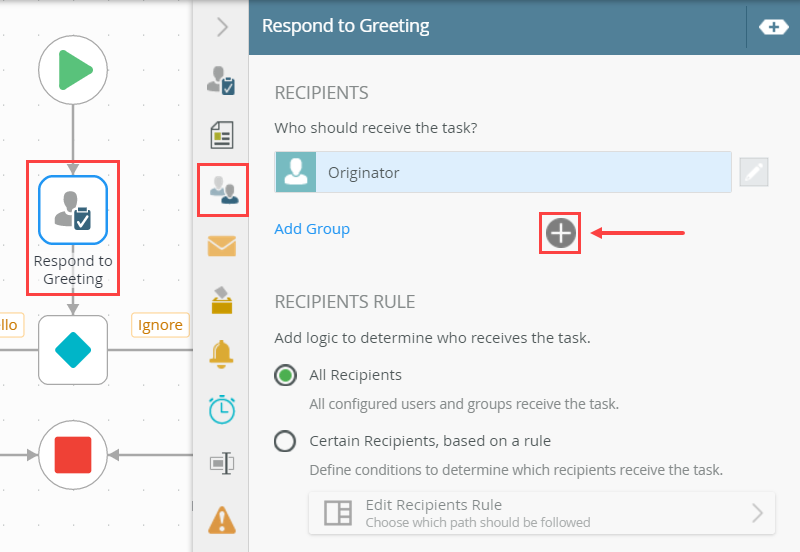
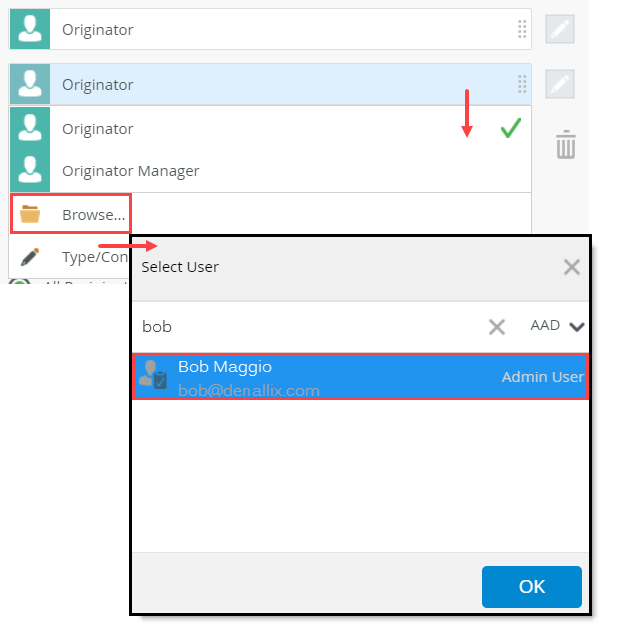
- The second recipient loads with the default value, Originator. Click the second Originator entry to expand the browse menu. Click Browse. In the Search Users box, enter your co-worker's name then wait for the people picker to find the entry. Select your co-worker, then click OK.If you are building this tutorial in your own environment or a shared environment, select a co-worker’s account so that they can action the task when testing the application.
- Now, you will add a second task recipient. You configure the outcome rules so that both recipients must select "Say Hello" for the workflow to follow the Say Hello outcome. If one or both recipients selects "Ignore", the workflow follows the Ignore outcome.
-
Configure the outcome rule to use the consensus option. If there is not a consensus, then configure the action to default to Ignore.
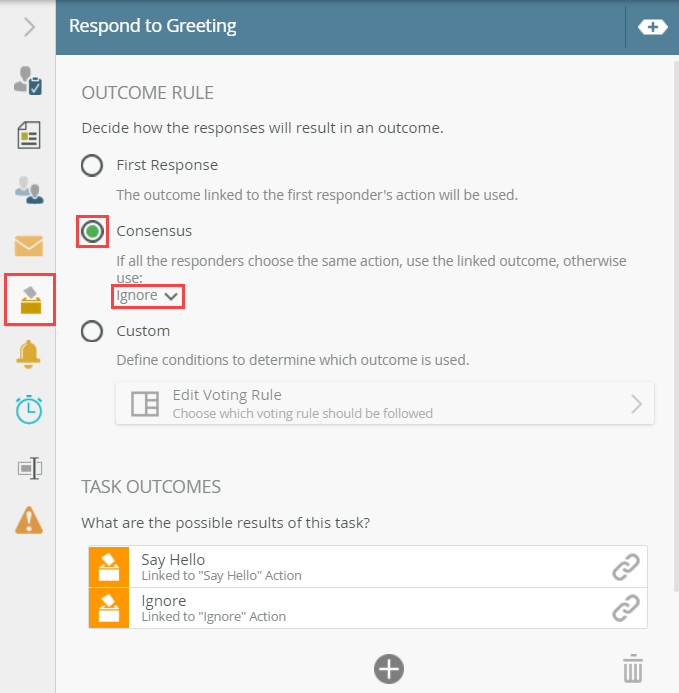
- Next, edit the outcome rules so that both recipients must reply to the greeting for the workflow to follow the Say Hello outcome. If one or both recipients choose to ignore the greeting, the workflow follows the Ignore outcome. Click the Results/Voting tab. Under the OUTCOME RULE heading, select Consensus. Change the action outcome to Ignore.
To explain this rule a bit further. There must be a consensus (both recipients) on the Say Hello action for the workflow to follow that outcome. If there is not a consensus, the workflow follows the Ignore outcome.
- Next, edit the outcome rules so that both recipients must reply to the greeting for the workflow to follow the Say Hello outcome. If one or both recipients choose to ignore the greeting, the workflow follows the Ignore outcome. Click the Results/Voting tab. Under the OUTCOME RULE heading, select Consensus. Change the action outcome to Ignore.
- Add a reminder that sends an email to both the recipients. Send the email after five minutes and repeat the reminder two times. Configure the reminder email message with any text you like, but include values from the Context Browser to personalize the message and explain what they need to do. Use the image below as a reference, if needed.
 A reminder (also known as an escalation) puts a time frame on a Task step. The reminder fires if the recipient has not responded to the task in the time allotted. Reminders can be simple such as sending reminder emails. They can be more complex such as redirecting the task to another recipient. You can configure reminders to repeat themselves. For example, a reminder can send an email every three days, three times.Take care when using email reminders! Reminder emails can crowd a recipient's in-box quickly. Keep in mind who you are sending the reminder to (managers? directors?). Consider sending the reminder to the workflow originator, so that they can follow up as is appropriate. Consider limiting the emails to only what is truly necessary.
- Click the Reminders tab. Under the REMINDERS heading, click the Email Reminder link.
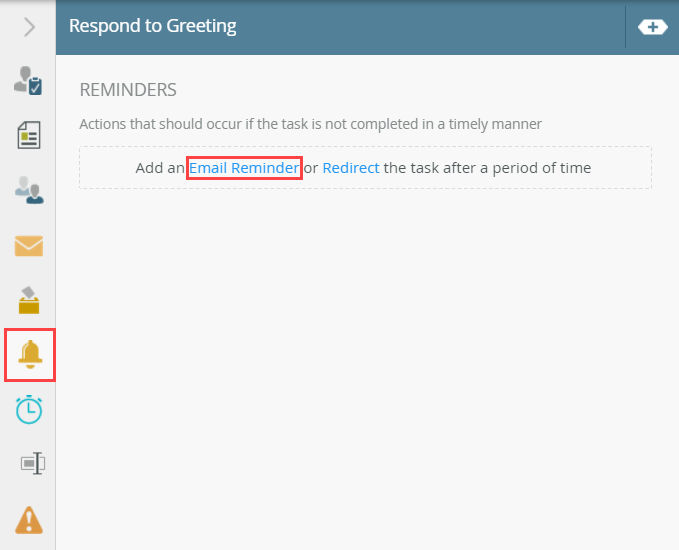
- In the Task Recipient Email box, leave the default After entry, then enter
5
into the Minutes text box. Click the repetitions icon and enter
2
so that the reminder executes after five minutes, then two more time after another five minutes.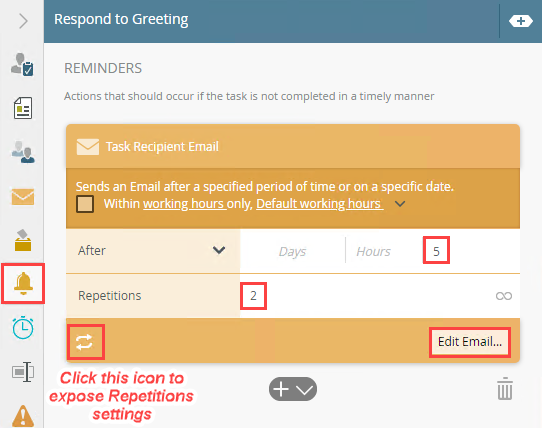
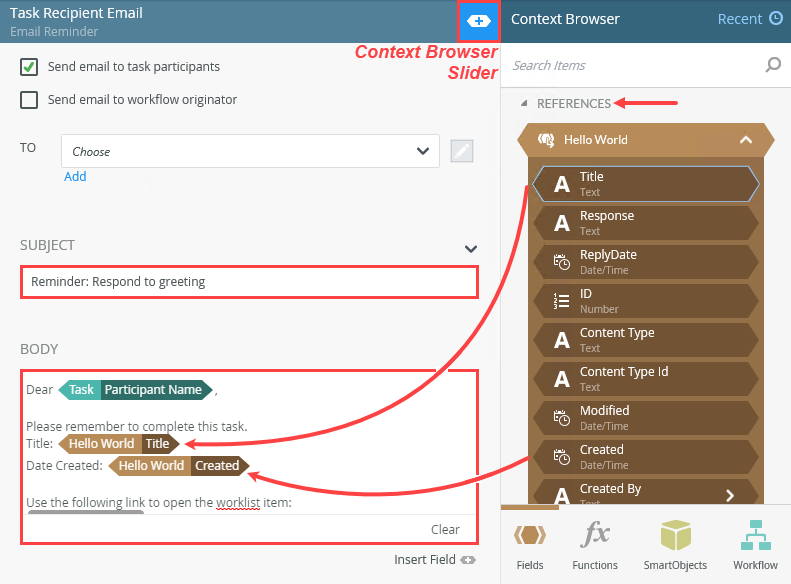
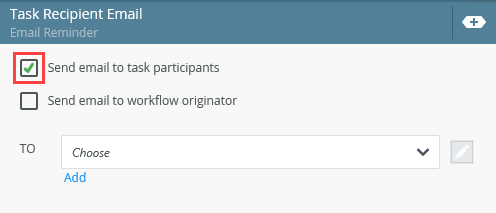
- Click the Edit Email link (see image above for reference). For the TO value, confirm the Send email to task participants option is checked.
- Enter any content you like for the Subject line. Expand the Context Browser. Expand the Hello World SmartObject under the REFERENCES heading. For the email body, enter
Please remember to complete this task.
Title:
Date Created:
below the Dear Task Participant line, then drag the Title and Created properties into the message body using the image below for reference. Collapse the Context Browser, email editor and Configuration Panel.
You will send an email reminder after five minutes. (Of course, in the real world, this is likely to be five days and not minutes. Use minutes for testing purposes.)
Next you configure the reminder email. You send the email to the two task recipients. Use values from the Context Browser to personalize the message.
- Click the Reminders tab. Under the REMINDERS heading, click the Email Reminder link.
Review
In this step, you modified the Hello World Workflow. First, you changed the Respond to Greeting task to use the Display Hello World SmartForm instead of the basic form. You can change form types at any time if you need to. Then, you added an additional recipient to the task and configured a consensus rule so that both recipients must respond with Say Hello for the workflow to follow that outcome. Otherwise, the workflow follows the Ignore outcome. Finally, you configured a reminder for this step, which sends an email if one or both of the recipients don't respond in the time specified. In the next step, you deploy the workflow to publish the changes you've just made to the server.