9. Update the Hello World Application
In this step, you update the Hello World application. Quite often, changes are necessary after deploying a workflow. Sometimes a data source changes, such as a new column in a SharePoint list. You might update the workflow to include the new column. In this tutorial, you add a new column, ReplyDate, to the Hello World list. You update the Set Response step (in the workflow) so that this column contains the current date. Finally, you add a Send Email step to the Ignore outcome. This email informs the originator the workflow deleted their list item.
- In the Hello World list, add a new date column called ReplyDate. For the type, select Date and Time. Click Yes to include the time. The workflow updates this column if the recipient responds to the greeting. You use a function that saves the current date and time to the ReplyDate column.
- From the Hello World list, Click Add column. For the column type, select Date. Name the new column
ReplyDate
and select Date and time for the Type. Select Yes for Include Time. Click Save.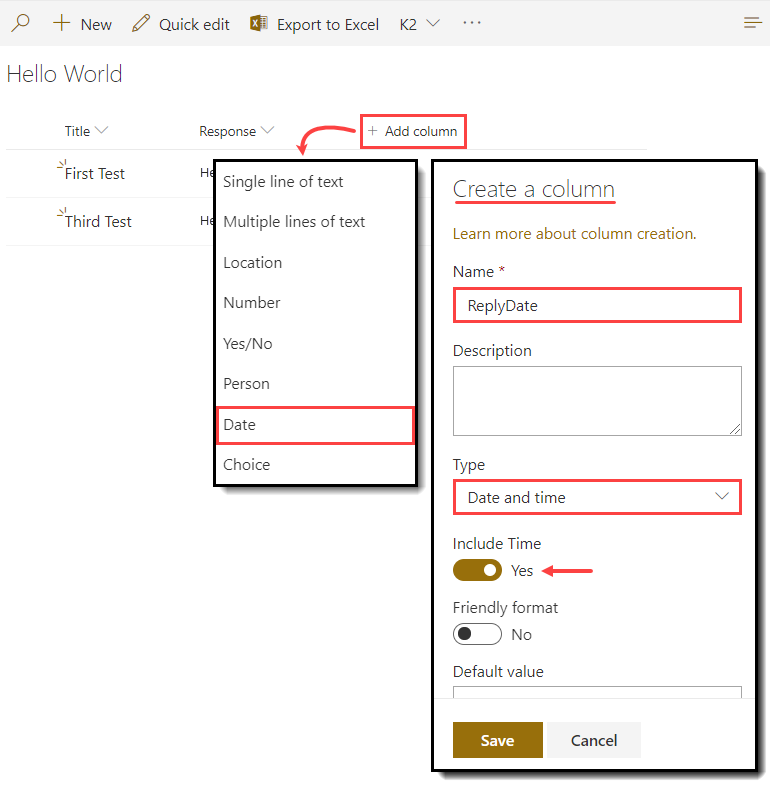
- From the Hello World list, Click Add column. For the column type, select Date. Name the new column
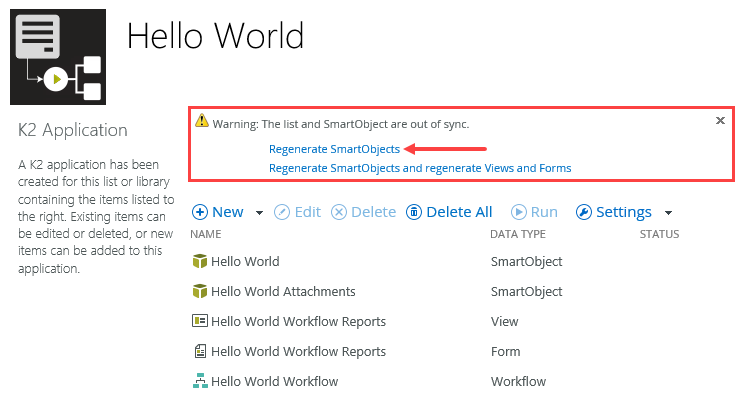
- On the K2 Application elements page, regenerate the Hello World SmartObject. Regenerating a SmartObject updates the server with any changes and makes those changes available in other elements. Here, you are updating the server with the new column and making it available for use in the workflow.
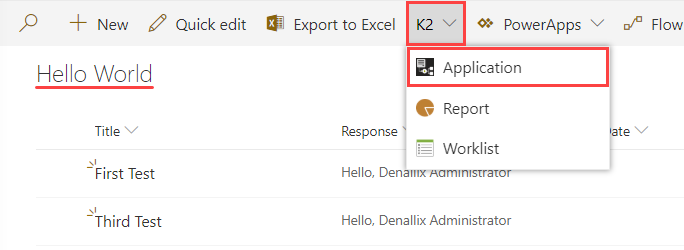
- From the Hello World list, navigate to the K2 Application elements page from the K2 menu (Application).
- Notice a warning shows because it has detected changes in the list. The list is now out of sync with its associated SmartObject. To resolve this warning, click the Regenerate SmartObjects link.
You will not use the Regenerate SmartObjects, Views, and Forms link because you are not using SmartForms. You are using the basic task form. This link does not apply since there are no SmartForms to update.
- From the Hello World list, navigate to the K2 Application elements page from the K2 menu (Application).
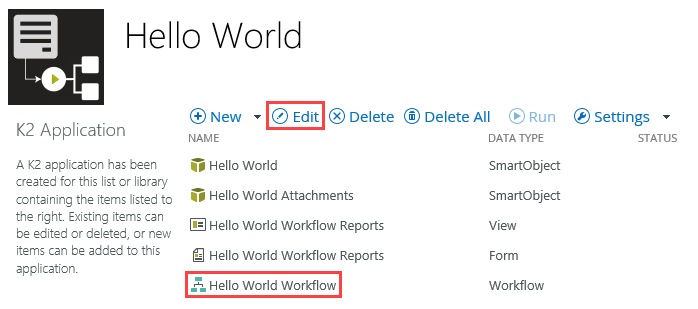
- Next, you edit the workflow and include the ReplyDate in the Set Response step. Edit the Set Response step in the Hello World Workflow. Using inline functions, set the ReplyDate value for today's date and time - Now().
- Select Hello World Workflow and click Edit.
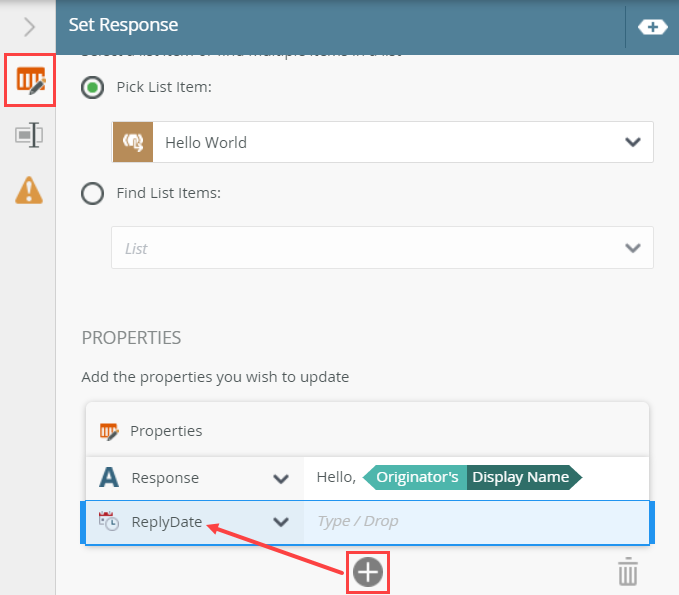
- First, you will edit the Set Response step so that the workflow inserts the current date and time into the new ReplyDate column. Select the Set Response step. Expand the Configuration Panel. Click the Update List Item tab. Click the Add (+) icon under the PROPERTIES heading, then CHECK the box for the ReplyDate property.
- Expand the Context Browser (A). Click the Functions tab (B). Expand the DATE AND TIME node (C), then drag the Now() function (D) into the ReplyDate text box. Collapse the Configuration Panel.
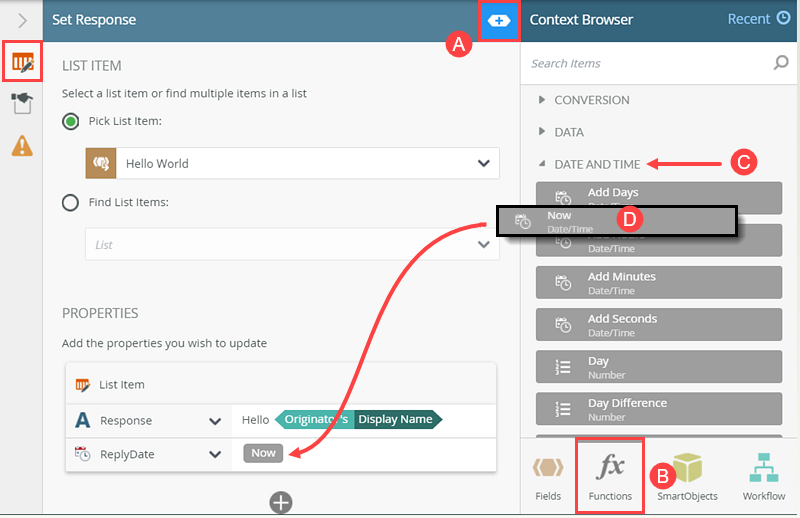
Next, you add a function for the ReplyDate value. The Now() function returns the current date and time. At runtime, the workflow updates the ReplyDate column with the current date and time.
- Select Hello World Workflow and click Edit.
- Add a Send Email step. Connect the Delete List Item step to the new Send Email step. Connect the Send Email step to the End step. Configure the email step using the table below as a guide. Deploy the workflow when you complete the edits.
Field Value Notes TO Originator Confirm the default value is Originator. SUBJECT Folio Use the Workflow context Folio for the email subject line. BODY The task recipient ignored your greeting. The workflow deleted your list item. Sorry! Enter any text you like for the body. - Add a Send Email step to the Ignore outcome. You route the email to the workflow originator and let them know their list item no longer exists in the Hello World list, since they selected the Ignore action. Connect the Delete List Item step to the Send Email step, then connect the Send Email step to the End step.
Begin by selecting the line that connects the Delete List Item step to the End step. Click <DELETE> on your keyboard.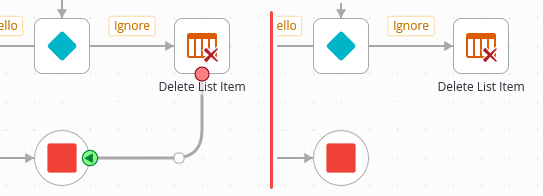
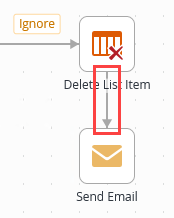
- Expand the Toolbox > Basic node. Drag a Send Email step below the Delete List Item step. Connect the Delete List Item step to the Send Email Step.
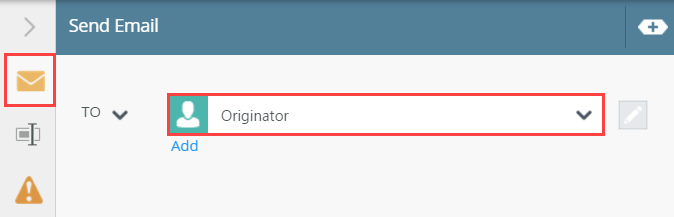
- Select the Send Email step, then expand the Configuration Panel. Click the Send Email tab. Confirm the TO value is Originator.
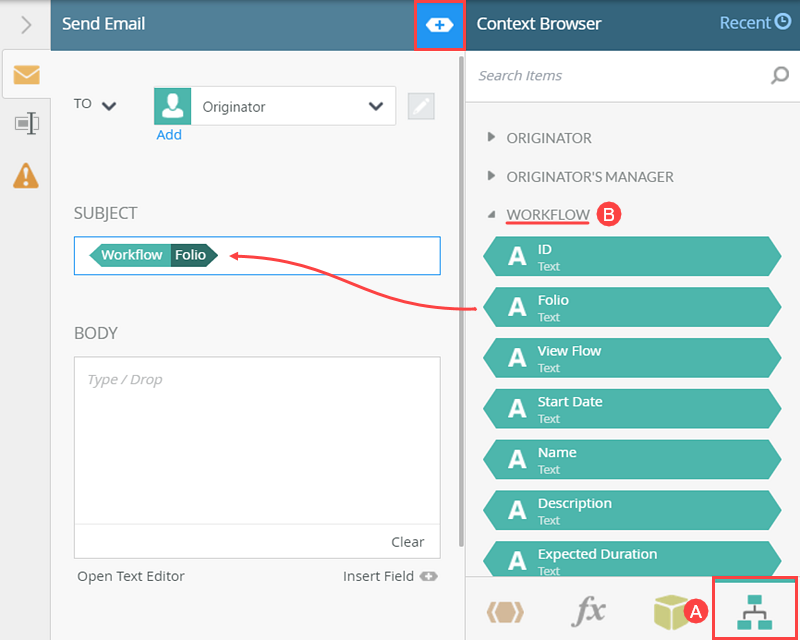
- Expand the Context Browser. Click the Workflow tab (A) near the lower right corner of your screen. Expand the WORKFLOW node (B). Drag the Folio property into the SUBJECT line. (Depending on your version of Nintex K2, the Workflow nodes may present in a different order.)
- In the BODY, type a message to the originator letting them know the recipient ignored the greeting and the workflow removed the list item. For example:
The task recipient ignored your greeting. The workflow deleted your list item. Sorry!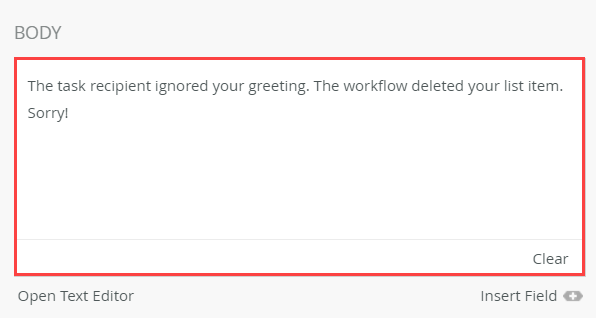
- Click the Properties tab. Change the step Name to
Email Originator
then collapse the Configuration Panel.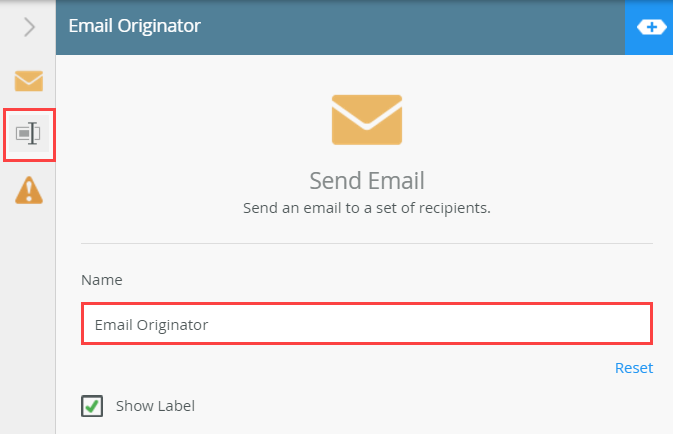
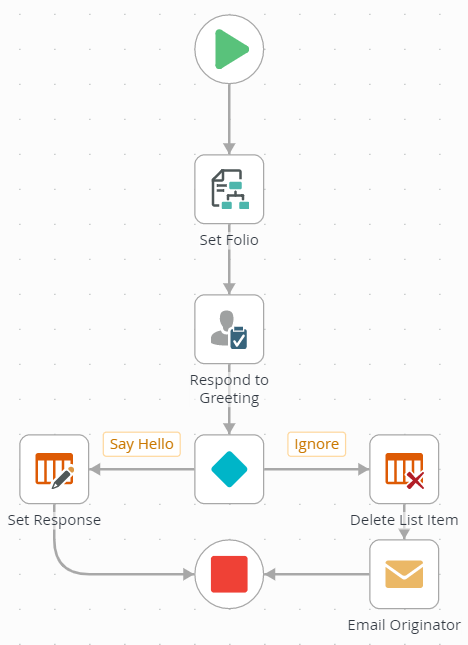
- Connect the Email Originator step to the End step. Your updated workflow should look like the image below.
- Deploy the workflow. (File > Deploy) Close the workflow designer. (File > Close). On the K2 Application elements page, click the Hello World title to return to the list.
Next you will customize the subject line with a value from the Context Browser.
Recall when you added the step for the Respond to Greeting user task, you configured the task notification email so that the subject line contains the Hello World > Title reference. You will customize the subject line for this email step as well. But there is a problem! You cannot use values from the references because the list item was just deleted. Fortunately, you mapped the Title property to the Folio, so you will use the Folio for the subject line instead.
The workflow is complete. You must redeploy the workflow to publish the changes to the server.
- Add a Send Email step to the Ignore outcome. You route the email to the workflow originator and let them know their list item no longer exists in the Hello World list, since they selected the Ignore action. Connect the Delete List Item step to the Send Email step, then connect the Send Email step to the End step.
Review
In this step, you learned how you can edit an existing data source, then apply the changes to other artifacts in the application. You regenerated the Hello World SmartObject from the K2 Application elements page so that the server "records" the data source changes (in this case, a new column). After adding the new column to the Set Response step, you learned how to apply functions (Now()) so that the new column reflects the current date and time. After adding a Send Email step, you deployed the workflow once again to save the changes to the server. In the next step, you will test your edits!