Required Internet Information Services (IIS) settings for product Site
The Nintex K2 Site does not function if IIS is not configured correctly. Configure the IIS application pool Managed Pipeline mode setting to Classic and ensure that:
- Windows Authentication is enabled
- Anonymous authentication is disabled
Configure IIS on the server machine where the Site is installed. If SharePoint is planned for the same physical machine, ensure that a new web site is created for the Site during the installation. This ensures that port numbers between the Site and SharePoint do not conflict. After a Site has been installed, two additional steps may be required to configure the Workspace(Desktop) website and the runtime web services.
Configure the Runtime Web Services
- Open Internet Information Services (IIS) Manager.
- Locate [Machine Name] > Sites > [K2 Site].
- In the Action panel > Manage Website, click Advanced Settings.
- In General > Application Pool, ensure that the website has been assigned the correct application pool. If it hasn't, follow the instructions below:
- Click the ellipse.
- Click in the Application Pool drop down and select the correct application pool.
- Click OK to save the changes.
- In the Connections panel, click Application Pools.
- Select the correct application pool from the list.
- In the Actions panel > Edit Application Pool, click the Advanced Settings link.
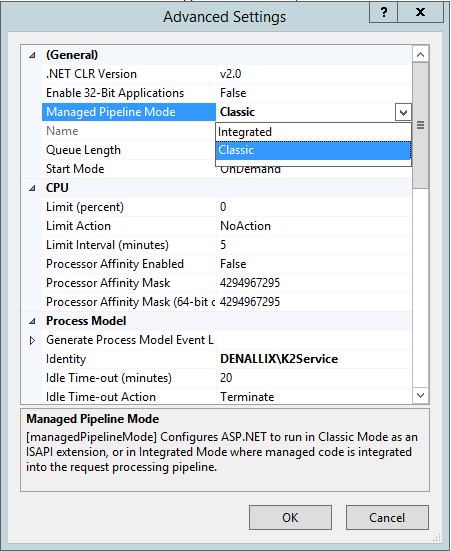
- In Advanced Settings > General, locate the Managed Pipeline Mode entry.
- If the Managed Pipeline Mode is notset to Classic, click on the drop down and select Classic.
- Click OK.
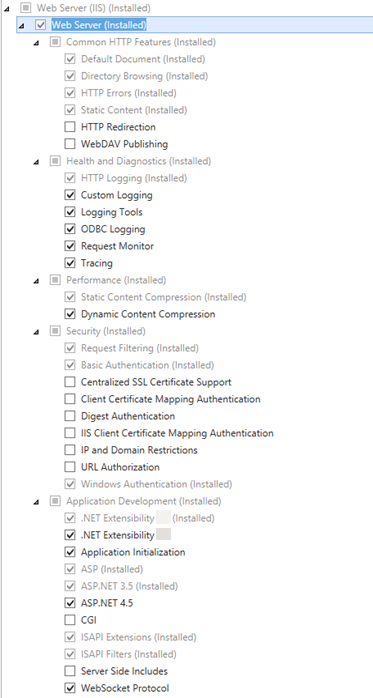
Before you install the product Site, enable the following features:
- .NET Extensibility. See .Net Framework Compatibility. The .NET Extensibility version installed must be the same as the .NET Framework installed. For example, if .NET 4.7.2 Framework is installed, then .NET Extensibility 4.7 must be installed.
- Application Initialization
- ASP.NET 3.5
- ASP.NET 4.5
- Default Document
- HTTP Errors
- HTTP Redirection
- HTTP Activation
- Static Content
- Dynamic Content Compression
- Static Content Compression
- Request Filtering
- URL Authorization
- Windows Authentication
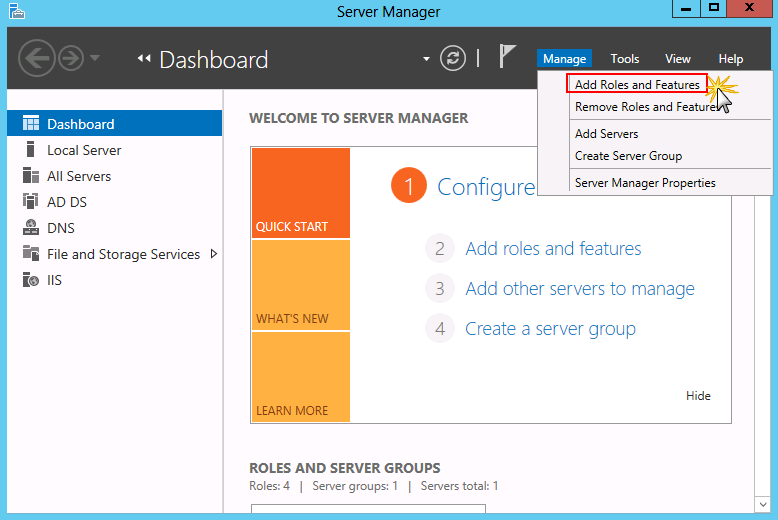
- To check if these features are enabled, open the Server Manager from the Taskbar and select Manage > Add Roles and Features:
- Select Role-based or feature-based installation.
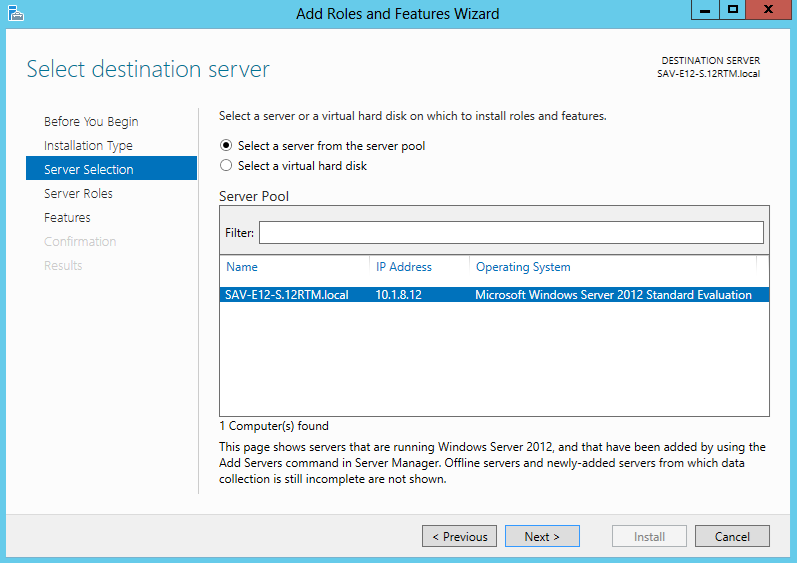
- Select the correct server from the Server Pool.
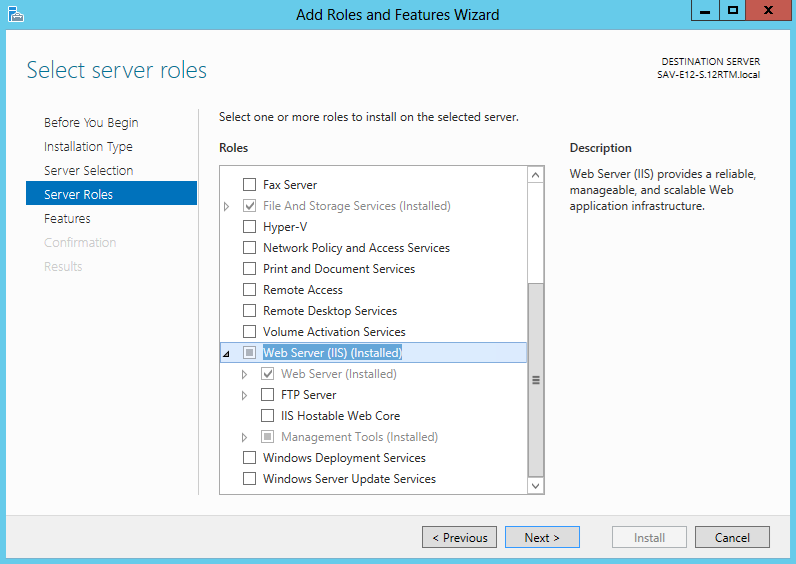
- In the Server Roles section, select and expand Web Server.
- Enable the features mentioned above. Note that the image below represents an environment where all settings and features have not yet been enabled. See .Net Framework Compatibility.

While infrastructure changes are required by the system, each environment is different and has its peculiarities which you must consider. Modifying the infrastructure could have unforeseen results if the changes are not appropriately understood or managed. Given the broad spectrum of underlying infrastructure utilized, it is recommended that a panel or committee with appropriate skill in each area concerned be assembled to outline the underlying infrastructure changes and gauge the impact of the required changes.