Manage applications
 Add an application
Any application that is used in an automation must first be defined in Nintex RPA Admin Tool.
To add an application:
-
Access the Admin Tool.
-
Click Applications in the menu pane.
-
Click New Application on the toolbar.
-
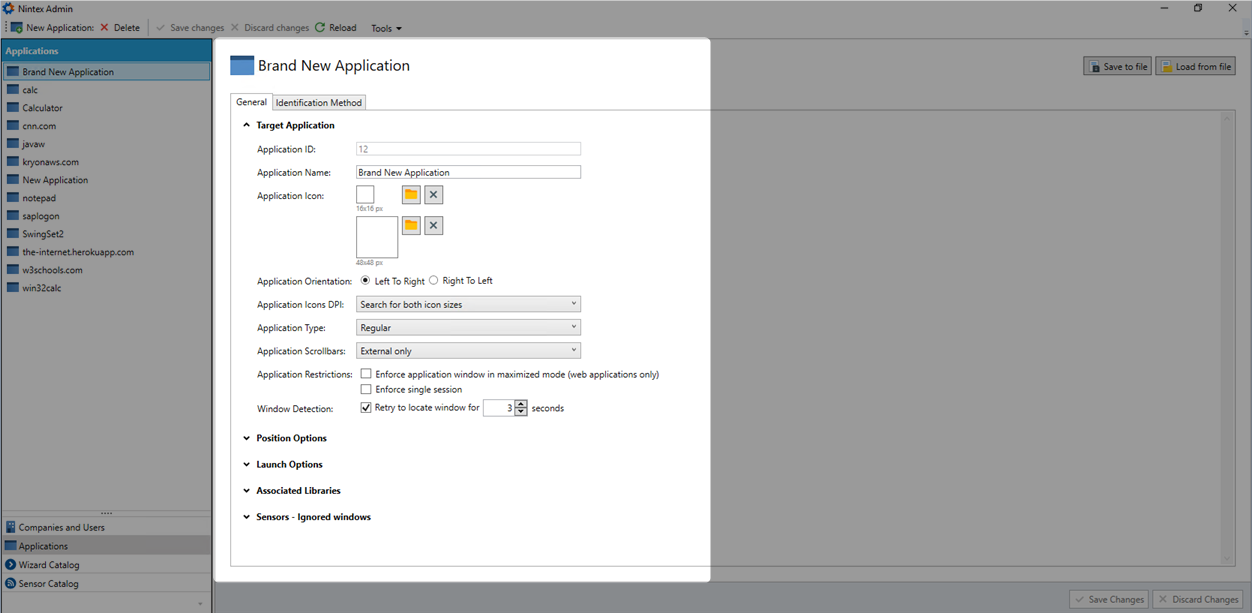
Enter a name for the application on the General tab.
There are many properties available on the General tab. However, when adding an application, the only General tab field that is required is the Application Name.
-
Define the application's identification methods on the Identification Method tab.
-
Click Save Changes.
-
Click Wizard Catalog in the menu pane.
-
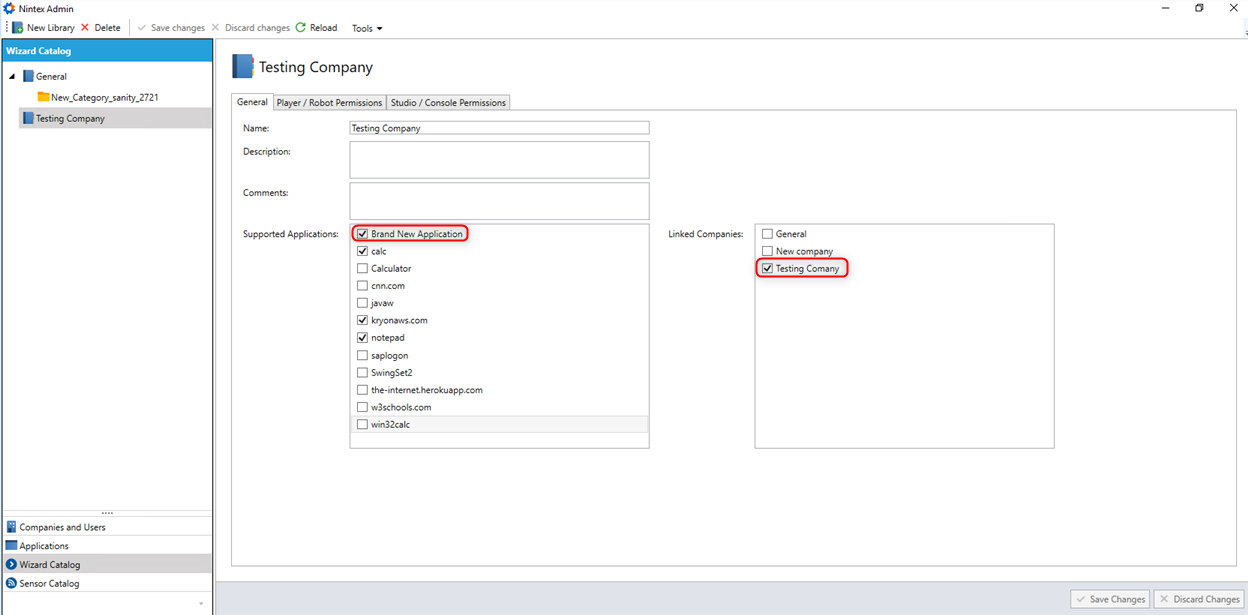
Select the newly created application.
-
Select the company name to assign it to the company.
-
Click Save Changes.
/Admin Management Tool_44.png)
An application called New Application is created in the entities pane.
The new application is automatically selected, and its properties appear in the properties pane, with the General tab active.
Application identification methods
Application identification methods are the ways in which the Nintex RPA Platform identifies the application being used. To add an application, you must define at least one identification method.
Add identification methods and conditions
/Admin Management Tool_46.png)
To add an identification method:
-
Tick its check box.
-
Enter the details of the condition under that method.
To add a condition under an identification method, click the /Admin Management Tool_47.png) button
button
To remove a condition under an identification method, click the /Admin Management Tool_48.png) button
button
One or more? AND or OR?
There are numerous methods by which an application can be identified, and you can specify more than one method for each application. Within each method, one or more conditions can be specified.
-
Use AND between each method: If you specify more than one method, and ALL the specified methods must be satisfied for the application to be properly identified.
-
Use OR between each condition: If you specify more than one condition within a method, but ONLY ONE condition must be met to satisfy the method.
Recommended identification methods
The recommended approach is to use one of the following identification methods (depending on whether the application is desktop- or web-based) and add other identification methods only as necessary.
Process name
This is the recommended identification method for desktop applications, except for web browsers. For web browsers, use the Application URL method, as applications added using a URL do not work when the browser is also added as a process name-based application.
In the condition, enter the application's process name as it appears in the Windows Task Manager > Details tab – without the .exe extension (e.g., outlook)
Application URL
This is the recommended identification method for web-based applications.
To maximize the probability that the web application is properly identified, ensure the following:
-
In the Condition, enter the website's URL, excluding:
-
the protocol (usually,
httporhttps) -
the "www"
-
the path (i.e., the section of the URL following the domain name)
-
-
Use an operator other than
Equals(e.g.,Contains, Starts With, etc.)
Additional identification methods
You can use additional identification methods either instead of or in addition to the recommended methods. These additional methods include:
-
Installation registry values
-
Company name
-
Class name
-
Application container
-
Product name
-
Product version
-
Window caption
-
Main module name
-
Registry values
Export/import application properties
Nintex RPA Admin Tool allows you to export an application's properties to an XML file and import them into a new environment. This simplifies migration of configured applications across different environments.
An application's general properties and identification methods are included when you export/import its properties.
Export application properties
To export an application's properties:
-
In the menu pane, click Applications.
-
In the entities pane, select the application whose properties you want to save.
-
In the properties pane, click the
/Admin Management Tool_49.png) button.
button./Admin Management Tool_50.png)
-
Navigate to the location where you want to save the file.
-
Click Save.
An XML file is saved to the selected location.
Import application properties
To import an application's properties:
-
In the menu pane, click Applications
-
If the application you want to import already appears in the entities pane:
-
Select the relevant application.
-
In the properties pane, click the
/Admin Management Tool_51.png) button.
button./Admin Management Tool_52.png)
-
Navigate to the XML file you previously saved for this application.
-
Click Open.
The application's general properties and identification methods are loaded into the properties pane.
-
Click the
/Admin Management Tool_5.png) button.
button.
-
-
If the application you want to import does NOT appear in the entities pane:
-
From the toolbar, click the
/Admin Management Tool_53.png) button.
button. -
In the properties pane, click the
button./Admin Management Tool_54.png)
-
Navigate to the XML file you previously saved for this application.
-
Click Open.
The application's general properties and identification methods are loaded into the properties pane.
-
Click the
button.
-