7. Create the Contact List Form
In this step you will create the Contact List Form to display your list of contacts. This form is main point of entry for contact management, and will act as a "container" for the views you have created thus far. (Forms can contain multiple views, along with controls). After creating this form, you will add a second tab that launches the Create New Contact form. This allows you to manage your current contacts and add new contacts from the same form.
-
Add a new form from the Forms category and name it Contact List Form, then change the theme to Lithium if it is not already. (This tutorial contains images based on the Lithium theme.) Change the form's Width to 100%, then add a Max. Form Width value of 1000px. This accommodates mobile devices.
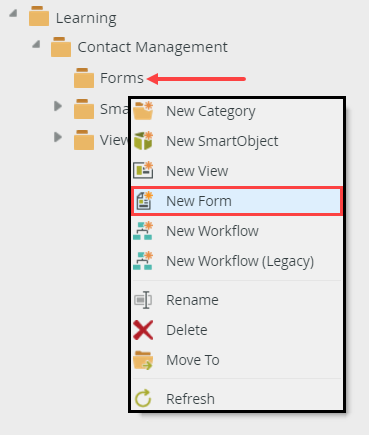
- Create a new form directly from the Forms category. (Forms are not designed from SmartObjects. Therefore, you can create the form from the category that will house that form). Right-click the Forms category and select New Form.
- On the GENERAL settings screen, Name the form
Contact List Form
then click CREATE.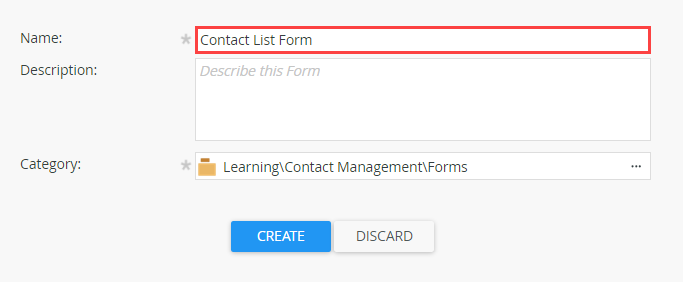
- Navigate to the Legacy Theme property in the Properties pane under the Advanced section. Change the theme to Lithium, if it is not already.The Lithium theme is a responsive web design theme, meaning it will scale according to the device being used. (Laptop, Tablet, Mobile)
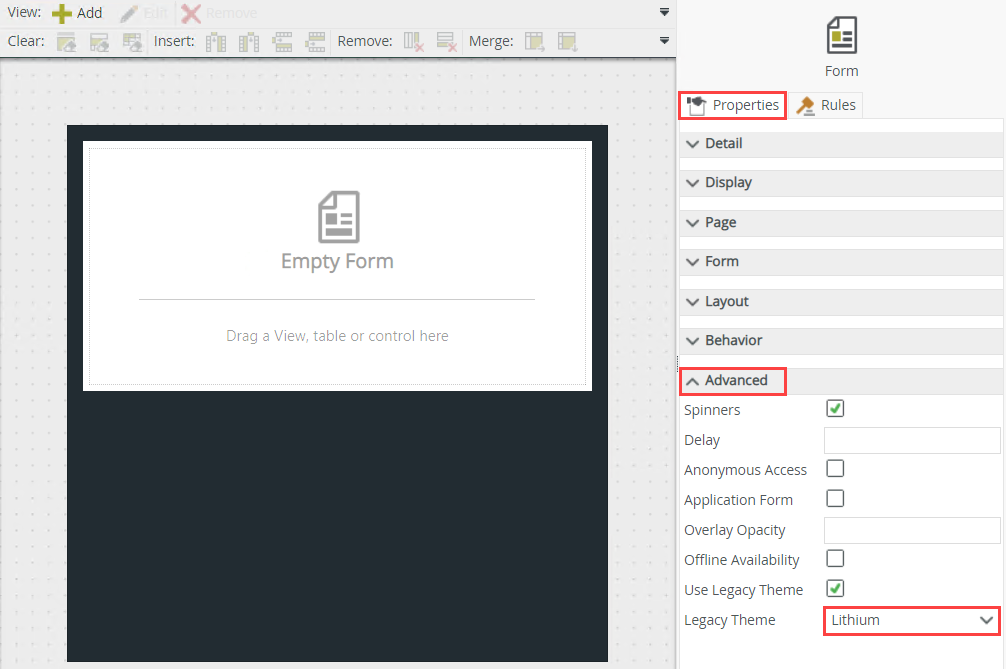
- To accommodate mobile devices, you will adjust the form's width and maximum width. In the Properties pane, confirm (or change) the Width to
100%
then for the Max. Form Width, enter
1000px
then click outside the box to set the value.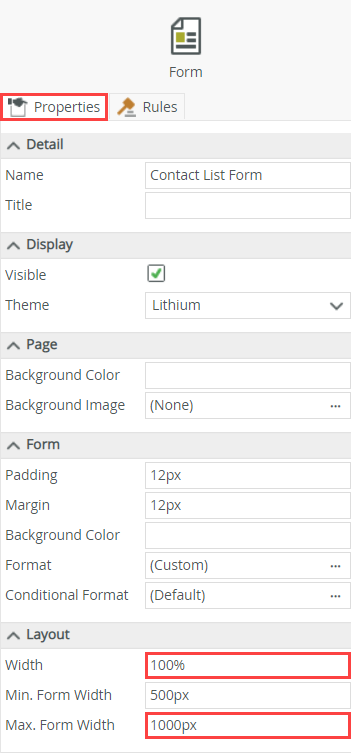
- Create a new form directly from the Forms category. (Forms are not designed from SmartObjects. Therefore, you can create the form from the category that will house that form). Right-click the Forms category and select New Form.
-
The Contact List Form contains only one view. This view displays a list of all contacts. In a later step, you will add a rule that launches the Contact Details Form when you click a row in the list. Add the Contact List View to the design canvas.
- Next, you will add the Contact List View to the canvas. Click the Views tab on the left side of your screen. Expand All Items, then navigate to your Contact Management categories. Expand the Views category. Drag the Contact List View onto the form design canvas.
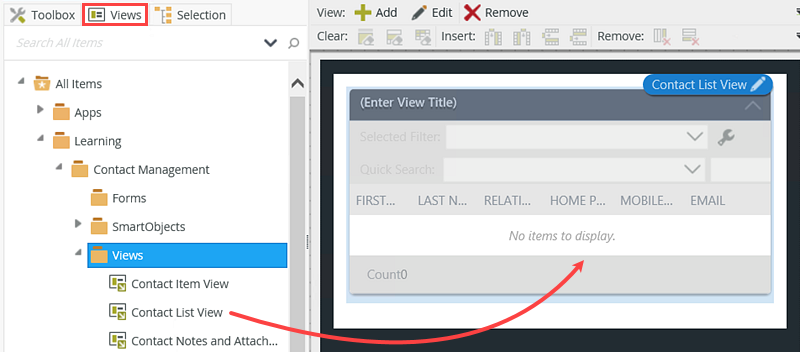
- To help clarify the purpose of the view, you can change the view title. When you have a form that contains multiple views, the titles can be very helpful to identify the different sections of a form. Click the view title and change it from (Enter View Title) to
My Contacts.
Do not close out of the form designer, as you will work with this form in the next step.
- Next, you will add the Contact List View to the canvas. Click the Views tab on the left side of your screen. Expand All Items, then navigate to your Contact Management categories. Expand the Views category. Drag the Contact List View onto the form design canvas.
Review
In this step, you created the Contact List Form that acts as the main point of entry for managing contacts. You added the read-only Contact List View, as you will not edit records directly from this form. In the next step, you will add a tabbed form for creating new contact records.