2. Create a Contact List
In this step, you create a new SharePoint list, then populate the list with data. This list acts as the application's data source or where the data resides. In a later step, you create a SmartObject from the SharePoint list. SmartObjects make the data available for use by other K2 components such as forms and workflows. Another key point is that K2 can interact with many different types of data sources, not just SharePoint lists. For example, you can create SmartObjects based on SQL tables, Active Directory, and web services as well.
-
Begin by creating a new list in SharePoint called Contact List. This list stores personal and professional contact records. After you create the list, change the Title column name to First Name, leaving all the other column settings as is. Add the following new columns and configure each to be a single line of text:If you are working in a shared environment where there may be multiple builds of this tutorial, consider adding your initials to the list name to make it unique. For example, Contact List KL.
- Last Name
- Phone
- Company Name
- Start your application by creating a new list in SharePoint. From your site (or subsite), click New > List. Name the list
Contact List
and click Create.If you are working in a shared environment where there may be multiple builds of this tutorial, consider adding your initials to the list name to make it unique. For example, Contact List KL.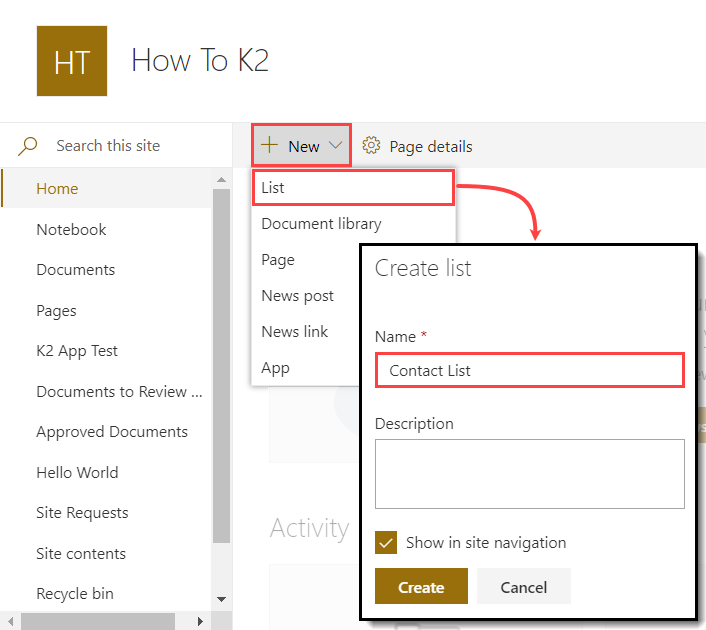
- Next, you edit the existing Title column and change its name. Click the menu arrow next to the Title name. Select Column settings > Rename. Change the name to
First Name
and click Save.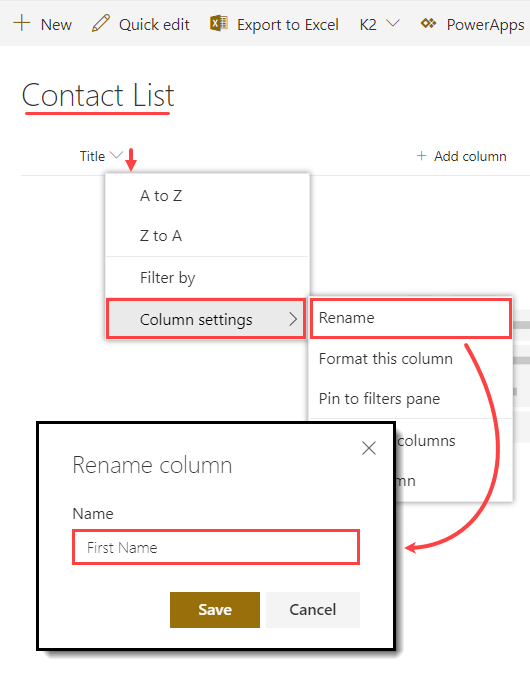
- Next, you add additional columns to the list. Click Add column. Select Single line of text. Name the column
Last Name
and click Save.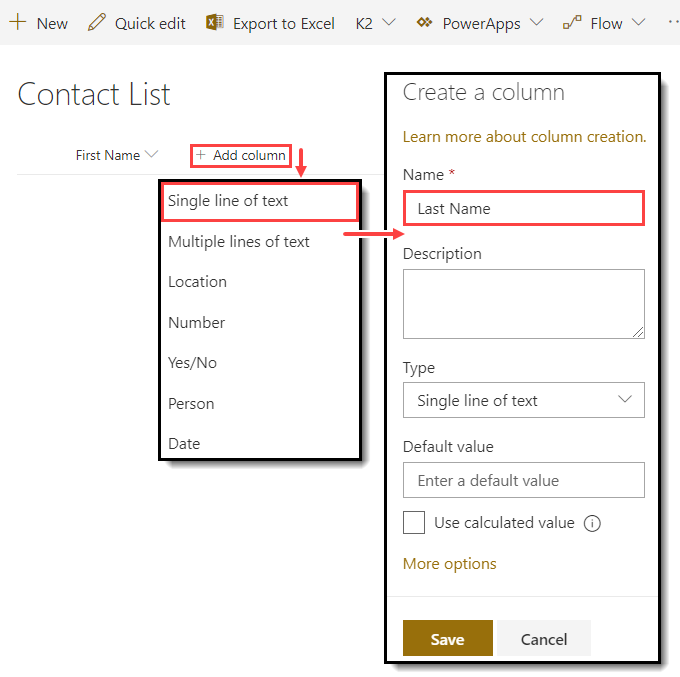
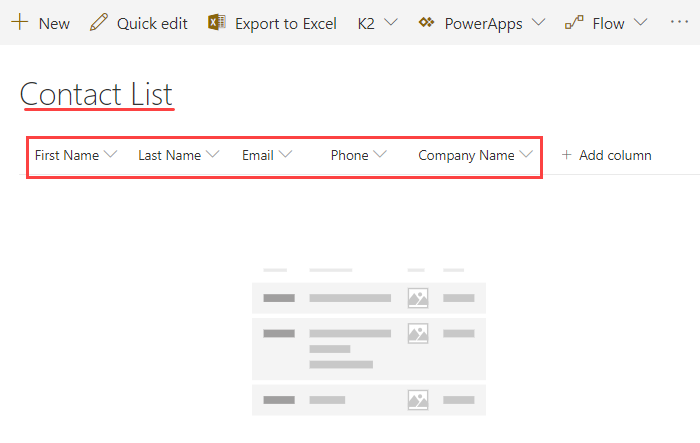
- Repeat the previous step and add the remaining columns listed below. Each column type is a single line of text.
- Phone
- Company Name
Your columns should look like the image below.
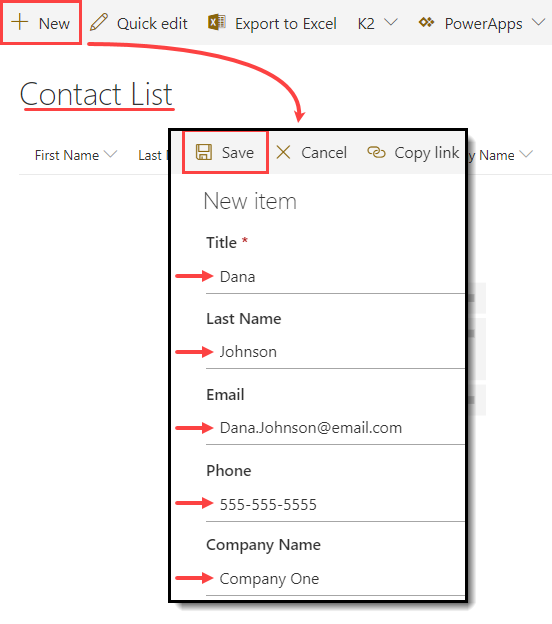
- Add five or more contacts to the list. This provides content for you to display when you create the SmartForm.
- Next, add five or more contacts to your Contact List. In a later step, you build a SmartForm that displays the contacts. From the Contact List landing page, click New. Complete the form fields and click Save.
- Next, add five or more contacts to your Contact List. In a later step, you build a SmartForm that displays the contacts. From the Contact List landing page, click New. Complete the form fields and click Save.
Review
In this step, you created the SharePoint list that acts as the data source for your application. Data sources are where data resides. K2 interacts with many types of data sources, including SharePoint lists, SQL tables, CRM, and Active Directory. In the next step, you generate a SmartObject based on the Contact List. The SmartObject acts as the bridge between the data source (a SharePoint list) and the SmartForm you build in a later step.