3. Create Application Elements for the Contact List
In this step, you create application elements based on your SharePoint list (Contact List). Application elements include data, forms, workflow, and reports and together, make up a K2 application. The data component (called a SmartObject) becomes the "bridge" between the data source (your SharePoint list) and other artifacts that consume the list's data (such as a form or workflow).
After creating the SmartObject, you explore its properties and methods from the K2 Management site. You execute a list method, then review the data returned. The data returned is the content (records) from the Contact List.
- Generate the Data application element for the Contact List. For this application, you will not generate forms, workflow, or reports elements.
- For this application, you only generate the data element. In a later step, you create a new form from scratch in K2 Designer. (This application does not use workflow or report elements.)
From the Contact List landing page, click the K2 menu, then Application.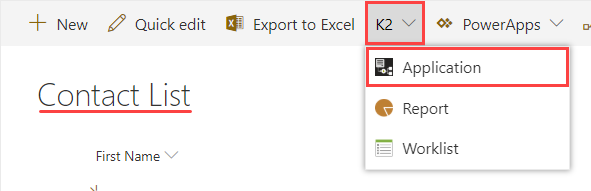
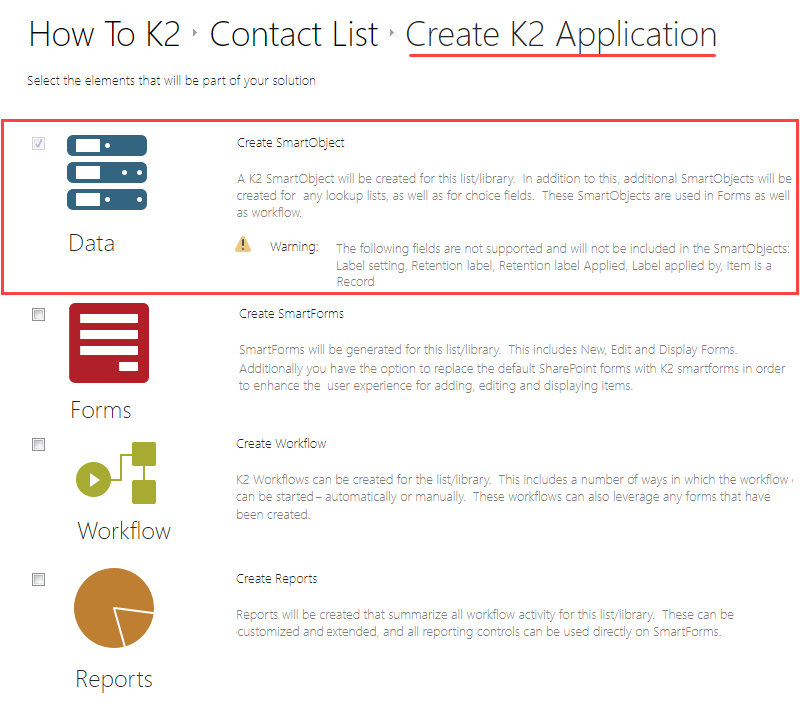
- On the Create K2 Application page, you only want the Data element. Confirm Data is the only option checked (it should be by default), then click OK (at the bottom of the page). When you create application elements, K2 assumes you want to create a SmartObject from the list or library containing the K2 menu (that you clicked). That is why the data option is already selected.
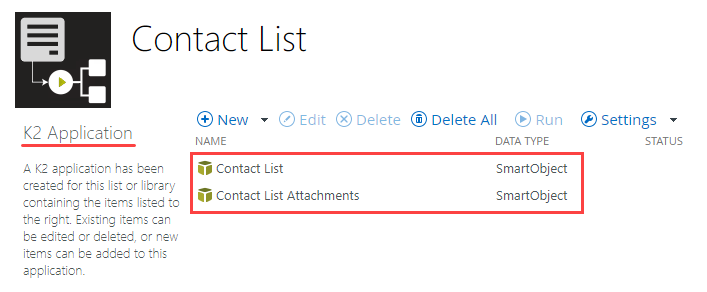
- After K2 creates the data element, the K2 Application elements page launches. Notice the two SmartObjects displayed: Contact List and Contact List Attachments. These are the data elements generated for the Contact List. (List items can have attachments. By default, K2 creates a second data source for storing attachments.)
- For this application, you only generate the data element. In a later step, you create a new form from scratch in K2 Designer. (This application does not use workflow or report elements.)
- Next, take a closer look at the Contact List SmartObject structure. Launch the K2 Management site. Open the Contact List SmartObject from the Categories menu. Review the properties and methods K2 discovered.
- Now that you have created the Contact List SmartObject, take a few minutes to look at the structure of the SmartObject, along with the properties and methods that K2 discovers when creating a data element. Begin by launching the K2 Management site.If you are unsure of how to launch the K2 Management site, see Accessing K2 Sites.
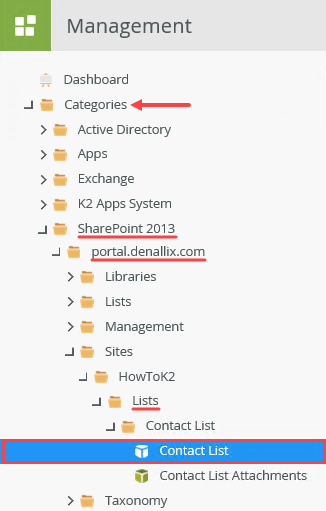
- The K2 Management site opens with the dashboard. Using the Management menu, expand the Categories node, then SharePoint 2013. Navigate to and select the Contact List SmartObject. (The image below reflects a K2-provided VM environment. Your menu tree may have different names, depending on your environment and if you created a subsite.)
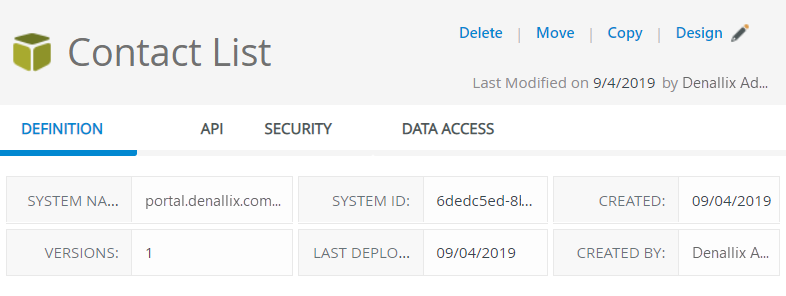
After you select the SmartObject, the details appear in the central pane. First you see system details, such as the system name and date created.
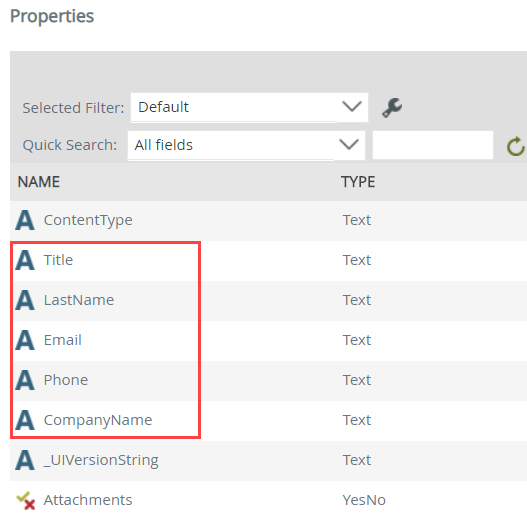
The Properties section displays the properties K2 discovered in the data source. Think of properties as the column titles in a list. Notice how K2 returns both list properties (such as CompanyName) and system properties (such as ContentType). If time allows, scroll through the list to review the other properties K2 returns from the SharePoint list.
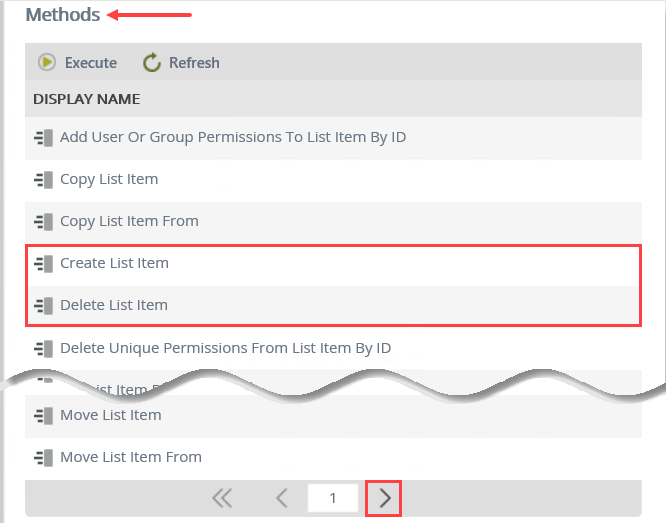
The Methods section displays the methods K2 discovered in the data source. Methods allow you to interact with the data (such as create, delete, and update). If time allows, take a minute to scroll through the methods. Notice you can move from one page to another to display additional methods by clicking the previous and next arrows at the bottom of the list.
- Now that you have created the Contact List SmartObject, take a few minutes to look at the structure of the SmartObject, along with the properties and methods that K2 discovers when creating a data element. Begin by launching the K2 Management site.
-
To demonstrate how SmartObjects return data from data sources, you will execute a method from the SmartObjects details page. The list method returns a list of all records found in the data source. In your Contact List application, the list method should return the records you previously entered. Execute the Get List Items method for the Contact List SmartObject. Do not add any parameters. Review the data returned.
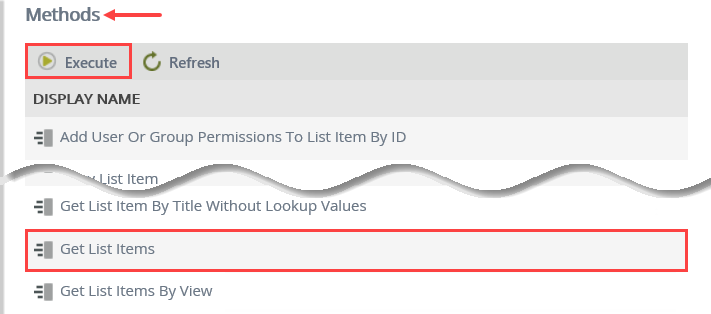
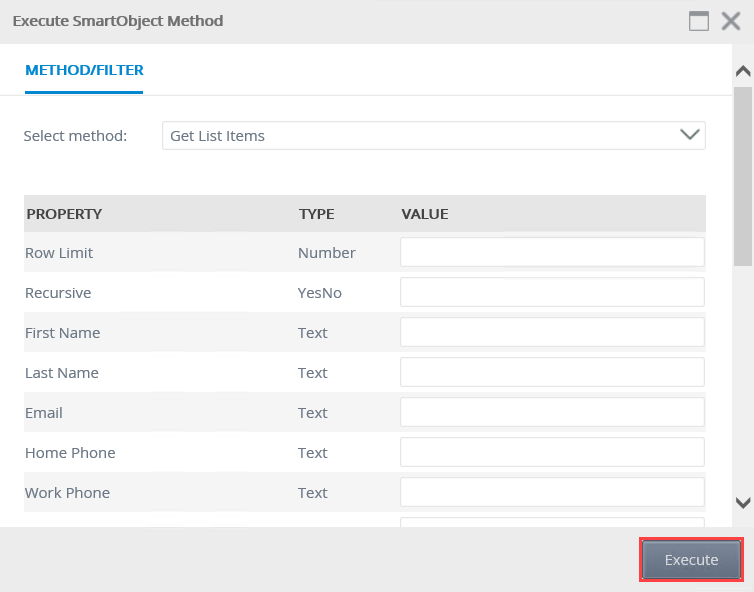
- Execute a list method that returns the contact records you previously entered. This action demonstrates how you can view the data from a source via a method and is useful for testing your application configuration. Begin by selecting the Get List Items method in the Methods section. Click Execute.
- On the Execute SmartObject Method screen, click Execute once again. You don't need to enter any parameters for this test. (Use parameters to filter data returned. In this case, you want to see all the records from this list so you do not apply any filters.)
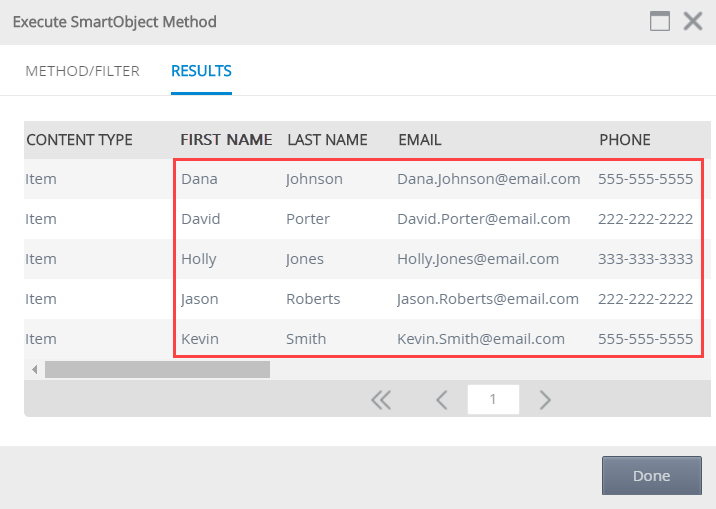
- A list of your contacts appears in the results pane. This confirms the Contact List SmartObject is linked to your SharePoint list as you are now viewing data outside of SharePoint! Click Done to close the results screen. Note that your list of contacts is likely different from the image below, depending on the values you entered.
- Execute a list method that returns the contact records you previously entered. This action demonstrates how you can view the data from a source via a method and is useful for testing your application configuration. Begin by selecting the Get List Items method in the Methods section. Click Execute.
Review
When creating application elements from SharePoint lists or libraries, you can choose from the following options: data, forms, workflow, and reports. In this step, you created the data application element (or Contact List SmartObject). You learned that you can view the details, properties, and methods for a SmartObject from the K2 Management site. Executing the Get List Items method demonstrates the link between the SmartObject and the SharePoint list and confirms the connection is functioning! In the next step, you create a new view and form in K2 Designer, using the Contact List SmartObject as the data source.