Escalation
Escalations are used to perform an action if a certain interval has passed and the User Task step in the workflow has not completed yet. For example, an escalation may be that if the Approval User Task in the workflow is not completed within 48 hours, the approval task should be re-assigned to the approver’s manager and an E-mail sent to both the original approver and the originator of the workflow to inform them that an escalation has occurred. If the approval task is completed within 48 hours, the escalation will never execute.
K2 escalations consist of a time-based component and an action component.
The time component defines when the escalation should fire, and could be a relative date-time (for example, fire the escalation 48 hours after the Activity is started) or an absolute date-time (for example, calculate the date-time 2 days before the item’s due date, and then use this date as the Escalation Rule for the Escalation).
The action component defines what action K2 should take when the escalation time is reached. The actions or escalation types that are applicable to a User Task escalation are, e-mail, redirect or expire. It is possible to define multiple escalations with different time and action components on the same item, which is useful if you have a “escalating levels of Escalation” requirement.
Follow these steps to configure an escalation rule:
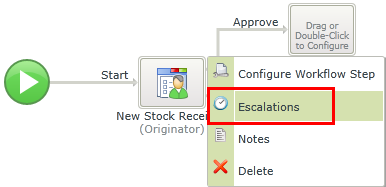
- Right click on the User Task you want to configure the escalation rule for and select the Escalation option.
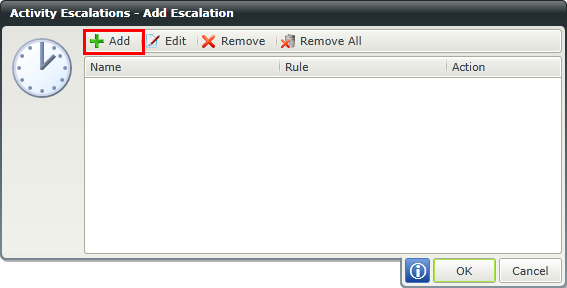
- Click on Add.
- The Add Escalation wizard opens.
- Configure the Escalation wizard as defined below:
- Send an E-mail,
- Redirect the work item to another user, or
- Expire the item. Expiring the item will result in no further action being taken on this work item.
- Click Next.
- The next page in the wizard will depend on the Escalation Type selected earlier.
- If the E-mail action was selected you will be able to customize an e-mail to be sent to a user, the participants or the originator.
- If the Redirect action was selected, you will be able to select a user/s to redirect this item to.
- If the Expire action was selected you can just click Finish as no further configuration will be required.
- Click Finish to complete the escalation configuration.
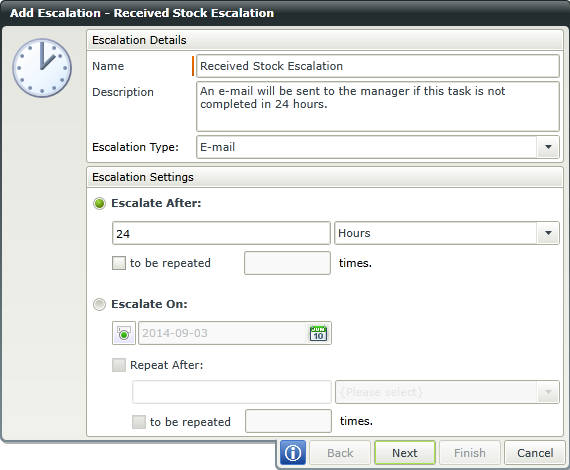
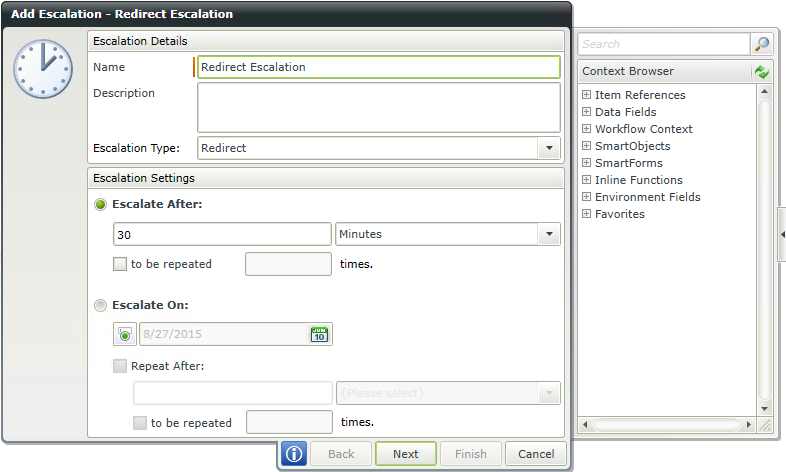
| Escalation Details | Description |
|---|---|
| Name: | Type a name for the escalation rule. |
| Description: | Type a description for the escalation. |
| Escalation Type: | Select the action that must be taken from the drop-down. The available options are: |
| Escalation Settings | Description |
| Escalate After: | Here you can specify the number of seconds, minutes, hours or days before the escalation rule must start. Select the to be repeated check box and enter the number of times this action is to be repeated. The repeat option will most likely be used with an e-mail action. |
| Escalate On: | Specify a date on which the escalation must start by using the calendar provided. Select the Repeat After check box and enter the number of seconds, minutes, hours or days this action is to be repeated, if required. The repeat option will most likely be used with an e-mail escalation action. |
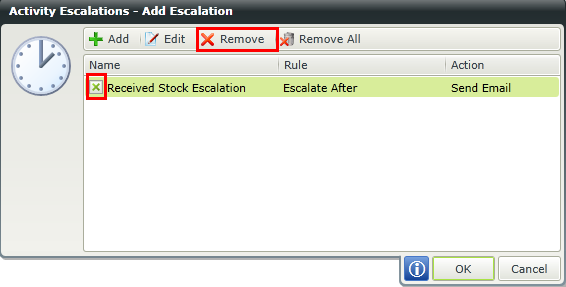
To edit an escalation, right-click the User Task and select Escalation. Select the check box of the escalation you want to edit and click the Edit button.

To delete an escalation, right click the User Task and select Escalation. Select the check box of the escalation you want to delete and click the Remove button. To delete all the escalation rules click the Remove All button.
Use the Redirect Escalation Type to specify users to redirect the workflow on escalation.
Use the Search feature to search for users or drag a value from the Context Browser such as a Data Field, Item Reference or a SmartObject Load method. Note that when a SmartObject Load method is used, an input property is required for the correct data to load.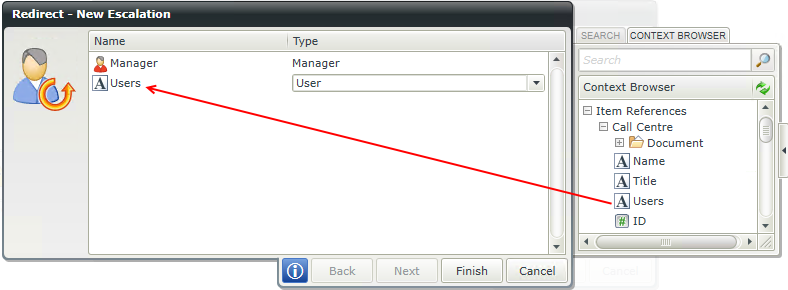
- Only User Item References can be used - Groups and Roles cannot.
- Be sure to drag and drop the correct Item Reference as the user name instead of a different user property. Using a different user property such as email will not work.
- The workflow process stops if an empty value is supplied in one of the references, but will continue if other references are populated. At least one value is required per reference.
- Multiple user selection is not available when using a Text column in SharePoint.
- When using a Lookup column, only a single user selection is available and should be the value of the Column Name.