How To: Use a Loop Step to Loop Through a List
This article illustrates how to use a Loop step in a workflow to loop through items in a SharePoint list. You loop through a list of customers and send each one an email. When the step reaches the end of the list, the looping completes and the workflow moves to the next step.
Using the Loop step in a workflow
Scenario
You work in Sales where you maintain a list of customers. Each month, you email your customers with the latest deals. To accomplish this, you have configured a workflow that sends an email to each customer in your list. You start the workflow manually when you need to.
Steps
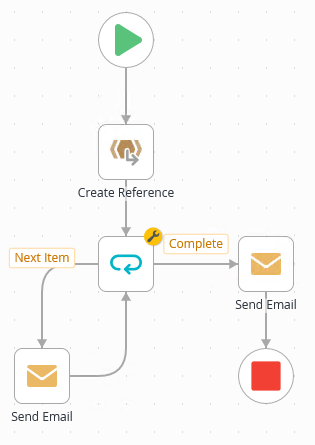
You begin by creating a SharePoint list to store your customer contacts. You create data and workflow application elements for the list. The first step in your workflow creates a reference to the data represented by a SmartObject containing the list of all customers. The second step performs the looping action based on the number of customers and uses the reference. In the loop, you send an email to each customer. When the looping completes, you send a final email to yourself to confirm the workflow process completed.
Setup Steps
The following steps set up the scenario from start to finish. If you want to skip the setup steps and view the topic step, go to Add and Configure Workflow Steps to Loop Through List Items.
- In SharePoint, create a custom List called Customers. Add at least one additional column called Email. (You can add other columns if you like.) Add at least three customers. For ease in testing, use the same email address for all customers. Create the Data and Workflow application elements. For the workflow start event, select Workflow is manually started.
- From SharePoint, create a custom List and name it
Customers.
Click Create.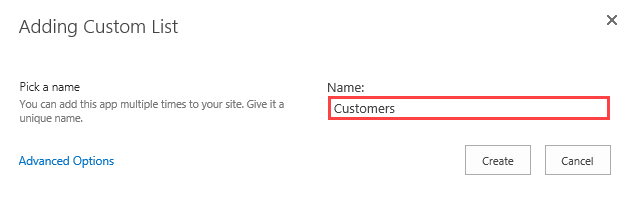
- Add a column and name it
Email
and configure it as a single line of text.
(Optional) Add additional columns to complete your contacts. You must have the email column to complete this demonstration. You can use other columns as variables in your email body, such as first name, title, and company name.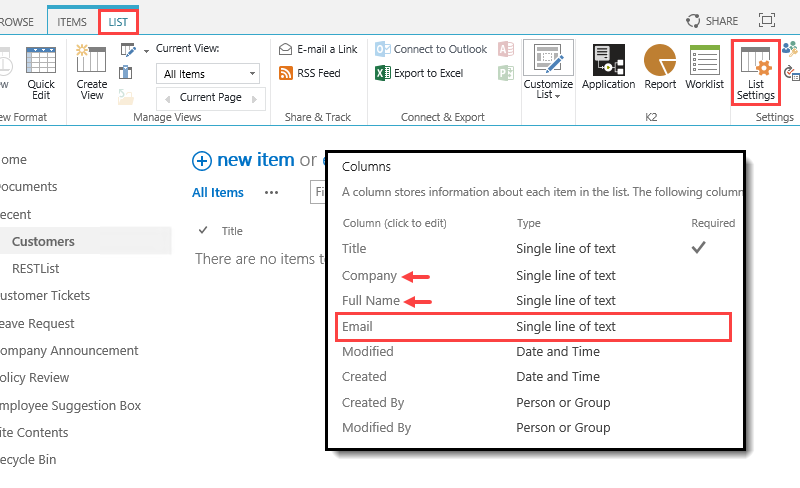
- Click the Customers list title to return to the landing page. Add at least three records. For testing, use the same email address for all three records. If working on a K2-provided VM, enter
Administrator@denallix.com
as the email value. If in your own environment, use your email address. In this way, you can view all the emails K2 sends as it loops through the list items.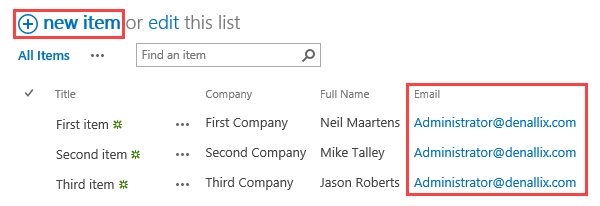
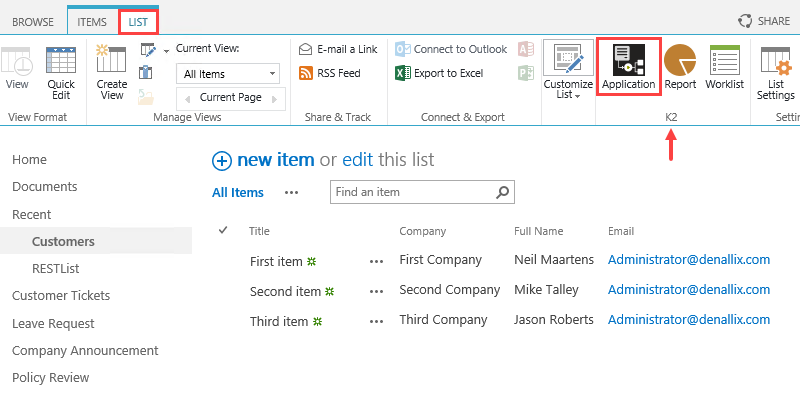
- From the list landing page, click the List tab. Click the Application icon found in the K2 group.
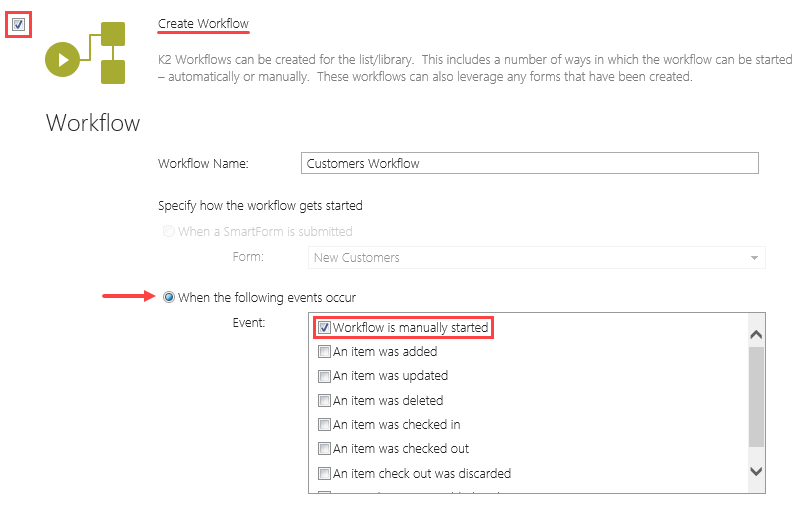
- Locate the Create Workflow section and check the Workflow option. Check the Workflow is manually started option in the workflow start events section. Click OK (at the bottom of the page). (You are not selecting the Forms or Reports elements for this demonstration.)
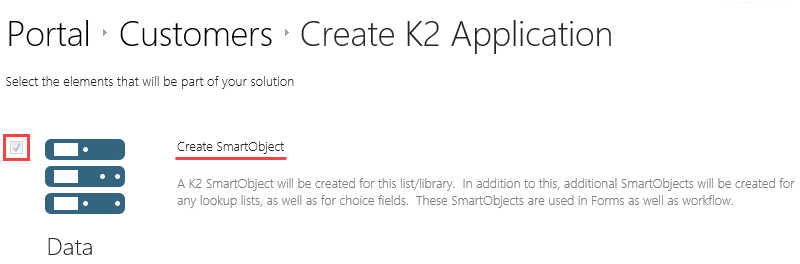
Next, you create the data and workflow application elements. The data element is a SmartObject bound to the SharePoint list. In this way, you can integrate the list properties and methods with other K2 elements, such as forms and workflows. You create the workflow as well, where you incorporate the steps that reference the list, then loop through its items.
On the Create K2 Application page, notice that K2 creates the Data element by default (a SmartObject).
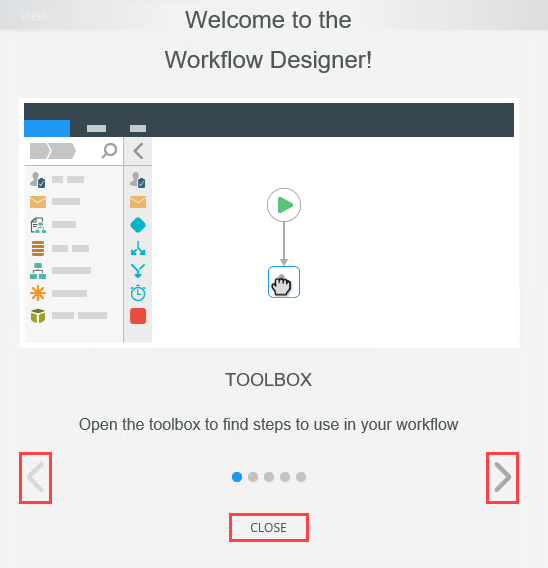
You see a Welcome screen with an interactive panel. You can click the right and left arrows to learn more about the workflow designer. Click Close to proceed to the design canvas.
- From SharePoint, create a custom List and name it
Add and Configure Workflow Steps to Loop Through List Items
In the next few steps, you create a reference to the list, then add the looping step and its action (sending emails to each customer).
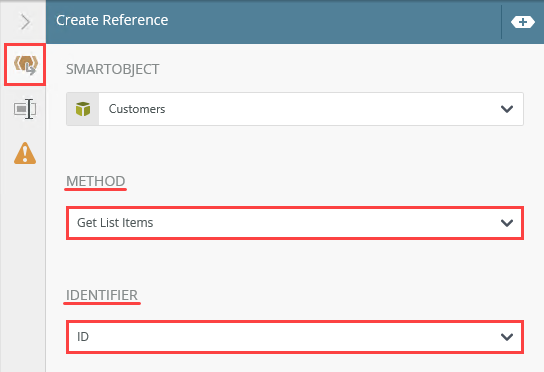
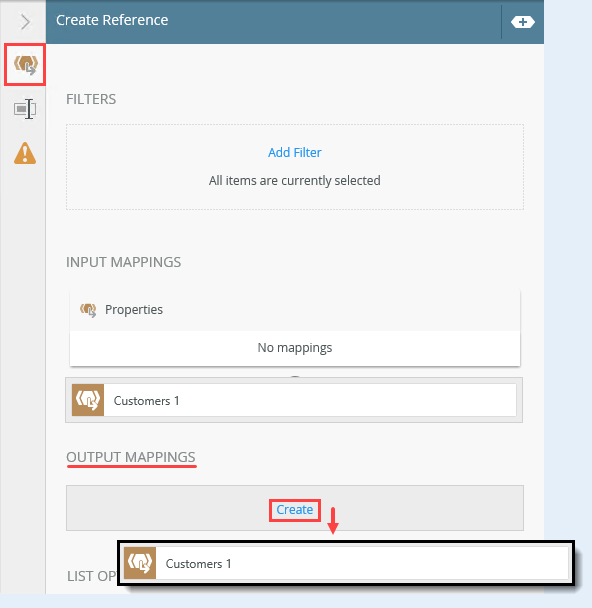
- Add a Create Reference step. Select the Customers SmartObject and the Get List Items method. Use ID as the identifier. Create Output Mappings, keeping the default name, Customers 1, for the reference.
Begin the workflow by creating a reference to the Customers SmartObject. (Remember, the SmartObject is bound to the Customers SharePoint list.) A reference is a pointer to a list, list item, or some other object. For example, you create a reference to list items so that you can loop through those items in a workflow.
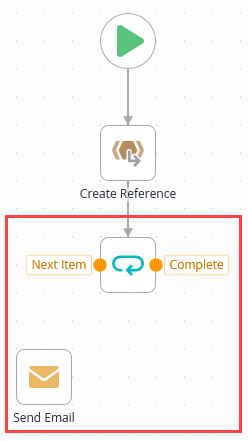
- From the Toolbox > Basic menu, drag a Create Reference step into the empty placeholder below the Start step.
 Notice the red warning badge on the Create Reference step. This badge indicates there are required settings in the Configuration Panel. When you expand the panel, you see the same badge next to the required settings.
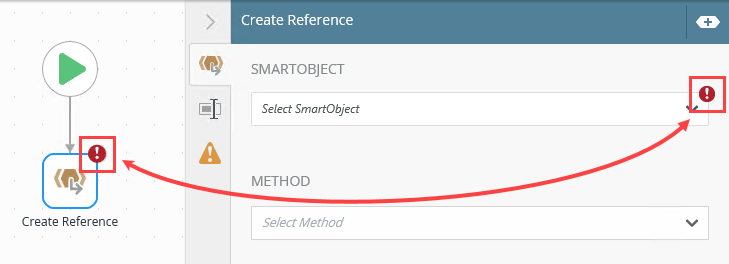
- Select the Create Reference step and expand the Configuration Panel.The Configuration Panel allows you to configure and customize the steps you add to your workflow.
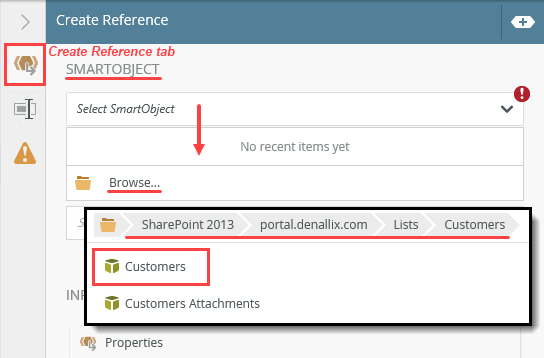
- Select the Create Reference tab if it is not already active. Under the SmartObject heading, click the Select SmartObject bar. Click Browse. Navigate to the Customers list, then select the Customers SmartObject. Your SharePoint path may be different than the image below, depending on your environment and where you created the custom list. Click OK.
- Under the Method heading, click the Select Method bar and choose Get List Items. The Identifier section appears. Select ID. You are creating a reference to the Customers list, using the ID property as the unique identifier for each list item.
- Scroll down and locate the Output Mappings heading. Click Create. You see the Customers 1 reference. This reference points to each list item (by ID). Now, you have a reference to the list and a reference to each list item.
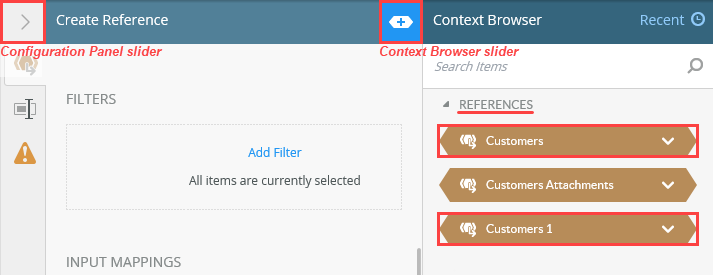
- Expand the Context Browser.The Context Browser contains references, variables, functions, and SmartObject properties. At runtime, K2 replaces references and variables with live data. For example, K2 replaces the ID reference with the ID of the current record.
- Notice the references include the Customers reference to the list and the Customers 1 reference to list items. You use the Customers 1 reference in the next step, where you loop through each list item. Collapse the Context Browser by clicking its slider. Collapse the Configuration Panel by clicking its slider.
- From the Toolbox > Basic menu, drag a Create Reference step into the empty placeholder below the Start step.
- Add a Loop step. Connect it to the Create Reference step. Select the Customers 1 reference as the list to loop through.
Next, you add a Loop step and configure it so that it points to the Customers 1 reference. In this way, the step loops through each Customers list item by ID.
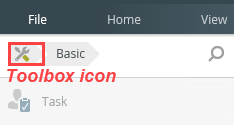
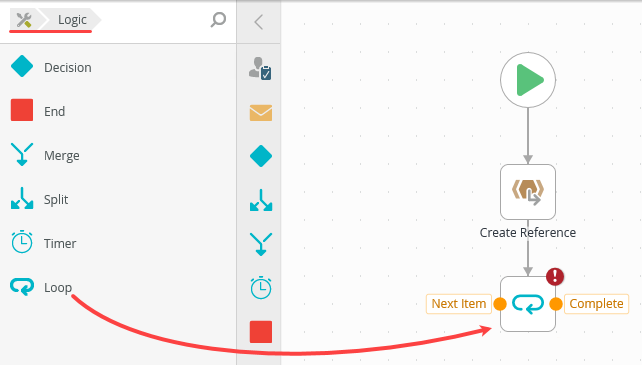
- From the Toolbox > Logic node, drag a Loop step just below the Create Reference step. Connect the two steps.To return to the Toolbox main menu, click the Toolbox icon.
 To connect steps, hover over the first step until you see a handle appear. Click and drag the handle into the second step. Click the design canvas to set the line.
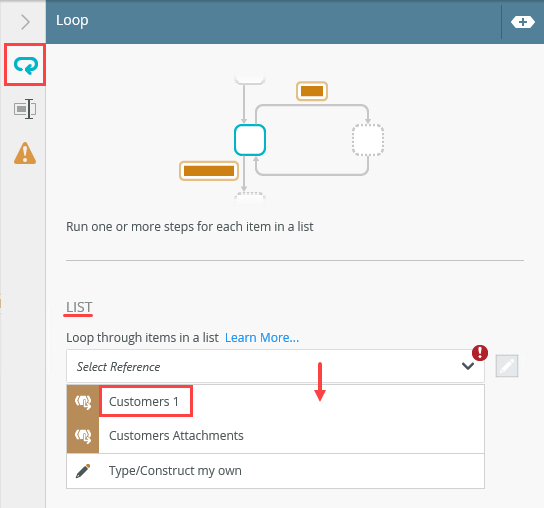
- Select the Loop step and expand the Configuration Panel. Select the Loop tab if it is not already active. Under the List heading, click the Select Reference bar. Select Customers 1.
You use the reference that points to each list item.
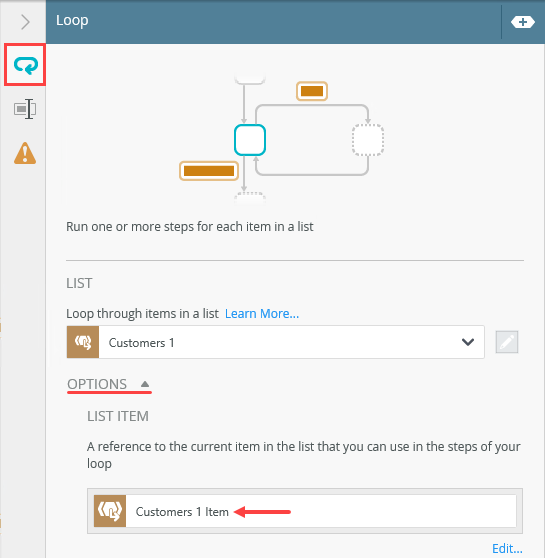
- Expand the Options section. Notice the new reference, Customers 1 Item. This reference points to the current record (in the looping process) and makes it possible to use properties from this record in other steps. For example, you use the email property in the Send Email configuration later on. Collapse the Configuration Panel.
- From the Toolbox > Logic node, drag a Loop step just below the Create Reference step. Connect the two steps.
- Add a Send Email step and connect it to the Next Item outcome. Use the Email property from the Customers 1 Item reference for the To value. Add your own content for the subject line and message body. Use properties from the SmartObject to personalize your message if you like. Connect the Email step to the Loop step.
Now you need a step that performs an action of some kind. For this demonstration, you send an email to each customer in the list.
- From the Toolbox > Basic node, drag a Send Email step onto the canvas.
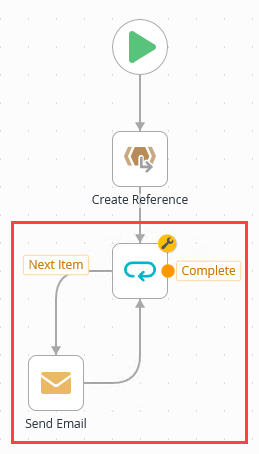
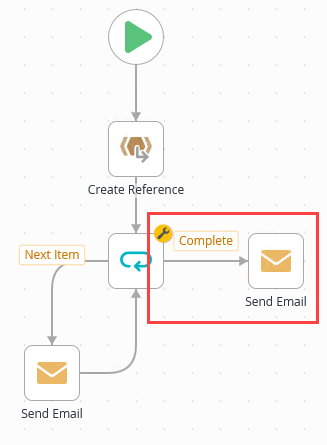
- The Loop step generates two outcomes: Next Item and Complete. The workflow loops through steps connected to the Next Item outcome until it reaches the end of the referenced list. At that point, it follows the Complete outcome. Connect the Next Item outcome to the Send Email step. Connect the Send Email step back to the Loop step.
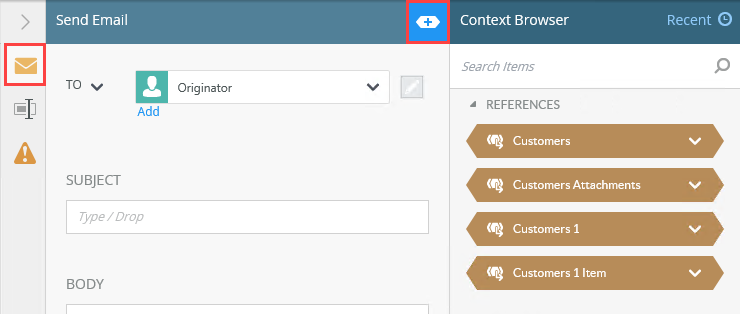
- Select the Send Email step and expand the Configuration Panel. Select the Send Email tab if it is not already active. Expand the Context Browser.
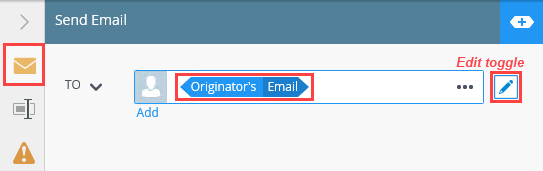
- Click the edit toggle to the right of the Originator bar. Select Originator's Email and delete it.
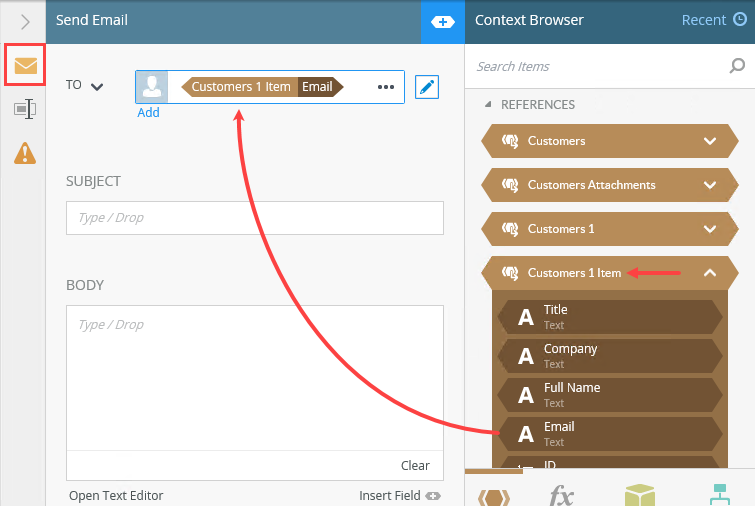
- Expand the Customers 1 Item reference. Drag the Email property into the To text box. Now, the recipient value points to the email address for the current record (during the looping process).
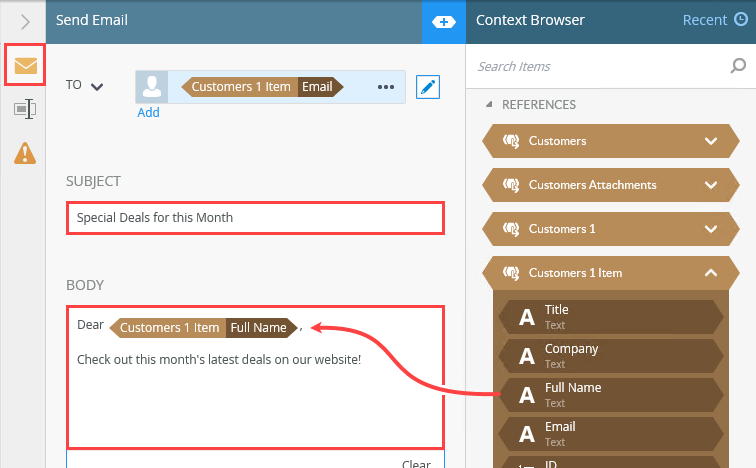
- Configure the Subject and Body sections with your own content. If you like, use properties from the Customers 1 Item reference to personalize your message.
By default, the email To value is Originator. This is the person who starts the workflow. You want the email recipient to be the customer in your Customers list. In the next step, you replace the default value with a reference to the current record's email property.
- From the Toolbox > Basic node, drag a Send Email step onto the canvas.
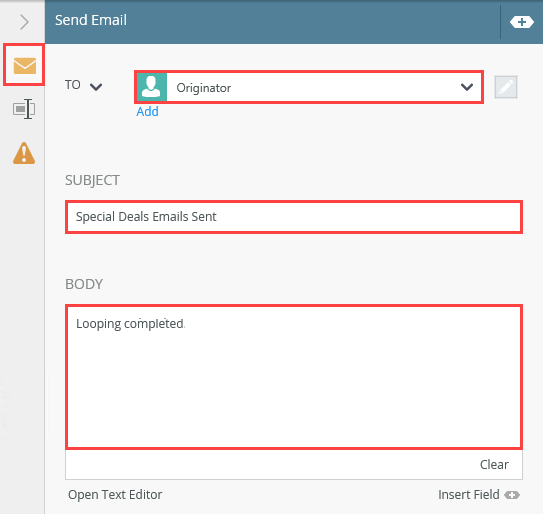
- Add a Send Email step and connect it to the Complete outcome. Keep the default recipient, Originator. Use your own content for the subject line and message body. Add an End step and connect it to the Send Email step.
- Next, you configure an email that lets you know the looping is complete. From the Toolbox > Basic node, drag a Send Email step onto the design canvas. Connect the Complete outcome to the new step.
- Select the new step and expand the Configuration Panel. Leave the To value with its default, Originator. Enter your own content for the subject line and message body. Collapse the Configuration Panel.
- From the Toolbox > Logic node, drag an End step below the new Send Email step. Connect the two steps.Use End steps to complete workflow outcomes. You can configure End steps to terminate the workflow or use them as visual indicators that there are no more steps to follow. In this demonstration, the End step provides a clean end to the final Send Email path.

- Next, you configure an email that lets you know the looping is complete. From the Toolbox > Basic node, drag a Send Email step onto the design canvas. Connect the Complete outcome to the new step.
- Deploy the workflow.
- Deploying the workflow publishes it to the K2 server and makes it available for use. If you make any changes to the workflow, you must deploy it again so that K2 has the latest version. Select File > Deploy. When you see the success dialog, click File > Close to return to the SharePoint application elements page.

- Deploying the workflow publishes it to the K2 server and makes it available for use. If you make any changes to the workflow, you must deploy it again so that K2 has the latest version. Select File > Deploy. When you see the success dialog, click File > Close to return to the SharePoint application elements page.
- Test the looping process by starting a new instance of the Customers Workflow from the K2 Management site. Open your email client. There should see one email for each customer in your list, along with the final confirmation email.
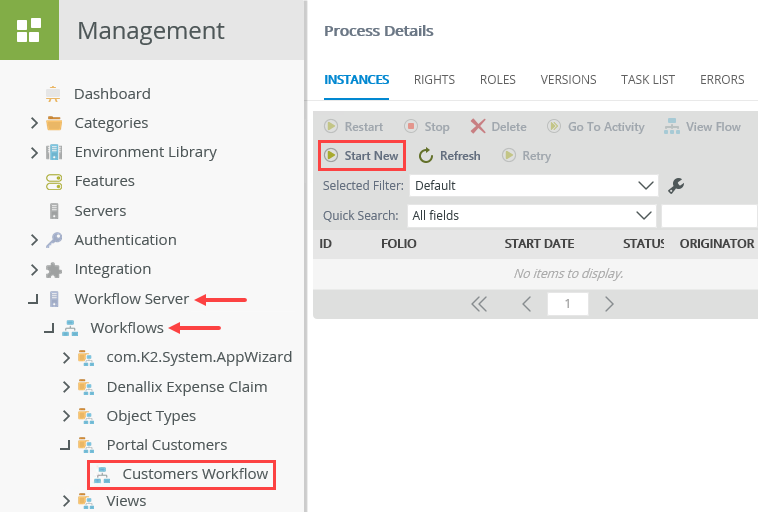
- Launch the K2 Management site.If you do not know how to access the K2 Management site, see Accessing K2 Sites.
- Expand the Workflow Server > Workflows node. Navigate to and select the Customers Workflow. (Your tree may not match the image below depending on your environment and where you created the custom list.) Click the Start New button located in the central pane.
- On the Start Workflow Instance screen, keep the default settings and click Start. Click OK for the confirmation dialog.
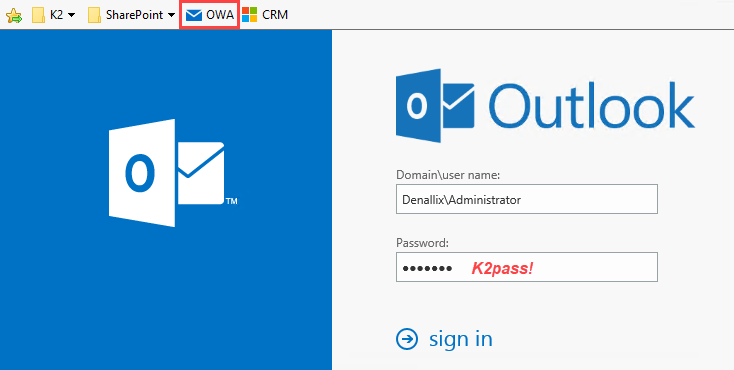
- Open your email client. If working on K2-provided VM, open Exchange in a new browser tab using the OWA link found in the Favorites bar.
You should see an email for each customer in your list. You should see an email indicating the looping process completed. Your email titles and message may not match the image below, depending on the content you entered while configuring the Send Email steps.

- Launch the K2 Management site.
Review
Use the Loop step in a workflow to parse through a list of items. Often, this process includes an action such as sending an email to a list of recipients or updating a column for each record. In most cases, the loop step uses references for list values; therefore, a Create Reference step often precedes the Loop step. When there are no more items to loop through, the loop completes.