How To: Use a workflow as an intermediary to upload a file from a form to cloud storage
If you have a Cloud Storage provider where files are uploaded from a form, but you do not want to give access or create accounts for all users who might use the form to upload files, you can use a workflow as an intermediary to upload files to a cloud storage provider. This topic explains how to allow users to upload files to a form, store those files in a temporary location, and then use a workflow to copy the file from the temporary location to the cloud storage provider. With this approach, you use the existing feature activation permissions to allow the workflow to add files to the cloud storage provider, which means the user uploading the file to the form does not need to log in or have access to the cloud storage provider.
- Workflows: When a cloud storage SmartObject method is executed without user context, such as in a SmartObject step in a workflow, the account used during Feature Activation is used to access the cloud storage provider, and K2 uses the OAuth token created during Feature Activation. This is what is used in this How To.
- SmartForms: When a cloud storage SmartObject method is executed with user context, such as in a SmartForm, the person using the form must login with their cloud storage credentials, which creates an OAuth token. It does mean that the user needs access to the target cloud storage environment so that they can interact with the target provider. In this case, they have access to their own personal files and folders. See How To: Upload a file to Google Drive with a SmartForm for an example of this approach.
In this how-to, you create a K2 application to allow users to upload files to a Google Drive environment. You use a workflow to upload the file, which uses the account and OAuth token created during Feature Activation. Although this example uses Google Drive, the same approach works for other cloud storage providers as well. The necessary OAuth tokens and SmartObjects are created for each cloud storage feature you activate. For more information about the cloud storage service type and creating service instances, see Cloud Storage.
Using a workflow to upload a file to Google Drive from a form

Scenario
As part of an expense claim application, employees upload files to a Google Drive location, supporting their expenses. The file needs to be uploaded to your company's Google Drive, but you do not want to allow all employees to access the Google Drive location directly, so you use a workflow as an intermediary to upload the file from a SmartObject.
Steps
You create a SmartBox SmartObject to store the file and file name of your employee's expense claim document. You then create a view for your employee to use to upload the file to the SmartObject, and host that view in a form. You create a workflow that starts when the button on the view is clicked, which uploads the file from the SmartObject into the Google Drive folder. Finally, you test the form and workflow.
Setup Steps
The following steps set up the scenario from start to finish. If you want to skip the setup steps and view the topic step, go to Create a workflow to upload the file from the SmartObject to Google Drive.
-
Activate the Google Drive feature.
- See Google Drive feature activation for configuration steps.
-
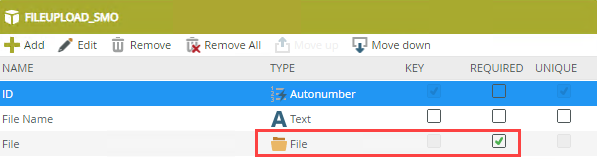
In K2 Designer create a SmartObject named FileUpload_SmO. Add FileName and File SmartObject properties. The Google Drive File SmartObject's Upload method that we use in the workflow requires these two properties as inputs.
If you are not familiar with creating a SmartBox SmartObject, see How To: Create A SmartBox SmartObject.
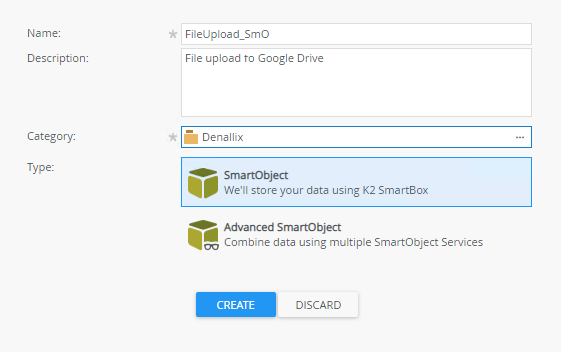
- In K2 Designer click the create SmartObject option.
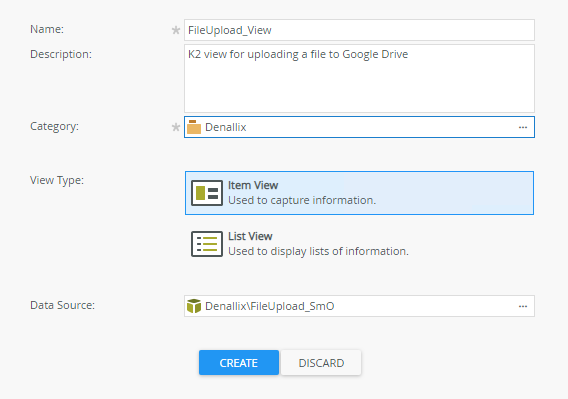
- Specify FileUpload_SmO as the SmartObject name.
- Specify a Description and Category. In this scenario the category is Denallix.
- Click Create.
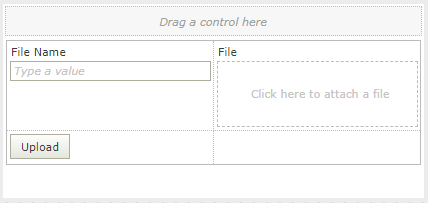
- Add File Name and File SmartObject properties as shown below:
- Click Finish to complete your SmartObject.
- In K2 Designer click the create SmartObject option.
- Create a view of the FileUpload_SmO SmartObject.
If you are not familiar with creating views, see How To: Create an Item View and a List View.
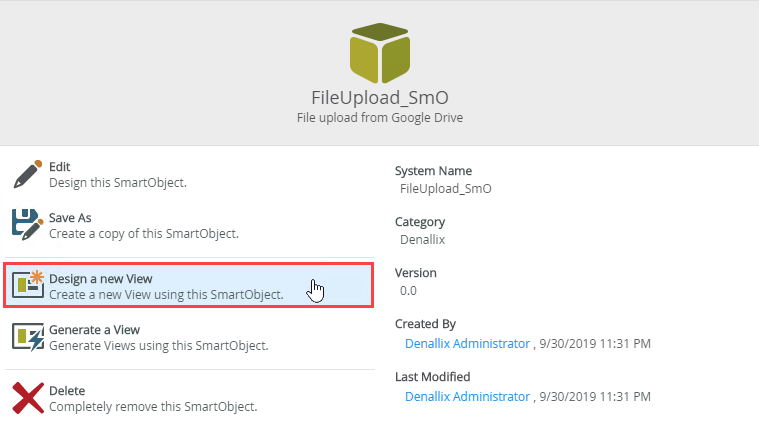
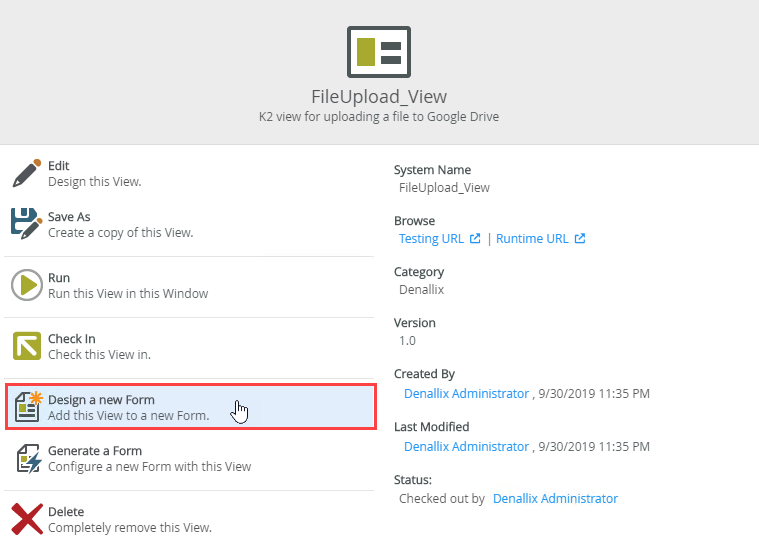
- On the FileUpload_SmO SmartObject page, click Design a new View.
- Specify FileUpload_View as the Name. Specify a Description.
- Leave Item View as the View Type.
- Click Create.
.
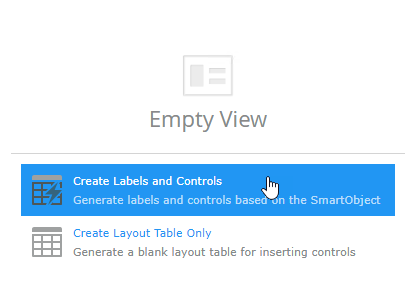
- Select Create Labels and Controls.
- Select the File Name and File fields, and the Create method.
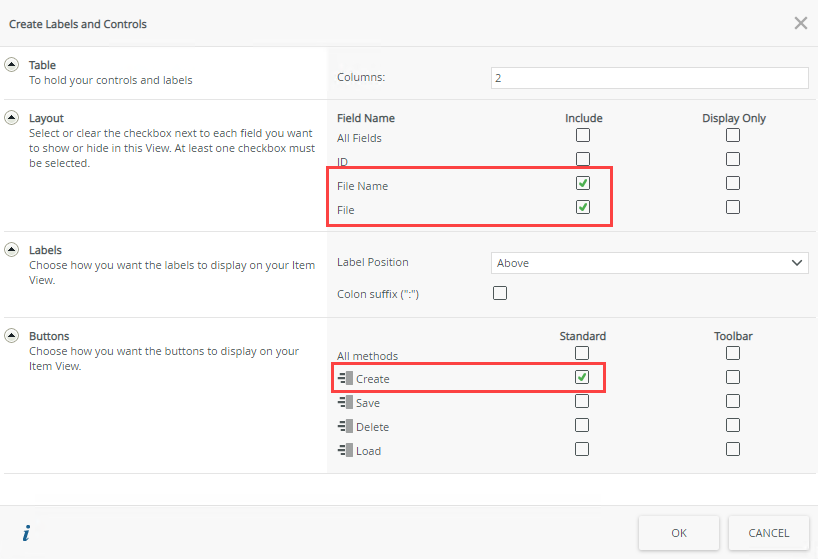
- Click OK.
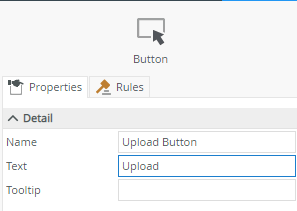
- Select the Create button control.
- Change the Name property to Upload Button and the Text property to Upload.
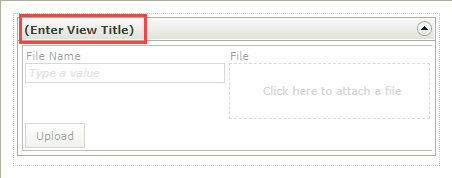
- Your view should look like this:
- Click Finish.
- On the FileUpload_SmO SmartObject page, click Design a new View.
-
Create a form for your FileUpload_View. In this scenario we only add FileUpload_View to the form, but a full expense claim form would have other views added.
If you are not familiar with creating forms, see How To: Create a Form.
- On your FileUpload_View page click Design a new Form.
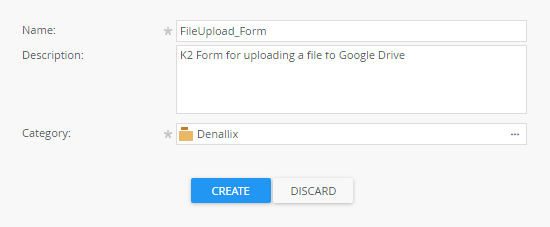
- Specify FileUpload_Form as the Name.
- Specify a Description and click Create.
- Click the Title bar and specify Upload File.
- Click Finish.
- On your FileUpload_View page click Design a new Form.
Create a workflow to upload the file from the SmartObject to Google Drive
Create a workflow that starts when the Upload button of the FileUpload_View is clicked. Add a Google Drive File SmartObject step and configure the Upload method with the FileUpload_SmO SmartObject reference properties from the form.
-
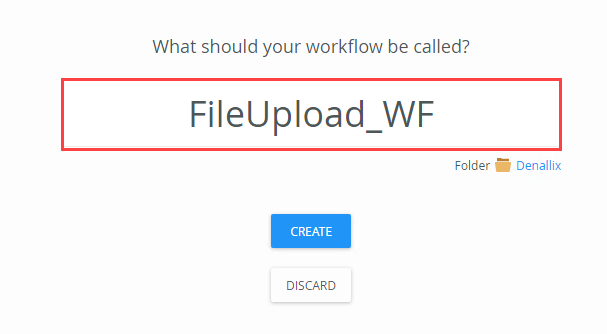
Create a new workflow named FileUpload_WF from your FileUpload_Form and configure the Start rule.
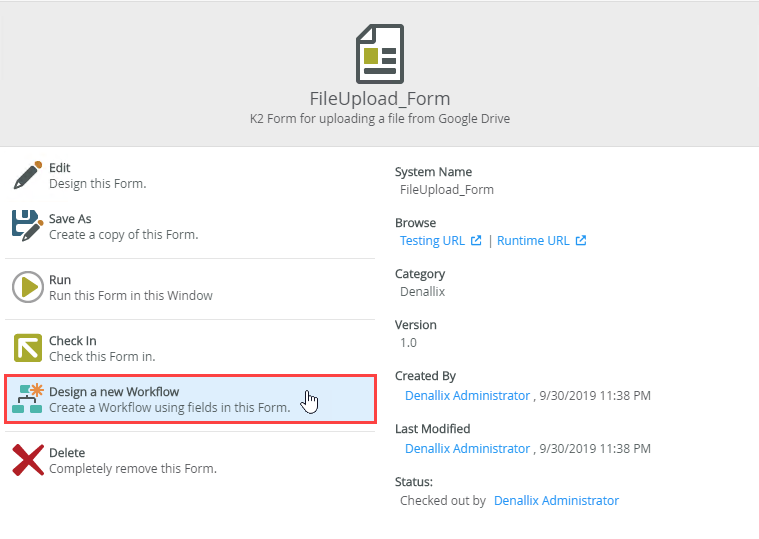
- On your FileUpload_Form page click Design a new Workflow.
- Specify FileUpload_WF as the workflow name and click Create.
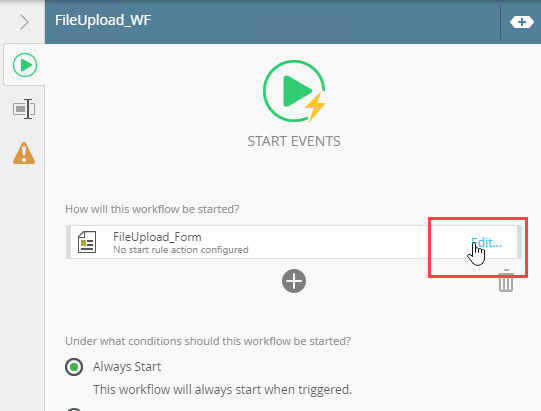
- Expand the Start Events panel (on the right) and click Edit.
- Click Next.
- Leave the default option of Do it for me! and click Next.
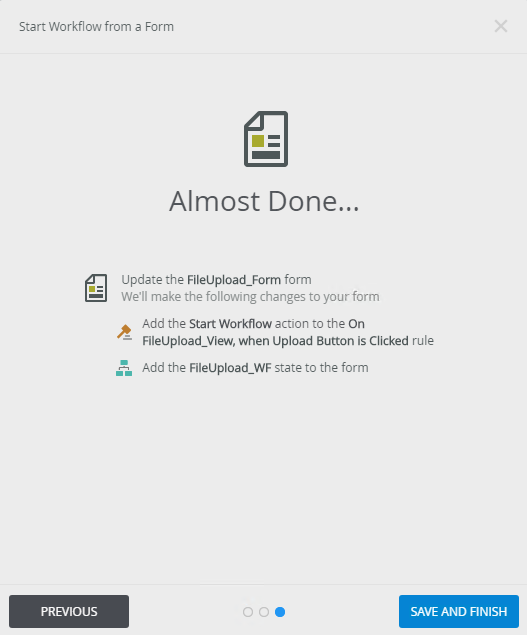
- Click Save and Finish.
- Click OK.
- On your FileUpload_Form page click Design a new Workflow.
-
Add a SmartObject step using the Google Drive File SmartObject. Configure the step with the Upload method.
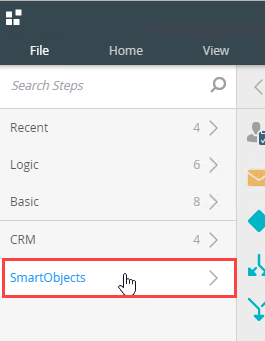
- Expand the SmartObjects step and navigate to Google Drive > [your Google Drive service instance].
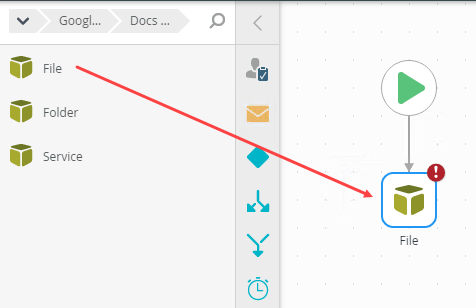
- Select the File SmartObject and drag it onto the design canvas step.
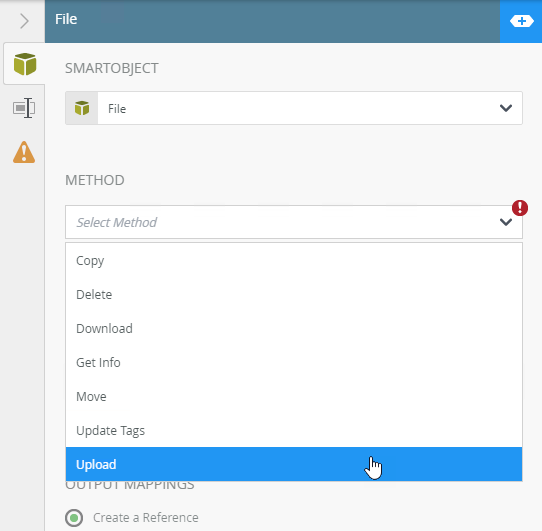
- In the SmartObject configuration panel select the Upload method.
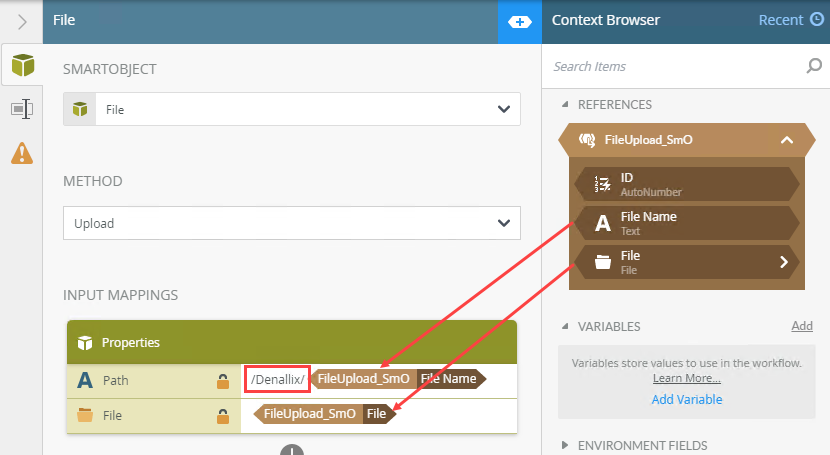
- In the Path property of the Input Mappings specify /Denallix/ (this is the folder that the file uploads to in Google Drive; your value may be different).
- Expand the Context Browser panel and expand the FileUpload_SmO reference. Drag File Name into the Path property, then drag File into the File property. When you created the workflow and associated the workflow with the form containing the UploadFile_Smo SmartObject, K2 automatically created a reference in the workflow that stores information about the specific file that was uploaded to the SmartObject. This is why we're using the reference in this step. Of course, the File Name and File could also come from another SmartObject, if needed.
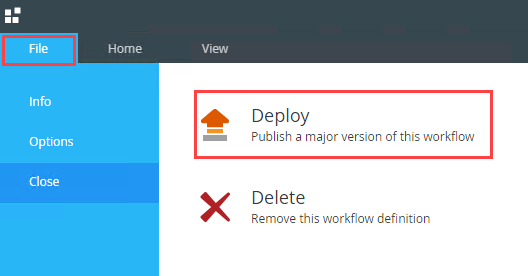
- Click File. Click Deploy.
- Expand the SmartObjects step and navigate to Google Drive > [your Google Drive service instance].
-
Test the K2 application by running the form.
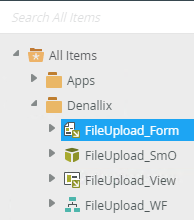
- In K2 Designer, browser to Denallix and select your FileUpload_Form.
- Click Run.
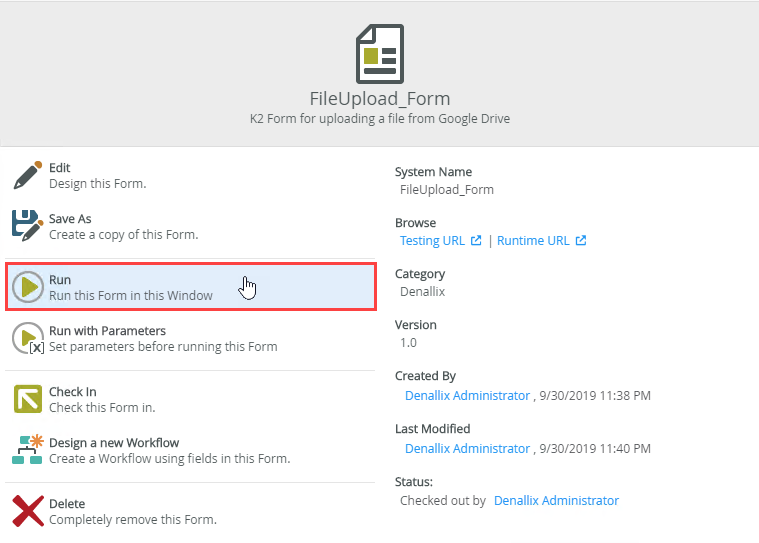
- Specify ExpenseClaim.pdf as the file name, then click the File attachment control and select your PDF file.
- Click Upload.
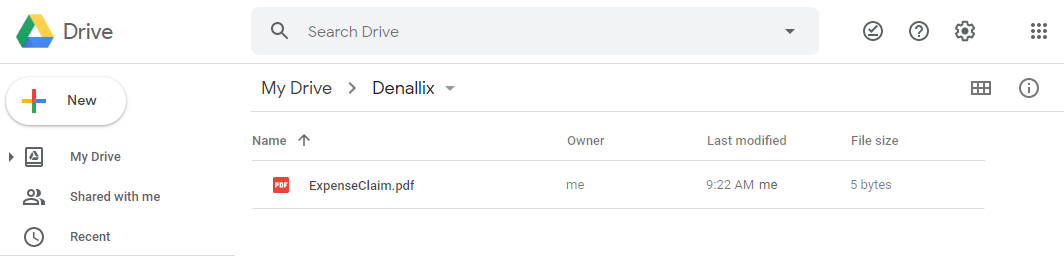
- Wait a couple of minutes for the workflow to complete, then check your Google Drive Denallix folder.
- In K2 Designer, browser to Denallix and select your FileUpload_Form.
Review
You created a SmartBox SmartObject that temporarily stores the file and file name of the expense claim document. You then created a view for employees to upload the file to the SmartObject, and hosted that view in a form. You created a workflow that starts when the button on the view is clicked, which then uploads the file from the SmartObject into your Google Drive folder. Finally, you tested the form and workflow.