How To: Download a file from Dropbox and attach it to an Email
In this article, you use the Dropbox File SmartObject to download a PDF file and attach it to an email sent by a workflow. This File SmartObject and others are created for each cloud storage feature you activate. These features allow you to integrate K2 with Dropbox, Box, Google Drive, and OneDrive using SmartObjects, and then use these SmartObjects in your K2 solutions. For more information about the cloud storage service type and creating service instances, see Cloud Storage
Request Information sends an email with an attachment downloaded from Dropbox
Scenario
Your company uses an online form for customers to request information. When they click Request Information, your form starts a workflow that sends an email with your product brochure attached. The brochure is a PDF file stored in Dropbox.
Steps
In this scenario, you create a new SmartObject to store information requests. You use that SmartObject to create a form for your customers to enter their name and email address. You then create a workflow in which you use the File SmartObject, configured for your Dropbox service, to attach the product brochure in an Send Email step. Your workflow starts when the form is submitted.
Setup Steps
The following steps set up the scenario. If you want to skip the setup steps and view the topic step, go to Design a new workflow from your form.
- Create a SmartObject that contains your customer request properties (name and email).
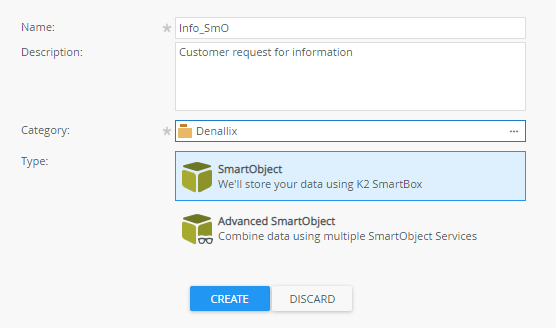
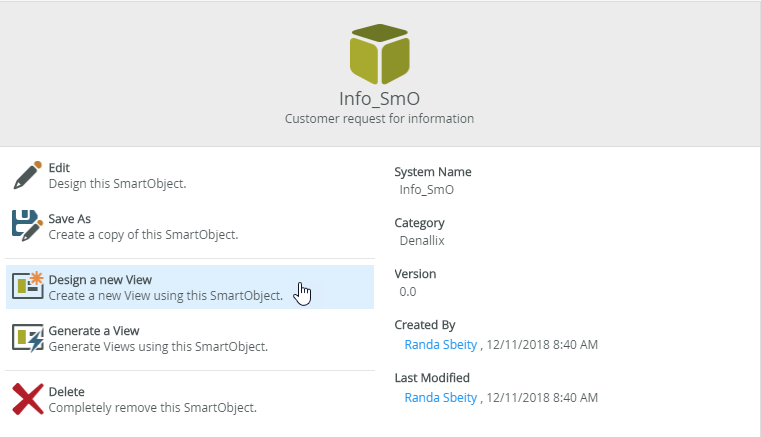
- Create a new SmartObject in K2 Designer. Name the SmartObject Info_SmO. Select the SmartObject option and click Create.
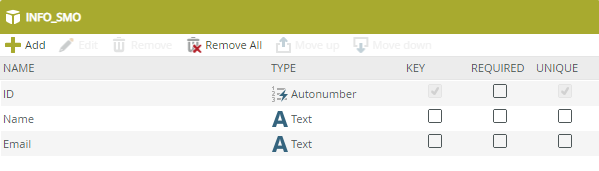
- Click Add to add the Name and Email text properties as shown in the image below. Click Finish to save the SmartObject and exit.
If you are not familiar with creating a SmartBox SmartObject, see How To: Create A SmartBox SmartObject.
- Create a new SmartObject in K2 Designer. Name the SmartObject Info_SmO. Select the SmartObject option and click Create.
-
Design a new view from your SmartObject.
- Create a view from the SmartObject. Select Design a new View on the Info_SmO page.
- Name the view Info_View and select Item View.
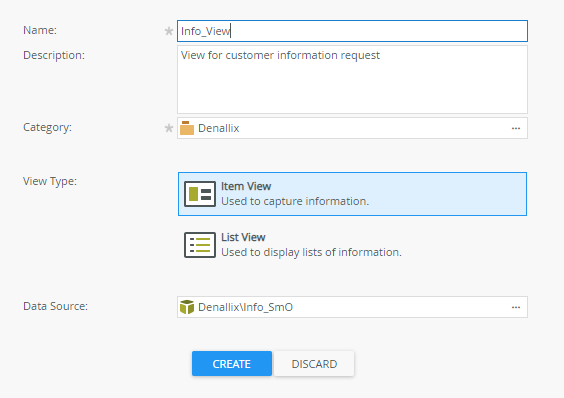
- Click Create.
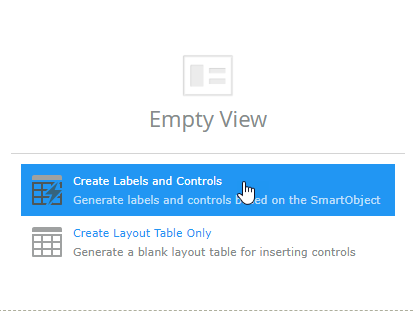
- Select Create Labels and Controls.
- Select to include Name and Email layout field names, and check the Create method as a Standard button .
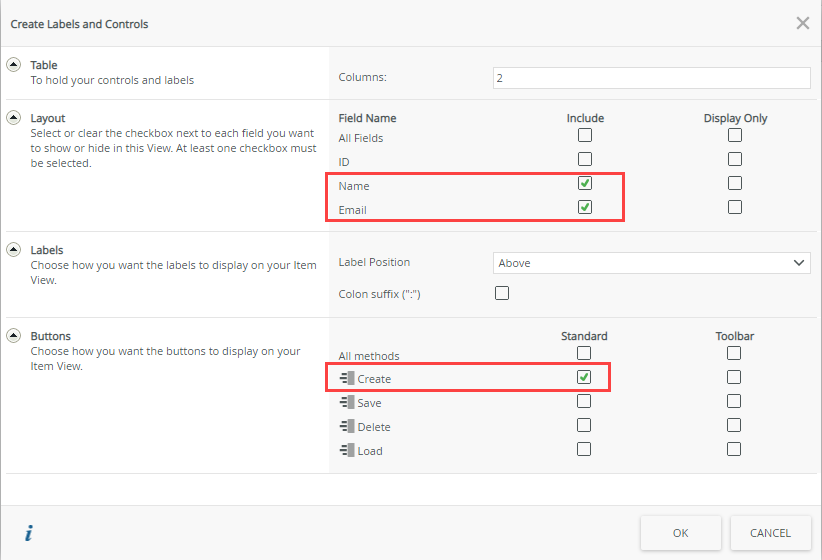
- Click OK to create your view.
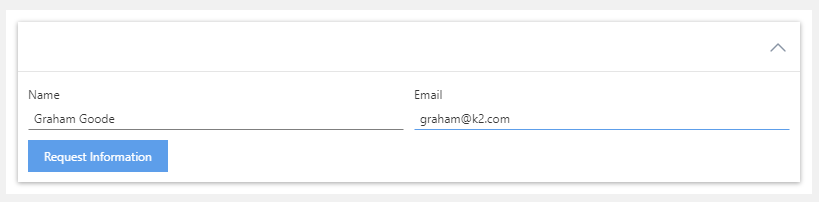
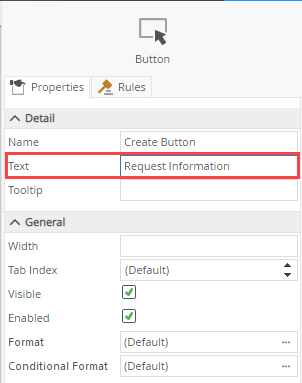
- On the view design canvas, select the Create button and change the Text property to Request Information.
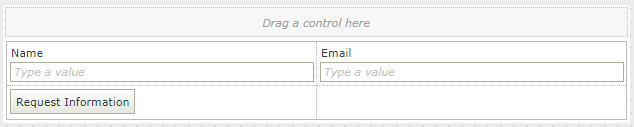
- Your view looks similar to the following image:
- Click Finish to save your view.
- Create a view from the SmartObject. Select Design a new View on the Info_SmO page.
- Design a new form from your item view.
- Create a form from the item view. Select Design a new Form from the Info_View page.
If you are not familiar with creating forms, see How To: Create a Form.
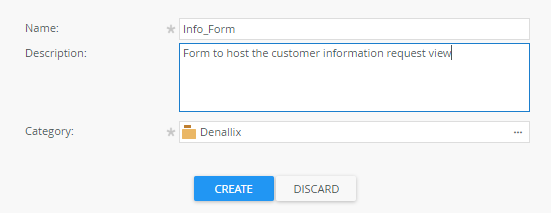
- Specify a Name and Description as shown in the image below.
- Your form looks similar to the following image:
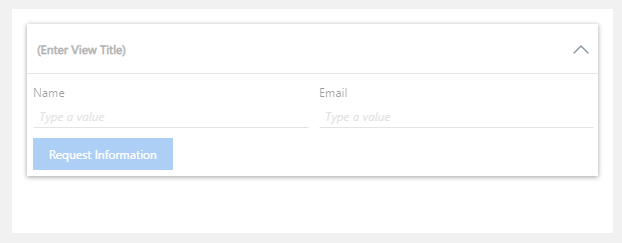
- Click Finish to save your form.
- Create a form from the item view. Select Design a new Form from the Info_View page.
If you are not familiar with creating forms, see How To: Create a Form.
Create a workflow that downloads the file and attaches it to an email
Create a workflow that starts with a form and then configure a Send Email step to send the product brochure stored in Dropbox as an attachment to the email.
-
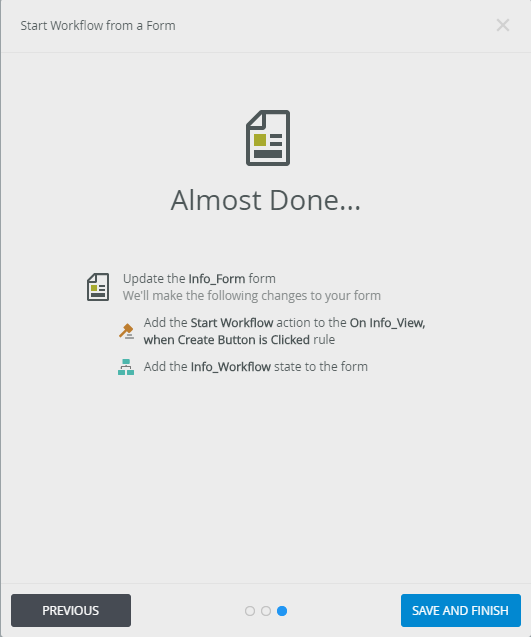
Design a new workflow from your form
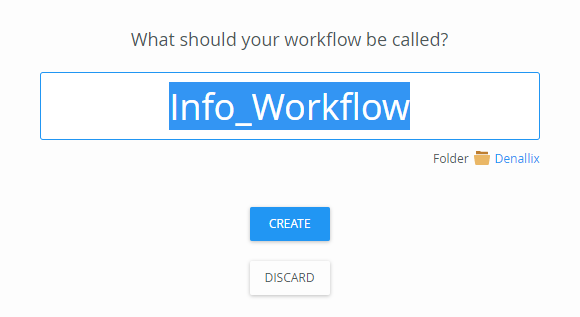
- Create a workflow from the form. Select Design a new Workflow on the Info_Form page.]

- Specify Info_Workflow as the name and click Create.
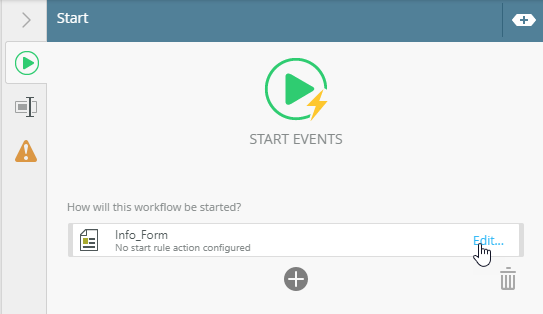
- Expand the right panel to see the Start Events page. Click Edit.
- Click Next, then Next again, keeping the default options.
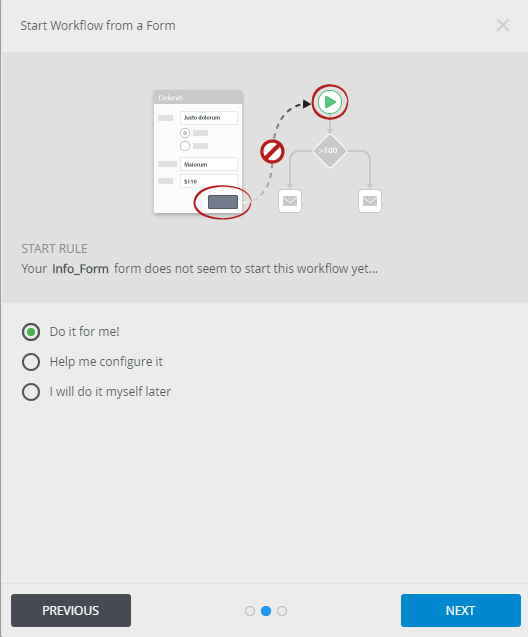
- Click Save and Finish to complete the start event.
- Create a workflow from the form. Select Design a new Workflow on the Info_Form page.]
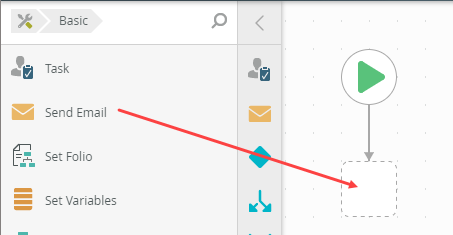
- Add a Send Email step that uses the information from your form to send an email to your customer.
- Drag and drop the Send Email step onto the workflow canvas.
- Expand the right panel to see the Send Email configuration page.
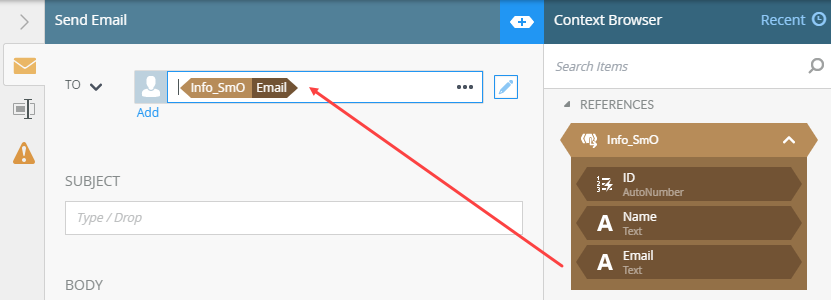
- Click the Edit button of the To property. Select the Originator's Email field and press Delete.

- Expand the Context Browser. Expand the Info_SmO reference. Drag and drop the Email field into the To property.
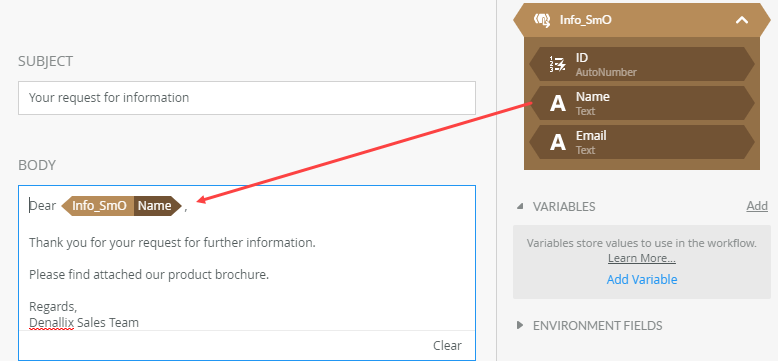
- Specify Your request for information as the Subject.
- Type the email body message as shown in the following image. Drag and drop the Name field into the email greeting section.
- Drag and drop the Send Email step onto the workflow canvas.
- Configure the email attachment to use the Download method of the File SmartObject to attach the product brochure from Dropbox.
- In the Attachment section, click Add Attachment

- Select the SmartObjects tab in the Context Browser. Navigate to the Categories > Dropbox folder. If you've activated a different cloud storage feature, select that one instead of Dropbox.
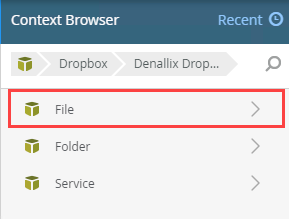
- Select your File SmartObject and then select the Download method. Drag and drop the File property into the attachment field.

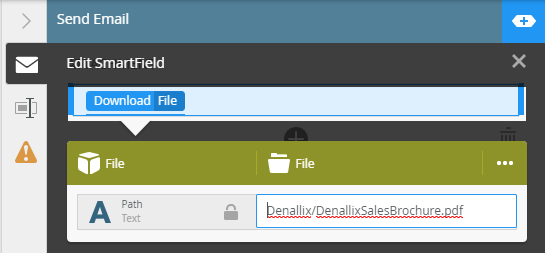
- Click the Download File field to configure it.
- Specify the Path (including the file name) for the file in Dropbox for your product brochure and close the SmartField Composer (click the X). In this example the Path is Denallix/DenallixSalesBrochure.pdf.
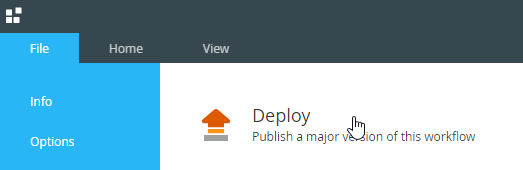
- Deploy your workflow
- In the Attachment section, click Add Attachment
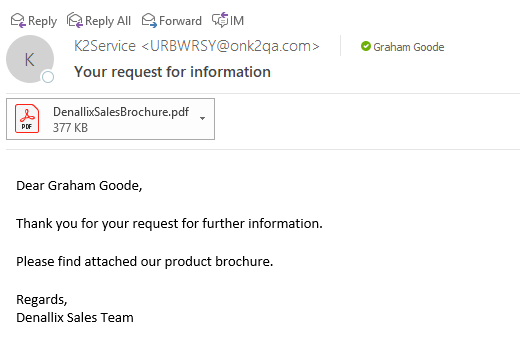
- Test your workflow by submitting a request for information form.
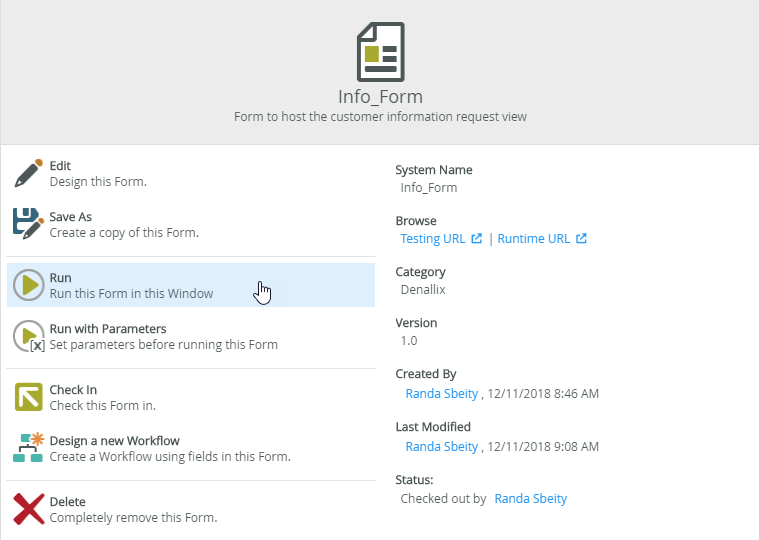
- In K2 Designer, select your Info_Form and click Run.
- Specify a Name and Email.
- Click Request Information.
- Check your inbox to see the email with the file attachment that was downloaded from Dropbox.
- In K2 Designer, select your Info_Form and click Run.
Review
You created an information request form to ask for the name and email of potential customers. Your form started a workflow that uses the Download method of the Dropbox File SmartObject to attach a product brochure to the information request email.