How To: Create a SmartObject to connect to a SQL Database
You can use an advanced SmartObject to access data from a SQL Server database. For example, you can create a SmartObject of a table in an SQL Azure database, and then create a SmartForm view to read and edit the data stored in that database.
SmartForm view of the Sales - Customer data from a SQL Azure database table

Scenario
Your company has a SQL Azure database used by your Sales organization to store customer content. You need to create a list view of customers from the customer database table.
Steps
First, create a new SQL Server Service Instance to connect to the SQL database. Then you create an advanced SmartObject for the tables/views/stored procedures in the database that you want to interact with. There are two ways you can create the advanced SmartObject:
- Create an Advanced SmartObject in K2 Designer
- Use the Generate SmartObjects option in K2 Management > Integrations > Service Instances
Once the SmartObject is created, you create a SmartForm to display the data.
Setup Steps
The following steps set up the scenario from start to finish. If you want to skip the setup steps and view the topic step, go to Create an advanced SmartObject to access the SQL data.
- Use the table settings below to configure a new service instance of the SQL Server Service service type in K2 Management. This data source provides look-up values for the sales categories.
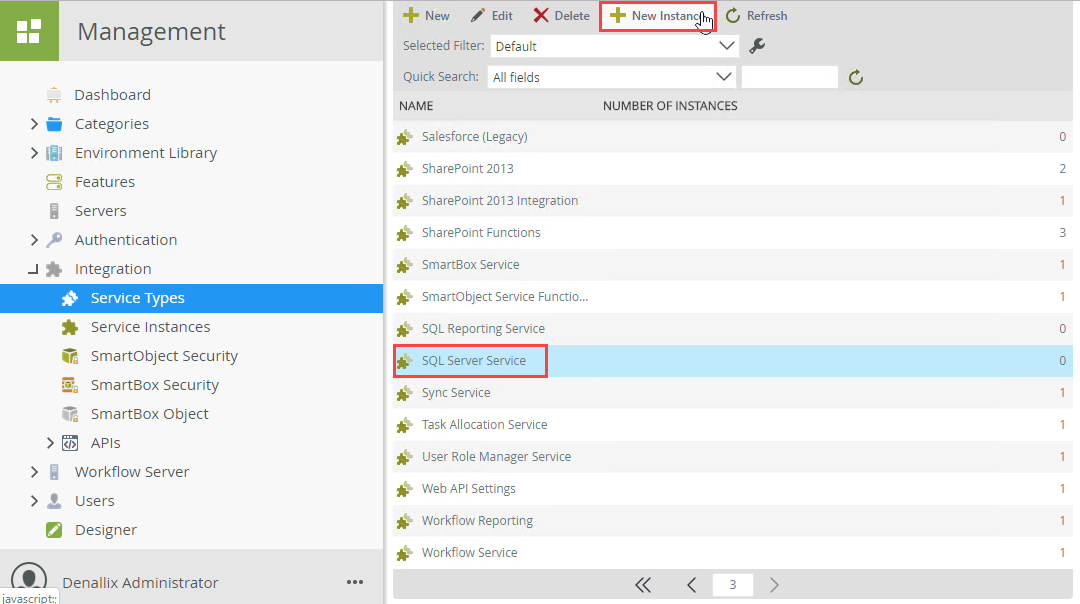
The database you will be connecting to is hosted on the internet as a SQL Azure database. This database should be accessible through port 1433, and unless your organization has strict firewall policies in place, it should be available for use anywhere. If you need to host this SQL database internally, you can download a SQL script to recreate the database from the following location: http://help.k2.com/files/8553. Contact a member of your application development team for help, if necessary. You will need to adjust the Service Instance's Database and Server keys and potentially the authentication method to connect to a local version of this SQL Database.Field Value Notes Service Instance A. Display Name K2 Tutorial Sample SQL Database If you are working in a shared environment, include your initials in the display name to make the name unique and easily identifiable to you. B. Description This is the service instance of the sample database used in the Expense Claim tutorial. C. Service Type SQL Server Service You will connect to a SQL database as the data provider. Service Authentication D. Authentication Mode Static You will provide a static username and password to connect to the sample SQL database. E. User Name K2LearningUser F. Password K2LearningPass Extra (leave blank) Service Keys G. On Different SQL Server true This database exists on a SQL server that is in a physically different location than your K2 system. H. Command Timeout 90 You want to extend the command timeout from the default to cater for high load. I. Database K2Learning This is the name of the target database on the sample SQL server. J. Server uh8ydarb4m.database.windows.net This is the name of the sample SQL server you want to connect to. K. Use Native SQL Execution false You do not want K2 to use native SQL commands for this target database. It exists on a separate server and the K2 service account does not have enough permissions on the target system to perform DDL operations. SmartObjects L. Generate SmartObjects for this Service Instance UNCHECKED You will create the SmartObject in a few minutes. - In the Management menu, expand the Integration node, then click Service Types. You will see current service types displayed in the central pane. Scroll through the service types until you locate SQL Server Service. You can also use the search option instead of scrolling through the pages. (You may see more than one result returned.)
- Select SQL Server Service, then click the New Instance button in the toolbar.
- Use the table below to configure the service instance. There is an image below the table for reference as well. If a setting is not indicated in the table, assume the default value. Click OK when you have entered the configuration settings, and then click OK for the confirmation dialog. (It may take a few seconds for the confirmation dialog box to appear).
Field Value Notes Service Instance A. Display Name K2 Tutorial Sample SQL Database If you are working in a shared environment, include your initials in the display name to make the name unique and easily identifiable to you. B. Description This is the service instance of the sample database used in the Expense Claim tutorial. C. Service Type SQL Server Service You will connect to a SQL database as the data provider. Service Authentication D. Authentication Mode Static You will provide a static username and password to connect to the sample SQL database. E. User Name K2LearningUser F. Password K2LearningPass Extra (leave blank) Service Keys G. On Different SQL Server true This database exists on a SQL server that is in a physically different location than your K2 system. H. Command Timeout 90 You want to extend the command timeout from the default to cater for high load. I. Database K2Learning This is the name of the target database on the sample SQL server. J. Server uh8ydarb4m.database.windows.net This is the name of the sample SQL server you want to connect to. K. Use Native SQL Execution false You do not want K2 to use native SQL commands for this target database. It exists on a separate server and the K2 service account does not have enough permissions on the target system to perform DDL operations. SmartObjects L. Generate SmartObjects for this Service Instance UNCHECKED You will create the SmartObject in a few minutes. 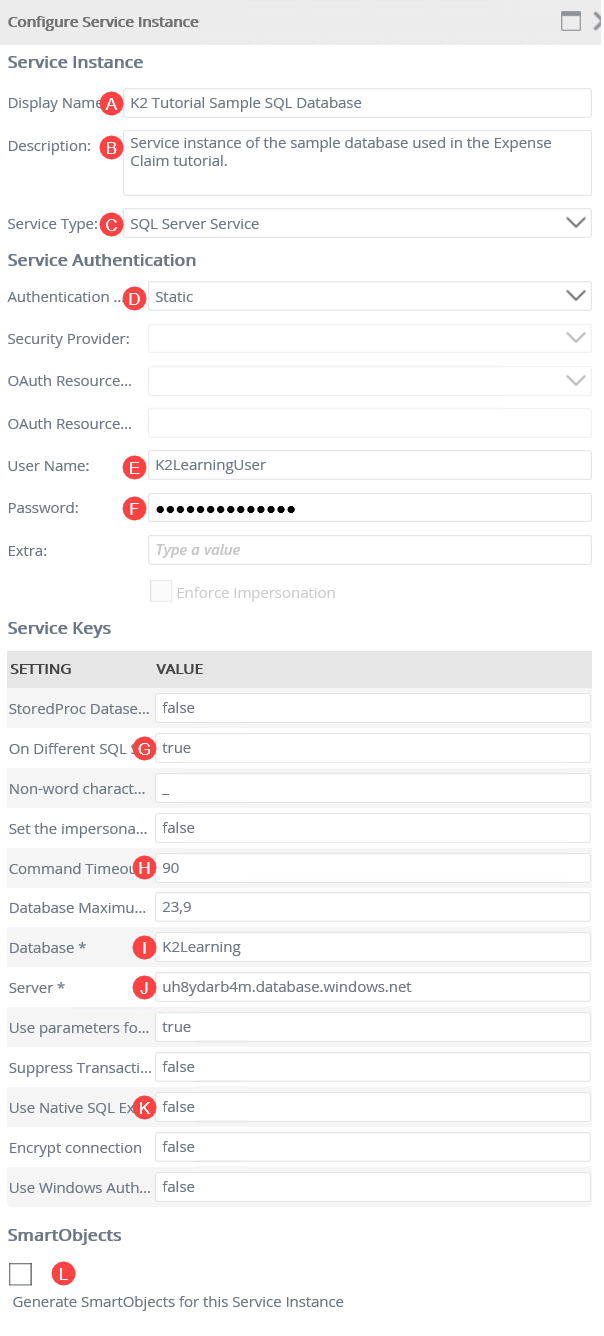
- Click OK.
- Click OK to close the service instance pop up.
Create an advanced SmartObject to access the SQL data.
The steps below explain how to create an advanced SmartObject in K2 Designer, mapping through your new SQL Server Service instance to the SQL Azure Sales - Customer data table.
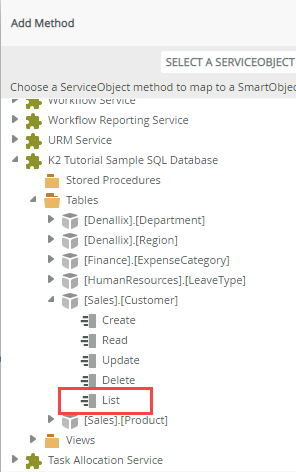
- In K2 Designer, create an advanced SmartObject named Sales-Customers and map it to the K2 Tutorial Sample Database SQL Server Service to the List method of the [Sales].[Customer] table.
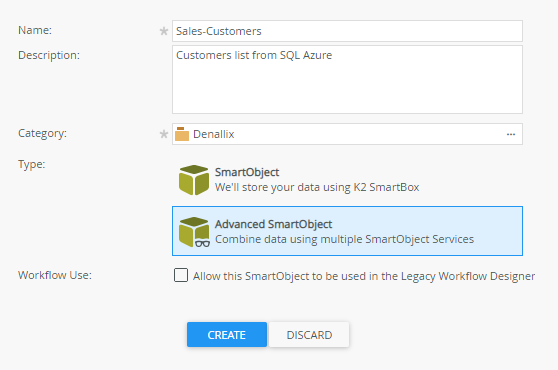
- In K2 Designer click the create SmartObject option.
- Specify Sales-Customers as the SmartObject name.
- Specify a Description and select a Category. In this scenario the category is Denallix.
- Select Advanced SmartObject as the type. Click Create.
- Select the Methods tab.
- Click Add.

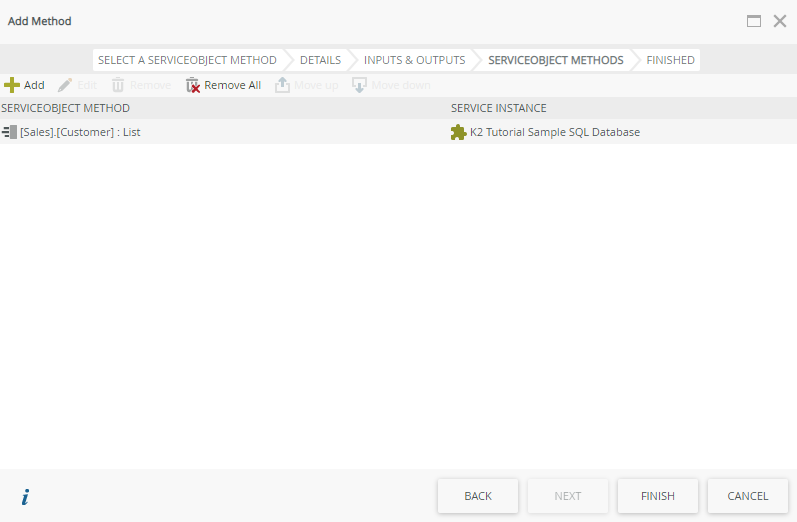
- Select the List method of the K2 Tutorials Sample SQL Database > Tables > [Sales].[Customer] table.
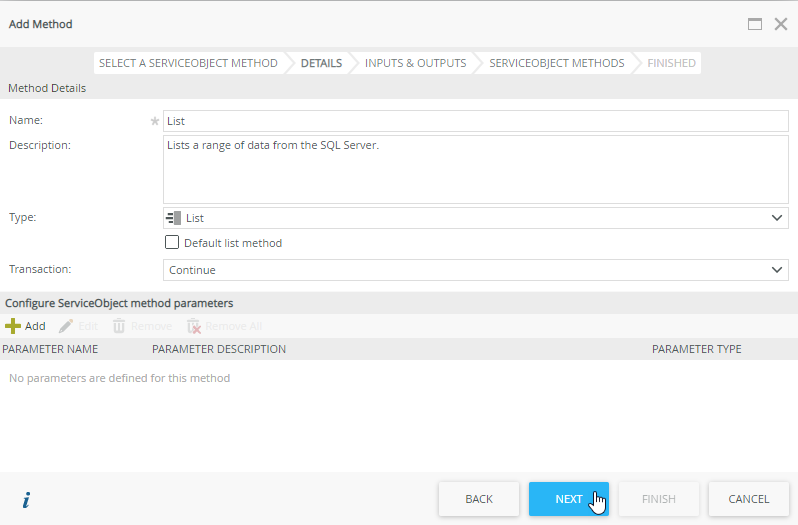
- Click Next.
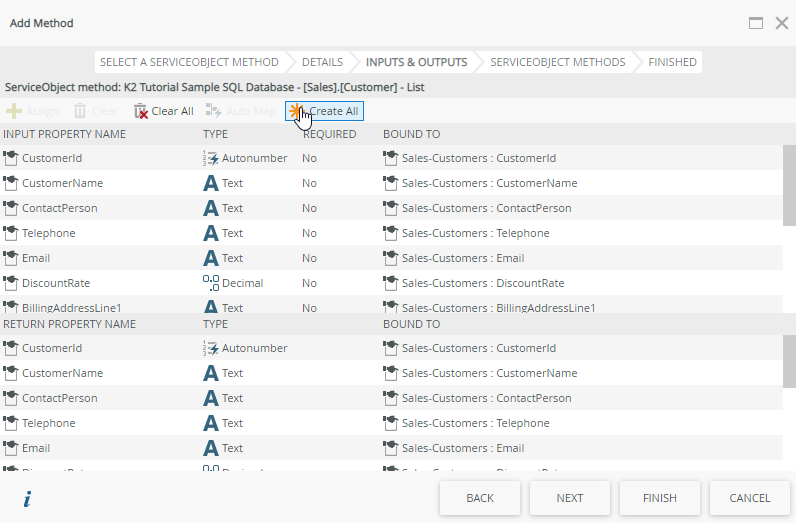
- On the Inputs and Outputs screen click Create All. This creates the SmartObject properties and maps them to the properties of the SQL table.
- Click Next.
- Click Finish.
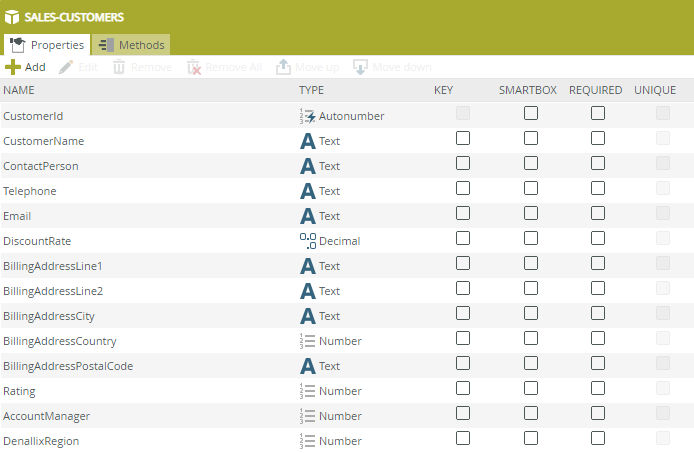
- Select the Properties tab. Your SmartObject properties should look similar to the following image:
- Click Finish.
- In K2 Designer click the create SmartObject option.
-
Create a List View of your Sales-Customers SmartObject.
If you are not familiar with creating views, see How To: Create an Item View and a List View.
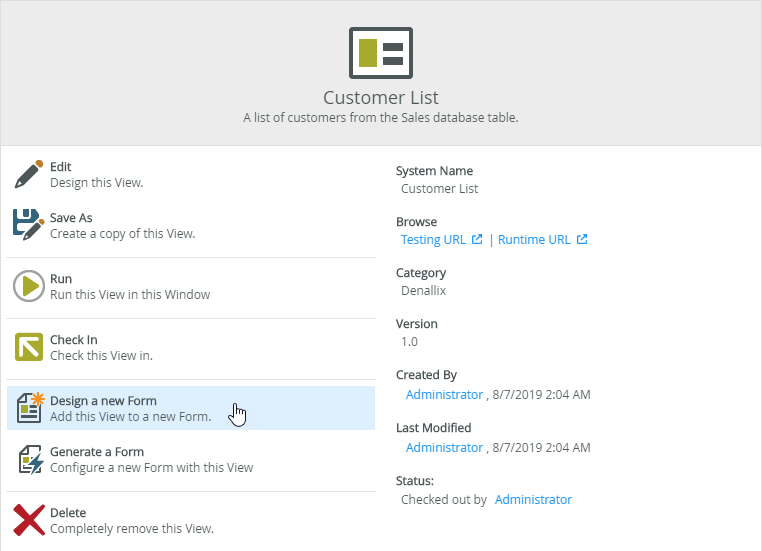
- On the Sales Customers SmartObject page click Design a new View.

- Specify Customer List as the name.
- Specify a Description and select a Category.
- Select List View as the View Type.

- Click Create.
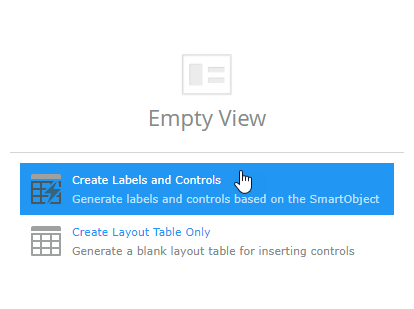
- Click Create Labels and Controls.
- Check the All Fields check box to select all the SmartObject fields.
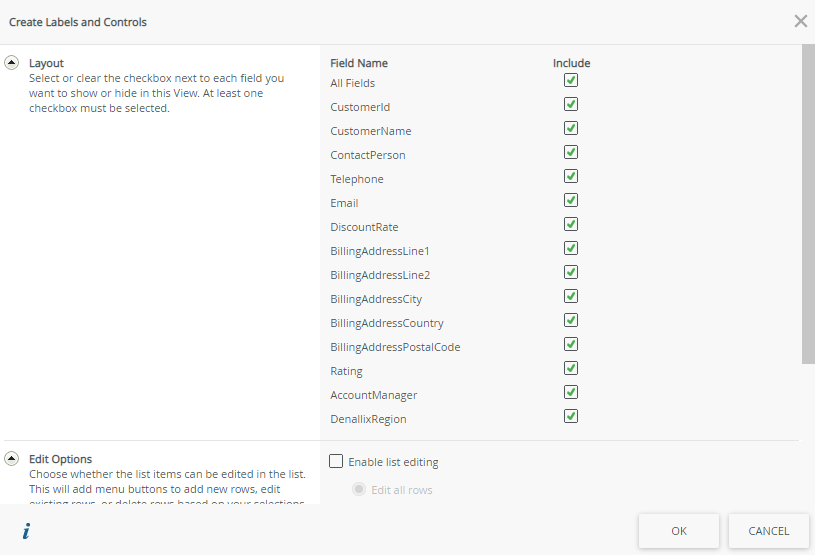
- Click OK.
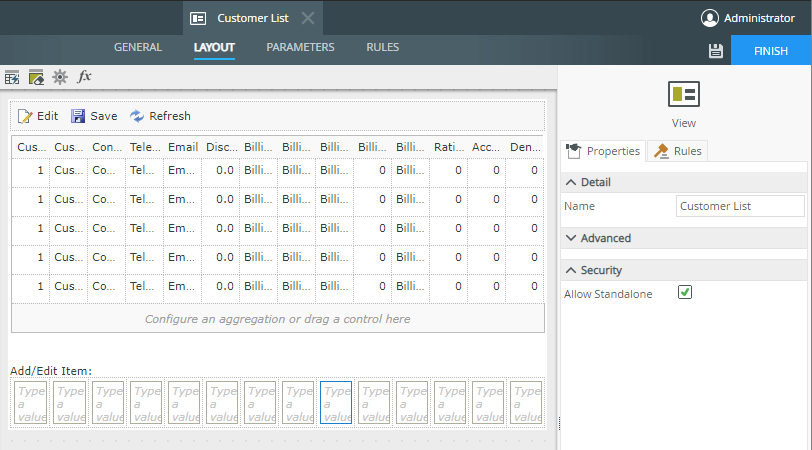
- Your view should look similar to the image below:
- Click Finish.
- On the Sales Customers SmartObject page click Design a new View.
- Create a form to host the Customer List view.
If you are not familiar with creating forms, see How To: Create a Form.
- On your Custom List view page click Design a new Form.
- Specify Custom List Form as the name.
- Specify a Description and select a Category.

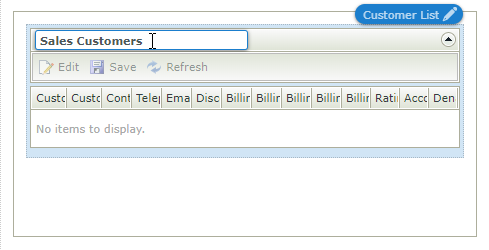
- In the form title, specify Sales Customers.
- Click Finish.
- On your Custom List view page click Design a new Form.
-
Test your SmartForm and view the list of customers from SQL Azure.
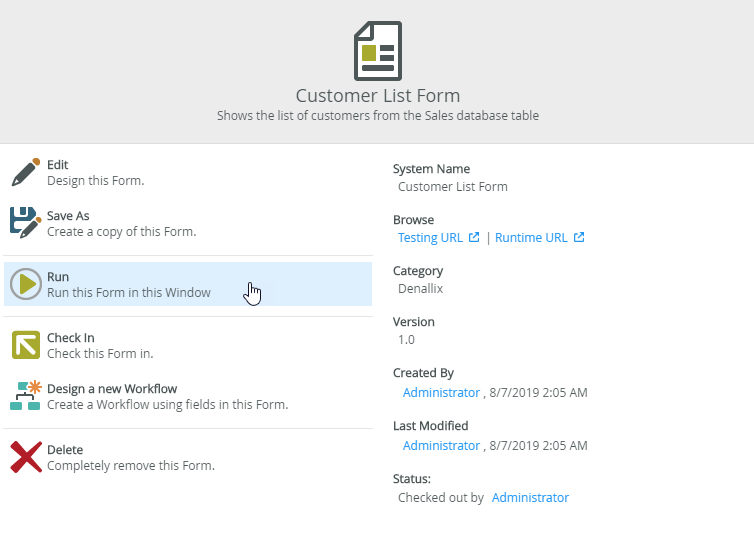
- On your Customer List Form page click Run.
- Your SmartForm should load and show the list of customers, as shown in the following image:
- On your Customer List Form page click Run.
Create an advanced SmartObject using the Generate SmartObjects option from the service instance
You can create the Sales - Customers SmartObject in K2 Management using the Generate SmartObjects option on the service instance page.
-
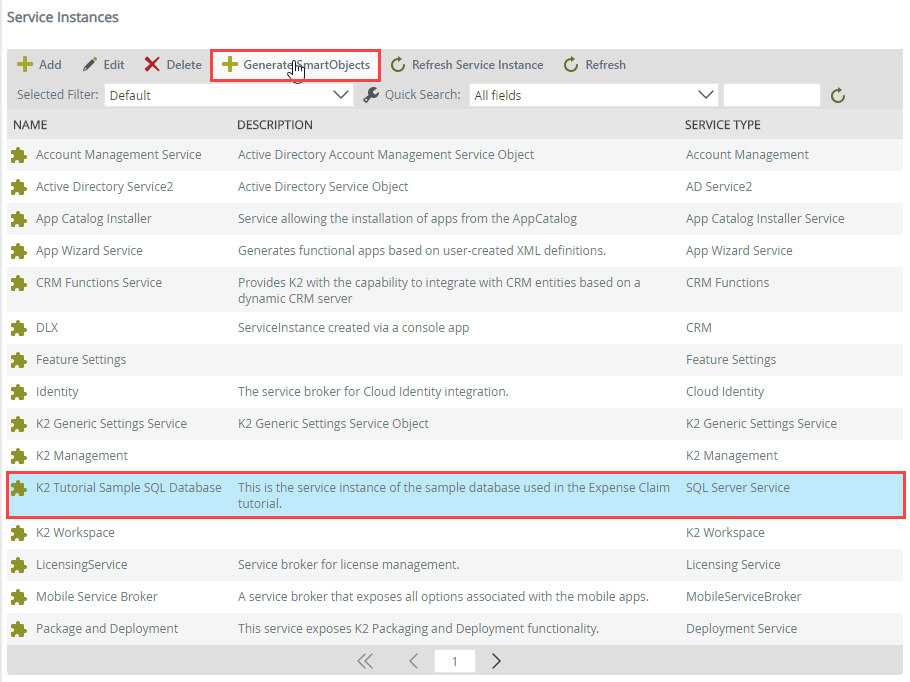
In K2 Management navigate to Integration > Service Instances > K2 Tutorial Sample SQL Database and use the Generate SmartObjectsoption to create a SmartObject of the [Sales].[Customer] table.
- In K2 Management navigate to Integration > Service Instances.
- Select the K2 Tutorial Sample SQL Database SQL Server Service instance.
- Click Generate SmartObjects.
- Expand the Tables node and enable the [Sales].[Customer] table check box.

- Click OK.
- Rename the generated SmartObject to Sales-Customer and move the SmartObject to the Denallix category.
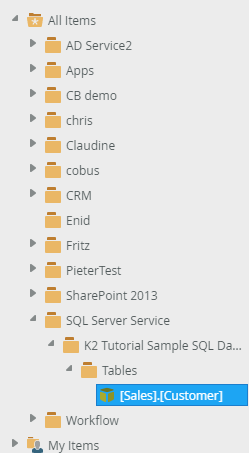
- In K2 Designer, browse your system and navigate to All Items > SQL Server Service > K2 Tutorial Sample SQL Database > Tables and select the [Sales].[Customer] SmartObject.
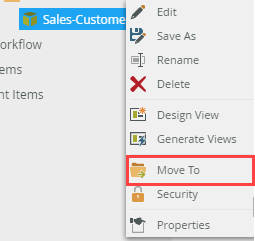
- Right click the SmartObject and click Rename.

- Specify Sales-Customer as the SmartObject name.
- Right click the SmartObject and click Move To.
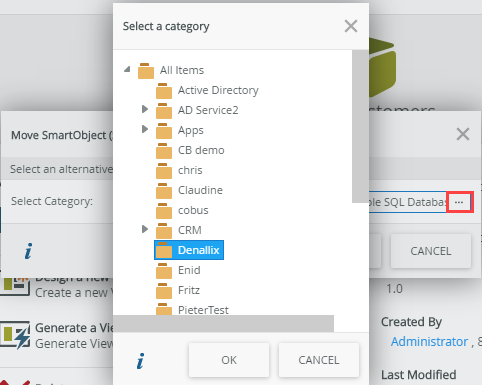
- Click the ... ellipses button and select Denallix from the category folders.
- In K2 Designer, browse your system and navigate to All Items > SQL Server Service > K2 Tutorial Sample SQL Database > Tables and select the [Sales].[Customer] SmartObject.
- You can now follow the same steps from Step 3 above to create a similar view and form to show the contents of the SQL table.
Review
You created a new SQL Server Service instance to connect to a SQL Azure database. Then you created an advanced SmartObject in K2 Designer for the Sales - Customers table and displayed the data from that SmartObject in a SmartForm. Finally you created a similar SmartObject using the Generate SmartObject option in K2 Management and renamed and moved it to the same location as the one created in K2 Designer.