4. Build the Leave Request List View
In this step you will create a read-only list view that displays the leave requestor's records. You will use this list view in two ways:
- The list view appears on the leave request form and displays the current user's previous requests.
- The list view appears on the approving manager's form and displays the leave requester's previous requests.
Later, you will learn that the two forms (requester and approving manager) are actually the same form, just configured to display the previous requests based on the form's use.
-
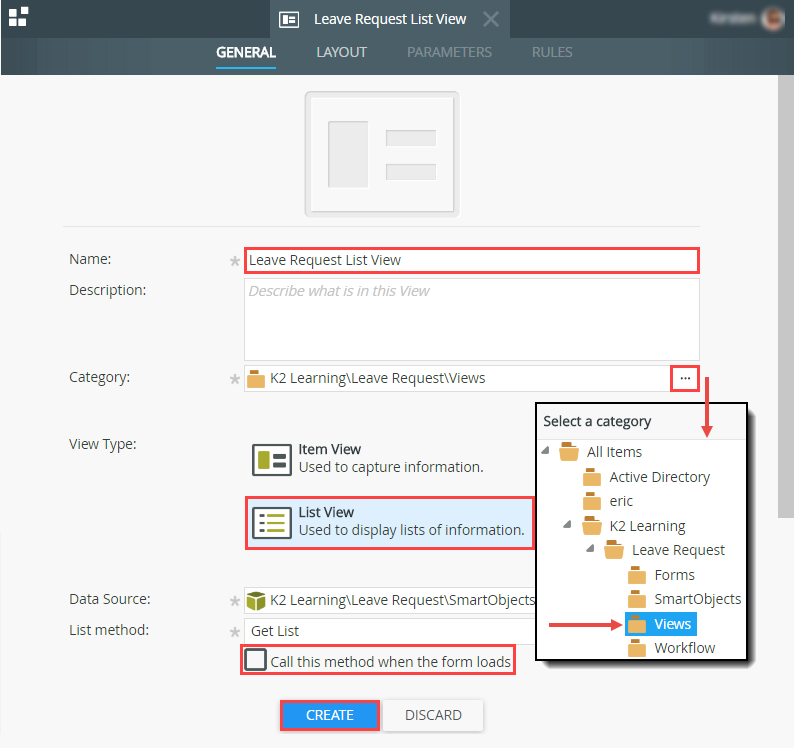
Design a new List View based on the Leave Request SmartObject and name it Leave Request List View then move it to the Views category. Change the View Type to List View and disable the Call this method when the form loads option. In a later step, you will configure a method action to call specific records when this view loads.
- Once again, you will design this view from the Leave Request SmartObject, creating a bind between the view and the data source. In this step, you will create a list view that returns multiple records (the requester's previous leave requests). (Recall that the item view created in the previous step returns a single record.).
Right-click the Leave Request SmartObject and select Design View. - Name the new view
Leave Request List View
then move it to the Views category. - Change the View Type to List View. UNCHECK the option to Call this method when the form loads. (By default for a list view, K2 assumes you want to display all the records from the SmartObject when the view loads. In this case, you only want the records for the leave requester, not all the records to appear. In a later step, you will configure a rule that retrieves only the leave requester's records.) Click CREATE.

- Once again, you will design this view from the Leave Request SmartObject, creating a bind between the view and the data source. In this step, you will create a list view that returns multiple records (the requester's previous leave requests). (Recall that the item view created in the previous step returns a single record.).
- Create the labels and controls, then add the following fields:
- Leave Request Title
- Employee Name
- Leave Start Date
- Leave End Date
- Leave Type
- Request Status
The Leave Request List View

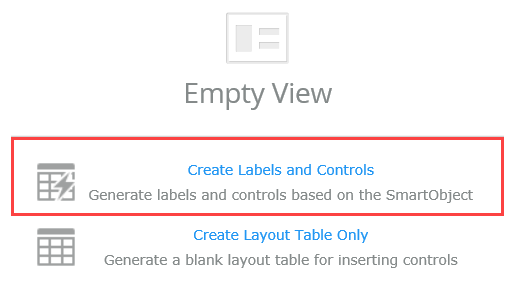
- Select Create Labels and Controls.

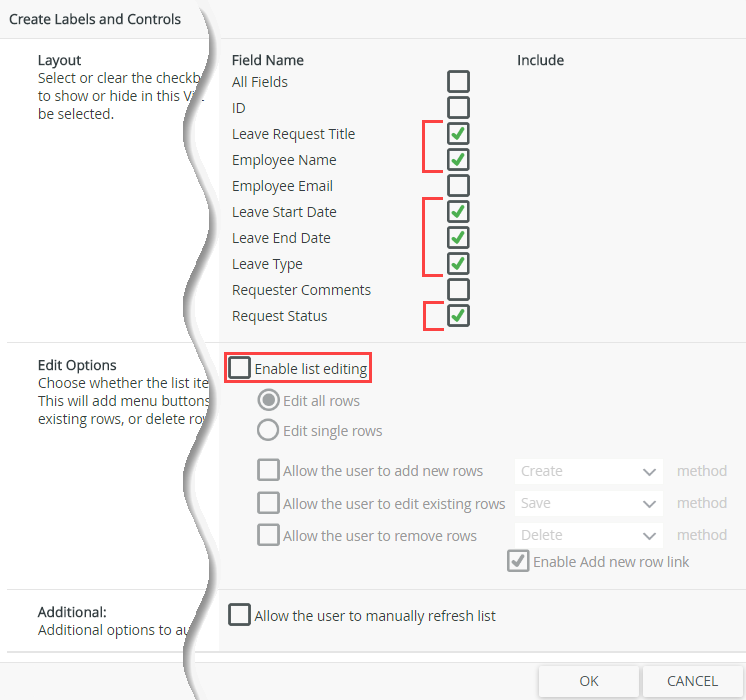
- On the Create Labels and Controls screen, Include the following fields:
- Leave Request Title
- Employee Name
- Leave Start Date
- Leave End Date
- Leave Type
- Request Status
- To avoid any changes to the records, keep the Enable list editing option disabled. There are no other changes to the layout editor, so click OK.

- Click FINISH to save and exit the view.
Review
In this step, you created a list view from the Leave Request SmartObject. This view is read-only since you do not want the approver to make any changes to the request details. In the next step, you will create the Leave Request Form.