5. Build the Leave Request Form
In this step, you will create the Leave Request Form, which will be the user interface for entering and approving leave requests. Users typically interact with views through forms, so you will create the form, then add the item view and the list view that you created in the previous two steps.
-
Create a New Form from the Forms category. Name the form Leave Request Form.
- In this step, you will create the Leave Request Form from the Forms category. Because the form itself is not bound to the Leave Request SmartObject, you can create it from its category location.
Right-click the Forms category and select New Form.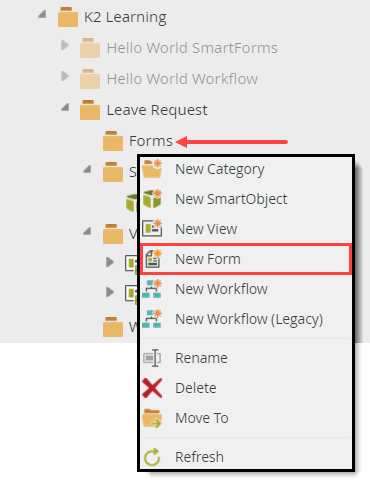
- On the GENERAL settings screen, Name the new form
Leave Request Form
then click CREATE.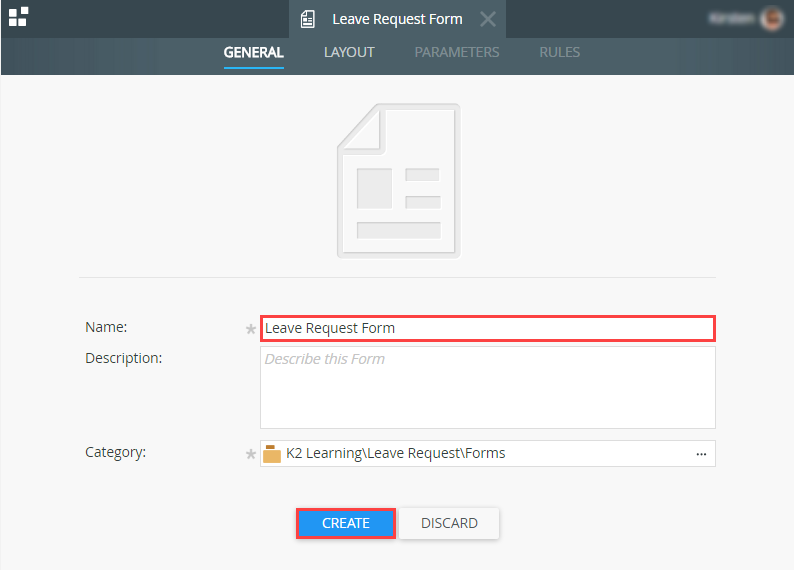
- In this step, you will create the Leave Request Form from the Forms category. Because the form itself is not bound to the Leave Request SmartObject, you can create it from its category location.
-
Add the Leave Request Item View and change the view title to Leave Request.
- Now that you created the form, the next steps are to add the two views. You will add the Leave Request Item View to the top of the form and the Leave Request List View below.
On the left side of the screen, click the Views tab. Expand the Recent Items node if it isn't already. Drag the Leave Request Item View onto the form design canvas. Depending on the number of recent items in your environment, you may have to scroll to locate the item view. (You can also add the view from the Views category.)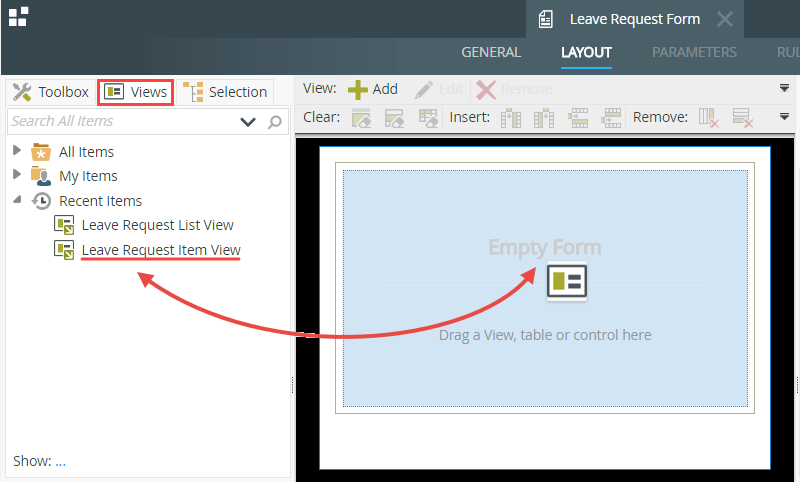
- Click the (Enter View Title) view title and change it to
Leave Request
then click outside of the view to set the value. This lets you name the views within the forms to user friendly names.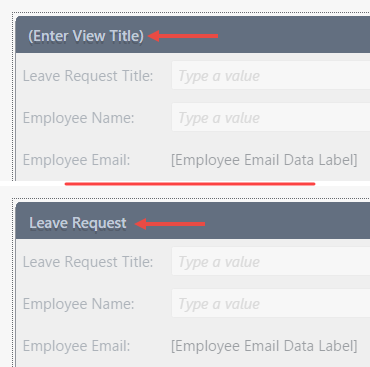
- Now that you created the form, the next steps are to add the two views. You will add the Leave Request Item View to the top of the form and the Leave Request List View below.
-
Add the Leave Request List View below the item view and change the view title to Previous Leave Requests. The list view displays a read-only list of requests. The list view displays the leave requests from the person requesting leave.
The Leave Request Form
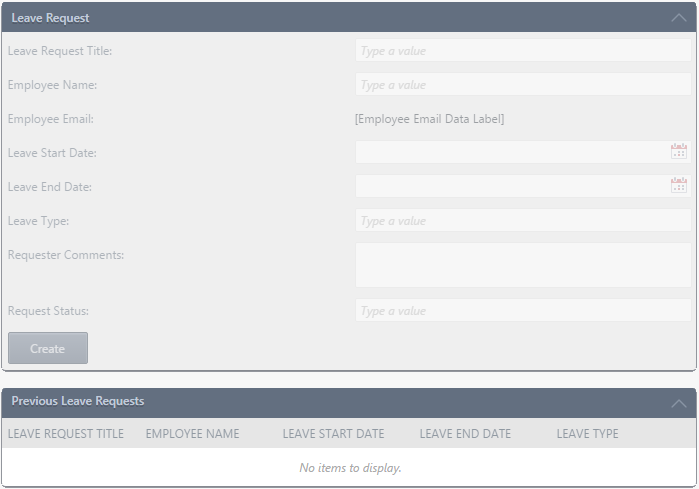
- Drag the Leave Request List View below the item view. Notice that K2 adds a new placeholder as you drag the view onto the canvas. Drop the view into the new placeholder. Your form should now contain the two views, labeled 'Leave Request' and 'Previous Leave Requests'
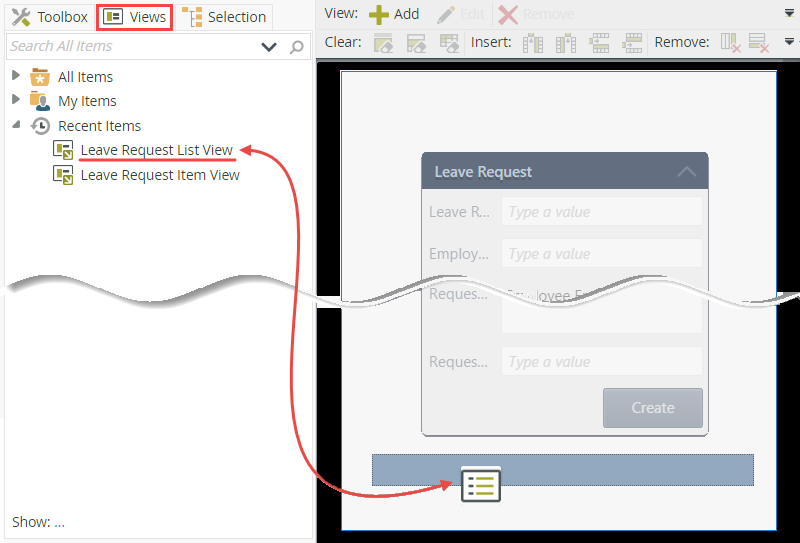
- Click the (Enter View Title) view title and change it to
Previous Leave Requests
(Depending on who is viewing the form (the requester or the approving manager), this list will either display the current user's previous requests, or the requester's previous requests. You will configure a method action later to populate the list, depending on its use.)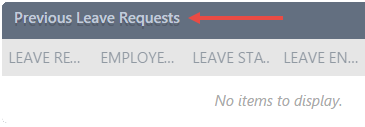
- Click FINISH to save and exit the form.
- In the explorer, right-click the Leave Request Form and select Check In. You will see a warning about associated views. CHECK the box to Check in associated Views, then click OK.
Views and forms are not available for live use until you check them in. Checking views and forms in publishes them to the K2 server and makes them available for users. To change a view or form, you must first check it out, make the change, then check it back in.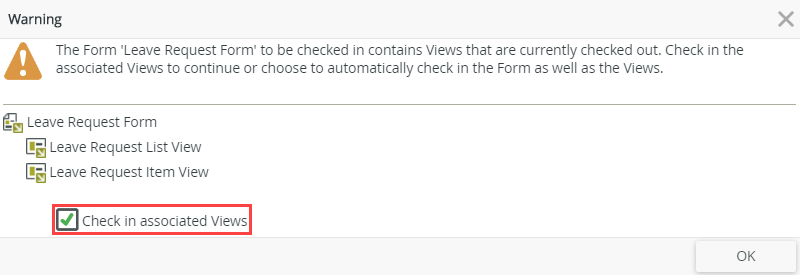
- Drag the Leave Request List View below the item view. Notice that K2 adds a new placeholder as you drag the view onto the canvas. Drop the view into the new placeholder. Your form should now contain the two views, labeled 'Leave Request' and 'Previous Leave Requests'
Review
In this step, you created the Leave Request Form, then added the Leave Request Item View and Leave Request List View to the form. You checked-in the form and view, which published them to the K2 server and made them available for users to use. In the next step, you will create the Leave Request Workflow.