2. Create the Contact SmartObject
In this step you will create the Contact (SmartBox) SmartObject in the Designer. This SmartObject stores the "parent" or "header"information for each contact, and contains properties such as name, phone numbers, and a contact photo. (In a subsequent step, you will create the second SmartBox SmartObject for storing notes and attachments).
SmartBox SmartObjects are Nintex K2-provided and managed storage where a new table is created on your behalf in the K2 database. You add properties (think columns in a table) and methods (think create, save, delete). You can associate one SmartObject with another, creating a JOIN type of relationship between data sources.
-
Begin by adding a data source to store the header information. Create a new SmartBox SmartObject under the SmartObjects category and name it Contact SmartObject.
- Begin by adding a new data source to store the header content for the contact records. In the Designer, right-click the SmartObjects category and select New SmartObject.
- The SmartObject designer opens on the GENERAL settings screen. Name the SmartObject
Contact SmartObject
then confirm the SmartBox option is selected. Click CREATE.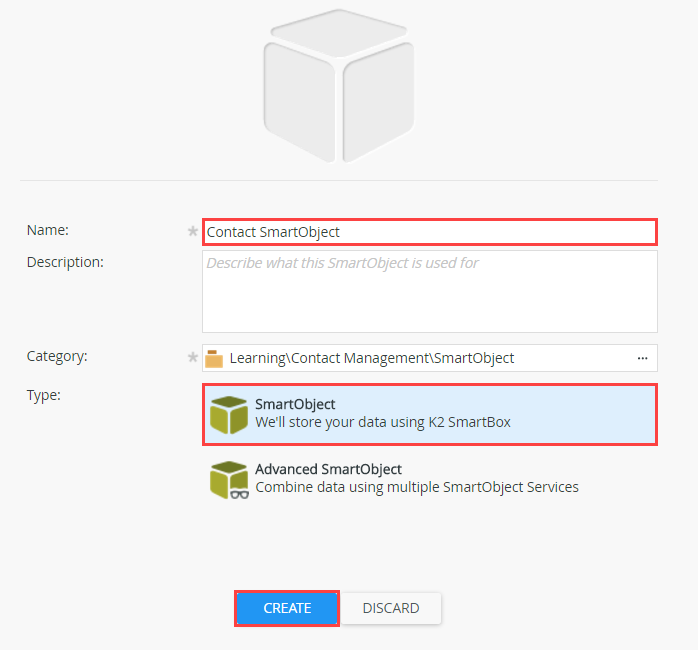
-
Next, define the properties necessary for the Contact Management application. Add SmartObject properties and their data types using the table below for reference.
Click FINISH to save the SmartObject.
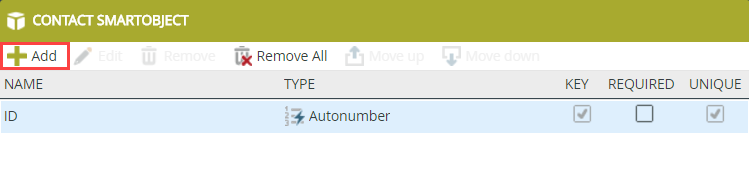
Name Data Type Notes ID Autonumber The ID is added automatically and it is the primary (or unique) key for each record. First Name Text Last Name Text Relationship Text Address Text Home Phone Text Work Phone Text Mobile Phone Text Email Text Photo Image On the properties screen, notice that the ID property is added for you, which is the primary (or unique) key for each SmartObject record. In this step, you will add the remaining properties for the Contact Management SmartObject. (In a later step, you will design a view from this SmartObject where controls and labels are generated based on the properties you have defined).
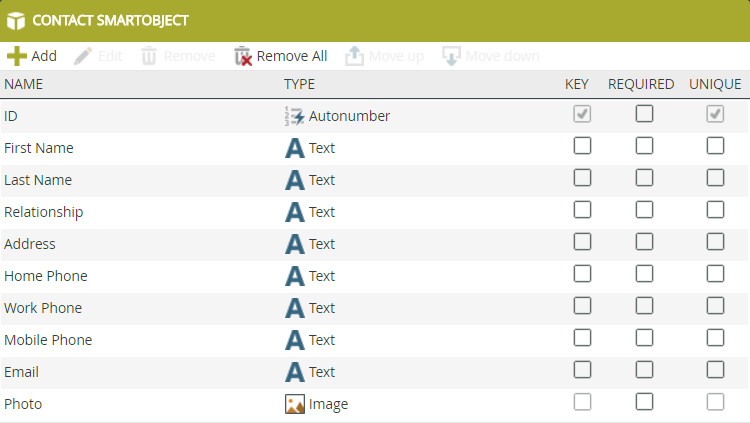
- Now add another property. Click Add. Enter the property Name and data Type using the table below the image for reference. Click the <Add property> link to add more properties until you have entered all nine. Click OK.

Name Data Type Notes ID Autonumber The ID is added automatically and it is the primary (or unique) key for each record. First Name Text Last Name Text Relationship Text Address Text Home Phone Text Work Phone Text Mobile Phone Text Email Text Photo Image - Finish the SmartObject. The FINISH button is in the upper right corner of the screen. Finishing a SmartObject publishes it to the server and makes it available for use in applications.
When complete, the Contact SmartObject should look like the image below.
- Now add another property. Click Add. Enter the property Name and data Type using the table below the image for reference. Click the <Add property> link to add more properties until you have entered all nine. Click OK.
Review
In this step, you created the Contact (SmartBox) SmartObject. This SmartObject stores the "header" content for each contact. In the next step, you will create the Contact Notes and Attachments (SmartBox) SmartObject, which stores the "details" content for each record.