Edit a previous version of a deployed workflow
You might need to edit a previously-deployed version of a workflow that is currently not set as the default version. For example, your current default workflow version is 7.0 but you want to load version 3.0, edit it and deploy it. To do this, use Management to set version 3.0 of the workflow as the default. Then you need to delete the last edited version of the workflow: using the Designer, select and delete the workflow (in this example, the workflow version is version 7.0). When you edit the workflow again, the Designer will load the default version of the workflow, which in this example means it loads version 3.0 of the workflow. Now you can edit this older version of the workflow and deploy your changes as a new version to the server, and this new version will become the default version.
See Workflow versioning for more information, and for the differences between edited and deployed workflow versions, see the article KB002953: Saving, copying and renaming workflows. For more detail on deleting workflows, see Delete a Workflow.
Follow these steps to edit a previously-deployed workflow.
- Launch the Designer, click Browse and find the folder in the category tree where your workflow is located.
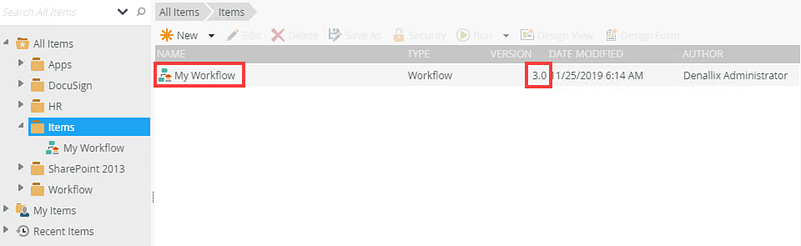
- Select the workflow. In this example, notice the version number is 7.0.
Because the version ends with 0, we know this was the last deployed version of the workflow and no-one has edited and saved any drafts for the workflow since it was last deployed.

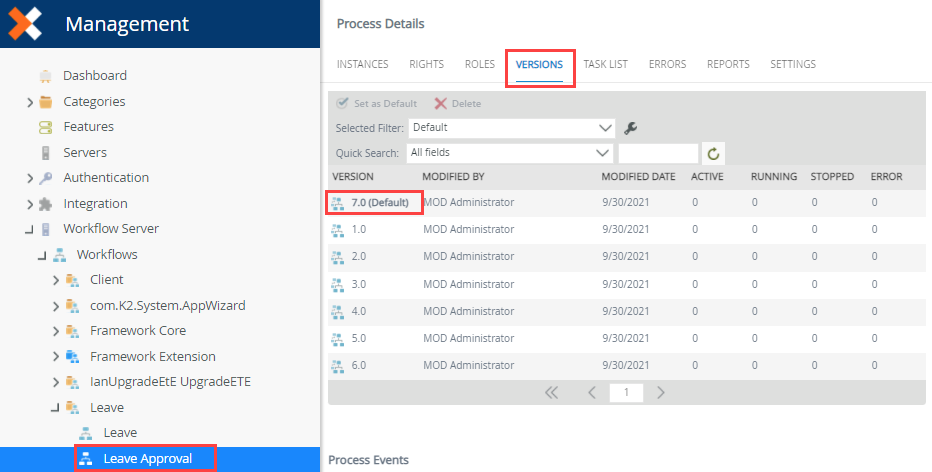
- In Management, browse to Workflow Server > Workflows. Select your workflow and click the Versions tab. Notice the default version of the workflow. In this example, the default version is 7.0 (Default), which aligns with version 7.0 in the Workflow Designer.
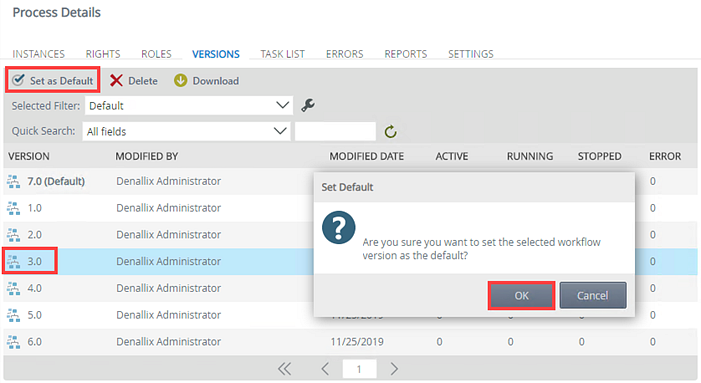
- To set another version of the workflow as default, select it and click Set as Default. In this example, we set version 3.0 as the default.
Click OK to confirm.
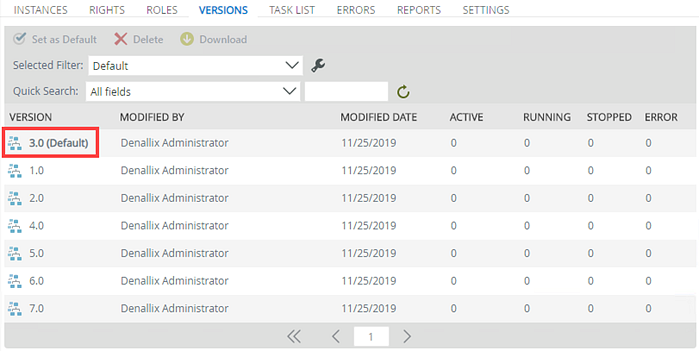
- You should see that the default version of the workflow has changed, 3.0 in this example.
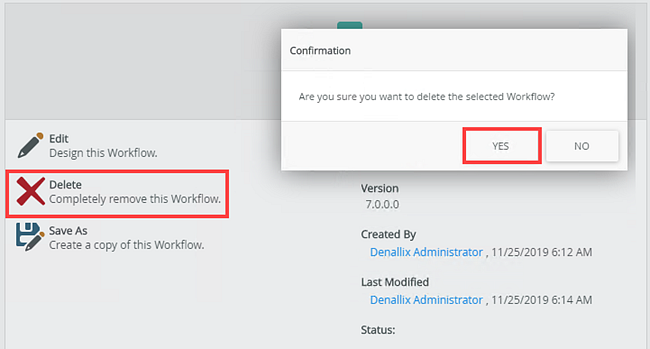
- Using the Designer, select the workflow and click Delete to delete the last saved version of the workflow, in this example we are deleting version 7.0. Click Yes to confirm.
- In the category tree, notice the workflow version number now shows as the same version you set as default in Management; in this example the version now appears as 3.0. The workflow status icon shows a blue workflow icon with a red arrow, which indicates that the workflow is deployed.
- To edit this 'restored' version of the workflow (version 3.0 in this example), select it and click Edit.

- Once you are finished making your changes to the workflow, deploy the workflow. When you deploy a new version of the workflow, the deployed version automatically becomes the default version, even if you previously set a different version as the default. In this example the newly-deployed workflow version shows as version 8.0 (Default) in Management after you deployed it. For more information on how to deploy a workflow, see the Deploy a Workflow topic.

When editing a previously deployed workflow keep in mind the following considerations:
- Existing workflow instances are not affected when you change the default version of a workflow, only new instances of the workflow started after the applied change are affected.
- Since SmartObjects and SmartForms always use the latest deployed version, modifying the default version of a workflow could cause errors and unexpected behavior if there are newer versions of SmartObjects, views, and forms referenced by the workflow. Since it is unpredictable how you are using SmartObjects, views, and forms in your workflows, it is impossible to provide specific guidance other than to be aware of this potential impact when setting a default version. Where possible, we recommend you allow existing instances of the workflow to complete before making changes to the default version of a workflow, especially when they also require updates to the SmartObjects, views, or forms used in the workflow.
- When you create a package and deploy it to a new environment, the workflow version will be different from the last edited one. After deployment on the new environment, the workflow version sets to 1.0 (Default)
- Take care when deleting a minor version of a workflow in the Designer. If a version number contains a second digit that is not equal to 0 (for example 7.1), it means there are changes to the workflow that have not been deployed yet. If you delete a minor version of a workflow, the undeployed changes will be lost.
For related information see, KB002953: Saving, copying and renaming workflows.