How To: Create an Advanced Style Profile
This article illustrates how to configure advanced colors for your style profile. Style profiles allow you to add color to your forms. Use the Style Profile Designer to customize the color palette using the three main colors, and configure advanced colors for items such as text styles, sliders, uploaders, tooltips, buttons, menus, charts, and more. Advanced colors are typically used to create corporate branding for your forms.
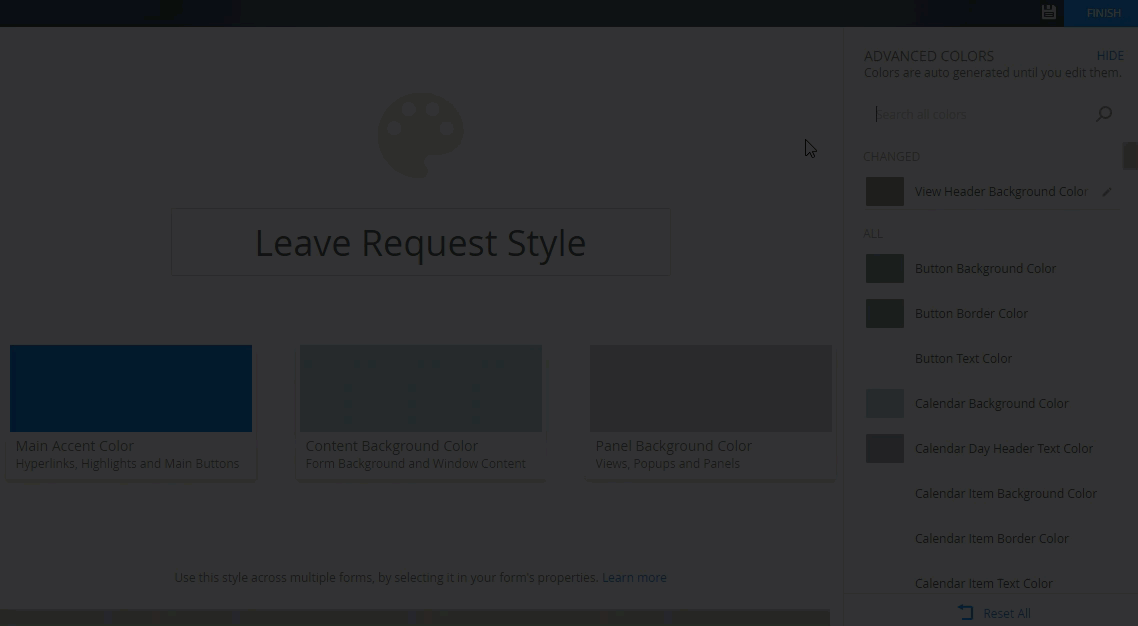
Runtime example of a form before and after applying advanced colors

Click to enlarge
Scenario
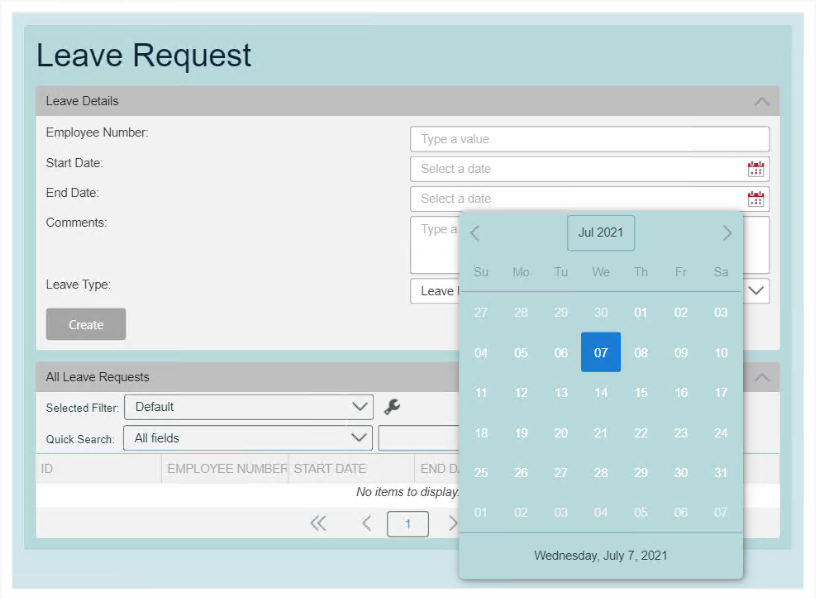
Your organization uses a form to capture leave request information. To change the appearance of the form, you want to configure colors for specific items such as the title of the form, the background color of the calendar, and the colors of the view headers.
Steps
This scenario uses the How To: Create a Basic Style Profile as the base for adding advanced colors. You edit the Leave Request Form, add a Label control and change the Style property of the label to Heading 1. You edit the Leave Request Style, change the Content Background Color, and configure advanced colors for the View Header Background Color, Heading 1 Text Color, and Calendar Background Color. You then test the form to see how the new style is applied at runtime.
Setup Steps
The following steps set up the scenario from start to finish. If you want to skip the setup steps and view the topic step, go to Configure advanced colors.
-
Edit the Leave Request Form and add a Label control called Leave Request. Change the Style property to Heading 1.
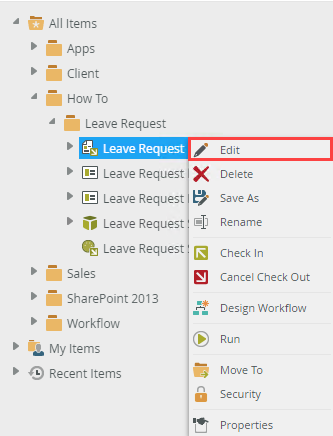
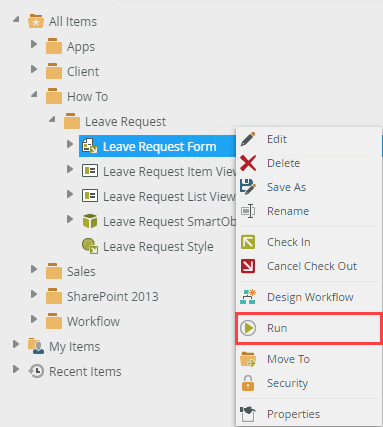
- From the the Designer, right-click the Leave Request Form in the How To/Leave Request category and select Edit.
- On the Layout page, drag the Label control onto the canvas, type Leave Request in the Text property and select the Heading 1 Style. We use this as the title for the form.
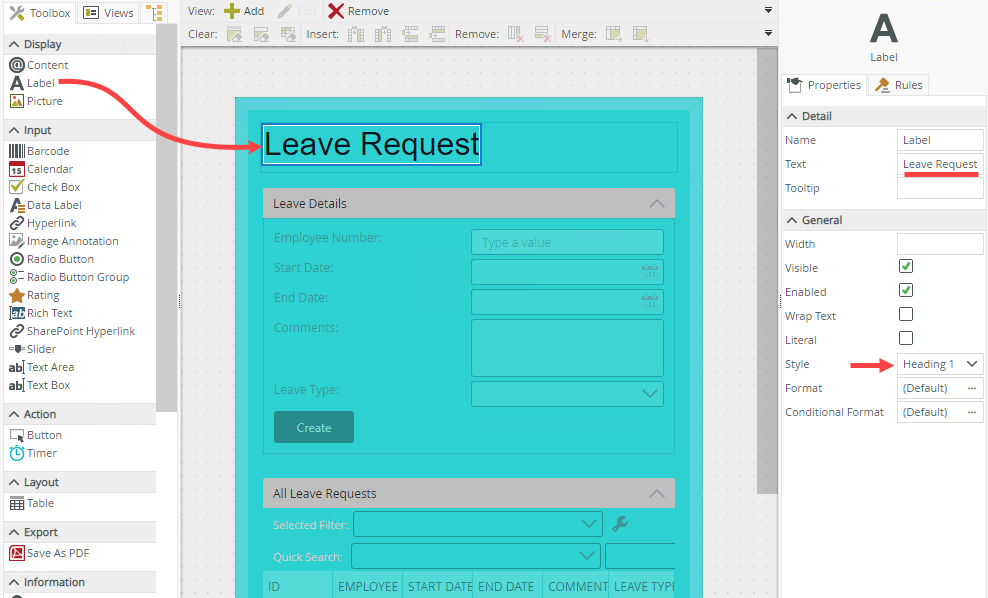
- Click Finish to save the form.
- From the the Designer, right-click the Leave Request Form in the How To/Leave Request category and select Edit.
-
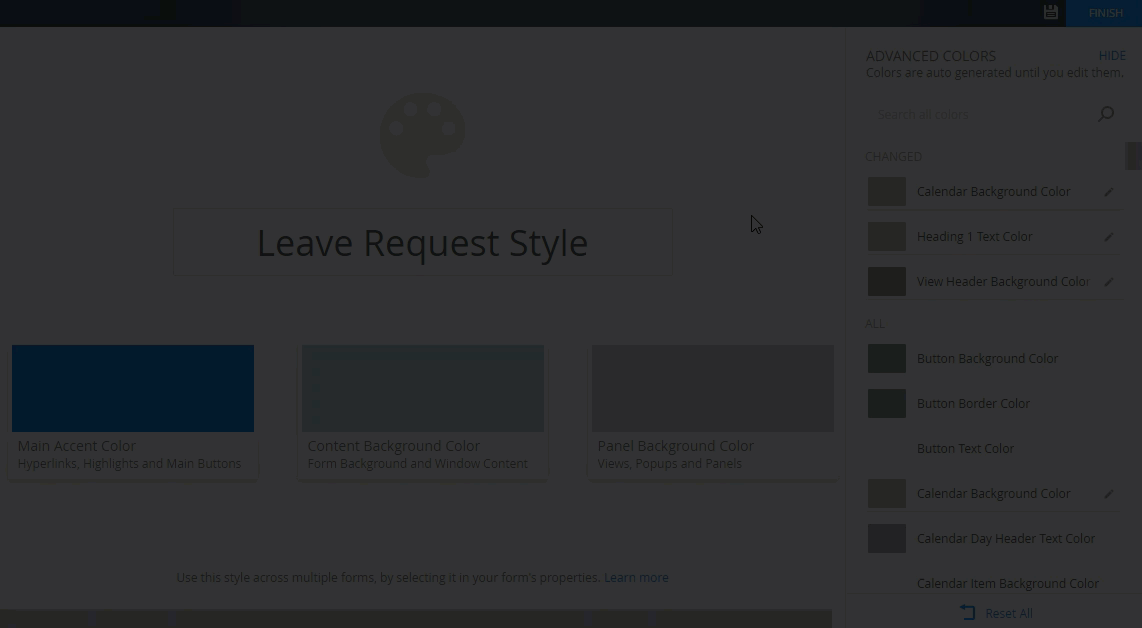
Edit the style profile called Leave Request Style and change the Content Background Color.
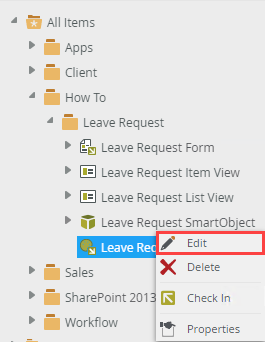
- From the the Designer, right-click the Leave Request Style in the How To/Leave Request category and select Edit. For information about creating this style profile, see How To: Create a Basic Style Profile.
- On the design canvas, click the Advanced link to open the Advanced Colors.
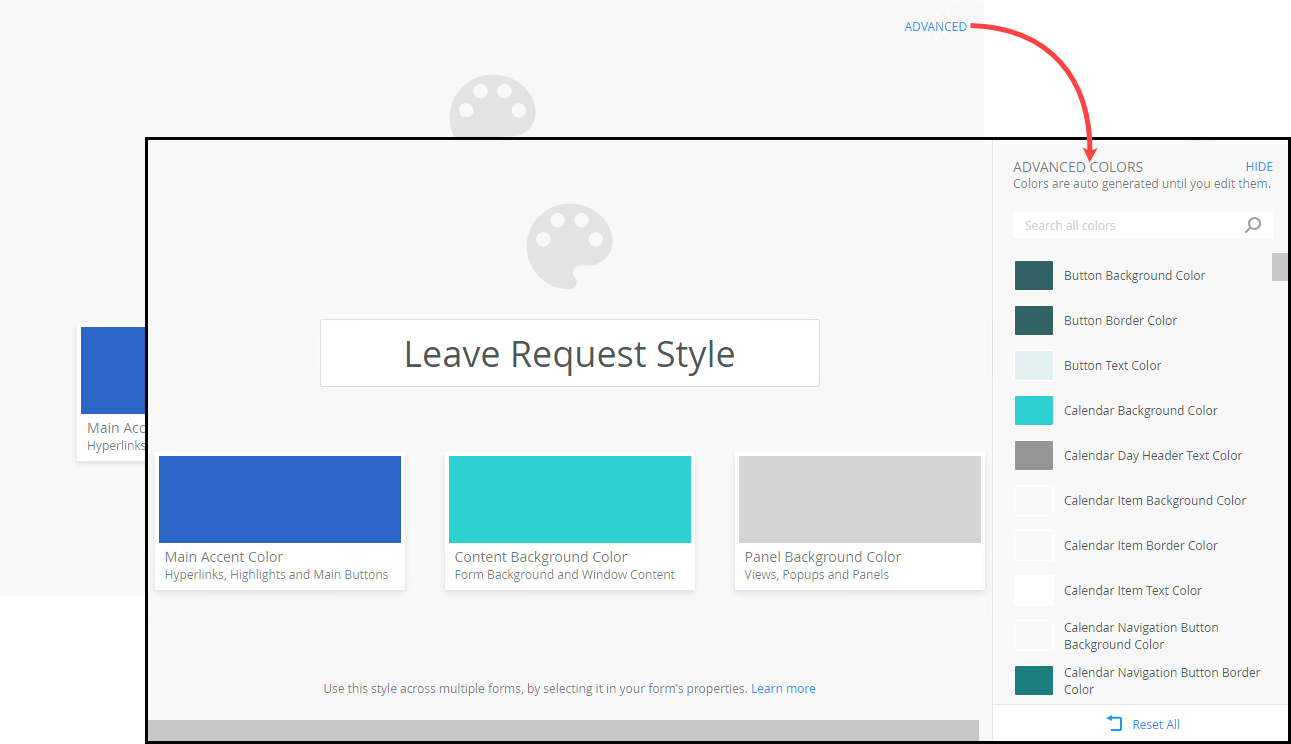
- Click the Content Background Color,
then select a color from the color wheel by clicking and dragging your cursor inside the picker area to highlight
a color. You can also change the brightness and transparency of the color, or type a named web color such as red, white, or yellow, or
type a HEX, HEX8, RGB, RGBA, HSL, or HSLA value in the field below the color wheel to specify a particular color. Note how the advanced colors automatically update in the panel on the right as you change the main color. You can also change the Main Accent Color and Panel Background Color to your liking. Once you are satisfied with the color palette for the three main colors, you can configure the advanced colors.
- From the the Designer, right-click the Leave Request Style in the How To/Leave Request category and select Edit. For information about creating this style profile, see How To: Create a Basic Style Profile.
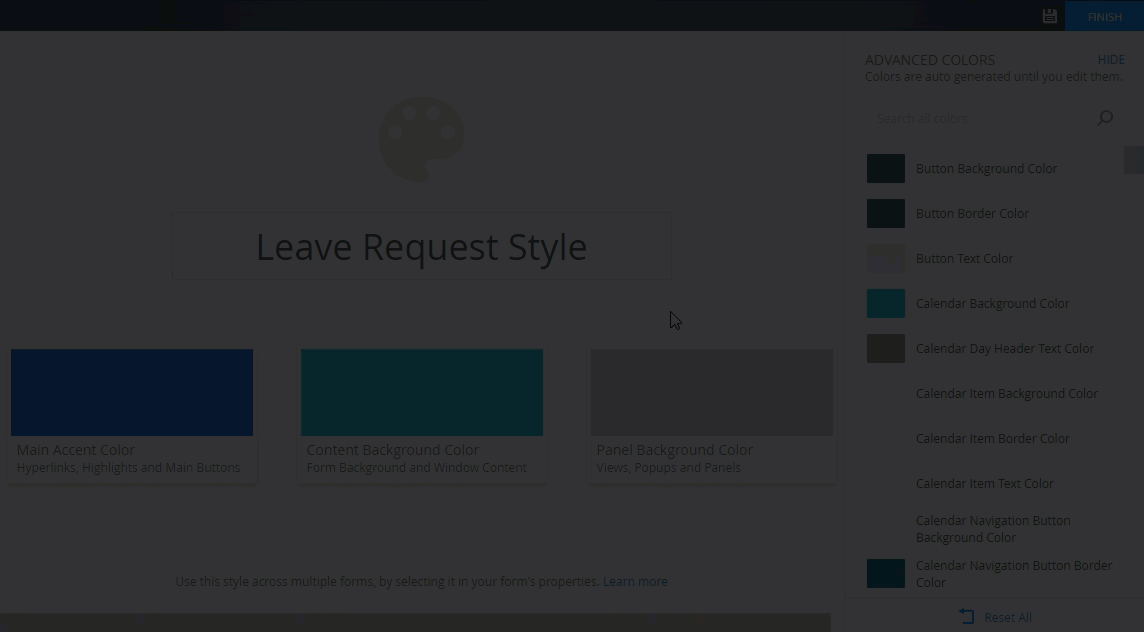
Configure advanced colors
In this step, you configure advanced colors for the View Header Background Color, Heading 1 Text Color, and Calendar Background Color.
-
Configure advanced colors
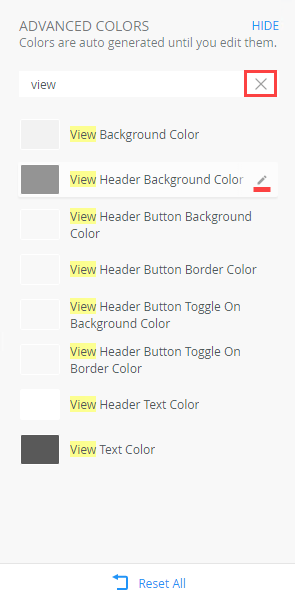
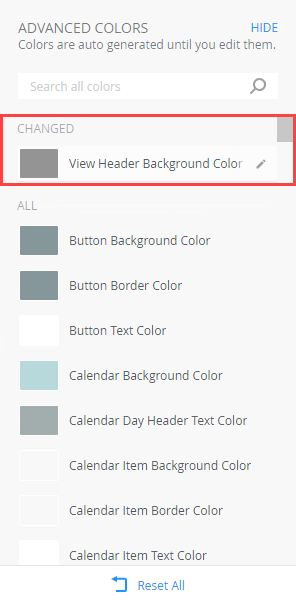
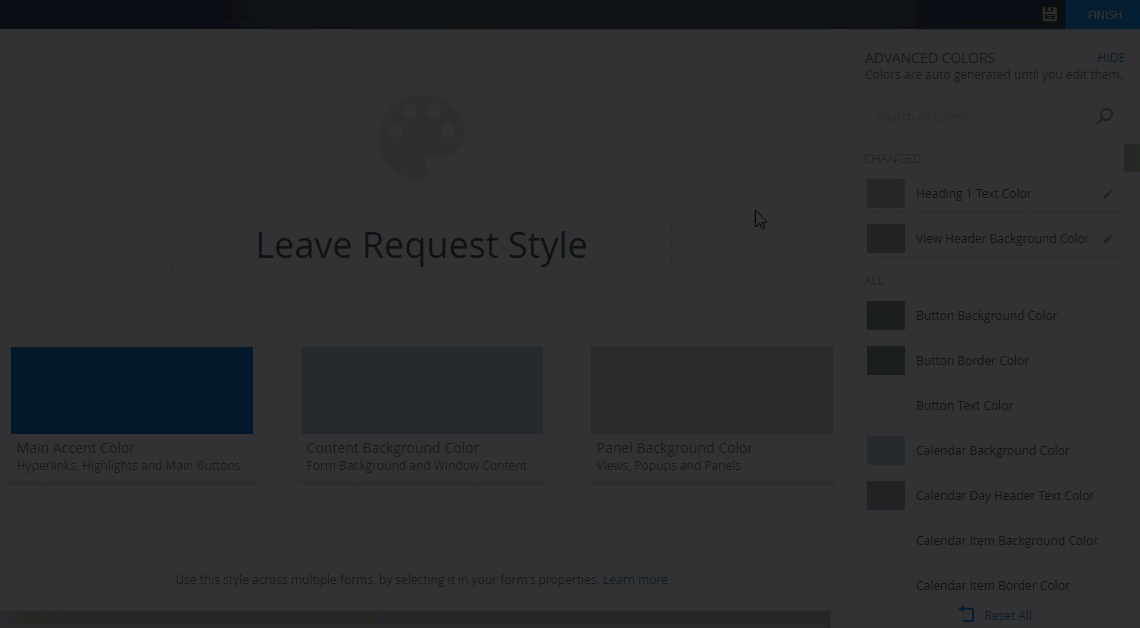
- In the Advanced Colors panel on the right of the design canvas, type view in the search bar. Select View Header Background Color and select the color you want to change the background of the view headers to from the color picker. Note the automatic updates to the related colors in the group to blend with the new color.
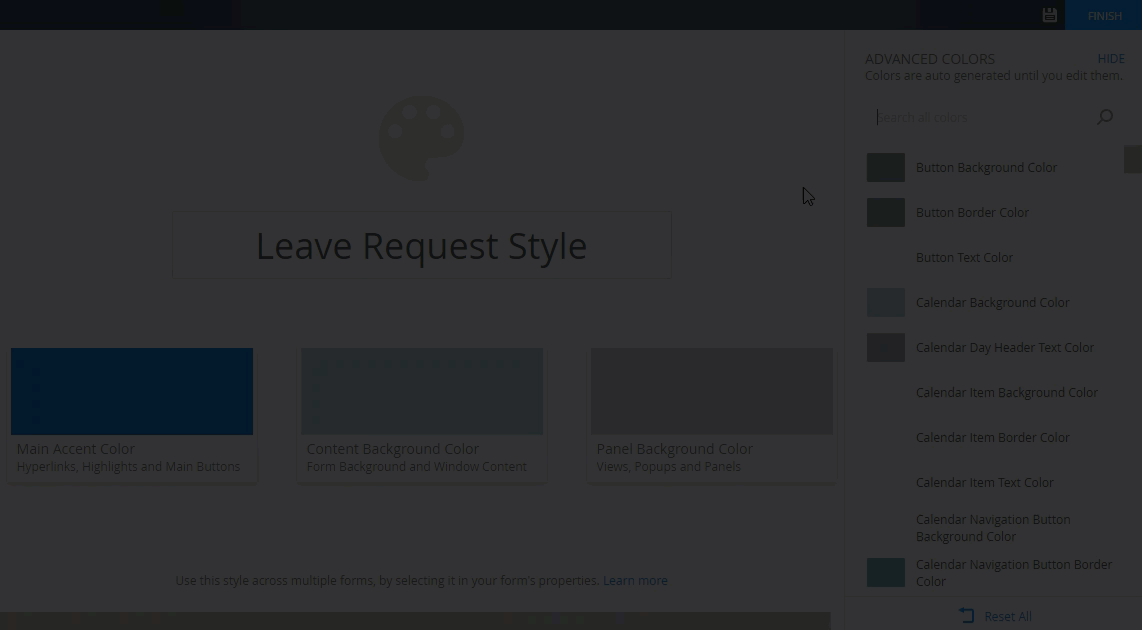
- An edit icon shows next to the color that you configured. Click the X to return to the top of the list.
- The configured color shows in the Changed section.
- Next you want to change the color of the title of the form. This is the label that you added and configured with Heading 1 style. Type head in the search bar. Select Heading 1 Text Color and select the new color for the title from the color picker. This updates the text color of all items with a Heading 1 style.
- Click the X to return to the top of the list. Both configured colors show in the Changed section.
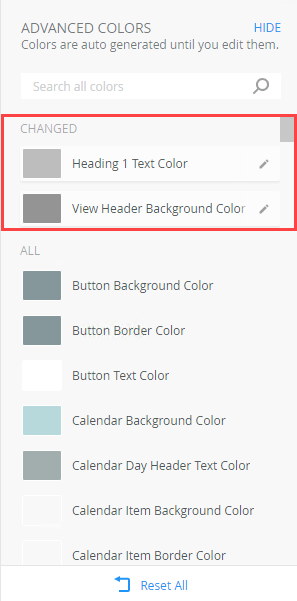
- Next you want to change the Calendar Background Color to be the same as the Heading 1 Text Color color. Click the Heading 1 Text Color and copy the code in the code value box. Click the Calendar Background Color and replace the code in the code value box with the code you copied. The same color now applies to the background color of the calendar.

- Click Finish to save the changes to your style profile.
- In the Advanced Colors panel on the right of the design canvas, type view in the search bar. Select View Header Background Color and select the color you want to change the background of the view headers to from the color picker. Note the automatic updates to the related colors in the group to blend with the new color.
-
Test the solution by running the Leave Request Form form to see the new style applied.
- From the Designer, select the Leave Request Form and click Run.
- The Leave Request Form shows the new style you configured.
- If you are not satisfied with your changes, you can edit the colors and select new colors, or you can reset the configured colors. Edit the style profile and open the Advanced link. To edit the color, simply select the color and use the color picker or color value bar to select a new color.
- To reset a color, hover over the color you want to change and click Reset. When you reset a color, the color and related group colors are automatically regenerated based on the three main colors.

- If you want to start over and reset all the advanced colors, click Reset All at the bottom of the panel.
- From the Designer, select the Leave Request Form and click Run.
Review
You learned how to use the Style Profile Designer to edit a main color and configure advanced colors for specific items. You can use this style profile on multiple forms by linking to the Style Profile property on each form. When you make changes to the style profile, these changes are applied to all the forms, meaning you don't have to change each form individually. See Using Advanced Colors for more information about advanced colors, and Style Profile Considerations and Best Practices for tips and best practices when creating a style profile.