How To: Update an Existing SmartObject to Another Data Source and Reconfigure a View Rule
This article demonstrates how to rebind the properties and replace the methods of an existing SmartObject with those from another SmartObject. You learn how to bind the target and original data source properties, then reconfigure a rule action in a view so that it reflects the new data source. The result is an existing SmartObject that returns data from another data source, with minimal interference in existing views, controls, and rules.
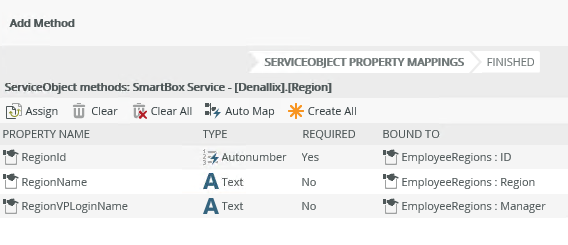
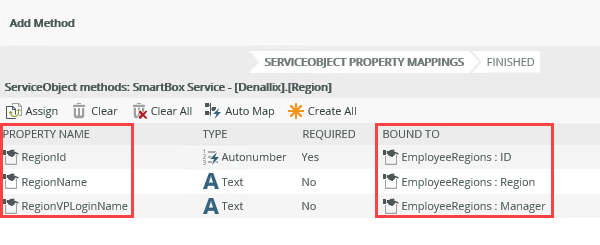
Properties mapped between two SmartObjects
Scenario
You work in Human Resources and have several forms that employees can submit online. As a best practice, you use data sources for drop-down list controls, such as leave types and departments. IT has informed you that you must use data sources maintained by them for consistency across departments. You must configure your views and forms to use the standard IT data sources.
Steps
In this demonstration, you edit an existing SmartBox SmartObject and remove the methods. You add methods from another SmartObject, then bind the target properties to the original properties. Finally, you update a rule in an associated view to reflect the new method.
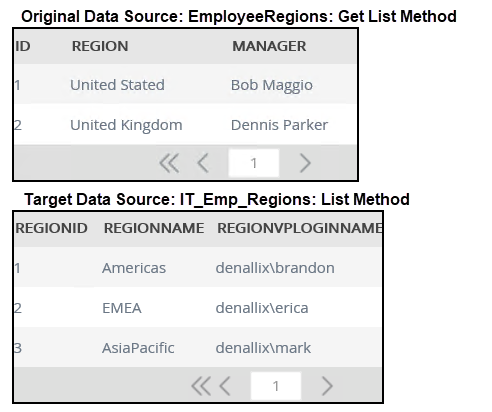
Execute both SmartObjects. Make a note of the results returned for each. You compare the results in a later step.
Setup Steps
The following steps set up the scenario from start to finish.
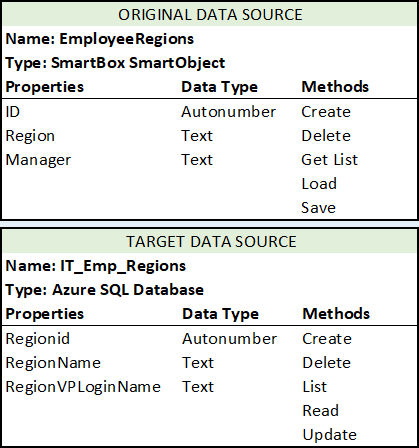
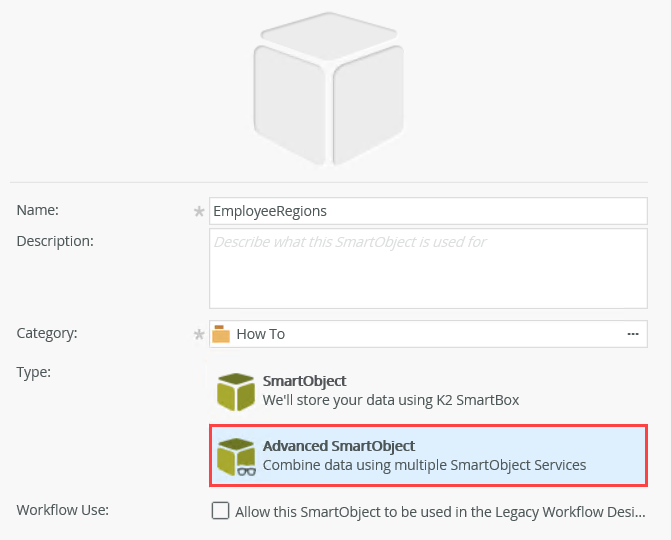
- In the Designer, edit the EmployeeRegions SmartObject. (This is the original SmartObject.) In the General settings, change the type to Advanced SmartObject. Remove the existing methods. From the Service Object tree, drag the target data source table (IT_Emp_Regions > [Denallix].[Regions]) onto the screen. Map the three target properties to the original properties. Save and exit the SmartObject.
- In the Designer, edit the EmployeeRegions SmartObject. Click the General tab. Change the Type to Advanced SmartObject. The advanced option allows you access to other service object methods and properties.
- Click the Properties & Methods tab.
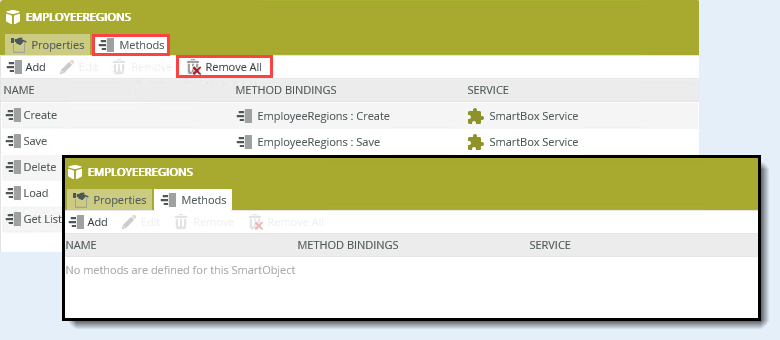
- In the EmployeeRegions screen, click the Methods tab. Click Remove All to delete the original methods. Click Yes when prompted for a confirmation.
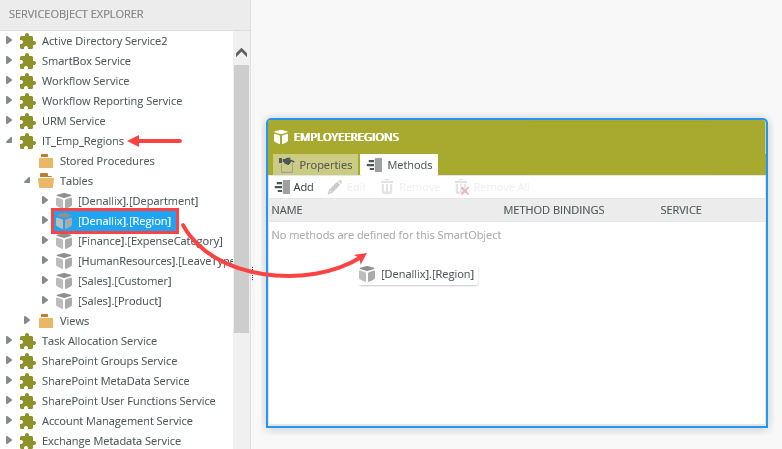
- Next, you add the methods from the target data source. On the left side of your screen, locate the IT_Emp_Regions service object. (This is the target data source.) Expand the node, then expand Tables. Drag the [Denallix].[Region] SmartObject onto the EmployeeRegions screen.
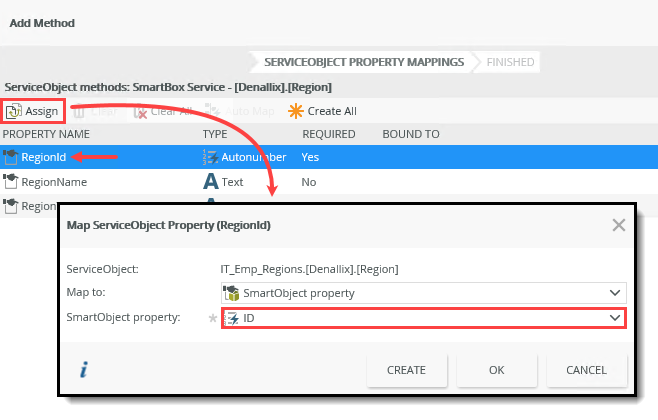
- Begin by binding the IDs from both data sources. Select Regionid, then click Assign. On the Map ServiceObject Property (Regionid) screen, confirm the SmartObject property is ID, then click OK. The ID in the target data source is now bound to the ID in the original data source.
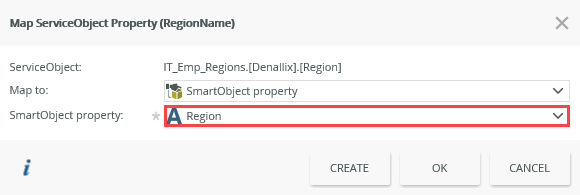
- Select RegionName, then click Assign. Map it to the Region property. Click OK.
- Select RegionVPLoginName and map it to the Manager property.
- You should see each property in the target data source mapped to their corresponding property in the original data source. Click Finish.
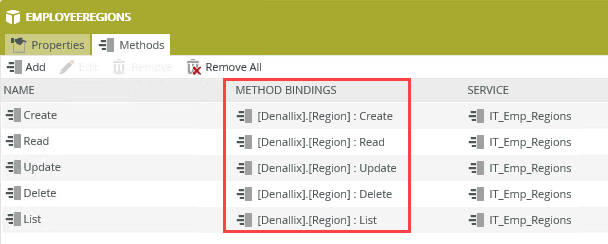
- Notice the Method Bindings now reflect the target data source methods. Click Finish to save and exit the SmartObject.
You are on the Service Object Property Mappings screen. Here, you must map the properties in the target data source to the properties in the original data source. In this way, the system keeps any existing data, but associates it with the new property name.
Note that you do not have to map all properties. For example, if the target data source has more properties than the original data source, you can skip the extra properties you don't need. - In the Designer, edit the EmployeeRegions SmartObject. Click the General tab. Change the Type to Advanced SmartObject. The advanced option allows you access to other service object methods and properties.
- Next, edit the view designed from the SmartBox SmartObject. Change the view executed initialize method to List. In the configuration setting, remap the Context Browser > view (that you designed from the SmartBox) > EmployeeRegions (SmartObject) > ID to the Input Properties > ID.
If you designed a view from the original SmartBox SmartObject, the system created rules on your behalf for loading list content when the view opens. The rule is now broken as it reflects the methods from the original data source. You must update the rule to reflect the corresponding method from the target data source.
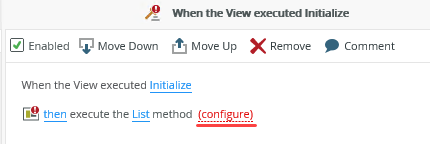
- Edit the view you designed from the EmployeeRegions SmartObject. In the image below, the view name is Employee Regions List. Click the Rules tab. Notice there is a red warning badge next to the title indicating an error.
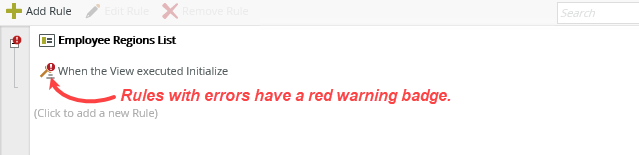
- Select the When the View executed initialize rule and click Edit Rule.
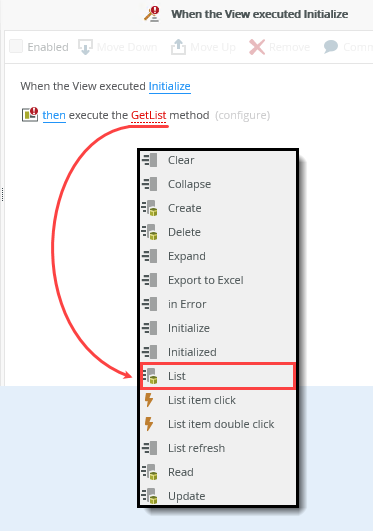
- In the rule definition pane, the system marks any errors in red. In this case, you see Get List is red. Get List is a method from the original SmartObject. Since you replaced the original methods with those from the target SmartObject, you must update this action to reflect the new method. Click Get List and select List from the drop-down options.
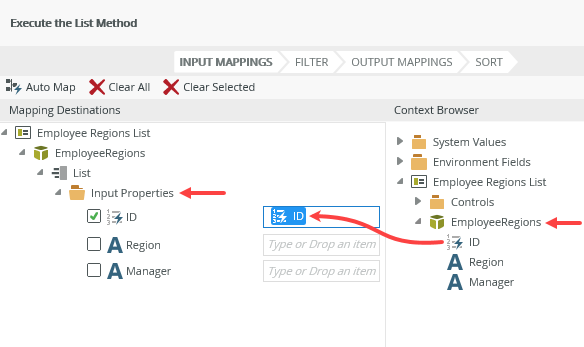
- Click (configure). You must remap the input property since you changed the method.
- From the Context Browser, map the Employee Regions List (view) > EmployeeRegions (SmartObject) > ID to the Input Properties > ID. This bind associates each record result with a record in the SmartObject. Click Finish. Click OK to save the rule action. Click Finish to save and exit the view.
- Edit the view you designed from the EmployeeRegions SmartObject. In the image below, the view name is Employee Regions List. Click the Rules tab. Notice there is a red warning badge next to the title indicating an error.
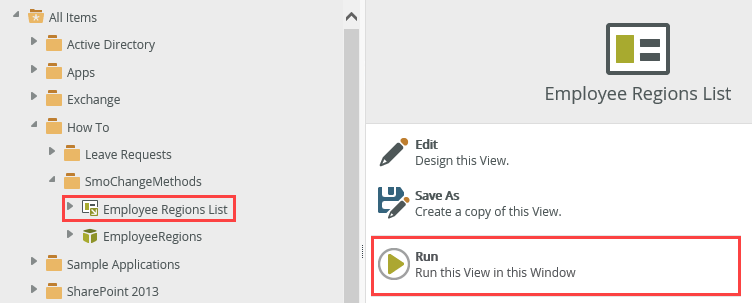
- Run the view. You should see results from the target SmartObject returned. Notice the property names do not change and still reflect the original data source.
- Select the view, then click Run. In the image below, the view name is Employee Regions List.
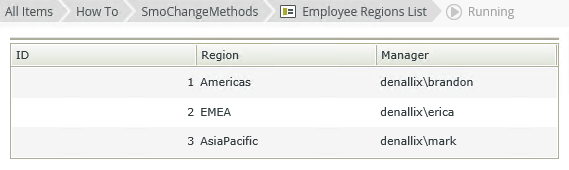
You see results returned from the target data source. What is significant is the column titles reflect the original data source. Because you mapped the target properties to the original properties, the system retained the original property names. If you have any rules, controls, or configurations bound to the property name, you do not need to update them when changing data sources.
- Select the view, then click Run. In the image below, the view name is Employee Regions List.
Review
SmartObjects consist of properties and methods discovered in service objects (or data sources). Most views, controls, and rules have an association with a SmartObject. You can point your SmartObject methods and properties to a different data source without loss of data, or the need for extensive reconfiguration. In some cases, you may need to make minor edits (such as updating a method type in a rule action).