How To: Create an Outlook Task in a workflow
This topic shows you how to use the Task SmartObject of the Exchange Online Broker in a workflow to create Outlook tasks.
The Exchange Task API does not include a recipient value and assumes that the task is added to the current user's Task folder. The example workflow uses the On behalf of parameter to store the email address of the person to impersonate, then calls the Create method using that account.
Using an Order form to create tasks in a users Outlook

Scenario
The scenario below shows you an example of how to use the Task SmartObject's Create method in a workflow. It adds a task to the order packer's Outlook calendar, and uses a SmartForm to gather information about the order and then starts the workflow. In this example the task is added to Chris's My tasks folder in Outlook.
Steps
In the below steps you use the Task SmartObject and its create method to create a view, a form, and a workflow. These allow you to fill in information about an order and start a workflow which creates a task in Outlook.
Setup Steps
The following steps set up the scenario from start to finish. If you want to skip the setup steps and view the topic step, go to Create the Orders Workflow.
-
Activate the Exchange Online Feature
- Before you start creating the Orders view, you must activate the Exchange Online feature.
- Once activated, create the Orders view and then add it to a form.
-
Create the Order SmartObject
- In the Designer, create a new SmartObject. In this example it is named Orders
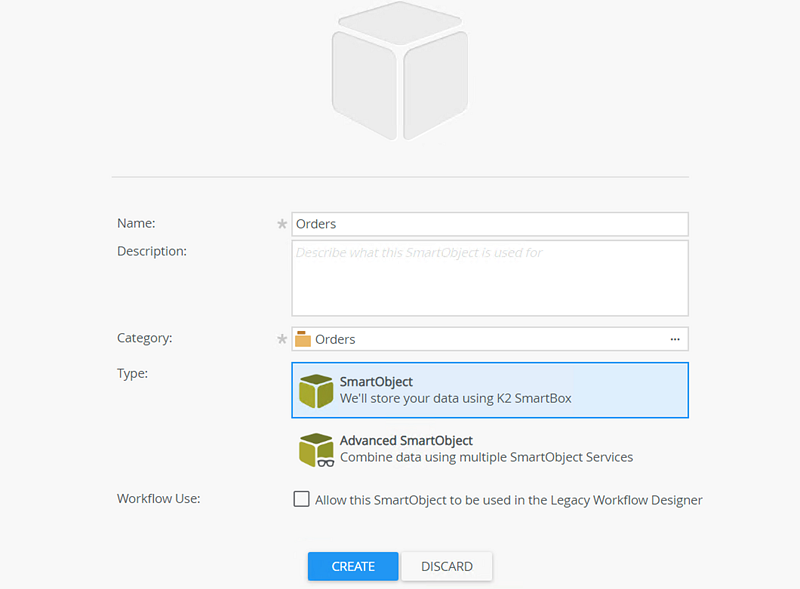
- Add two properties called Item and Quantity as shown below:
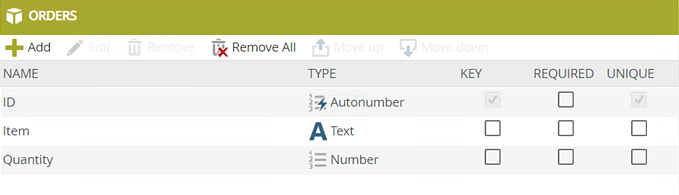
Order SMO Properties Type Key Required Unique ID Autonumber Yes No Yes Item Text No No No Quantity Number No No No - Click Finish to save the SmartObject
- In the Designer, create a new SmartObject. In this example it is named Orders
-
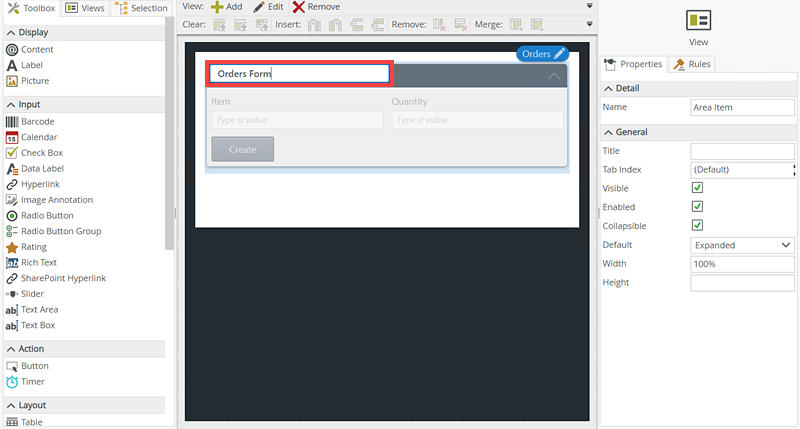
Create the Orders View
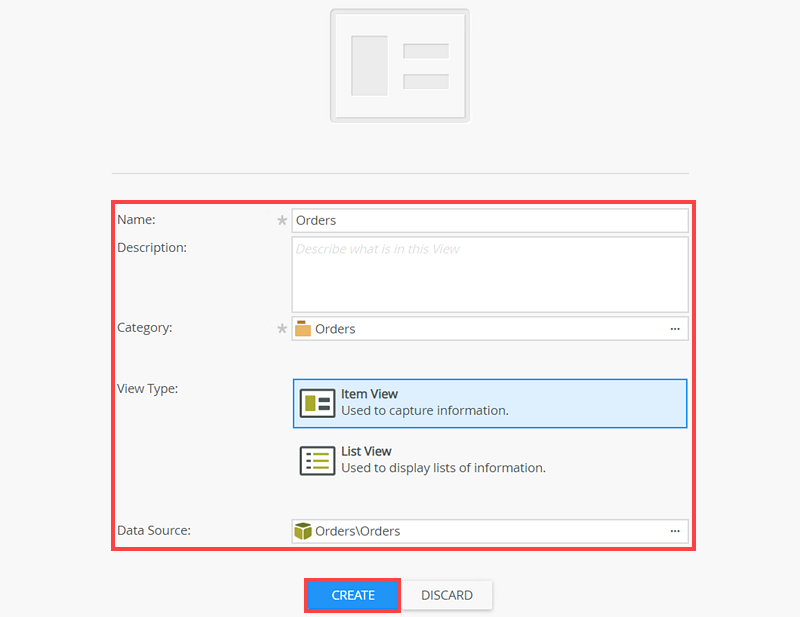
- Click Design a new View.
- Enter Orders as the name of the view.
- Select the same category as the Orders SmartObject.
- Select Item View and click Create.
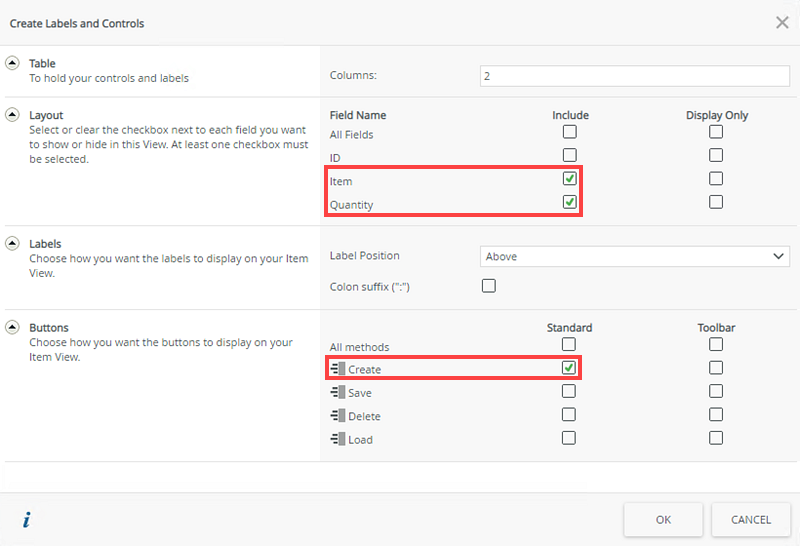
- Select Create Labels and Controls.
- Select Item and Quantity fields for the layout and select the Create method for the button. Click OK.
- Click Finish to save the view.
-
Create the Orders Form
- Click Design a new Form.
- Enter Orders as the name of the form and click Create.
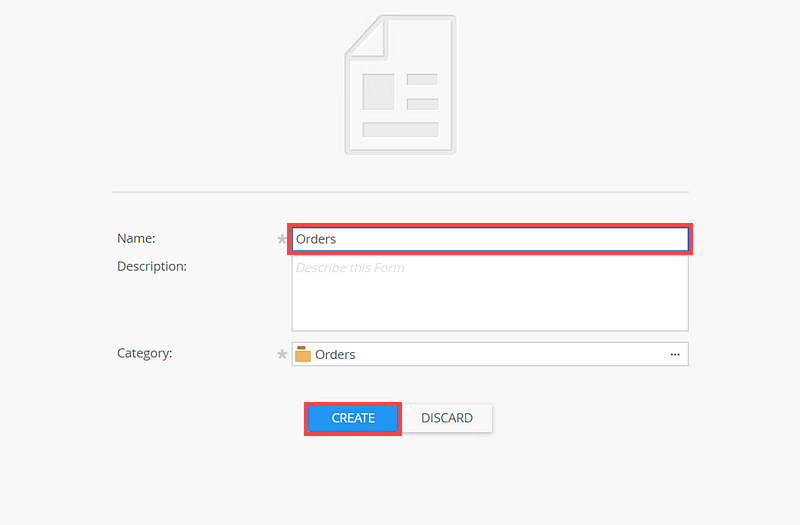
- Add a title to the form.
- Click Finish to save the form.
Create the Orders Workflow
The steps below discuss how to configure the Orders Workflow.
-
Create the Orders Workflow
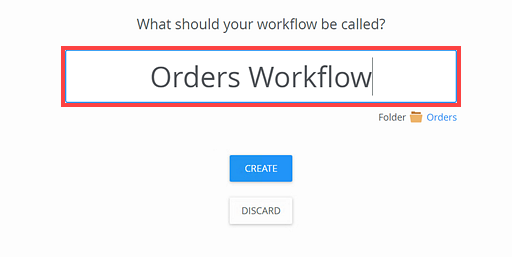
- Click Design a new Workflow.
- Type in a name and click Create.
- Configure the workflow's Start rule to run when the Create Button is Clicked. Click Next.

- From the left side of the workflow designer, select the SmartObject Method step and drag in onto the canvas.

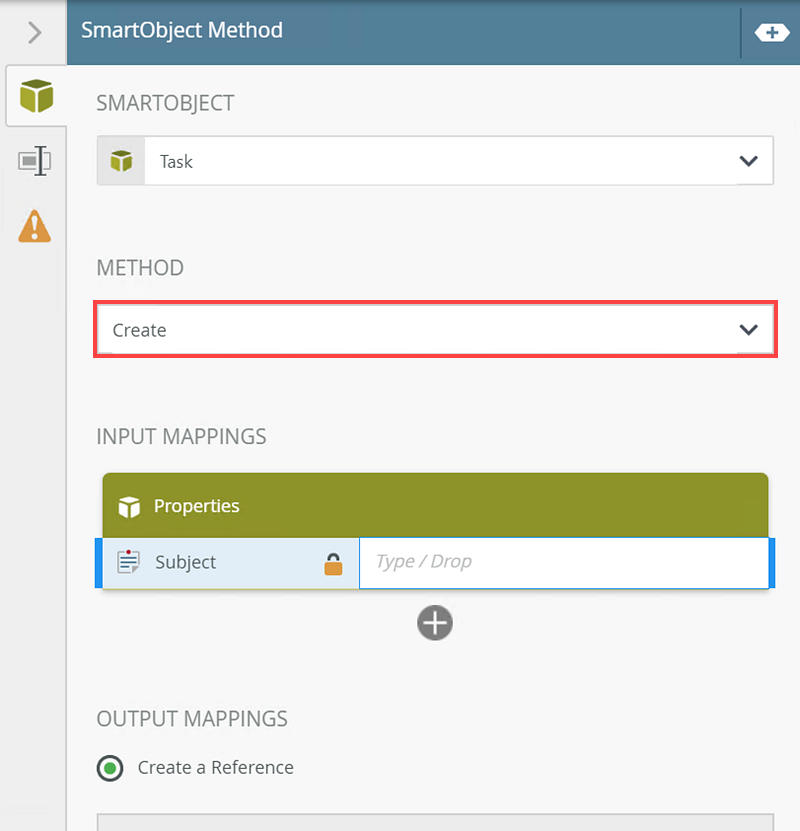
- Select the Task SmartObject from Exchange Online SmartObjects.
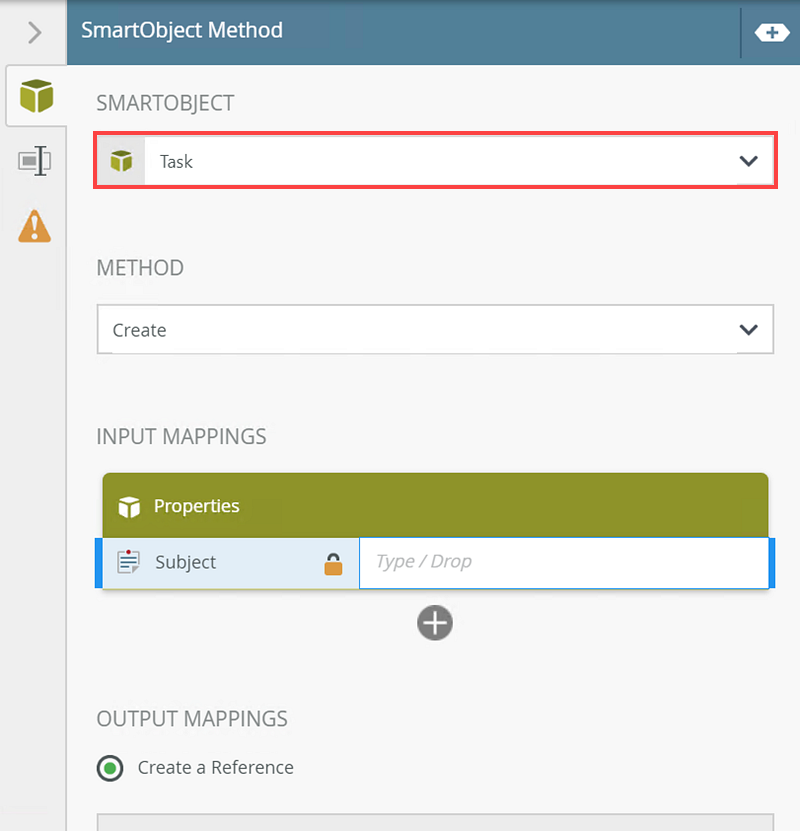
- Select the Create method.
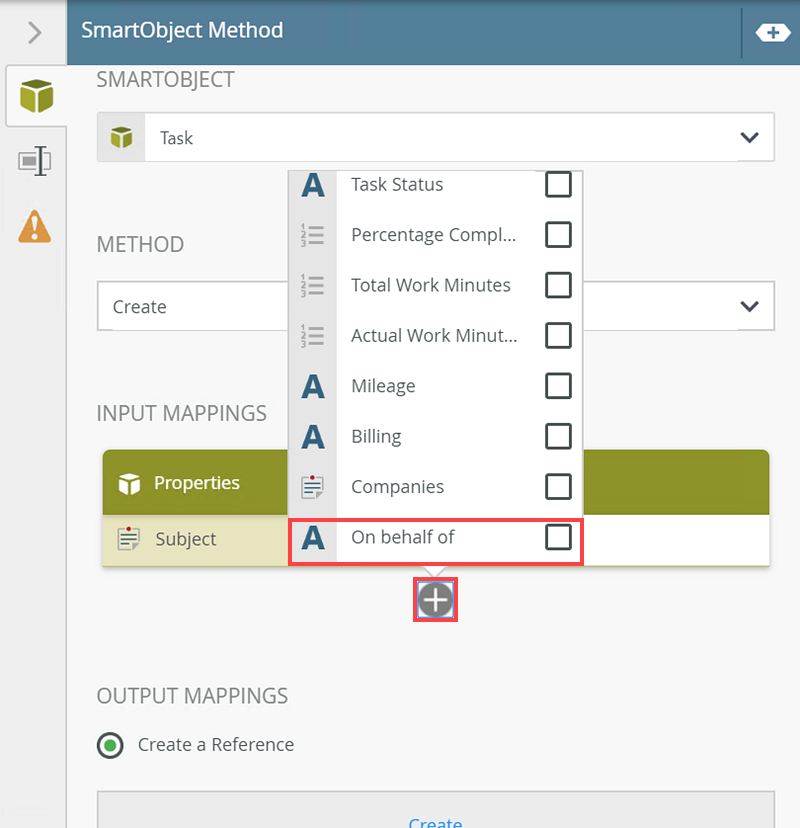
- Expand the SmartObject event configuration and add the On behalf of parameter.
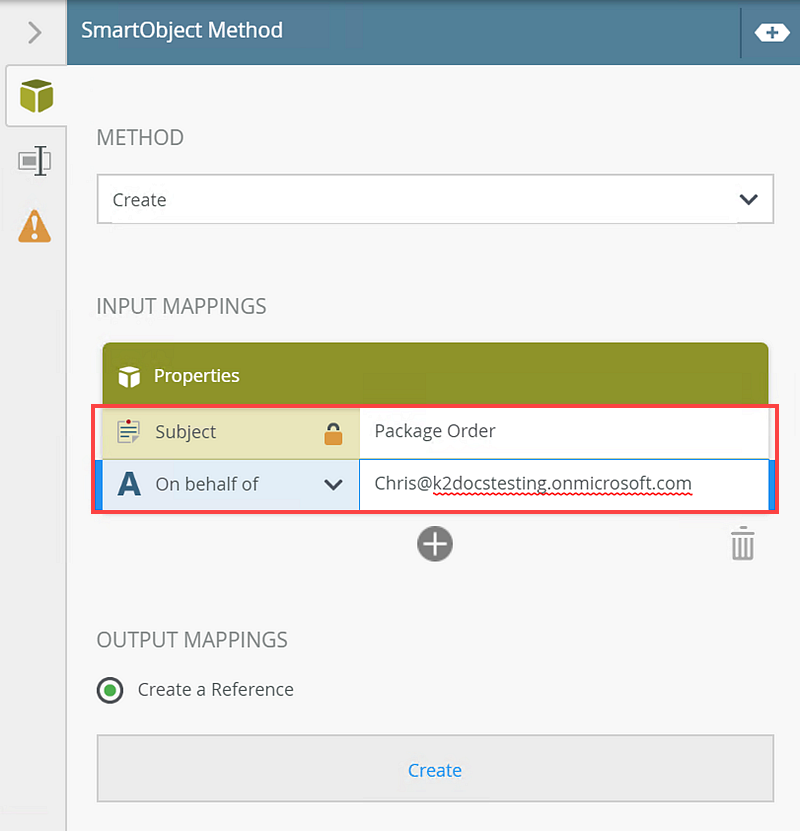
- Add Package Order as the Subject for the task. Enter the email address of the person who will package the order as the On behalf of value (the task is created in this person's My Tasks folder). In this example, Chris packages all orders, but you can use someone in your organization or a field in your workflow or environment that contains a valid email address.
- Deploy the workflow.
-
Test the solution
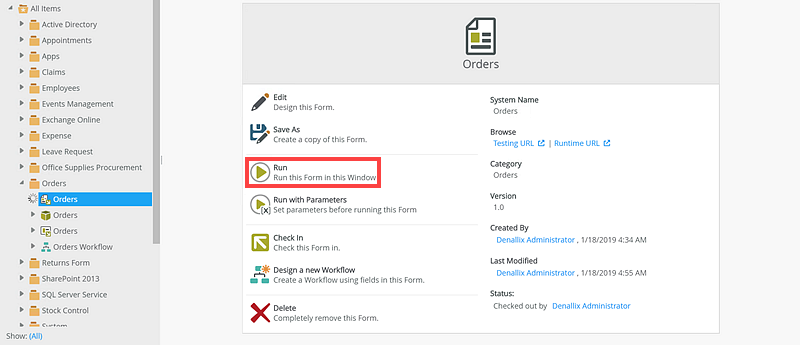
- On the Orders form page, click Run.
- On the form, enter an Item and Quantity value. Click Create.

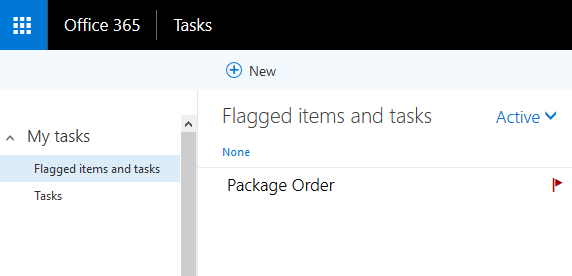
- The values are added to the SmartObject and the workflow starts, creating a task in Chris's My tasks folder in Outlook.
- Log in to Outlook using the account of the person you configured to package the order. The task shows in the Tasks folder.
- On the Orders form page, click Run.
Review
In this topic you learned how to create a SmartObject, view, form, and workflow that creates a task in the My tasks folder in Outlook.