How To: Create an Exchange Appointment Form
This topic shows you how to use the Appointment SmartObject of the Exchange Online Broker to create a form that adds an appointment in the attendees' Outlook calendars.
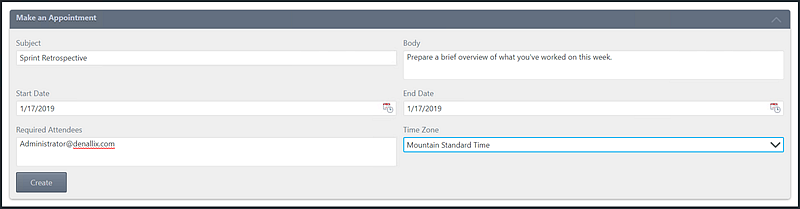
Appointment Form
Scenario
In this scenario, you build a Make an Appointment form using the Create method of the Appointment SmartObject. The Make an Appointment form captures appointment information such as the subject, start date, end date, and time zone of the appointment, and a list of attendees.
More properties are available from the Appointment SmartObject. See Exchange Online SmartObjects Reference for more information.
Steps
In the following steps you build a view and form based on the Appointment SmartObject using the Exchange Online service.
Setup Steps
The following steps set up the scenario from start to finish. If you want to skip the setup steps and view the topic step, go to Create an Exchange Appointment Form.
-
Activate the Exchange Online Feature
- Before you start creating the Make an Appointment form, you must activate the Exchange Online feature.
- Once activated, create the Make an Appointment view.
-
Creating the Make an Appointment View
- Open the Designer and create a category folder called Appointments.
- Create a new Item View called Make an Appointment.
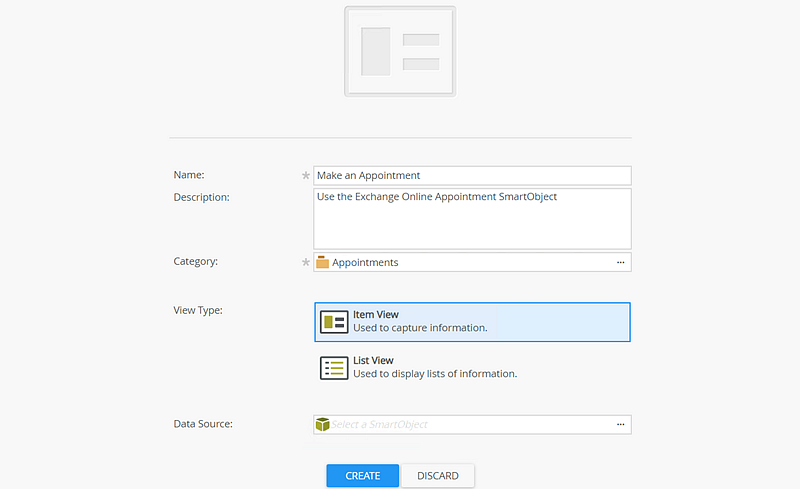
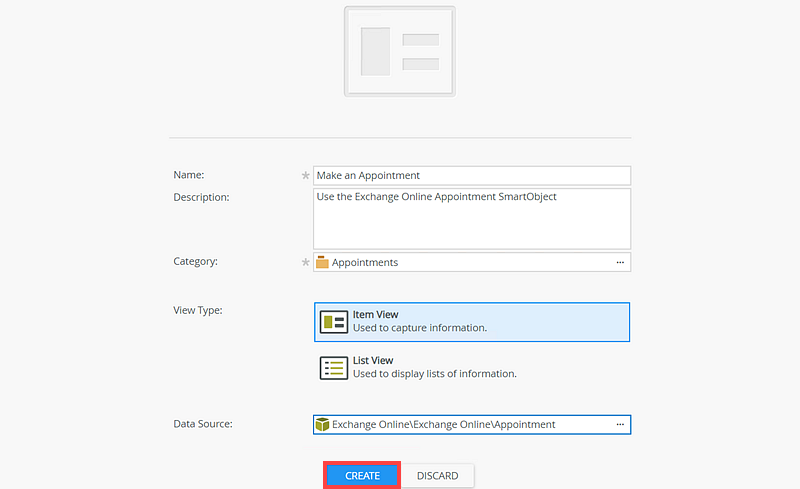
- On the Data Source option select the Appointment SmartObject.

- Click Create.
-
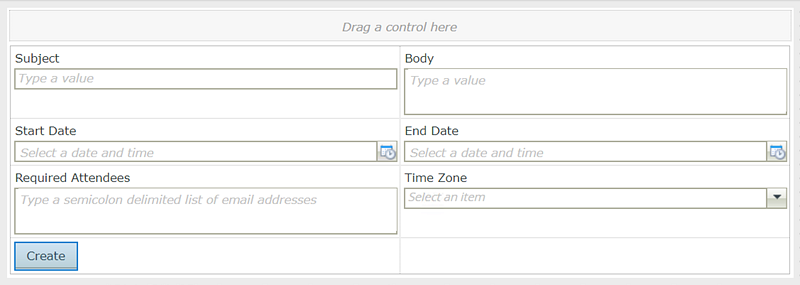
Click the Create the Labels and Controls option in the empty view.
- Click the Create Labels and Controls link.
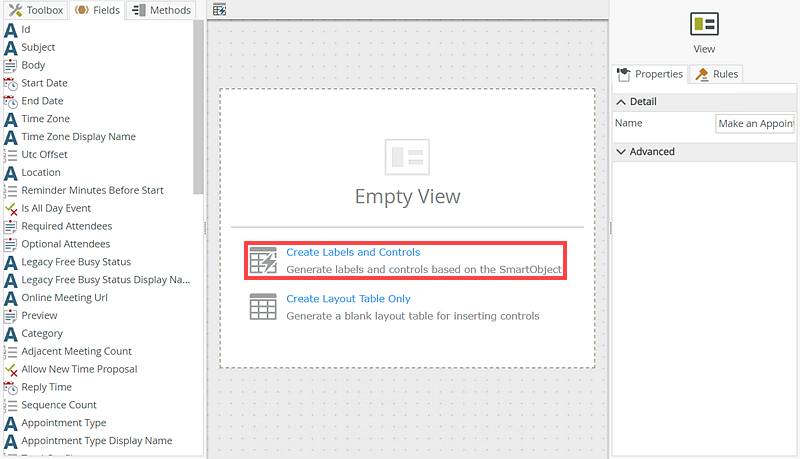
- Select to include the Subject, Body, Start Date, End Date, and Required Attendees fields.
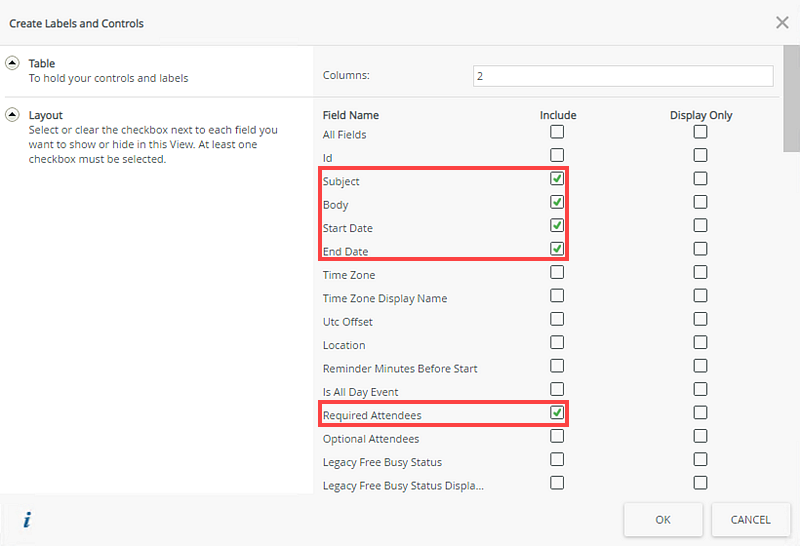
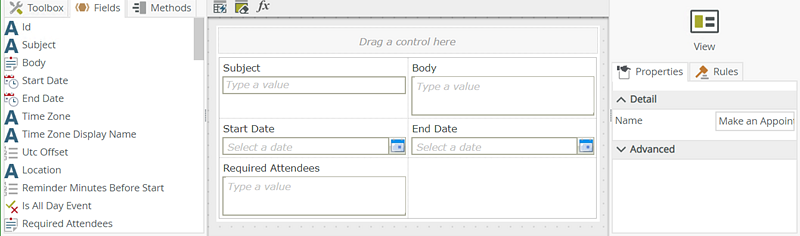
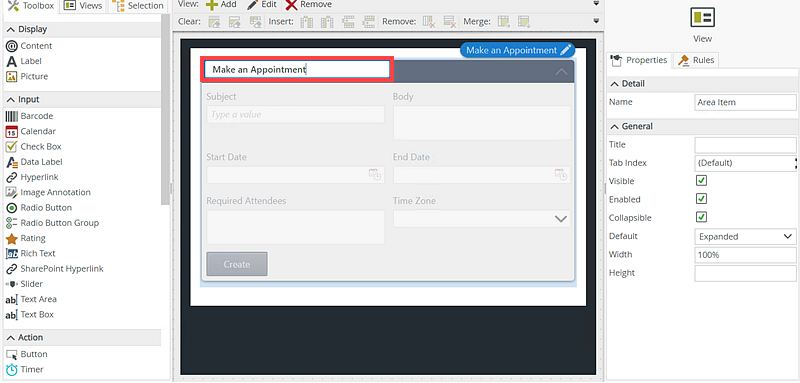
- The view looks like the following:
- Click the Create Labels and Controls link.
-
Configure the Start Date Control
- Select the Start Date calender control and click the Picker Type setting.
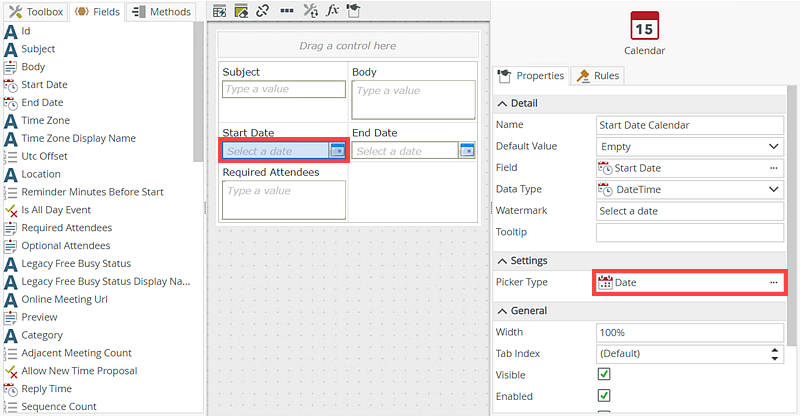
- Configure the control to include the Date and Time, selecting hh:mm:ss tt as the Time format. Click OK.
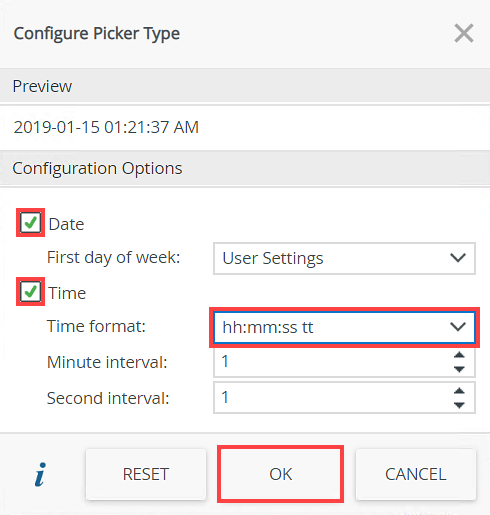
- Select the Start Date calender control and click the Picker Type setting.
-
Configure the End Date Control
- Select the End Date calender control and click the Picker Type setting.
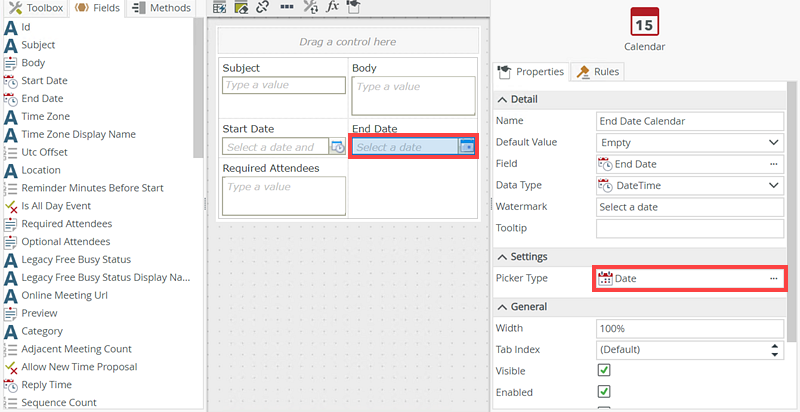
- Configure the control to include the Date and Time, selecting hh:mm:ss tt as the Time format. Click OK.
- Select the End Date calender control and click the Picker Type setting.
-
Configure the Required Attendees Control
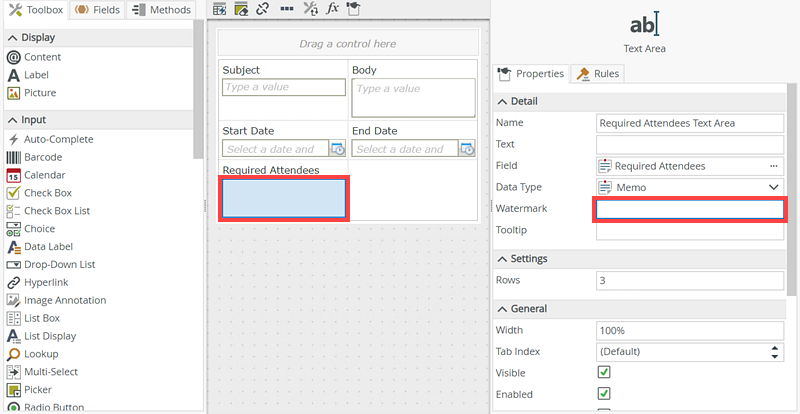
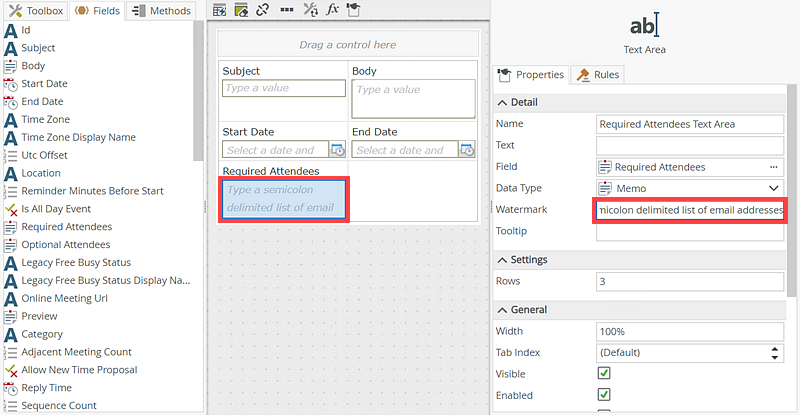
- Select the Required Attendees text area control and change the Watermark to Type a semicolon delimited list of email addresses.
- The controls watermark displays as follows.
- Select the Required Attendees text area control and change the Watermark to Type a semicolon delimited list of email addresses.
-
Configure the Time Zone Control
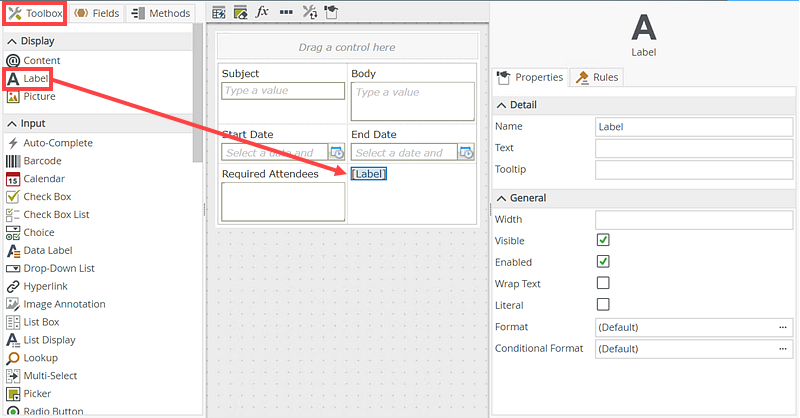
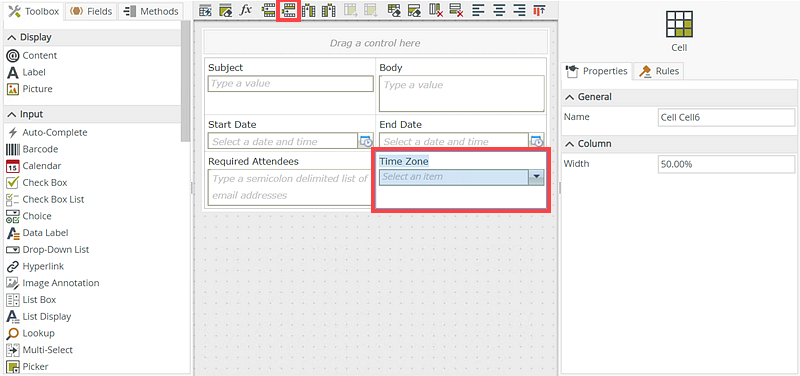
- Select the view Toolbox tab and drag a Label control on the empty cell below End Date.
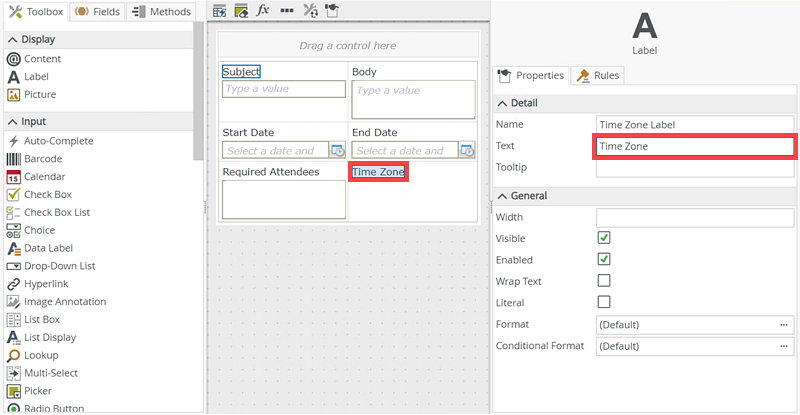
- Change the label Name to Time Zone Label.
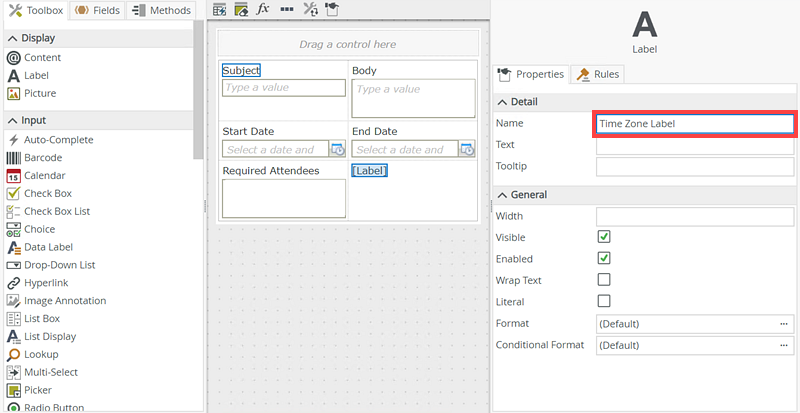
- Enter Time Zone in the Text field.
- Select the Drop-Down List control from the Toolbox and drag it below the Time Zone Label.
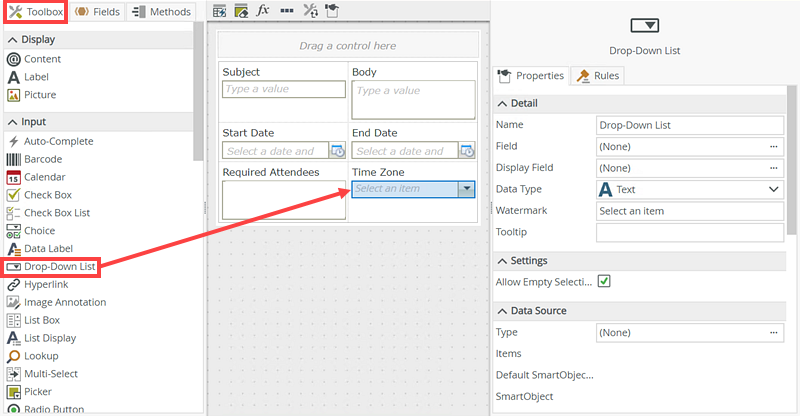
- Configure the Drop-Down List to use Time Zone for the field.

- Click the ellipses of the Type option in the Data Source section.
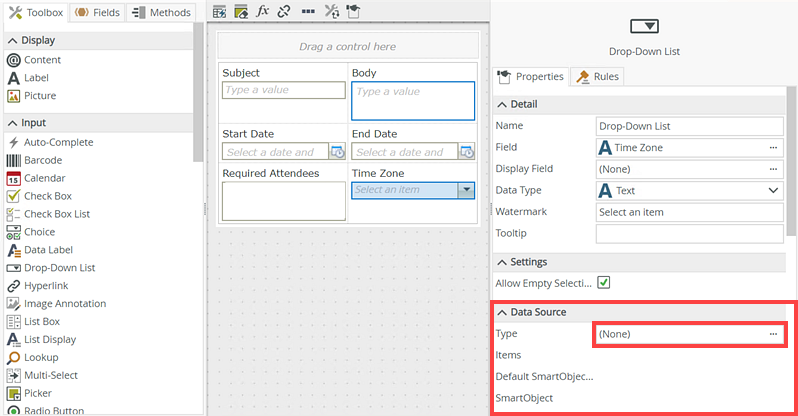
- On the Configure Data Source page, click the ellipsis on the SmartObject field.
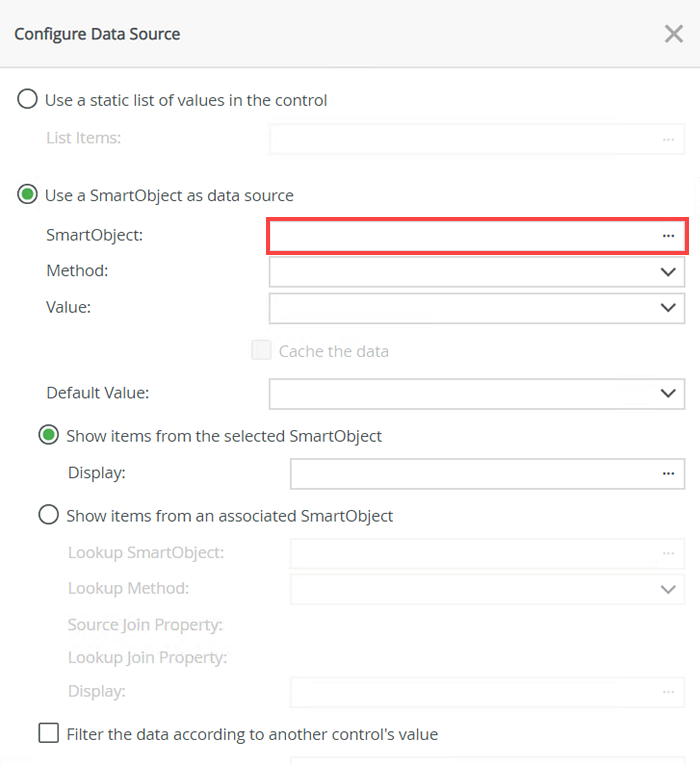
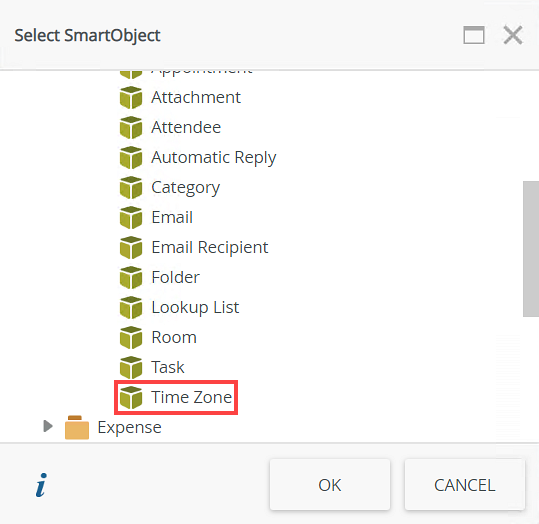
- Select the Time Zone SmartObject as the data source and click OK.
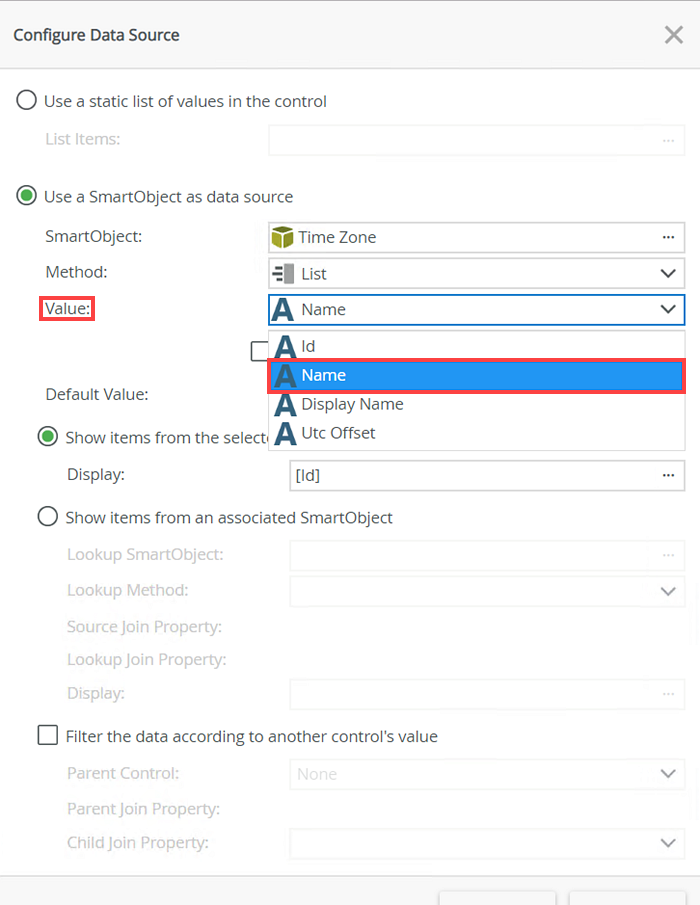
- Select Name from the Value drop-down. Click OK to complete the data source configuration.
- Click on the empty space below the Time Zone drop down in the view and select Insert Row Below from the top view menu icons.
- Select the Methods tab in the toolbox and drag the Create method into the new row.
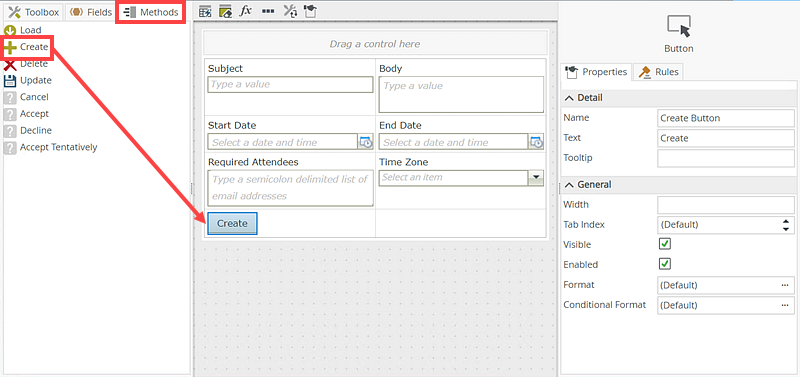
- Your Make an Appointment view should look similar to the following.
- Select the view Toolbox tab and drag a Label control on the empty cell below End Date.
Create an Exchange Appointment Form
The steps below show you how to create the form used in this scenario.
-
Create the Make an Appointment Form
-
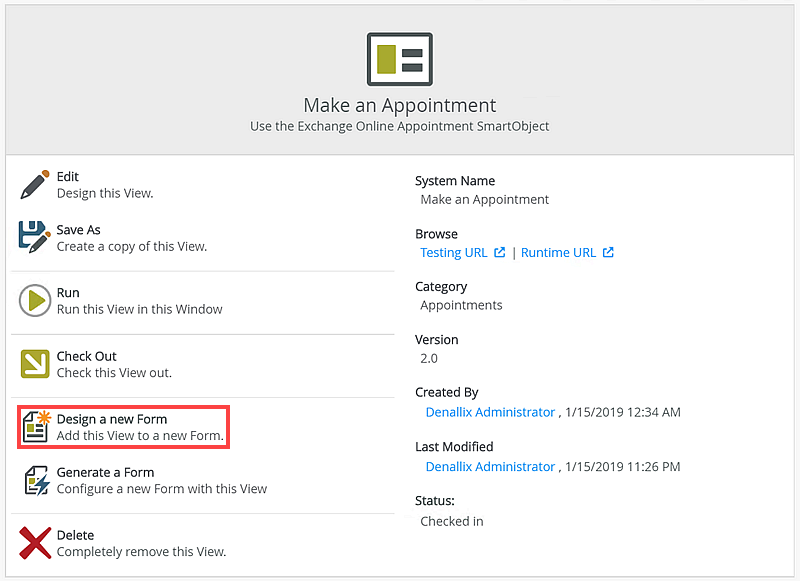
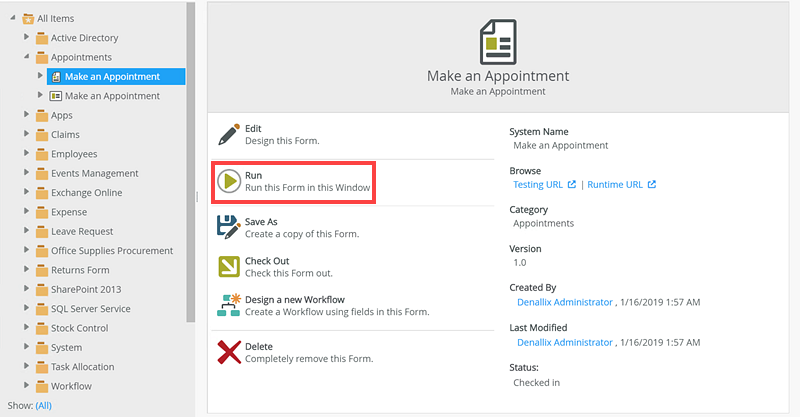
From the Make an Appointment view page, select the Design a new Form option.
-
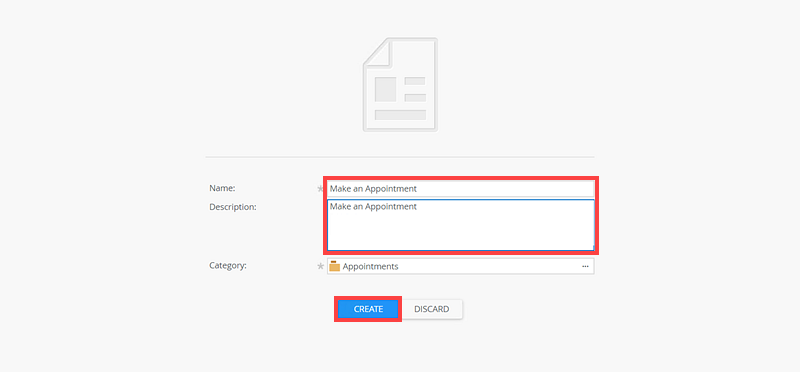
Specify Make an Appointment as the Name and Description and click the Create button.
-
Click the (Enter View Title) area and type Make an Appointment.
- Click Finish.
-
From the Make an Appointment view page, select the Design a new Form option.
-
Test the Make an Appointment Form
- Select Run from the Make an Appointment form.
- Specify a Subject and Body.
- Specify a Start Date and End Date, making the appointment for tomorrow and the end time value an hour later than the start.
- Use your own email address for the Required Attendees value (so the appointment is added to your Outlook calendar). When you're adding multiple recipients, separate them with semicolons.
- Select your time zone from the Time Zone drop-down.
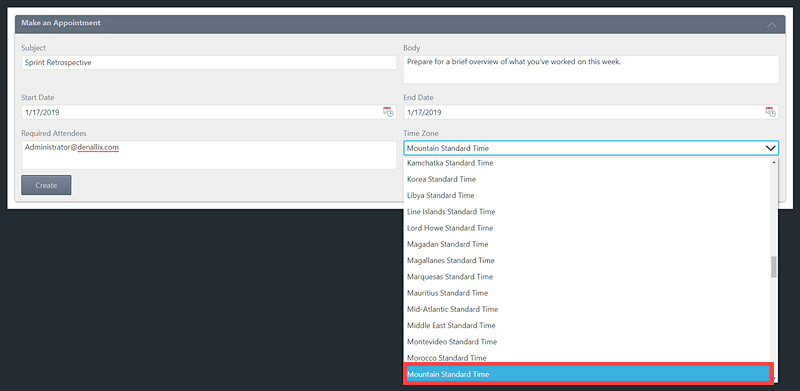
- Click Create.
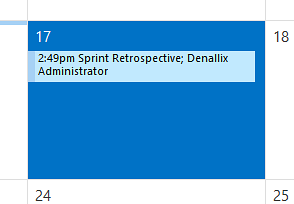
- Open Outlook and check tomorrow's calendar where you see the new appointment.
- Select Run from the Make an Appointment form.
Review
In this topic you learned how to create a view and a form based on the Exchange Online SmartObject called Appointment. You used this form to create appointments in your Exchange calender.