How To: Configure Forms with Draft Functionality
Use this topic to enable forms to be saved as drafts on mobile devices for later completion. For this scenario, you configure the When the Form is Submitting event and the also execute the Submitting Form method action on a form to enable draft functionality in the Workspace (Mobile) app. For more information on drafts in the Workspace (Mobile) apps, see the Drafts topic.
Drafts Functionality
Scenario
In this scenario you create an Insurance Claim form that allows customers to submit an insurance claim. They can save the claim form as a draft and submit it at a later time. Once submitted, the claim form is sent to a claims manager for approval. The claims manager can also save the task form as a draft and complete at a later time. The insurance claim is done using an application form available in the Workspace (Mobile) app. In this scenario, Codi submits the claim and Bob approves it.
Steps
Follow the steps below to configure a SmartObject, view, form, and workflow that illustrates how to enable draft forms.
Setup Steps
The following steps set up the scenario from start to finish. If you want to skip the setup steps and view the topic step, go to the Configure Form Parameters and Rules step.
-
Create the Insurance Claim SmartObject
- Create a basic SmartObject called Insurance Claim.
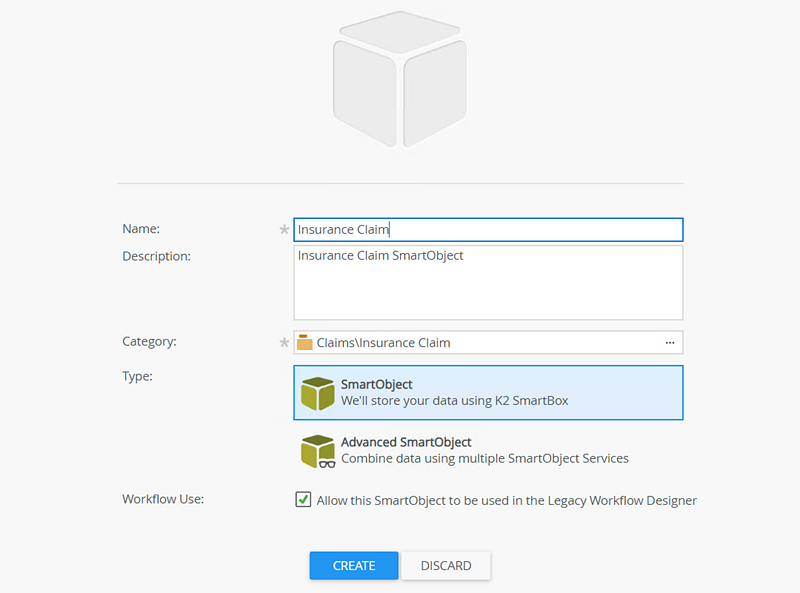
- Add the following properties to the Insurance Claim SmartObject:
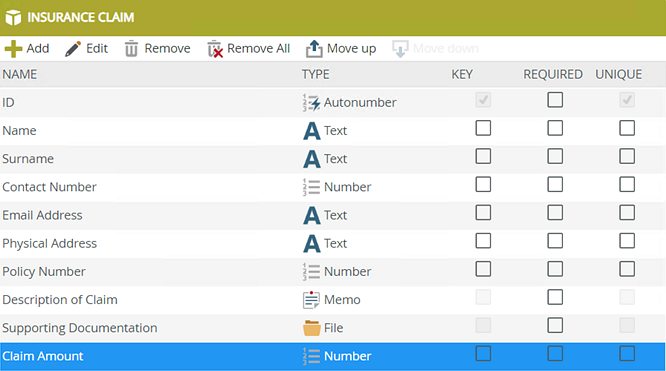
Click Finish.Property Name Type Key Required Unique ID Autonumber Yes No Yes Name Text No No No Surname Text No No No Contact Number Number No No No Email Address Text No No No Physical Address Text No No No Policy Number Number No No No Description of Claim Memo No No No Supporting Documentation File No No No Claim Amount Number No No No
- Create a basic SmartObject called Insurance Claim.
-
Create a view based on the Insurance Claim SmartObject
- Generate an Item List View based on the Insurance Claim SmartObject.
- Remove all buttons on the view.

When removing the buttons, select the Remove all dependencies option on the Dependencies page.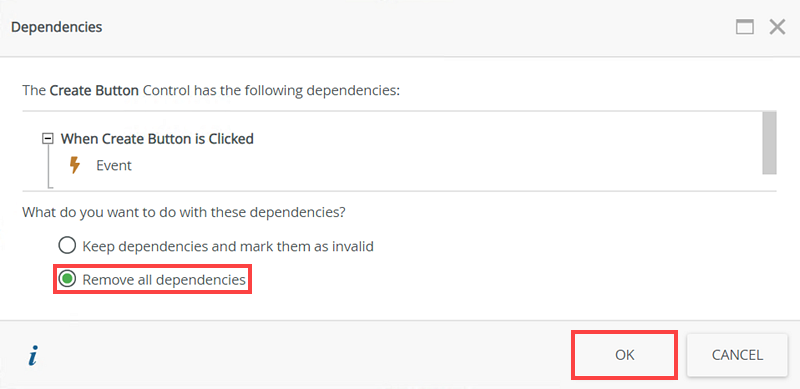
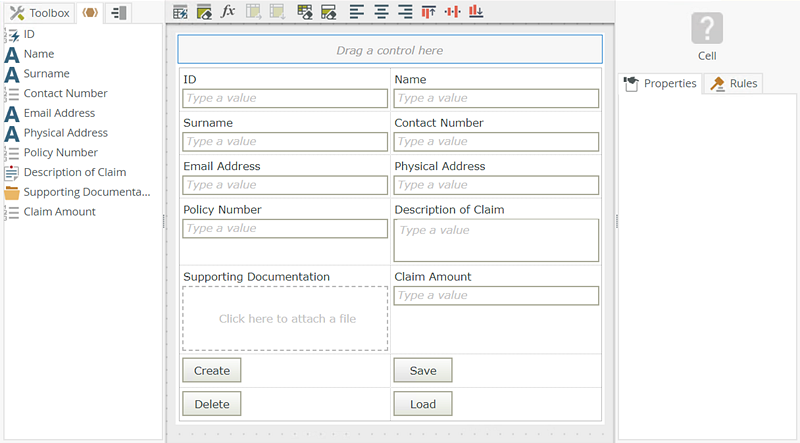
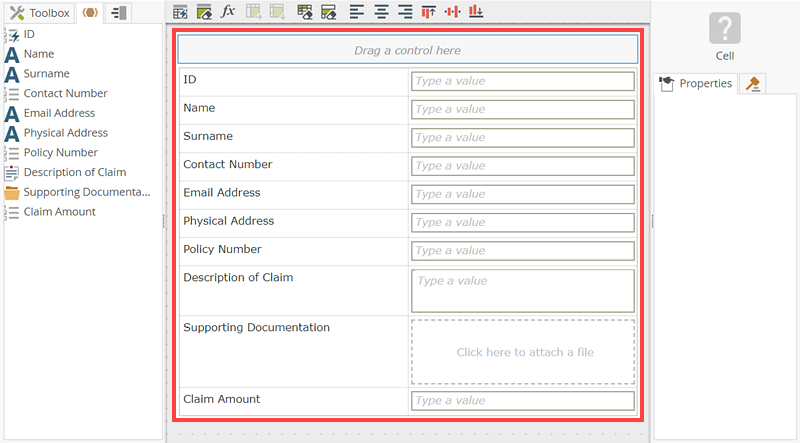
You do this because later you add buttons to the form which execute the create method, start the workflow, and approve or decline the workflow task. In order to use Drafts functionality on your form, you must configure the When the Form is Submitting event and the also execute the Submitting Form method action. - Rearrange the Insurance Claim Item View as shown below:
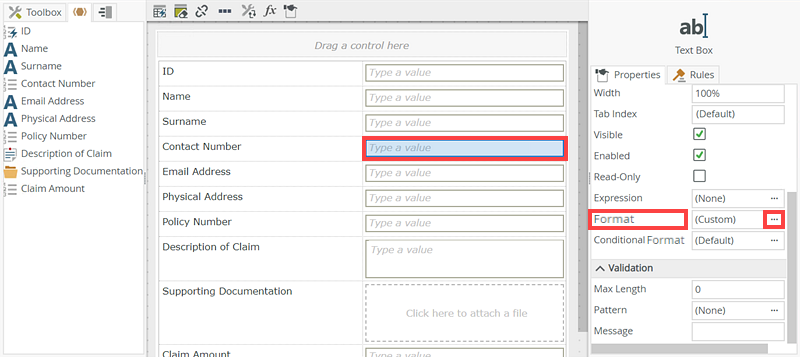
- Select the Contact Number text box and click the Format ellipsis ....
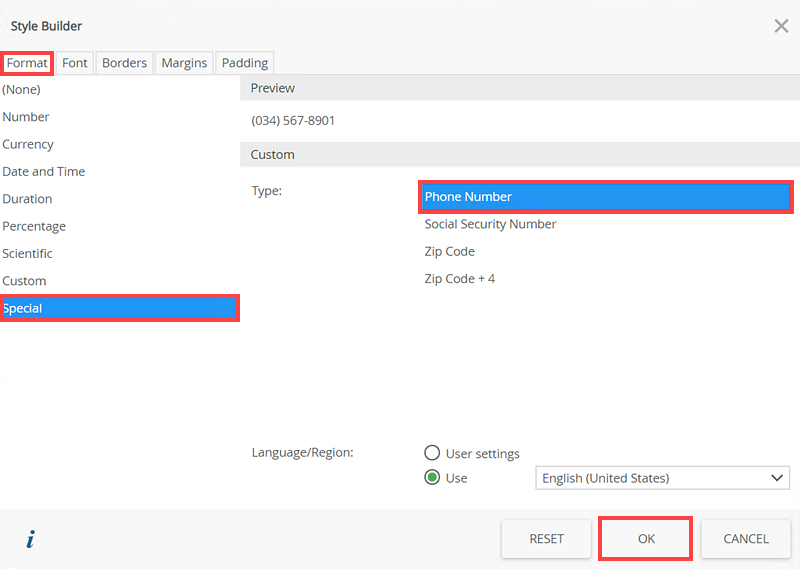
- On the Style Builder page, select Special in the Format tab, then Phone Number. Click OK.
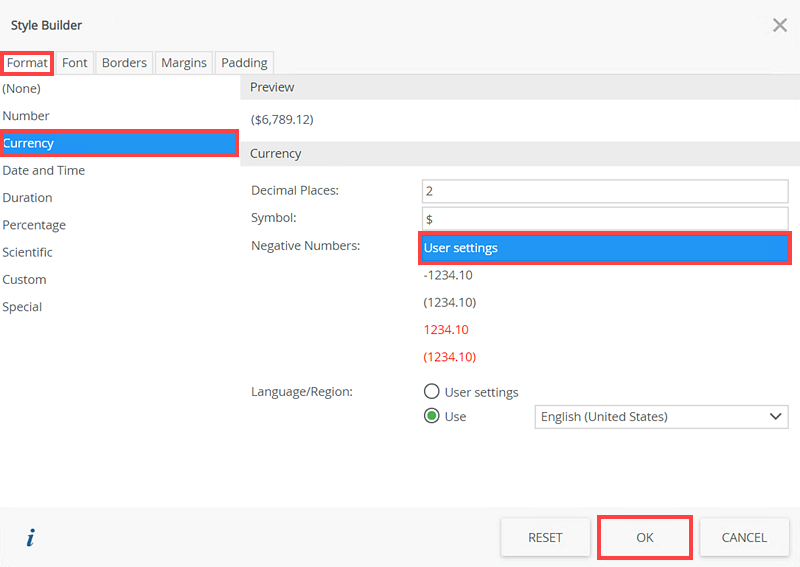
- Select the Claim Amount text box and click the Formatellipsis ....
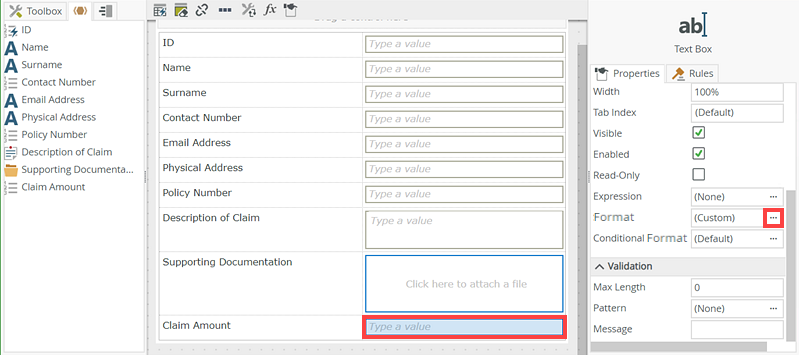
- On the Style Builder page, select Currency in the Format tab, then User Settings. Click OK.
- Generate an Item List View based on the Insurance Claim SmartObject.
-
Create a form based on the Insurance Claim view
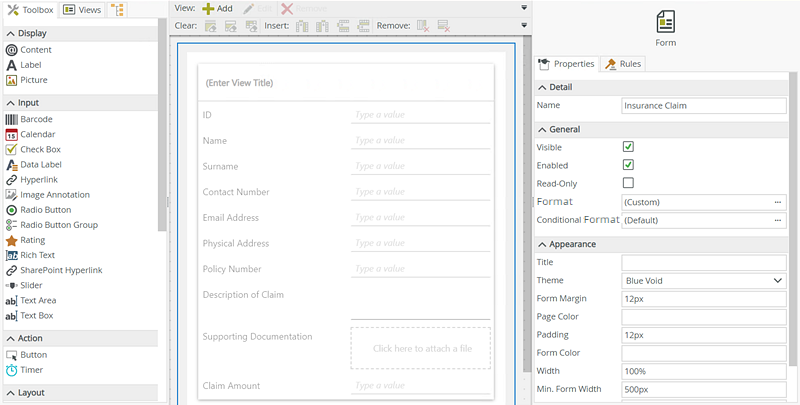
- Generate an form based on the Insurance Claim view.
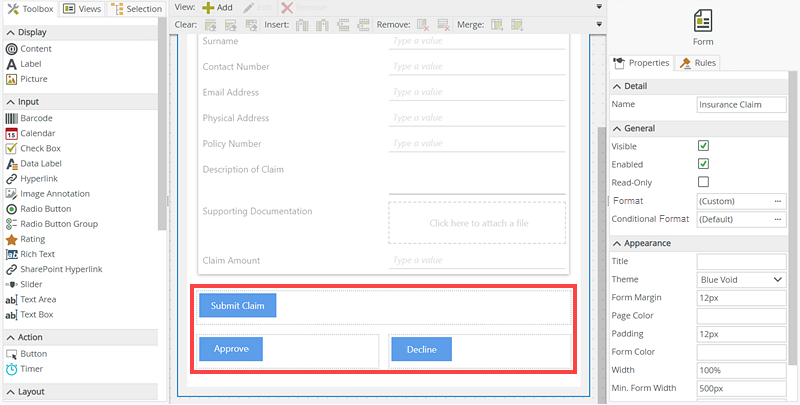
- Add three buttons to the form called Submit Claim, Approve, and Decline
- Expand the Advanced section and check the Application Form and Offline Availability options. Click Finish.

- Generate an form based on the Insurance Claim view.
Configure Form Parameters and Rules
Use the steps below to configure the rules for the Insurance Claim form.
-
Create the rules for the Insurance Claim form
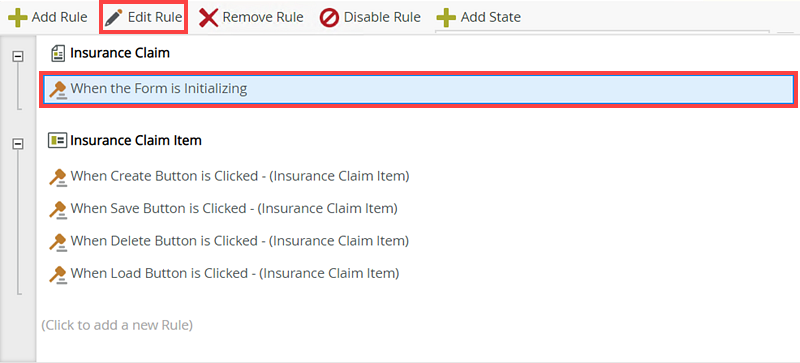
- Open the Insurance Claim form and edit the When the Form is Initializing rule in the Rules tab.
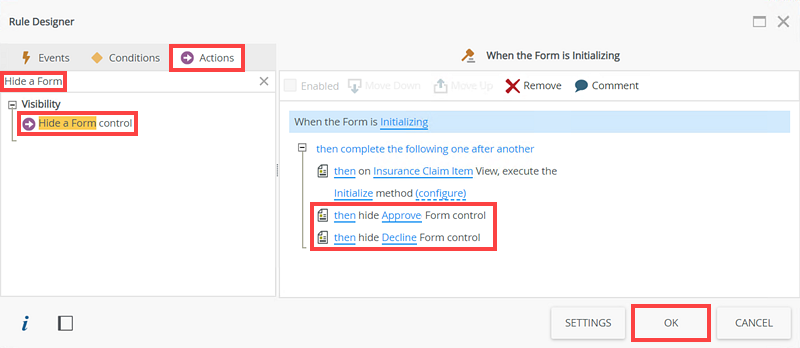
- On the Rule Designer page, add two Hide a Form Control actions. Configure one to hide the Approve button and the other the Decline button. Click OK.
- On the Rules tab of the Insurance Claim form, click Add Rule.
- Add the When a Form raises an event event and select Submitting.
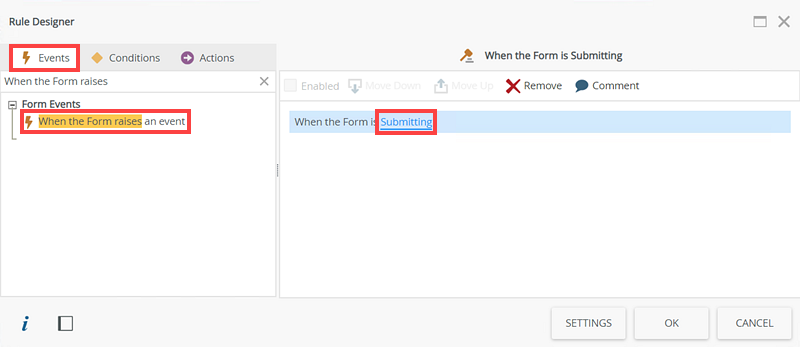
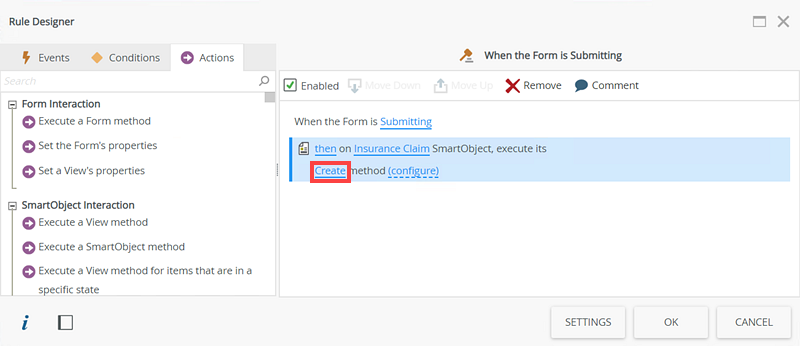
The When the Form is Submitting event is used by the Workspace (Mobile) app to check if the form can be saved as a draft. - Add the Execute a SmartObject method action.

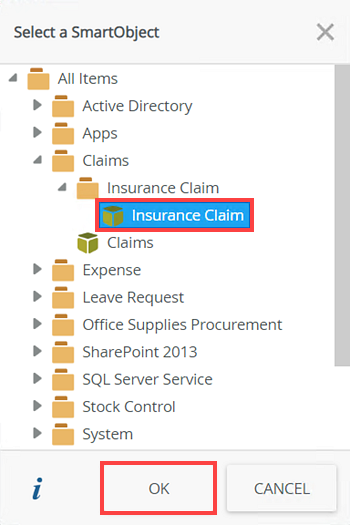
- Click select SmartObject. On the Select a SmartObject page, select the Insurance Claim SmartObject and click OK.
- Click select method and select the Create method.
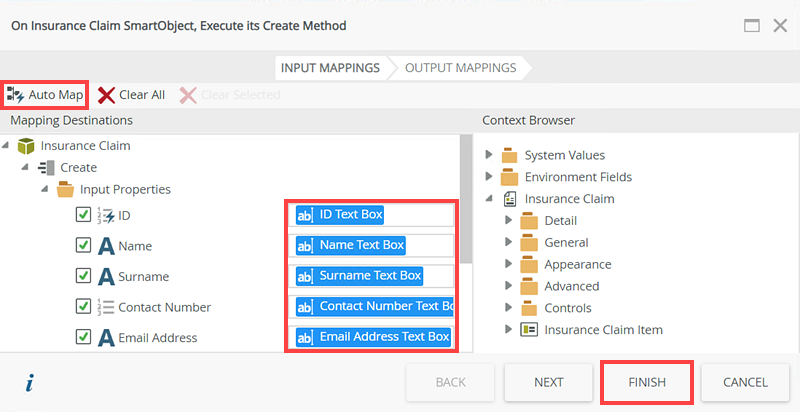
- Click configure. On the On Insurance Claim SmartObject, Execute its Create Method page, click Auto Map. There are no output mappings. Click Finish.
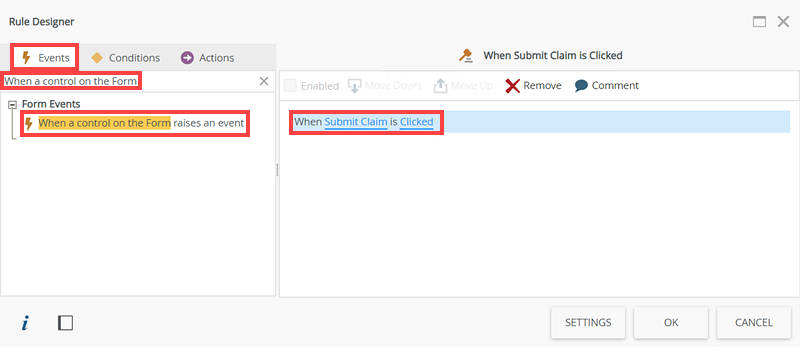
Click OK. - On the Rules tab of the Insurance Claim form, click Add Rule.
- Add the When a control on the Form raises an event event and select the Submit Claim button and Clicked.
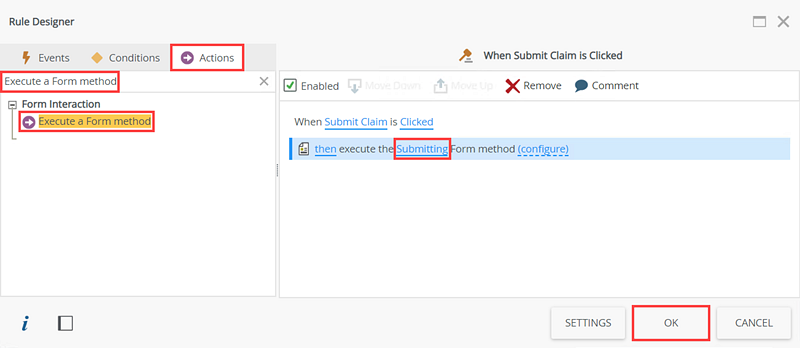
- Add the Execute a Form method action and select the Submitting method. There is no further configuration required. Click OK.
- More rules are required but you will configure them once the you have created the Insurance Claim Approval workflow. Now you must configure a form parameter which is used when the claim is actioned with either the Approve or Decline buttons.
- Open the Insurance Claim form and edit the When the Form is Initializing rule in the Rules tab.
-
Create a form parameter for the Insurance Claim form
- Select the Parameters tab and click Add Parameter.
- Name the parameter Status, set the data type to Text, and leave the default value as blank. Click Finish.

Create the Insurance Claim Approval Workflow
Use the steps below to create the Insurance Claim Approval workflow.
-
Create the Insurance Claim workflow
- Select the Insurance Claim form and click Design a new Workflow.
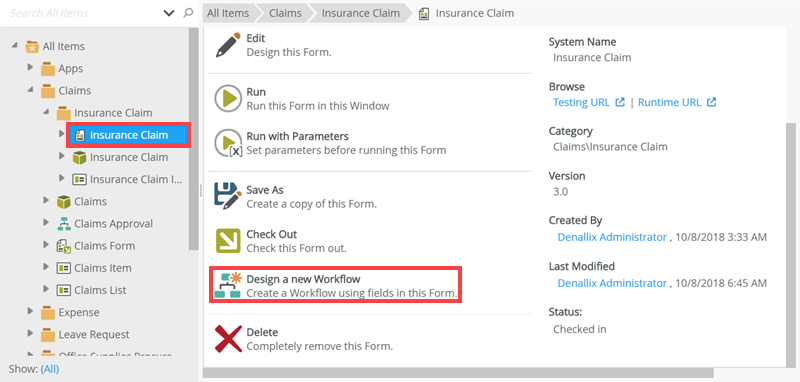
- Name the workflow Insurance Claim Approval Workflow and click Create.
- Select the Insurance Claim form and click Design a new Workflow.
-
Configure the Insurance Claim Approval Workflow start event
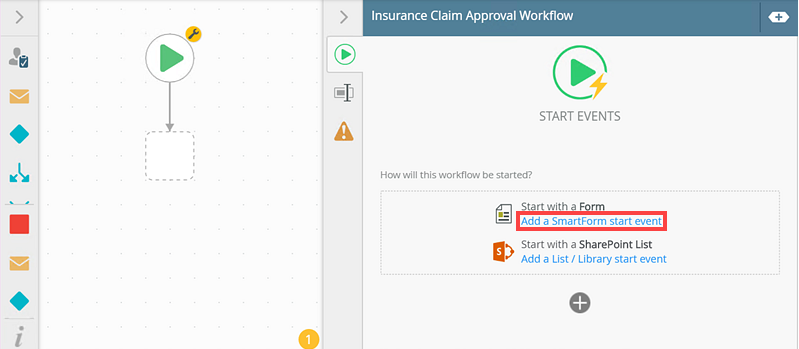
- Select the Start event and click Add a SmartForm start event.
.
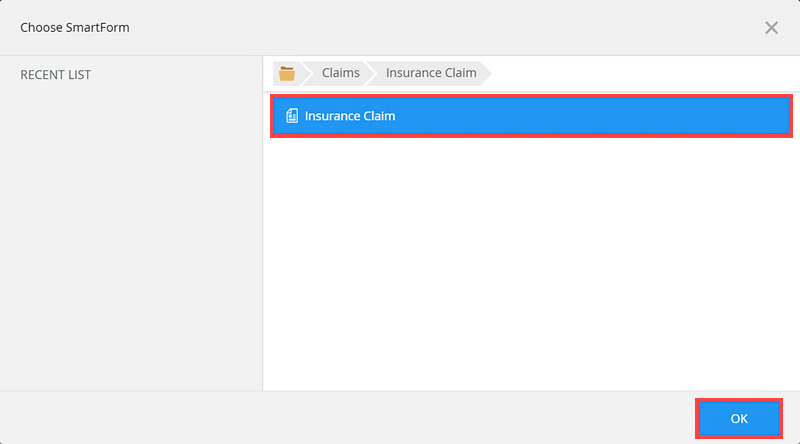
- Select the Insurance Claim form on the Choose SmartForm page then click OK.
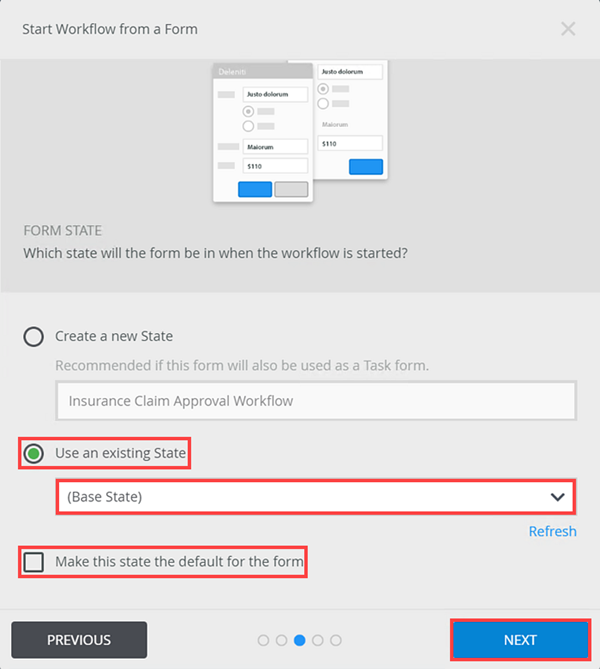
- Click Next on the Start Workflow from a Form page.
- Select the Help me configure it option on the Start Workflow from a Form page and click Next.
- Select the Use an existing State option and select the Base State. Deselect the Make this state the default for the form option.
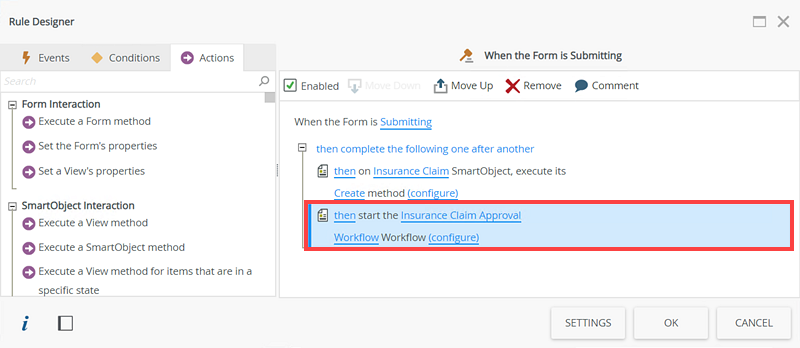
- Select the When the Form is Submitting option from the Form Rules section. The Actions section should display the following:
then on Insurance Claim SmartObject, execute its Create method
then start the Insurance Claim Approval Workflow workflow
Click Next.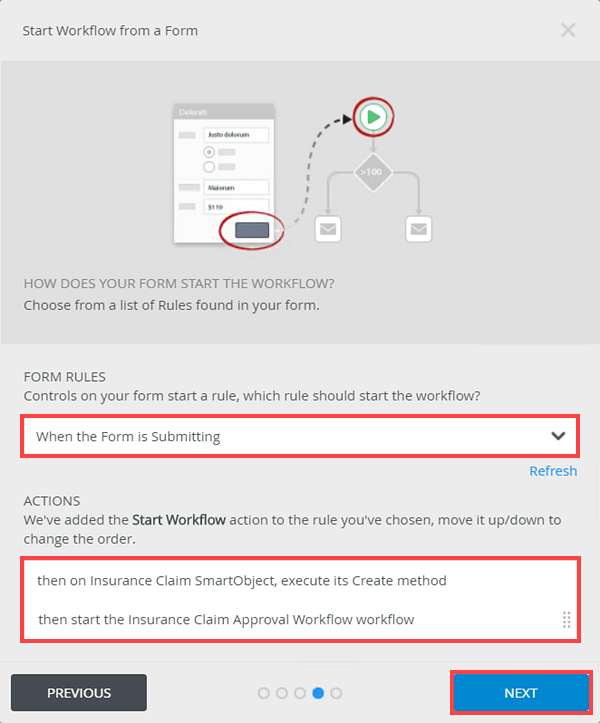
- Click Save and Finish on the Start Workflow from a Form page.
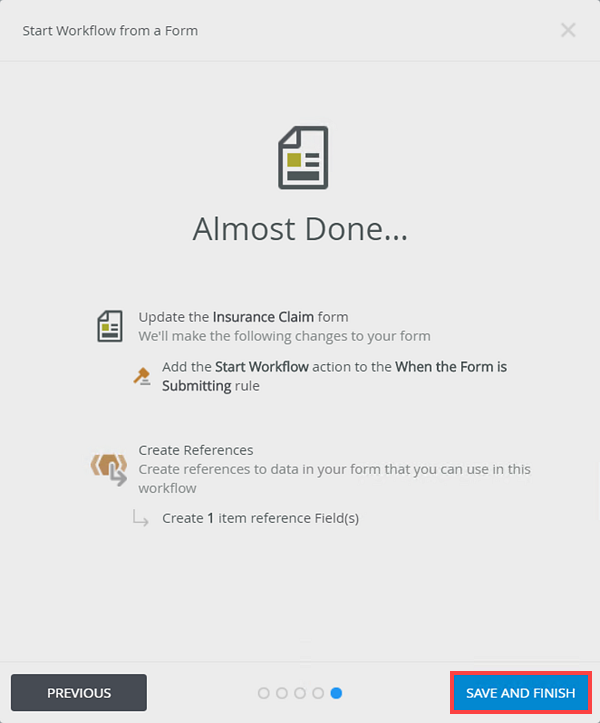
The Insurance Claim form's When a form is Submitting rule is updated with above Start Event rule. Click OK.
- Select the Start event and click Add a SmartForm start event.
-
Configure a Set Folio step
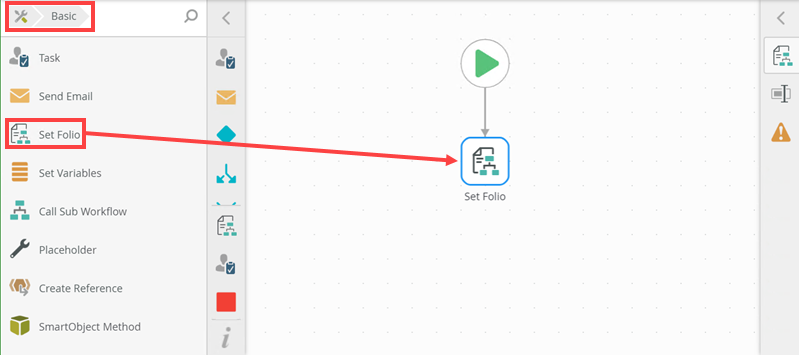
- Drag a Set Folio step from the Basic section of the Toolbox onto the canvas.
- Expand the Set Folio page and expand the Context Browser.
- Expand the Insurance Claim reference and drag the Policy Number reference to the Set Folio page.
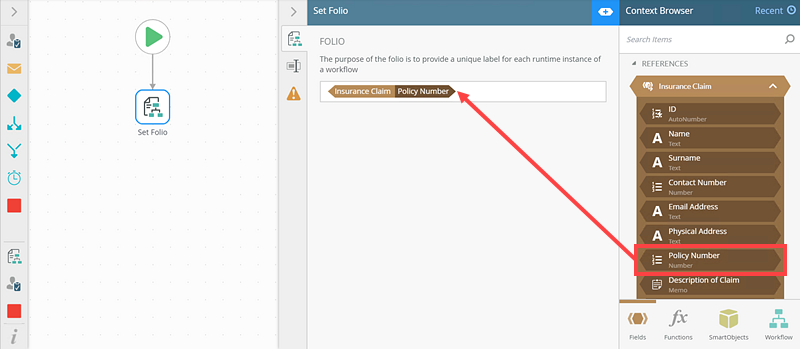
- The Set Folio step is configured.
- Drag a Set Folio step from the Basic section of the Toolbox onto the canvas.
-
Configure the Insurance Claim Manager Approval step
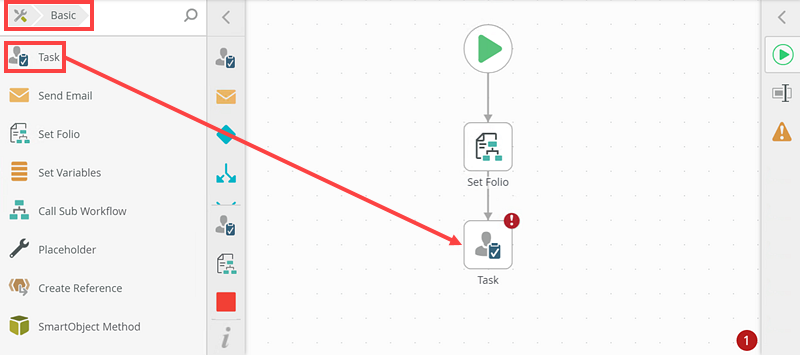
- Drag a Task step from the Basic section of the Toolbox onto the canvas.
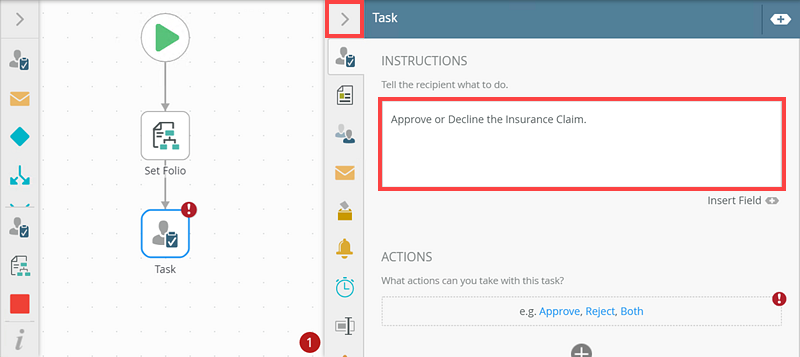
- Expand the Task step page and add an instruction.
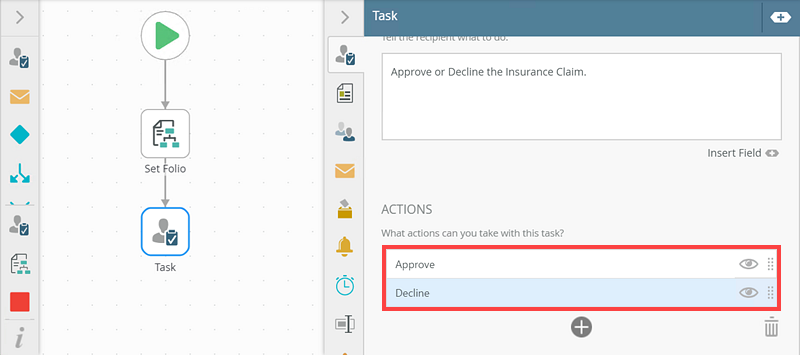
- On the Actions section of the Task step page, add two actions called Approve and Decline.
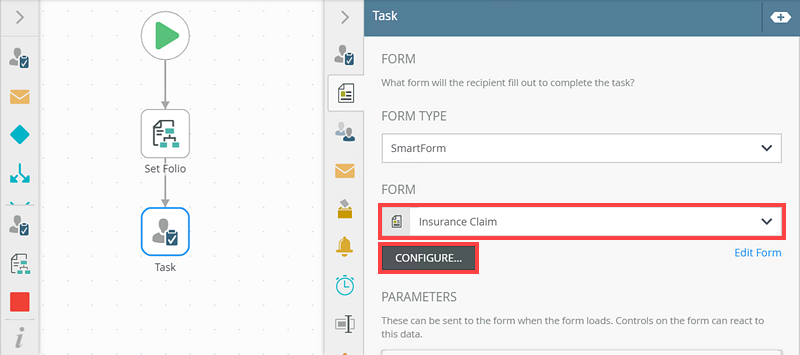
- Click the Form option on the Task step. On the Form Type section, select SmartForm.
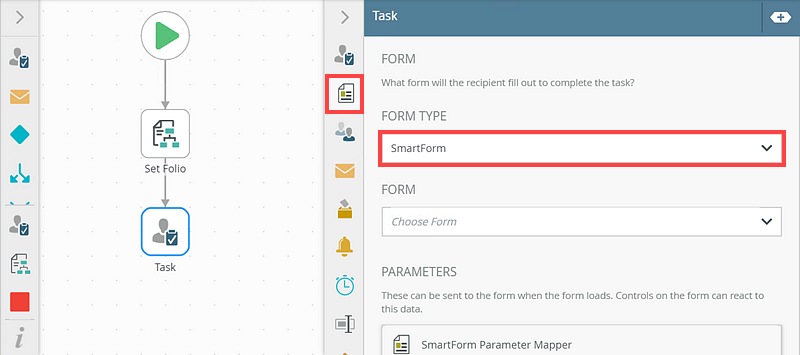
- On the Form section select the Insurance Claim form and click Configure.
- On the Open Task on a Form page click Next.
- Select the Help me configure it option and click Next.
- Select the Create a new State option in the Form State section and name the state Workflow Task.
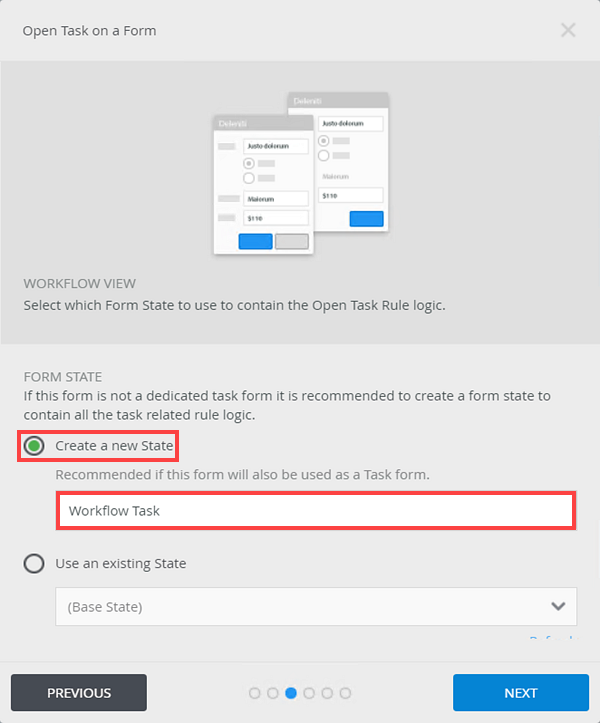
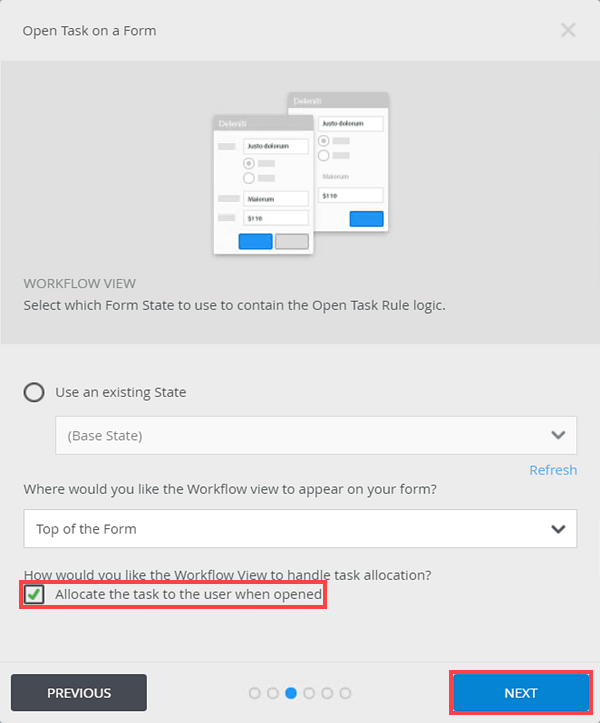
This state is used in the approval part of the workflow after the claim is submitted by Codi, and Bob must approve or decline the insurance claim in the Workspace (Mobile) app. - On the same page, select the Allocate the task to the user when opened option and click Next.
- Select the When the Form is Initializing option from the Form Rules section. The Actions section should display the following:
If Current Workflow Activity is Task
then open the Task worklist item
Click Next.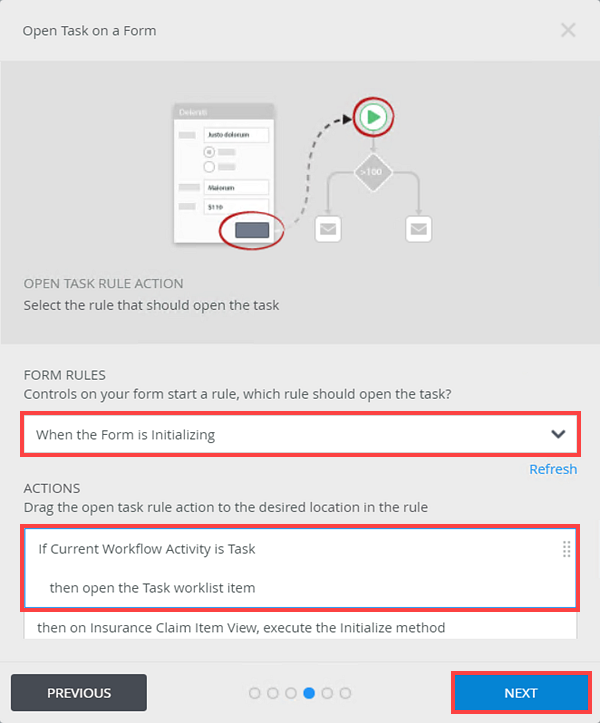
- Leave the Show a Message option as default and click Next.
- Click Save and Finish. The new Workflow Task state is configured.
- On the Task page, click the Recipients tab. Remove the Originator option on the Who should receive the task? section and add Bob as the recipient.
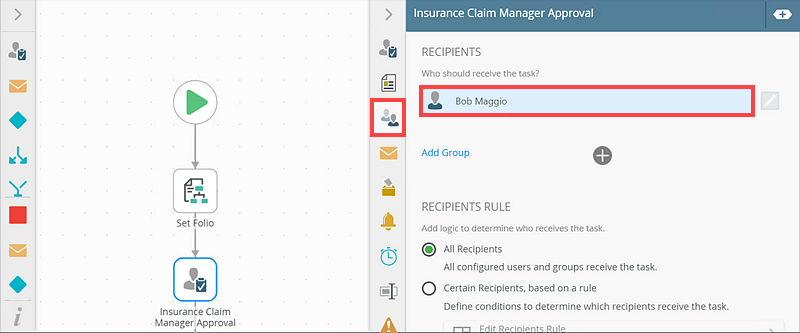
- On the Task page, click the Properties tab and rename the task name to Insurance Claim Manager Approval. Add the following to the Description: Insurance Claim Manager Approval. Set the task Priority to High.

- Drag a Task step from the Basic section of the Toolbox onto the canvas.
-
Configure the Decision step
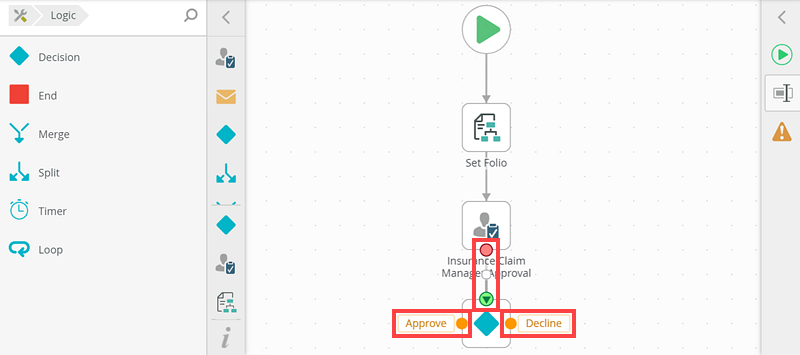
- Drag a Decision step from the Logic section of the Toolbox onto the canvas.
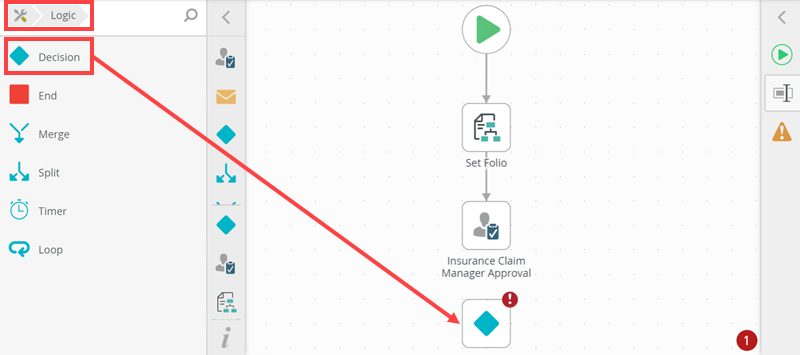
- Connect the Insurance Claim Manager Approval step to the Decision step. Notice that the actions are generated on the canvas.
- Drag a Decision step from the Logic section of the Toolbox onto the canvas.
-
Configure the Send Email steps
- Drag two Send Email steps from the Basic section of the Toolbox onto the canvas.
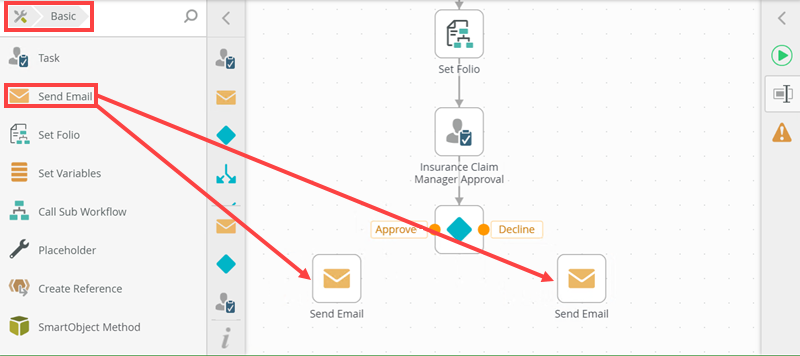
- Connect the Approve action to one Send Email step and the Decline action to the other Send Email step. Rename the Send Email steps to Approved and Declined.
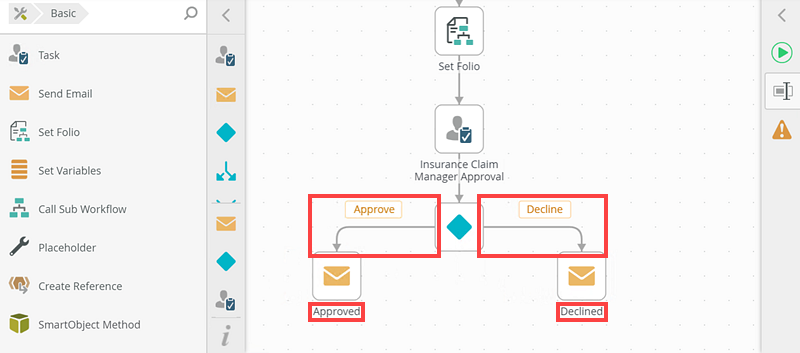
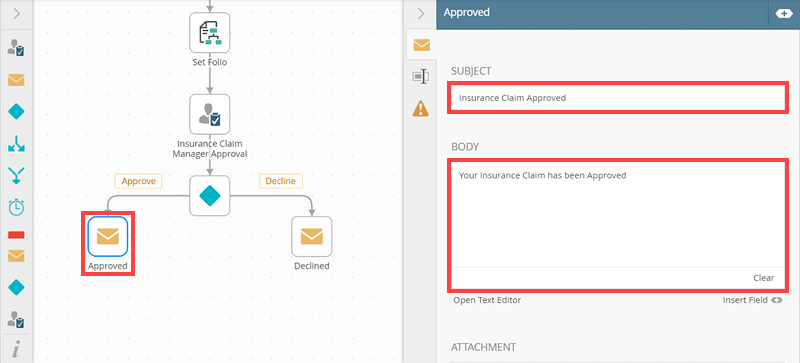
- Configure the Approved step as shown below.
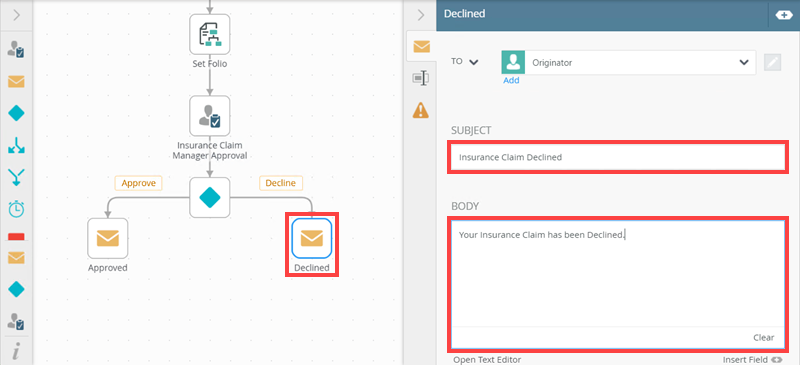
- Configure the Declined step as shown below.
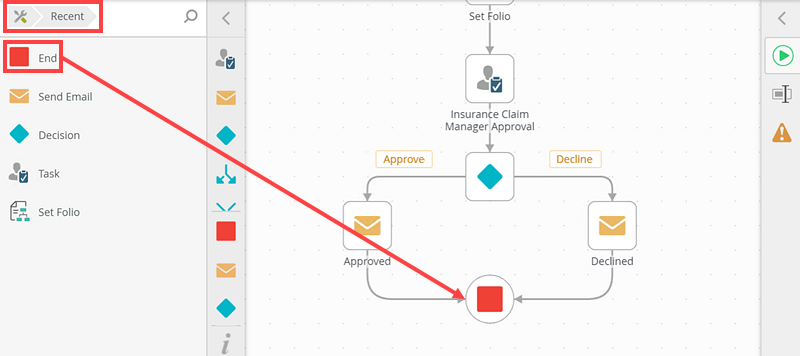
- Add an End step to the canvas and connect both email steps to it.
- Drag two Send Email steps from the Basic section of the Toolbox onto the canvas.
-
Deploy the Insurance Claim Approval Workflow
- Click File and then Deploy.
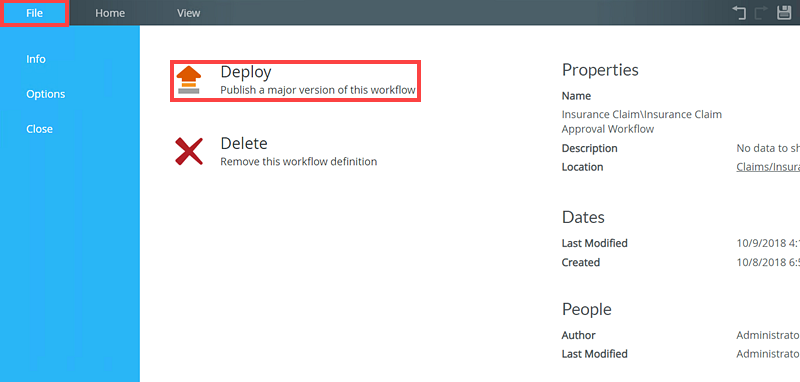
- The workflow is deployed successfully.
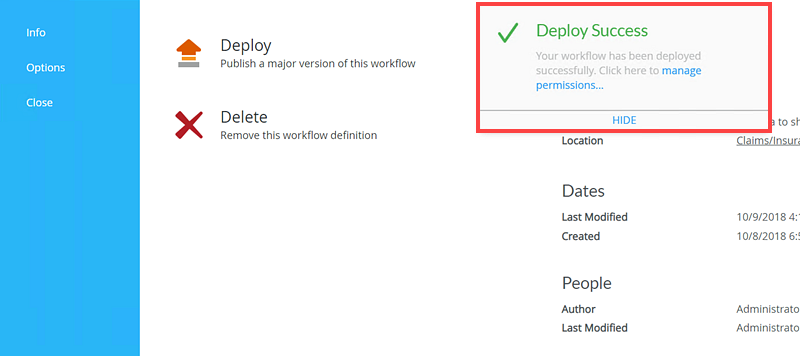
Now that the workflow has been deployed, you need to return to the Insurance Claim form to continue configuring its rules.
- Click File and then Deploy.
Continue Configuring the Form Parameters and Rules
Use the steps below to continue configuring the parameters and rules for the Insurance Claim form.
-
Continue configuring the When a Form is Submitting rule
- Edit the Insurance Claim form and navigate to the Rules tab to edit the When Form is Submitting rule.
- Notice that the start event which you configured in the Insurance Claim Approval Workflow is added to the rule.
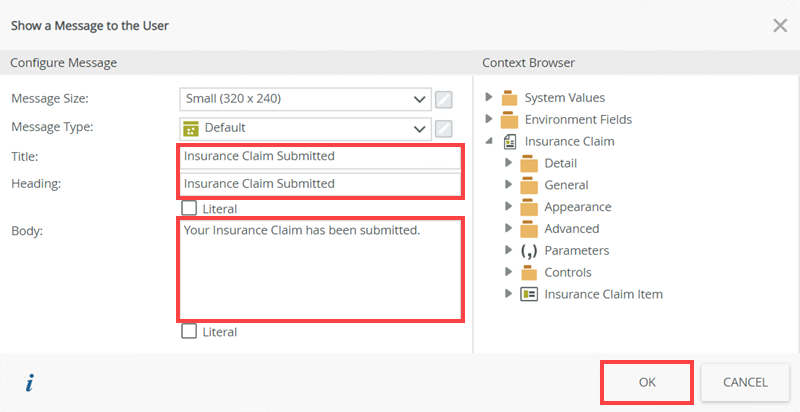
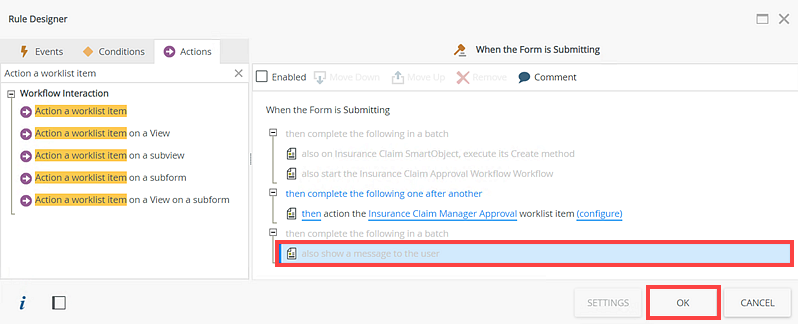
- Add a Show a message action to the rule. Click configure.
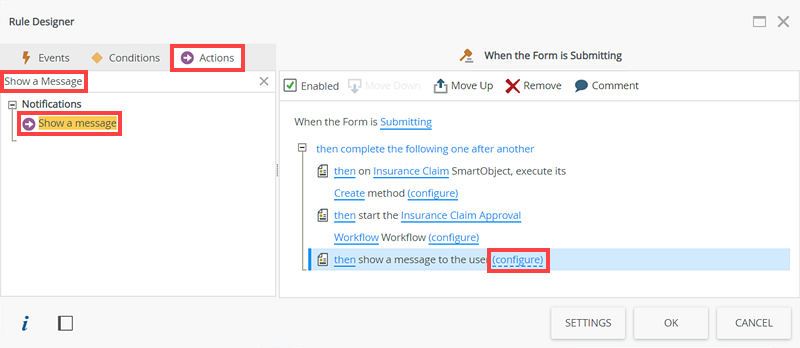
- Configure the message as shown below. Click OK.
- Next, change the then complete the following one after the other execution type to the then complete the following in a batch execution type. This batch execution is required for forms that can be saved as a draft. If you don't do this, the forms rules do not execute as expected and the Save draft action is not available in the Workspace app. Click OK.
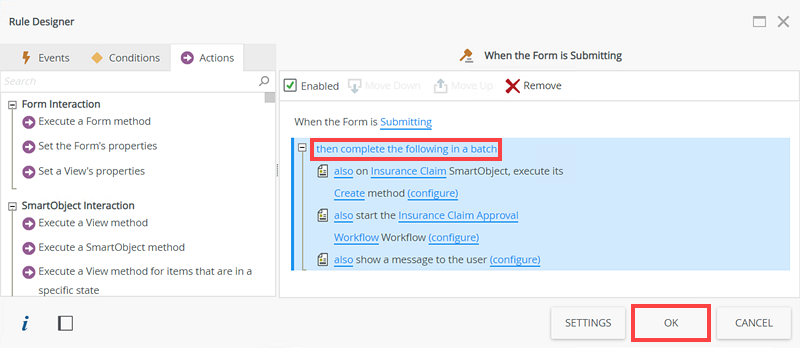
Important: If you don't set the then complete the following in a batch execution type, the drafts feature in the Workspace (Mobile) app does not function as expected and the Save draft action is not available in the Workspace app. - All the rules for drafts functionality in the (Base State) are now configured. Now you must configure the rules in the Workflow Task state, created when you configured the Form section of the Insurance Claim Manager Approval step in the Insurance Claim Approval Workflow.
-
Configure the rules for the Workflow Task state on the Insurance Claim form
- On Rules tab, click the Workflow Task state in States section.
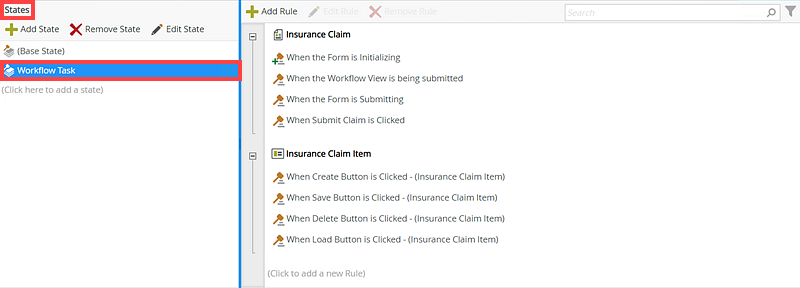
- Now you add two rules for the Approve and Decline buttons on the Workflow Task state.
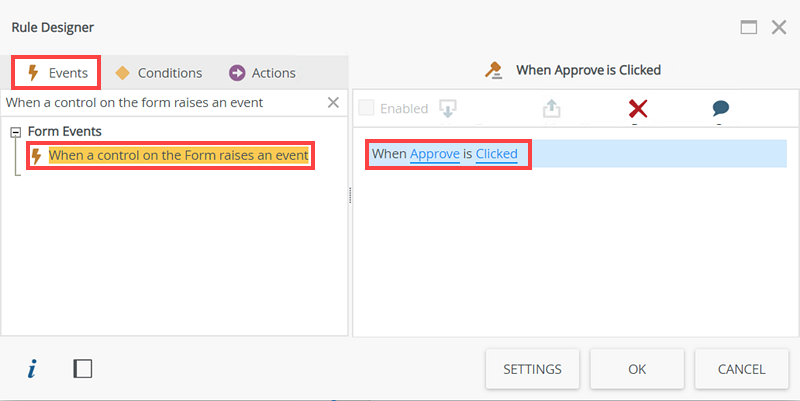
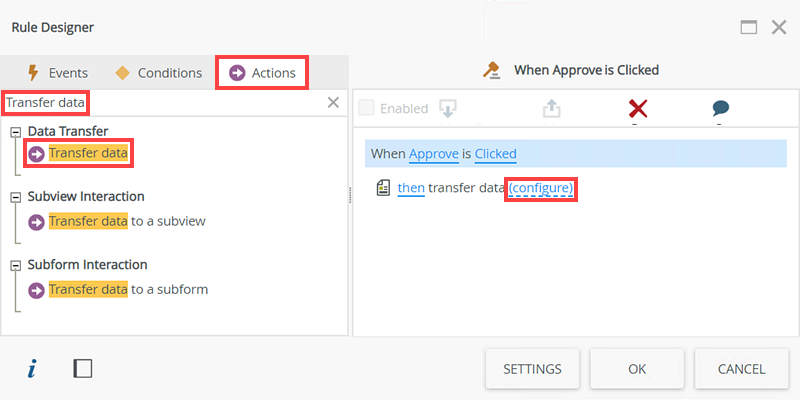
- Click Add Rule. Add a When a control on the Form raises an event event and select the Approve option in the select control section. The event is as follows: When Approve is Clicked.
- Add a Transfer Data action to the rule. Click configure.
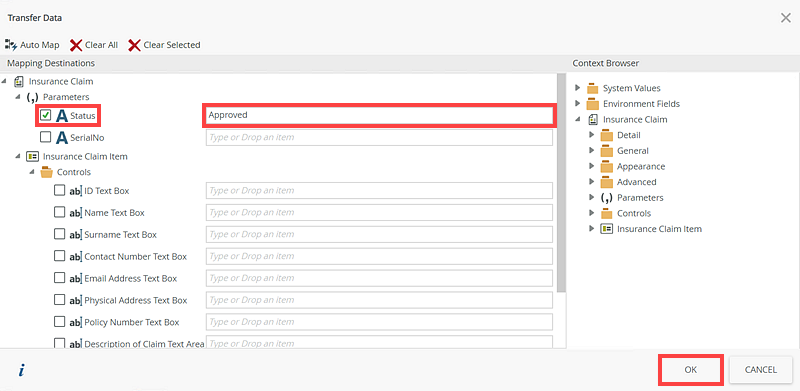
- On the Transfer Data page, type Approved in the Status section. Click OK.
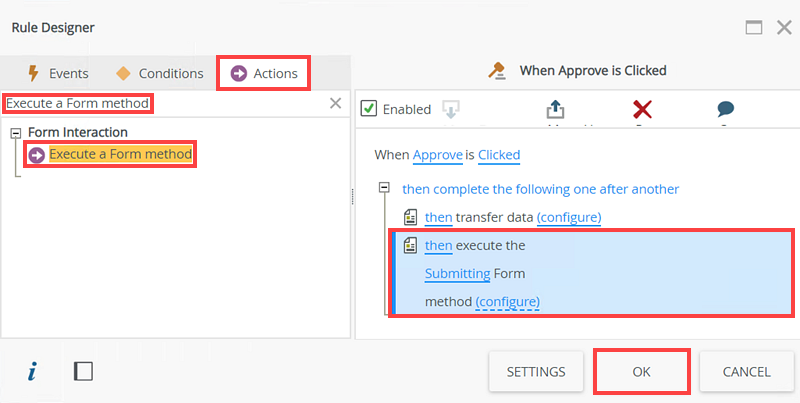
- Add a Execute a Form method action to the rule and select the Submitting method. Click OK.
- On the Workflow Task state, click Add Rule.
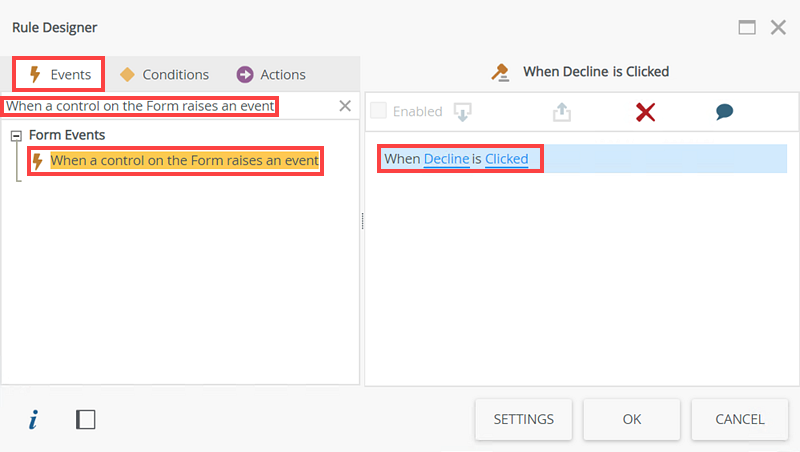
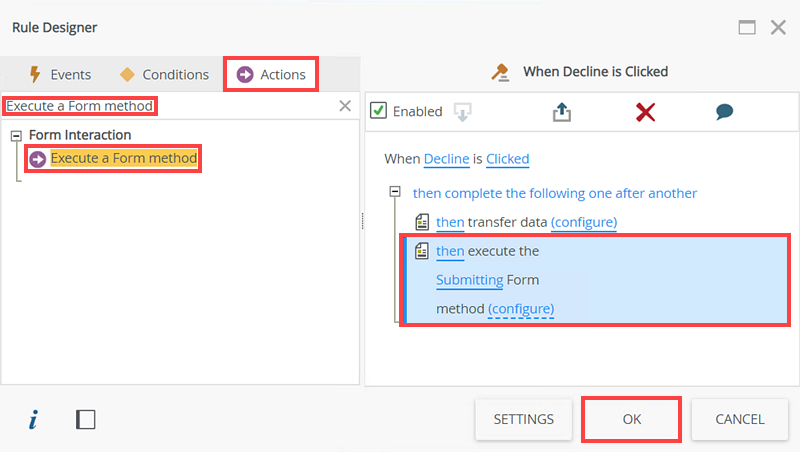
- Add a When a control on the Form raises an event event and select the Decline option in the select control section. The event is as follows: When Decline is Clicked.
- Add a Transfer Data action to the rule. Click configure.
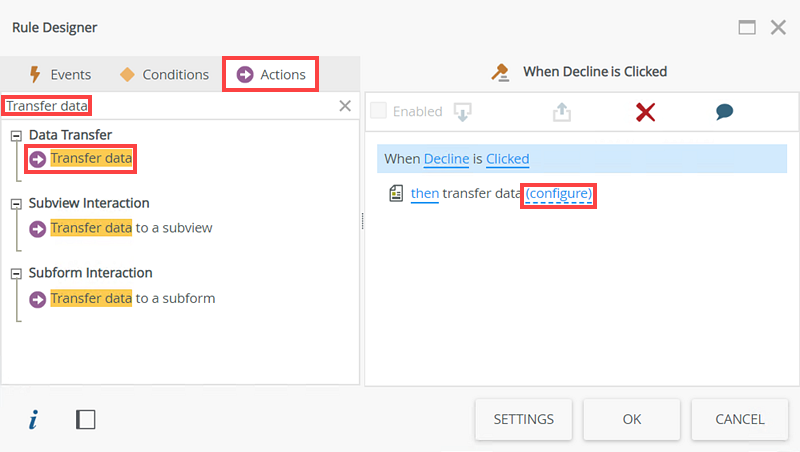
- On the Transfer Data page, type Declined in the Status section. Click OK.

- Add a Execute a Form Method action to the rule and select the Submitting method. Click OK.
- On the Workflow Task state, edit the When the Form is Initializing rule.
- Disable the then hide Approve Form control and then hide Decline Form control actions. When Bob opens the worklist item he should see the Approve and Decline buttons so he can decide whether to approve or decline the insurance claim.
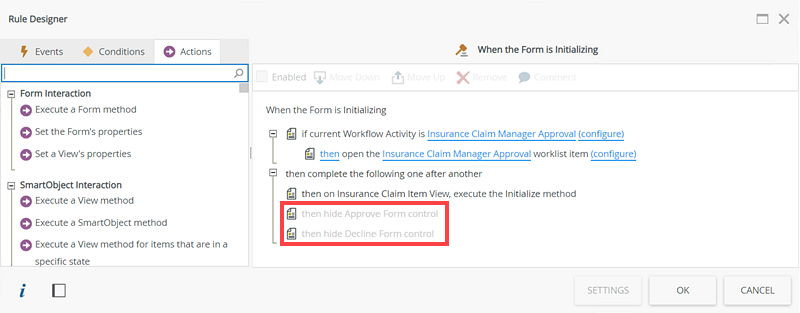
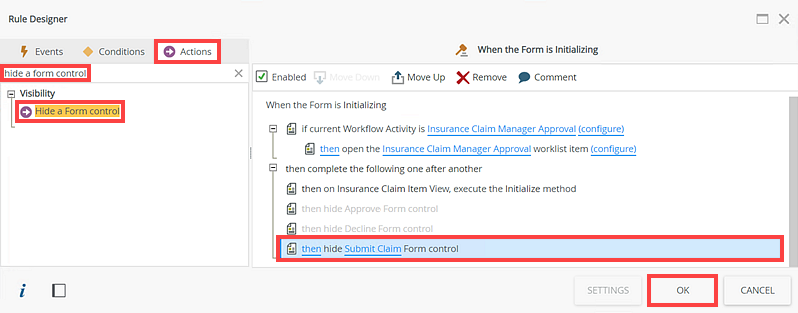
- Add a Hide a Form control action to the rule and select the Submit Claim option. Click OK. Bob does not need to see the Submit Claim button to approve or decline the claim.
- Edit the When the Form is Submitting rule in the Workflow Task state.
- Disable the also on the Insurance Claim SmartObject, execute its Create method and also start the Insurance Claim Approval Workflow Workflow actions.
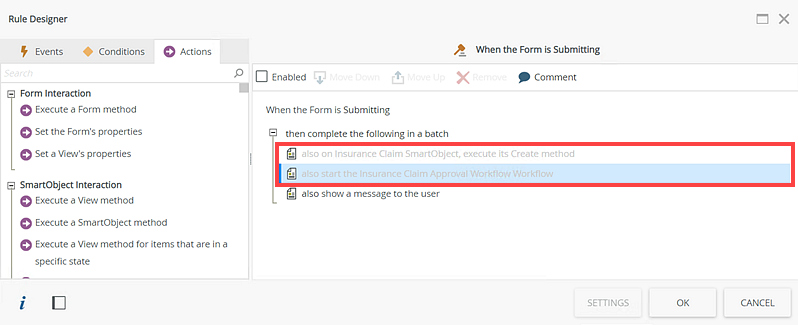
You do this because, when Bob is approving or declining the claim saved as a draft, executing the create method and starting the workflow actions should not occur.
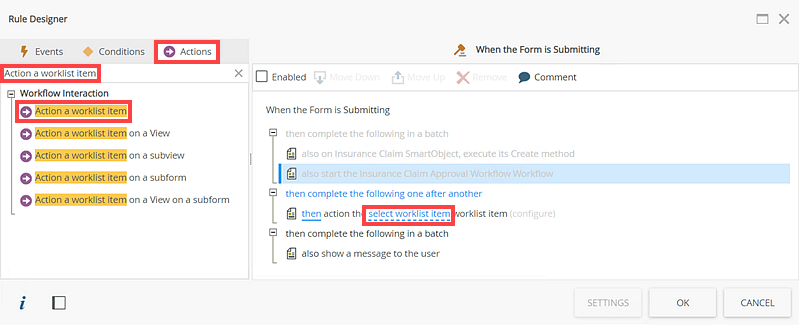
- Add a Action a worklist item action to the rule. Click select worklist item.
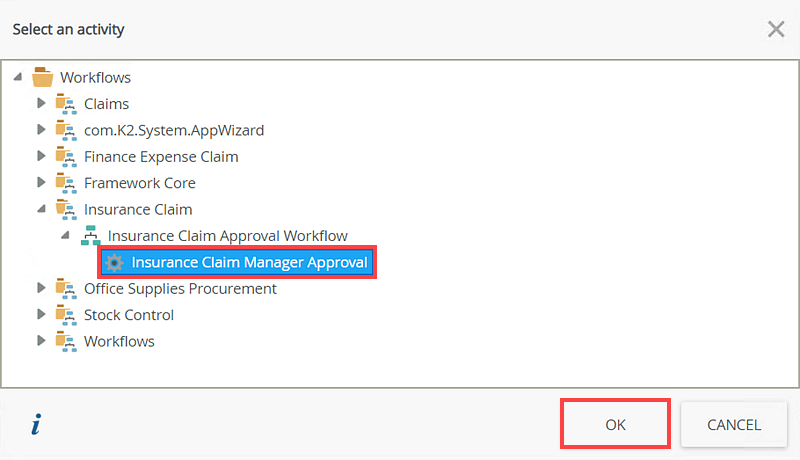
- On the Select an activity page, select the Insurance Claim Manager Approval activity and click OK.
- Click configure.
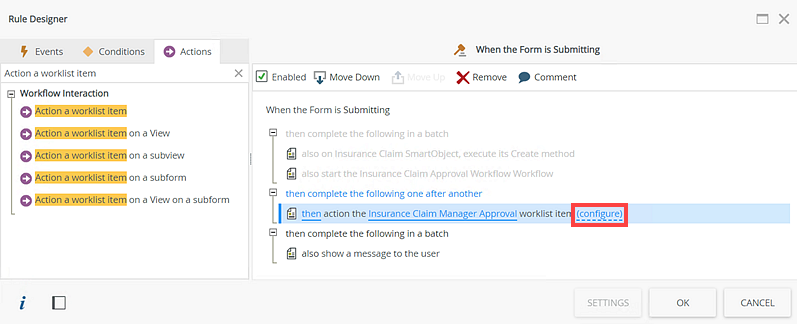
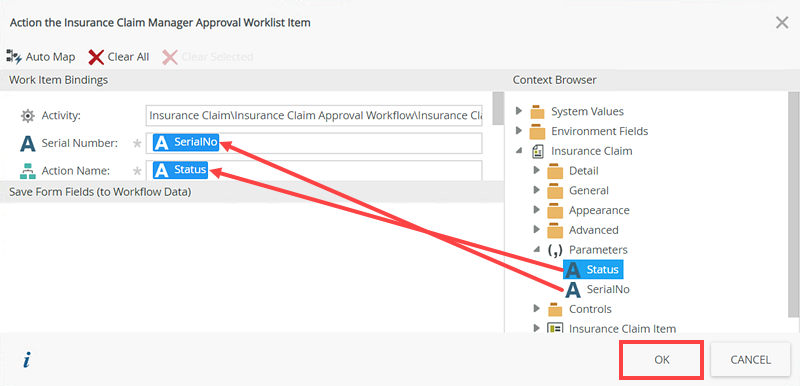
- On the Action the Insurance Claim Manager Approval Worklist Item page, drag the Status and SerialNo parameters to the corresponding Work Item Bindings. Click OK.
- Disable the also show a message to the user action and click OK.
- Click Finish and Check In the Insurance Claim form.
- On Rules tab, click the Workflow Task state in States section.
Test the Insurance Claim Scenario
Use the steps below to test the Insurance Claim scenario.
-
Submit an Insurance Claim
- Sign In to the Workspace (Mobile) app.
- On the menu, tap Forms.
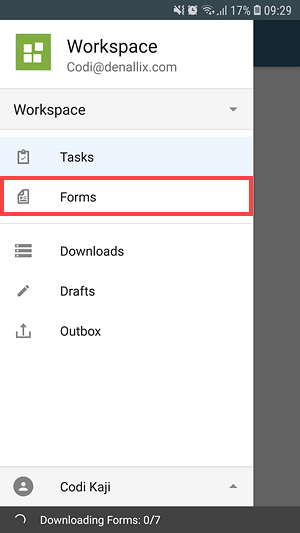
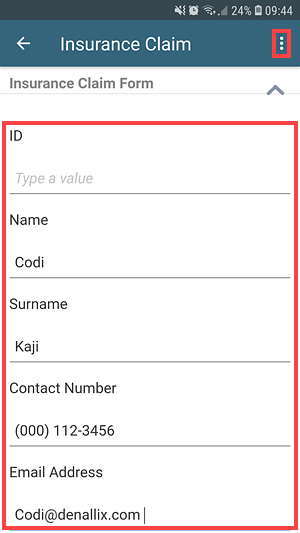
- Open the Insurance Claim form.
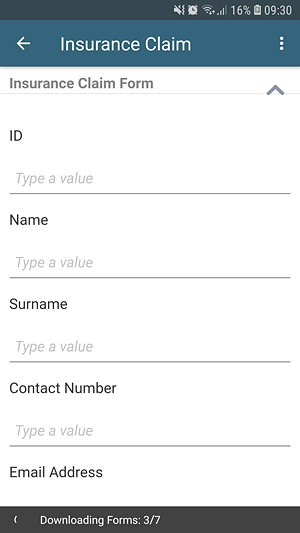
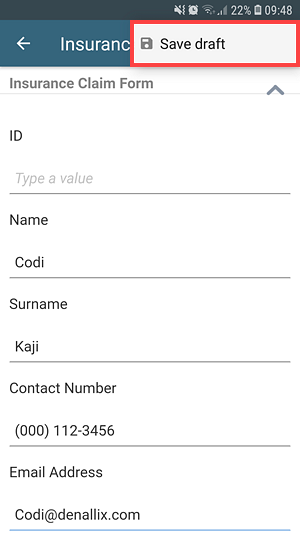
- Fill in half the form. Tap the Standard Actions button.
- Tap Save draft.
- On the Save draft page, rename the draft and tap Save.
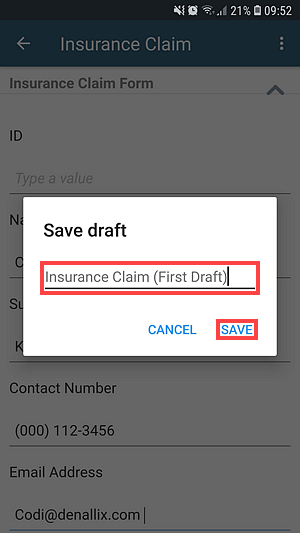
- The draft of the Insurance Claim form is saved in the Drafts section of the Workspace (Mobile) app.

-
Complete the Insurance Claim form and Submit the Claim
- Open the draft of the Insurance Claim form, complete the form, and tap Submit Claim.
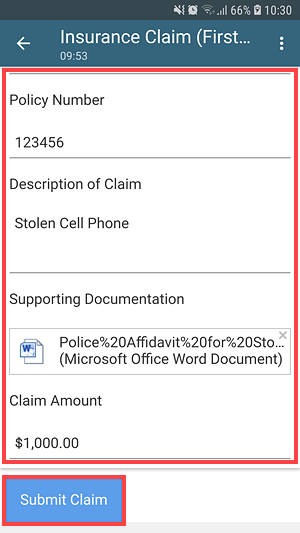
- The Insurance Claim form is submitted and sent to Bob for approval.
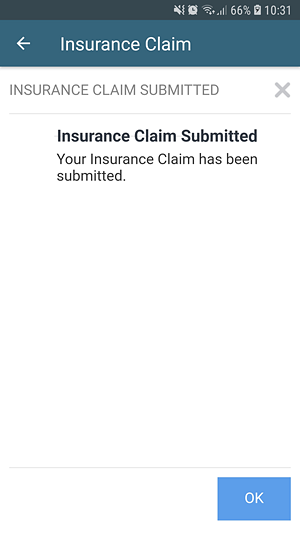
- The draft of the Insurance Claim form is removed form the Drafts section.
- Open the draft of the Insurance Claim form, complete the form, and tap Submit Claim.
-
Save the Insurance Claim Task form as a draft
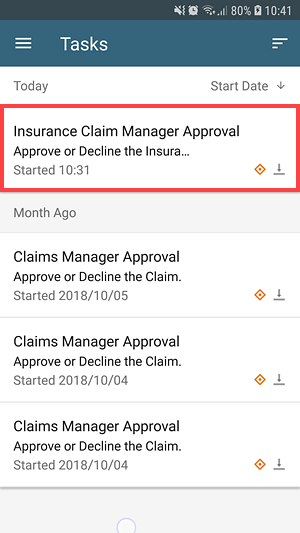
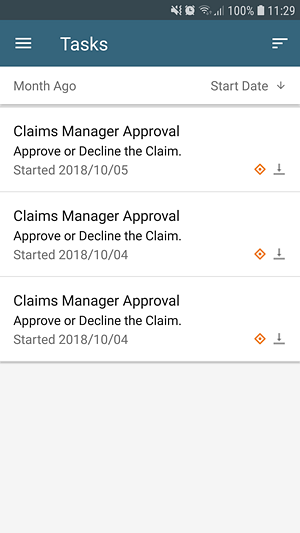
- Bob signs in to the Workspace app and sees a new Insurance Claim Manager Approval task in his Tasks. Open the task.
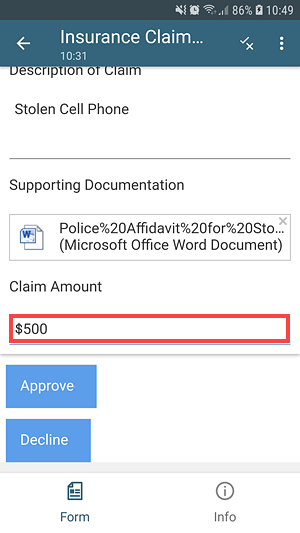
- Bob reviews the insurance claim and decides that the claim amount is too high and adjusts it to $500.
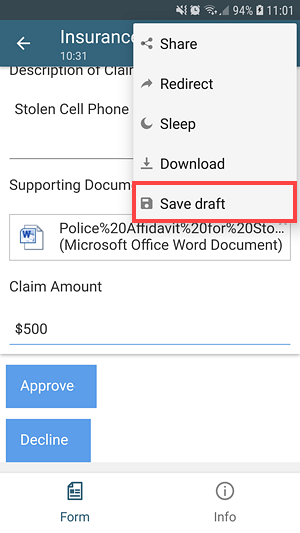
- Bob wants to discuss the claim with his colleagues, so he saves the insurance claim task form as a draft. Tap the Standard Actions button.
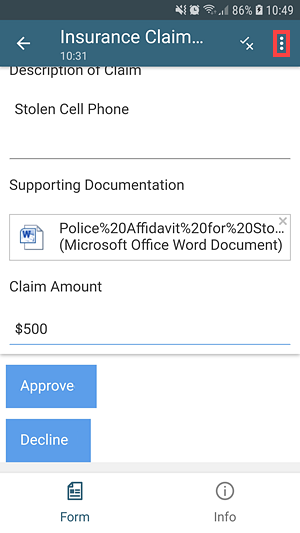
- Tap Save draft.
- The Insurance Claim task form draft is saved in the Drafts section of the Workspace (Mobile) app.
- Bob signs in to the Workspace app and sees a new Insurance Claim Manager Approval task in his Tasks. Open the task.
-
Approve the Insurance Claim Manager Approval using the Task Form Draft
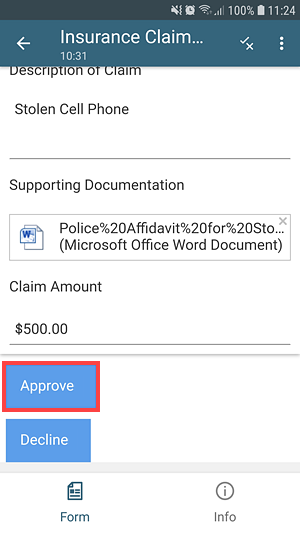
- Open the Insurance Claim Manager Approval task form draft in the Drafts section and tap Approve.
- The Insurance Claim Manager Approval draft is removed from the Drafts section.
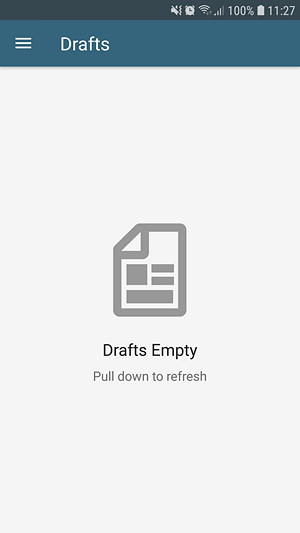
- The Insurance Claim Manager Approval task is completed and removed from Bob's tasks.
- Open the Insurance Claim Manager Approval task form draft in the Drafts section and tap Approve.