How To: Create a Custom Workspace
This article illustrates how to create a custom workspace. You can specify a landing page and create a custom menu to personalize Workspace with the items you use most.
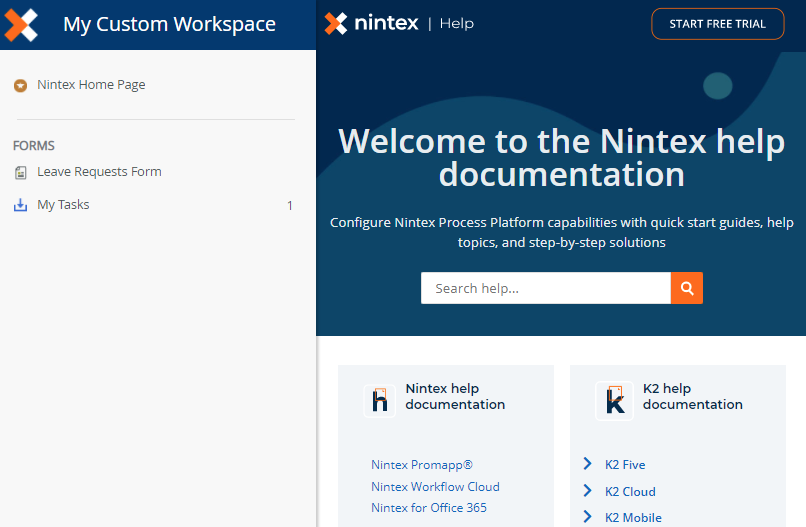
A custom workspace
Steps
Use the Custom Workspace template to create and personalize your workspace interface. Add headers and menu items.
Setup Steps
The following steps guide you through the creation of a custom workspace.
- From the Management site, create a custom workspace.
- Launch the Management site.If you do not know how to access the Management site, see Accessing Sites.
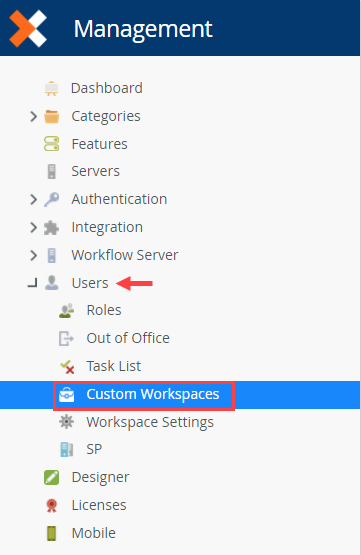
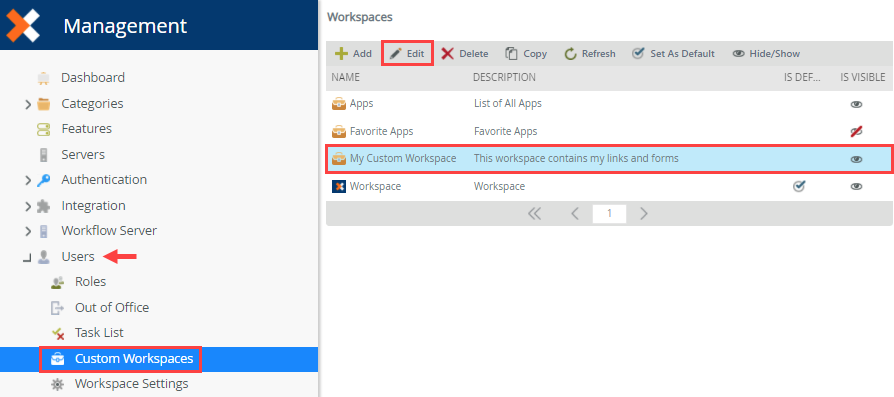
- Expand the Users category. Select Custom Workspaces.
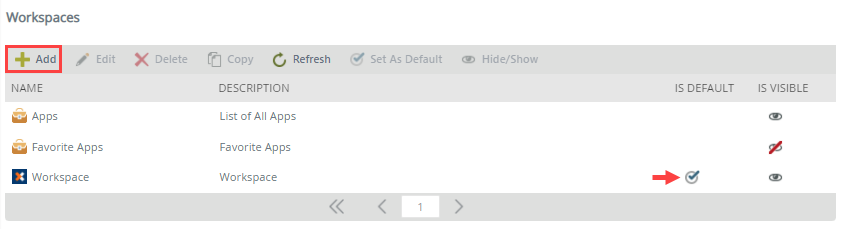
- On the Workspaces page, you see a list of current workspaces in the central pane. Notice the default workspace. This is the page that opens when you launch the Workspace site. You can change this to your custom page if desired. Click Add.
- Click the Details tab if it is not already active. For the Name, enter
My Custom Workspace
and for the Description, enter
This workspace contains my links and forms.
For the Tooltip, enter
My Custom Workspace.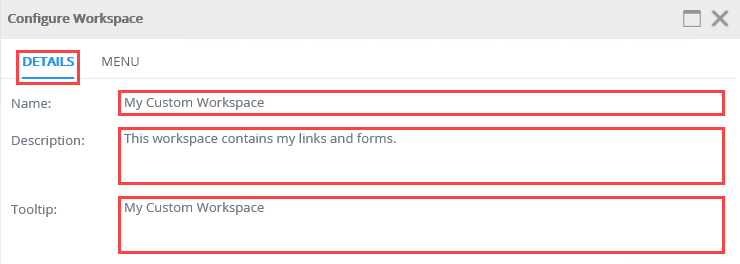
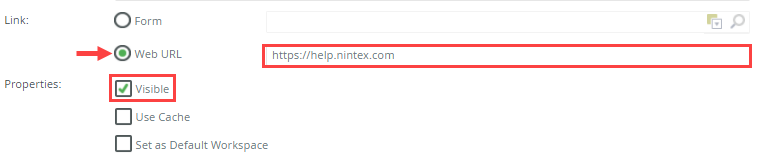
- Next, configure the Link. This URL points to the default page you want to load in your workspace central pane. You have two options: you can load a form or open a web page. Select Web URL and for the value, enter
https://help.nintex.com
For the Properties, select Visible.There are three options for Properties: Visible, Use Cache, and Set as Default Workspace.- Visible: Hides your custom page from the list of available workspaces. For example, if you are still configuring your workspace and don't want it displayed.
- Use Cache: Loads the last session from your cache, improving performance. Uncheck the cache option to load a fresh version of the page each time you visit.
- Set as Default Workspace: Displays this workspace when Workspace is launched. You can still access the previously default workspace from the menu.
The Configure Workspace page opens. You see two tabs: Details and Menu. From the Details tab, you set the name and description of the custom workspace. You can also set this workspace as the default. From the Menu tab, you add links to the tools, forms, and sites that you use the most.
- Launch the Management site.
- Customize the menu by adding headings and links to tools, forms, and sites.
Next, you configure the menu you want for your workspace. The menu appears in the left column and can include links to other sites, forms, and tools.
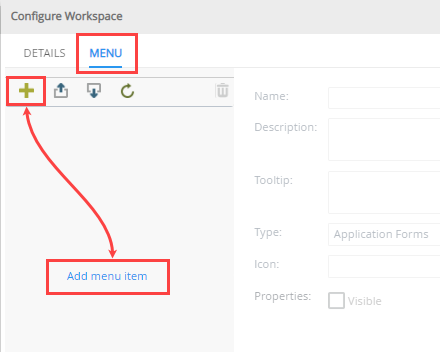
- Click the Menu tab. The first menu item is a link to a web site. Click Add menu item or click the Add(+) icon at the top of the left side column.
- Complete the settings for the menu item. Use the table below as a guide for completing the menu item fields. Notice your menu item name appears as a sample in the left column. This gives you an idea of how your menu looks when you load your custom workspace.
Setting Value Notes Name Nintex Home Page This link takes you to the Nintex home page. Description Nintex Home Page
Tooltip Nintex Home Page
This value appears when you hover over the link. Type SmartForm or URL You are adding a link to a web site. Icon Generic You can add icons to your menu that help distinguish target types. Link Web URL
https://www.nintex.comThis link takes you to the Nintex home page. Properties Visible
Use CacheYou want the link displayed and you use the cache to load the last session. 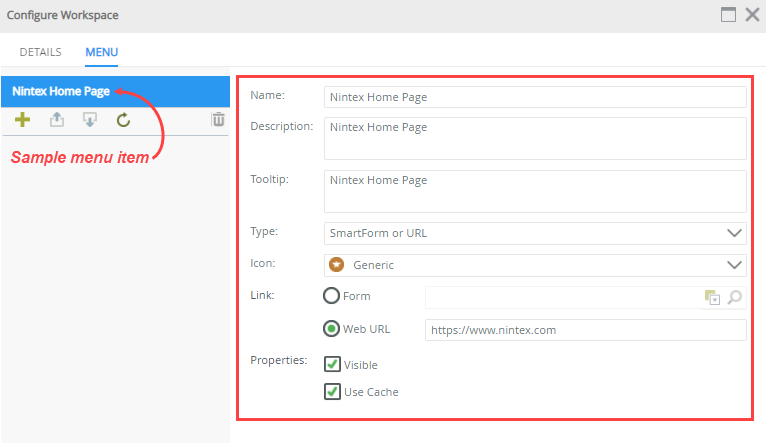
- Next, you add a link to a form. Note that the SmartForm must already exist on the server. Click the Add (+) icon. Use the table below as a guide for completing the menu item fields. (Configure your own menu item to point to an existing SmartForm in your environment. Your values may be different than the table and image below.)
Setting Value Notes Name Leave Requests Form This link launches the Leave Requests Form. Description Leave Requests Form
Tooltip Leave Requests Form
This value appears when you hover over the link. Type SmartForm or URL You are adding a link to an existing SmartForm. Icon Form You can add icons to your menu that help distinguish target types. Link Form Click the search icon. When you see the Search screen, type the name of your form, then click the search icon once again. Select your form and click OK. 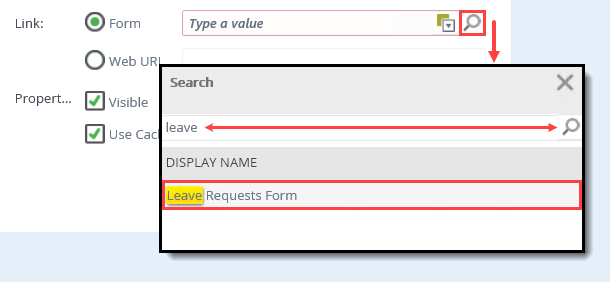
Properties Visible
Use CacheYou want the link displayed and you use the cache to load the last session. 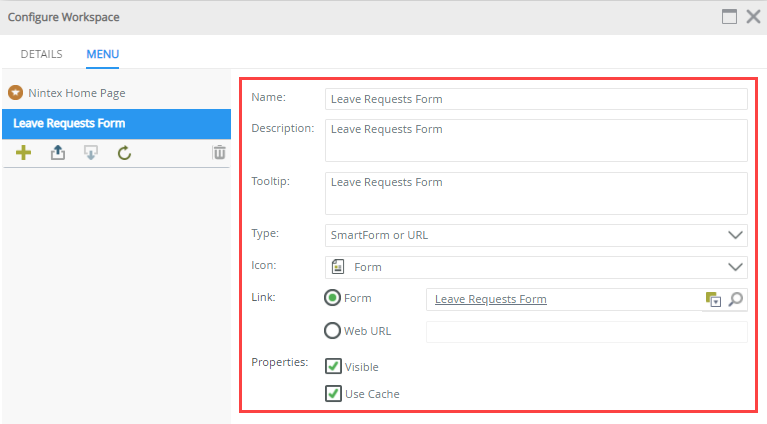
- The final menu item opens your task list. Click the Add(+) icon. Use the table below as a guide for completing the menu item fields.
Setting Value Notes Name My Tasks This link opens your workspace inbox. Description Opens my workspace inbox.
Tooltip My Tasks
This value appears when you hover over the link. Type Task List The Task List is a predefined type that points to the current user's workspace inbox. Icon Inbox Use either the Inbox or Task icon. Properties Visible You want the link displayed. 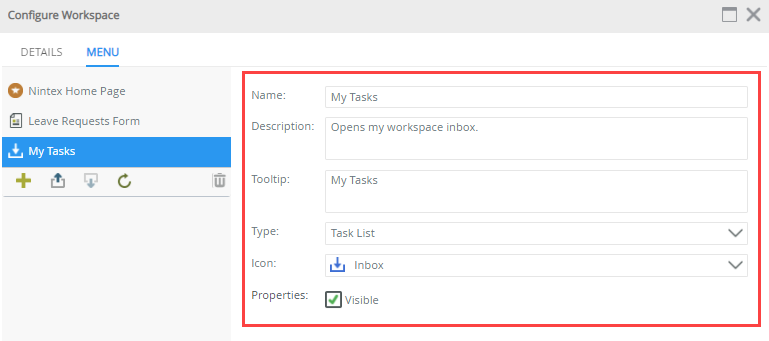
- The final task is to add a header to your menu. Use headers to group your menu items and keep them organized. Click the Add(+) icon. Use the table below as a guide for completing the header fields.
Setting Value Name Forms Description Header for forms menu items.
Tooltip Forms
Type Header Properties Visible 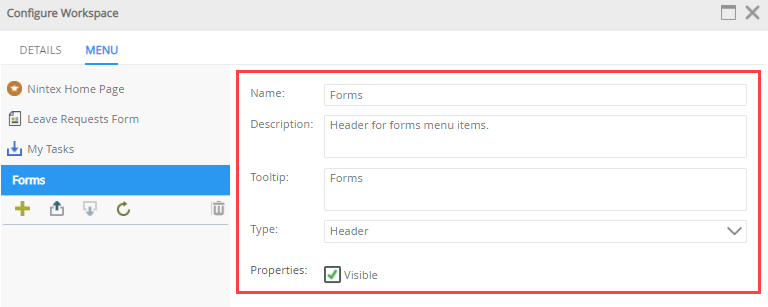
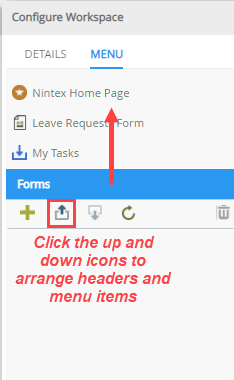
- With the Forms header selected, click the Up icon to move it above your form. If you like, add other headers and arrange your menu using the up and down icons.
- Click OK to save your custom workspace.
- Click the Menu tab. The first menu item is a link to a web site. Click Add menu item or click the Add(+) icon at the top of the left side column.
- Launch Workspace and open your custom workspace menu. If you need to make changes, edit the workspace from Management > Users > Custom Workspaces. Select the workspace, then click Edit.
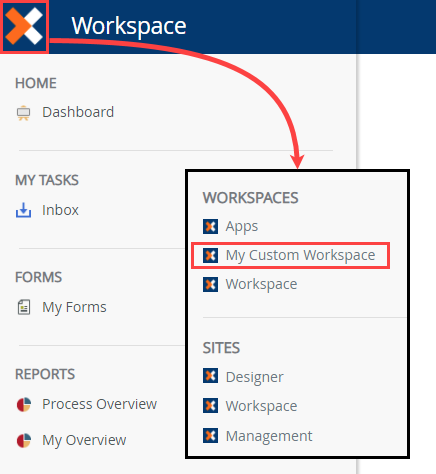
- After saving a custom workspace (and if it is visible), you find the link on the Workspace > Workspaces menu. Launch Workspace .
- Click the logo to switch to the Workspaces menu. Click My Custom Workspace.
- If you need to make a change to your custom workspace, return to the Management site > Users > Custom Workspaces page. Select your workspace and click Edit. After making changes, click OK to save the latest version.
Notice your landing page link appears at the top of the menu and your home page loads in the central pane. You see the header and menu items below the landing page link.

Review
Custom workspaces allow you immediate access to the forms, sites, and tools you use most often. Use headers and icons to group links, such as forms. You can create as many custom workspaces as desired, personalized for your needs.