How To: Create a SmartObject to connect to a REST service
You can use the REST service type and an advanced SmartObject to connect to a REST web service. For example, you have a REST service that exposes data from a store, and you want to create a SmartObject to use that data on a SmartForm.
Using a SmartForm to add, update, and delete pet data from an example Pet Store REST service.

Try it yourself!
Scenario
In this example you will create an advanced SmartObject to integrate with a sample REST service that represents data from a hypothetical pet store. The Pet Store demonstration REST service provides an example JSON descriptor file with functions for managing a pet store. You use the add, update, and delete pet functions in a SmartForm by creating an advanced SmartObject configured to use those properties and methods for the three pet operations.
Steps
First, create a new REST service instance to connect to the demonstration Pet Store REST service. Then you create an advanced SmartObject, adding properties needed for the AddPet, UpdatePet, and DeletePet functions of the REST service. You add methods for those three functions, mapping inputs and outputs to the SmartObject properties. Finally you create a SmartForm view using the SmartObject properties and methods and test the three functions using the view.
Setup Steps
The following steps set up the scenario from start to finish. If you want to skip the setup steps and view the topic step, go to Create an advanced SmartObject with methods to add, update, and delete pet data.
- In Management create a new REST service instance that connects to the Swagger Pet Store demonstration service. This scenario uses the PetStore service at http://petstore.swagger.io/. You can use the following swagger file https://petstore.swagger.io/v2/swagger.json. Use the table settings below as a guide for the service instance configuration.
Field Value Notes Service Instance 1. Display Name Pet Store REST If you are working in a shared environment, include your initials in the display name to make the name unique and easily identifiable to you. 2. Description This is the sample Petstore server. 3. Service Type REST Service Authentication 4. Authentication Mode Impersonate The Authentication Mode of the service instance should be set according to the authentication required by the endpoint. For example, if the endpoint supports static authentication then select the static authentication mode and provide a username and password. Service Keys
There is only one service key value to set in this step (Descriptor Location).5. Descriptor Location https://petstore.swagger.io/v2/swagger.json The location of the descriptor file. This must be a URL.
The Authentication Mode used for the service instance is also used to access the Descriptor Location JSON file when that file is a URL.
This file must be available at this location when the service instance is refreshed.
Paths in the Swagger file must be unencoded.
For more information about getting a Swagger file, see Resources for working with the REST Service Broker
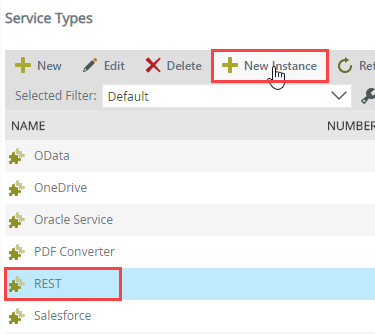
- In Management navigate to Integration > Service Types.

- Select REST and click New Instance.
- Use the table below to configure the service instance. There is an image below the table to use as a reference as well. If a setting is not indicated in the table, assume the default value.
Field Value Notes Service Instance 1. Display Name Pet Store REST If you are working in a shared environment, include your initials in the display name to make the name unique and easily identifiable to you. 2. Description This is the sample Petstore server. 3. Service Type REST Service Authentication 4. Authentication Mode Impersonate The Authentication Mode of the service instance should be set according to the authentication required by the endpoint. For example, if the endpoint supports static authentication then select the static authentication mode and provide a username and password. Service Keys
There is only one service key value to set in this step (Descriptor Location).5. Descriptor Location https://petstore.swagger.io/v2/swagger.json The location of the descriptor file. This must be a URL.
The Authentication Mode used for the service instance is also used to access the Descriptor Location JSON file when that file is a URL.
This file must be available at this location when the service instance is refreshed.
Paths in the Swagger file must be unencoded.
For more information about getting a Swagger file, see Resources for working with the REST Service Broker

- Click OK.
- Click OK to complete the service instance.

- In Management navigate to Integration > Service Types.
Create an advanced SmartObject with methods to add, update, and delete pet data.
In the next steps you create the Pet Store advanced SmartObject. By creating a SmartObject from scratch, you can create your own methods and properties and tailor them specifically to your application. You create three methods, mapping to the AddPet, UpdatePet, and DeletePet functions of the REST endpoint.
- Create an advanced SmartObject in Designer.
- In Designer click create SmartObject.

- Configure the properties for the new SmartObject using the table below as a guide.
Field Value Notes Name Pet Store SmO Description This is the sample Pet Store server. Category Select a category for the new SmartObject. In this scenario the category is Denallix. Type Advanced SmartObject You will point this SmartObject to the REST instance that you created earlier. 
- Click Create.
- In Designer click create SmartObject.
-
Add SmartObject properties to be used in the AddPet, UpdatePet, and DeletePet methods. These properties are described in the JSON descriptor file.
- In the Properties tab, click Add.
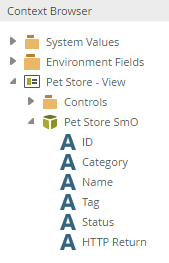
- Use the information in the following image to Add the ID, Category, Name, Tag, Status, and HTTP Return properties. These properties are defined the descriptor JSON file.

-
Add a new method and map it to the AddPet function of the Pet object of the Pet Store REST endpoint.
- Select the Methods tab and click Add.

- Expand the Pet Store REST service object, and navigate to Object Types > Pet.

- Select AddPet. Click Next.
- Leave the Details page with the default settings. Click Next.

- Select the HttpResponseCode return property and click Assign.
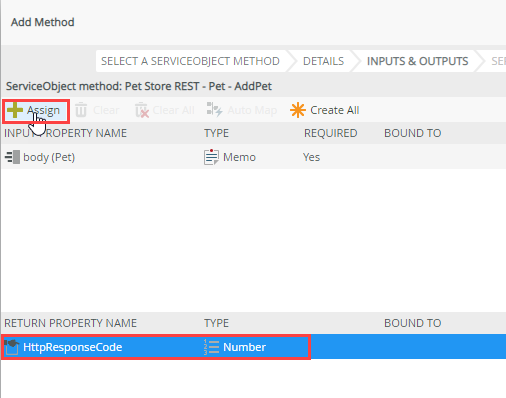
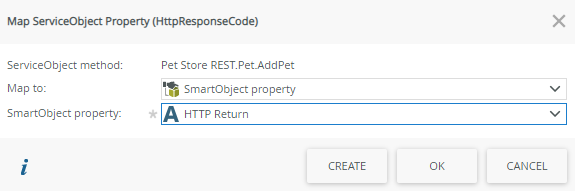
- Select the HTTP Return SmartObject property from the drop down and click OK.
- Click Create All to automatically create the remaining inputs and outputs.
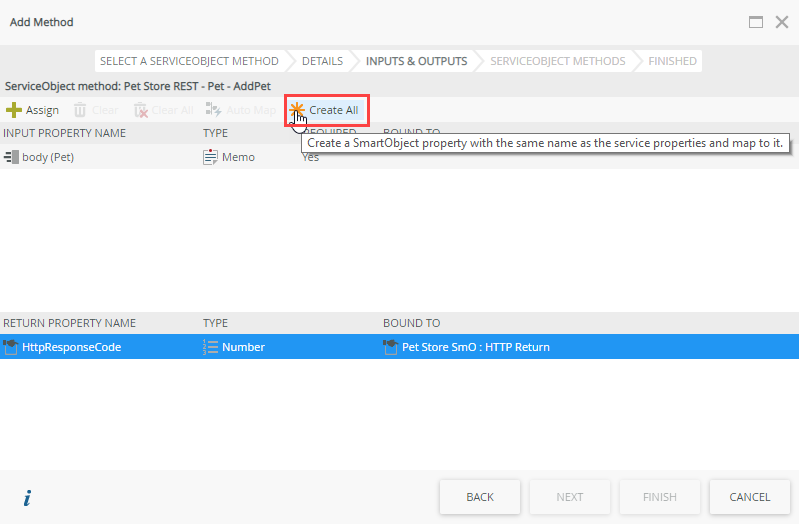
- Click Next.
- Click Finish.
- Select the Methods tab and click Add.
-
Add another method and map it to the UpdatePet function of the Pet object of the Pet Store REST endpoint.
- On the Methods tab click Add.
- Navigate to Pet Store REST > Object Types > Pet, click UpdatePet and click Next.
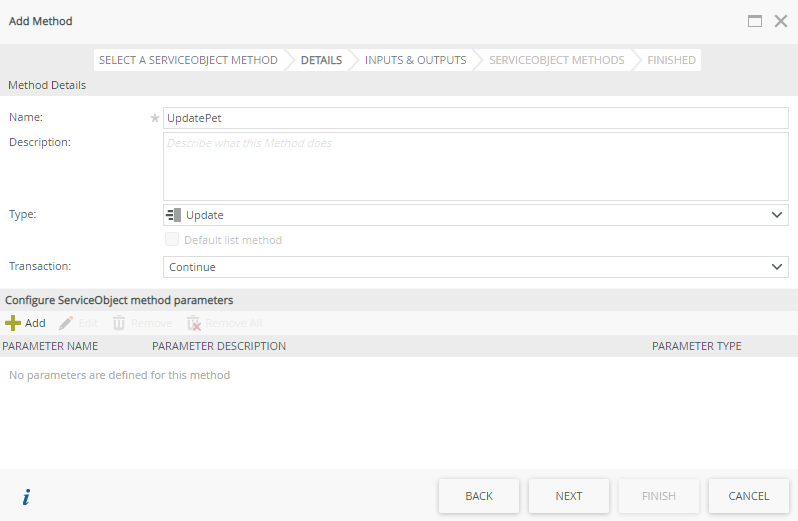
- Leave the Details page default settings. Click Next.
- On the inputs and outputs page assign the HttpResponseCode return property to the HTTP Return SmartObject property.
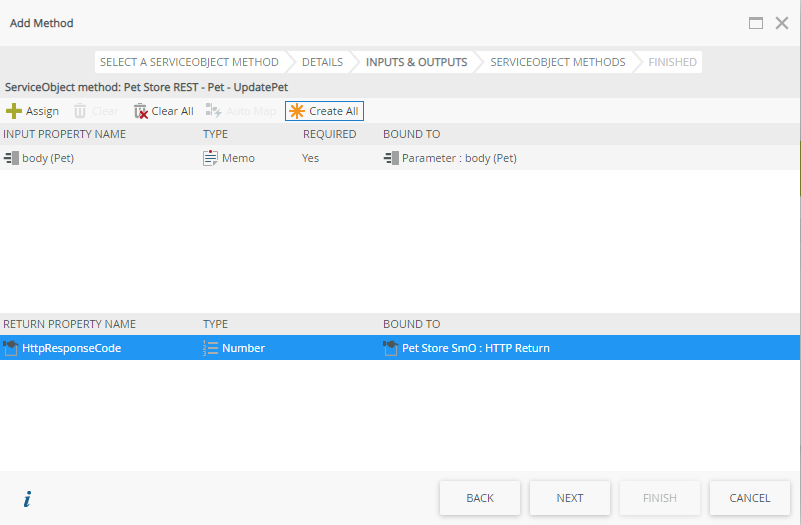
- Click Create All to automatically create the remaining inputs and outputs.
- Click Next.
- Click Finish.
-
Add a final method and map it to the DeletePet function of the Pet object of the Pet Store REST endpoint.
- On the Methods tab click Add.
- Navigate to Pet Store REST > Object Types > Pet, click DeletePet and Next.

- Leave the Details page default settings. Click Next.
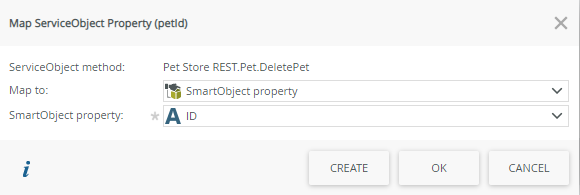
- On the inputs and outputs page assign the petId input property to the ID SmartObject property.

- Assign the HttpResponseCode return property to the HTTP Return SmartObject property.
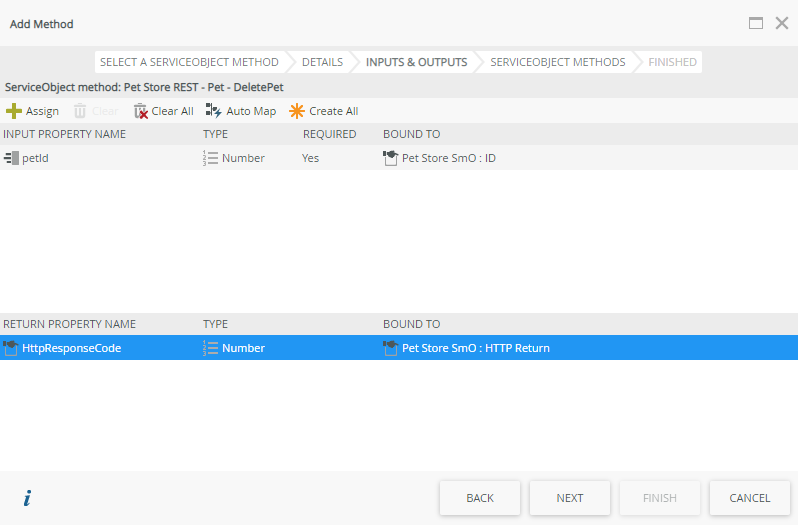
- Click Next.
- Click Finish.
- Your Methods tab should look similar to the image below:
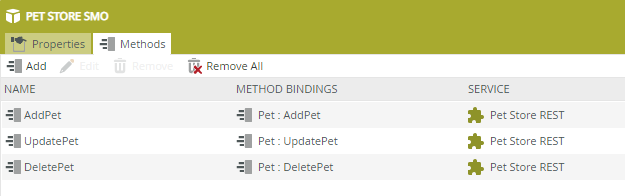
- Click Finish to complete your SmartObject.
-
Create a view of the Pet Store SmO, adding all field names (SmartObject properties) and buttons (SmartObject methods).
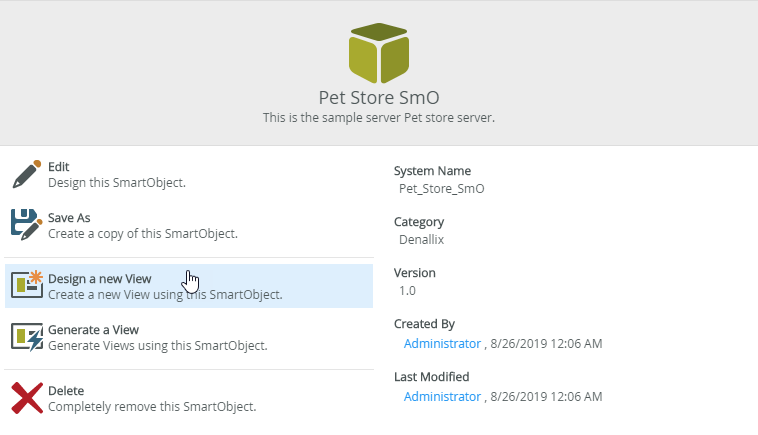
- On the Pet Store SmO page click Design a new View.
- Specify Pet Store - View as the Name.
- Specify a Description, and select a Category.
- Leave the View Type as Item View.
- Click Create.

- Click Create Labels and Controls.

- Select to include all field names and all methods.

- Click OK.
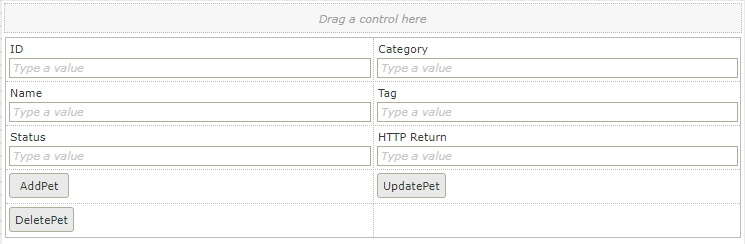
- Your view should look similar to the image displayed below:
- On the Pet Store SmO page click Design a new View.
-
Edit the AddPet button rule to send data from the ID, Category, Name, Tag, and Status fields.
- Select the AddPet button.
- Select the Rules tab and click the When AddPet Button is Clicked rule.
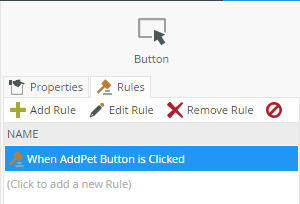
- Click Edit Rule. This opens the rule designer.
- In the rule, click configure.

- Delete the body (Pet) mapping.

- In the Context Browser expand the Pet Store - View > Pet Store SmO SmartObject to show the properties.
- Copy the following string into the body text box, then drag and drop the SmartObject properties to match, overwriting the values as shown in the image. (The format of this input value is defined in the JSON descriptor file).Copy
Copy into body text box:
{ "id": ID, "category": { "id": ID, "name": "Category" }, "name": "Name", "photoUrls": ["string"], "tags": [{"id": ID, "name": "Tag" }], "status": "Status" }
- Click Finish.
- Click OK.
-
Edit the UpdatePet button rule to send data from the ID, Category, Name, Tag, and Status fields.
- Select the UpdatePet button.
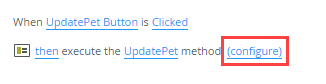
- Select the Rules tab and click the When UpdatePet Button is Clicked rule.
- Click Edit Rule. This opens the rule designer.
- In the rule, click configure.
- In the Context Browser expand the Pet Store - View > Pet Store SmO SmartObject to show the properties.
- Copy the following string into the body text box, then drag and drop the SmartObject properties to match, overwriting the values as shown in the image. (The format of this input value is defined in the JSON descriptor file).Copy
Copy into body text box:
{ "id": ID, "category": { "id": ID, "name": "Category" }, "name": "Name", "photoUrls": ["string"], "tags": [{"id": ID, "name": "Tag" }], "status": "Status" } - Click Finish.
- Click OK.
- Click Finish to complete your view.
-
Run the view. Test the AddPet, UpdatePet, and DeletePet buttons.
- On the Pet Store - View page click Run.
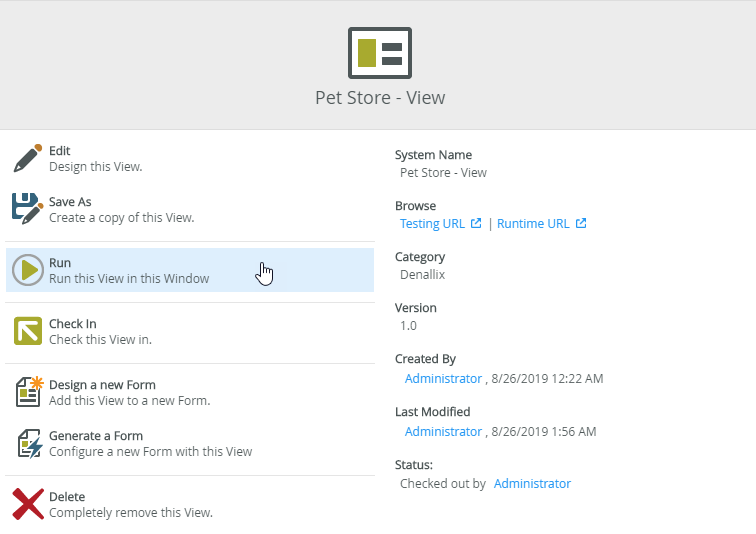
- Specify an ID, Category, Name, Tag, and Status. You can use the values shown in the following image:
- Click AddPet.
- The HTTP Return field should show 200. This is the Successful message from the REST service.

- Change the Status value from available to sold.

- Click UpdatePet.
- The HTTP Return field should show 200. This is the Successful message from the REST service.
- Click DeletePet.
- The view should now show an empty form.
- You can double check you results by viewing the REST data at https://petstore.swagger.io/.
- On the Pet Store - View page click Run.
Review
You created a REST service instance to connect to the swagger.io demonstration Pet Store REST service. You then created an advanced SmartObject, adding properties needed for the AddPet, UpdatePet, and DeletePet functions of the REST service. You added methods for those three functions, mapping inputs and outputs to the SmartObject properties. Finally you created a SmartForm view using the SmartObject properties and methods and tested the three functions using the view.