Managing custom workflow steps
Although you cannot change an existing custom step's toolbox path or name, you can update the service type, service object, service object method, the description (tooltip), and the icon. You can also deactivate the custom step so it doesn't show up in the Workflow Designer toolbox.
To manage custom steps, use the custom step management form located at:
https://[servername]/Runtime/Runtime/Form/com__K2__System__Management__Workflows__CustomStep__Forms__Main
(Replace the [servername] placeholder with the name of your environment)
Activate or deactivate a custom step
For scenarios where you need to prevent designers from using a custom step, you can disable it. This hides it from the toolbox but allows existing workflows to continue to run. For example, you may want to create a new version of the custom step in a different folder location, but you do not want to delete the custom step because this will cause existing workflows to fail. You can Deactivate a Custom Step to prevent it from showing up in the Designer toolbox.
Fallback Icons
If you delete a step or the SVG icon becomes corrupted for any reason, you will see placeholder icons in the affected steps in existing workflows and in the View Flow report. The placeholder icon appears as follows on the canvas: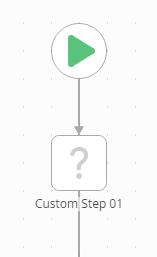
If the SmartObject that the custom step is configured for still exists, the step still executes as designed. To fix the icon, use the management form to upload a new icon for the step.
If the custom step was deleted, you must create a new custom step for the SmartObject method, reconfigure those workflows to use the new custom step, and redeploy the workflows.
Configuring Step Authorization
You can configure step authorization for custom steps in the same way you authorize designers to be allowed to use out-of-the-box steps. For more information, see the
Find custom steps in the Custom folder under Categories > Workflow > Steps as shown here:
Update a custom step
To update a custom step do the following:
- Open the custom step management form and select the step you want to update.
- Click the Update tab.
- Make the changes you want, but note you cannot change the name of toolbox path of the step.
- Clear the Activated checkbox to deactivate the step if you do not want the step to appear in the Designer toolbox.
- Click Update to continue.
- Refresh (Ctrl+F5) the Workflow Designer to see your updated custom step in the toolbox.
Delete a custom step
To delete a custom step, you can:
- Use the Custom Step Management Form to select the step on the form, and click Remove. Note that there is no dependency check, and that any workflows using the step will have to be reconfigured and redeployed.
- In Management, browse to the Category tree > System > Management > Workflows > Custom Step > SmartObjects > Custom Step
- Execute the Delete method.
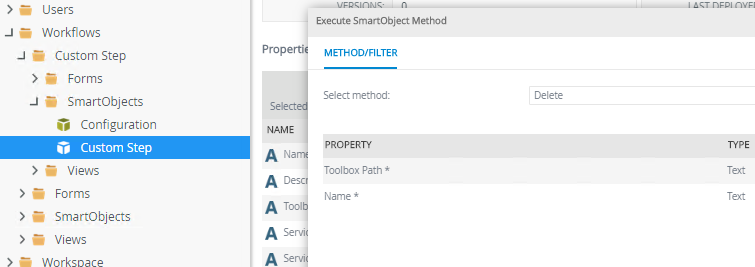
- Specify the Toolbox Path and Name for the step you want to delete. You can use the custom step management form to check both properties.
- If successful, a value of True is returned.
Considerations
- If you delete all the custom steps in a toolbox node, the system removes the node.
- You can delete a custom step from the custom step management form located at:
https://{yourServername}/Runtime/Runtime/Form/com__K2__System__Management__Workflows__CustomStep__Forms__Main/. You cannot delete custom steps from the Category System in the Designer. - If you delete a step that is currently used in a workflow, instances of that workflow may fail.
- If you deactivate a step, it will no longer appear in the toolbox, but existing workflows that use the custom step will still use the step even though it was deactivated.