How To: Send an email to a role using the Send Email step
This topic illustrates how you can use the Send Email step to send a email to members in a Role.
Use the Send Email step to send an email to a role
Scenario
When a leave request is approved or rejected, email notifications need to be sent to certain roles within your organization.
Steps
For this scenario, you configure roles in Management and build a simple leave request workflow with a Send Email step to send an email to members within the role when a leave request is approved or rejected. You create a view from a SmartObject, then add it to a form. The workflow consists of a simple Task step and two Send Email steps linked to the configured Decision outcomes.
Setup Steps
The following steps set up the scenario from start to finish. If you want to skip the setup steps and view the topic step, go to Add Send Email steps and configure the To sections with the UMUser Email SmartObject property.
- Create a SmartBox SmartObject called Leave Request. Add properties using the table below as a guide. (Optional: Add categories first to the Designer to keep your work organized.)
Property Type ID Autonumber Leave Request Title Text Employee Name Text Employee Email Text Leave Start Date Date Leave End Date Date Leave Type Text Requester Comments Memo Requester Status Text Approver Comments Memo - Launch the Designer.If you do not know how to access the Designer, see Accessing Sites.
- Create a new category called Leave Request.
- Create a SmartObject called Leave Request. Click Finish
.
- Launch the Designer.
- Generate a View and Form
- Click Generate a View on the Leave Request SmartObject screen.
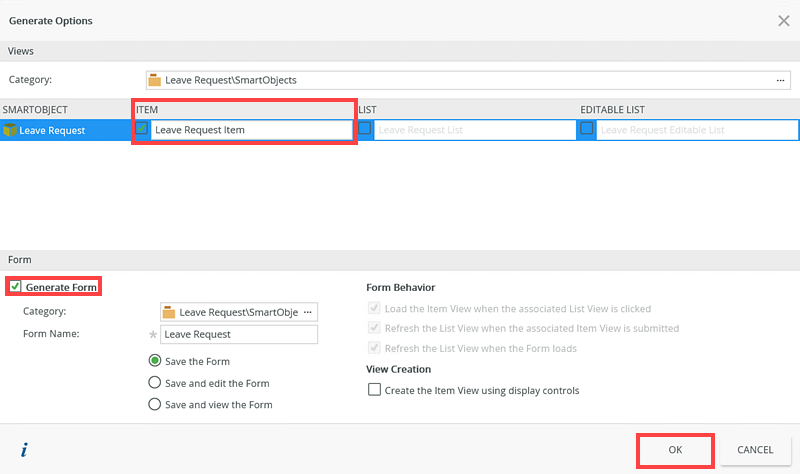
- On the Generate Options screen, select the Item and Generate Form options. Click OK.
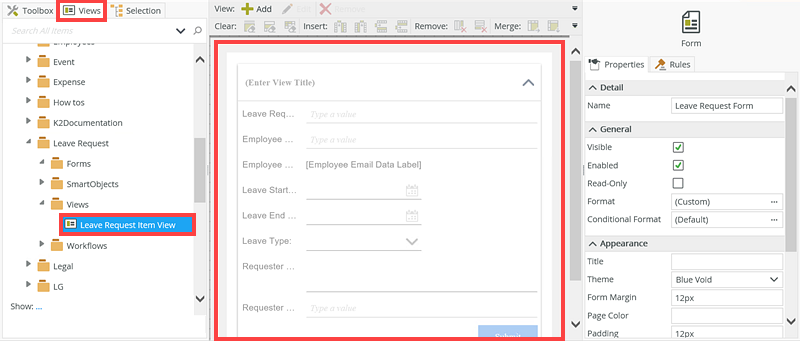
- Edit and configure the Leave Request Item View
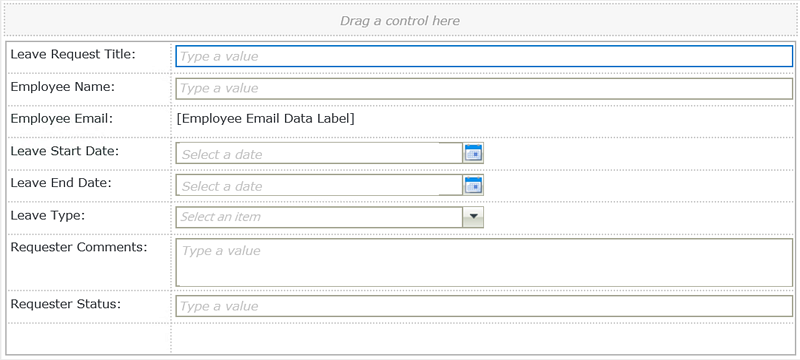
- Edit and configure the Leave Request Item View as shown below:
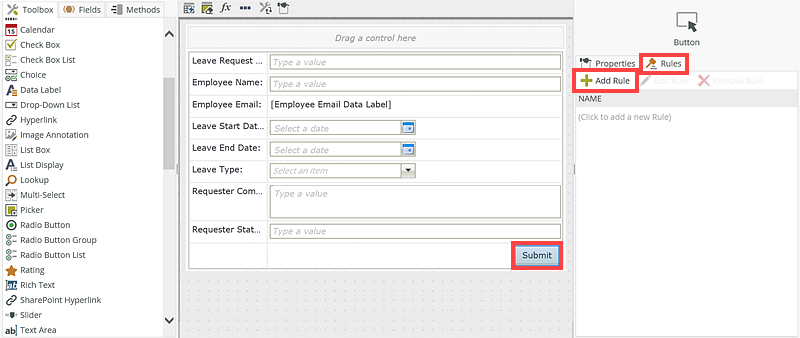
- Add a Button control to the item view and rename it to Submit.

- Select the Submit button control and click Add Rule in the Rules tab.
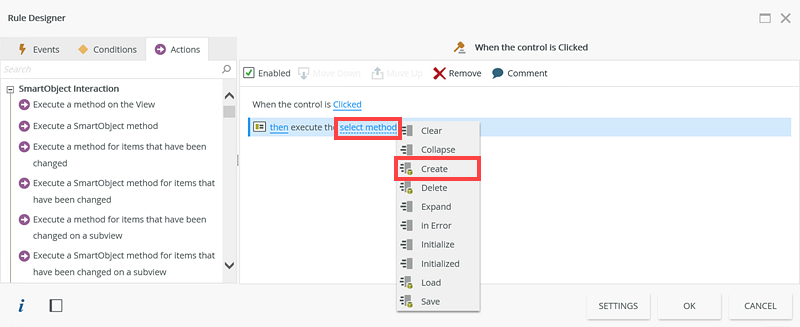
- On the Rule Designer screen, select the Actions tab and select the Execute a SmartObject method action.

- Click the Select Method option and select the Create method.
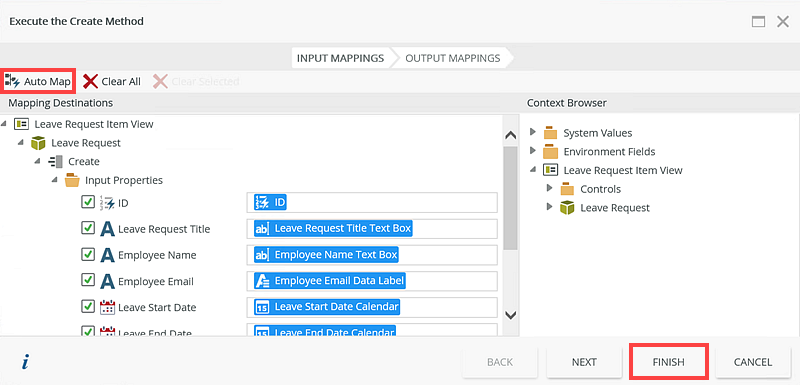
- Click Configure. Click Auto Map and then Finish.
- Click OK then Finish.
- Check in the Leave Request Item View.
- Edit and configure the Leave Request Item View as shown below:
- Edit and Configure the Leave Request Form
- Edit the Leave Request form.
- Select the Views tab and add the Leave Request Item View to the form.
- Click Finish and check in the form.
- Configure the Leave Request Workflow
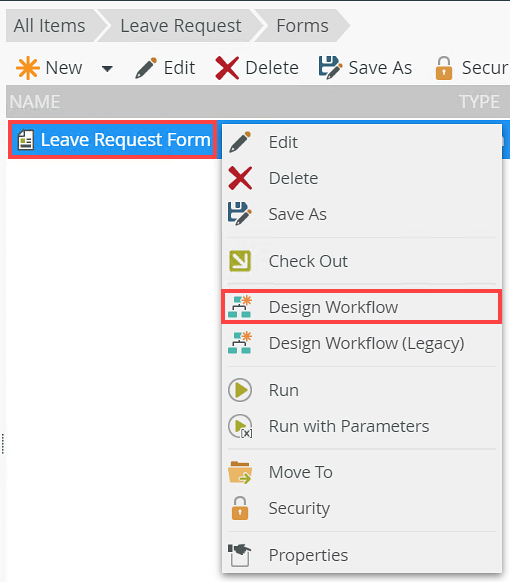
- Select the Leave Request Form and click Design Workflow.
- Name the workflow Leave Request Workflow.
- Select the Start step and click Add a SmartForm start event.
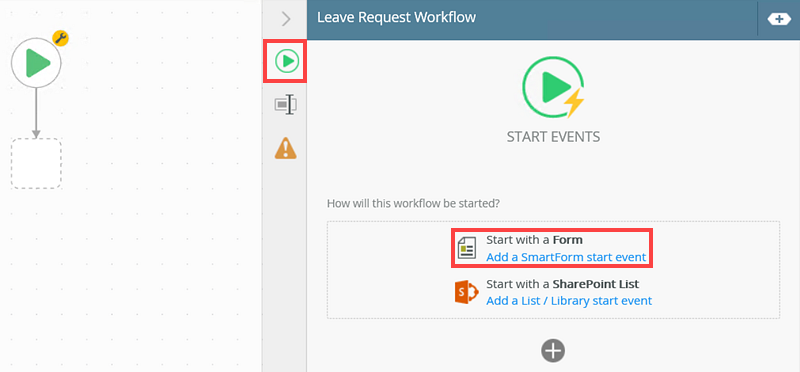
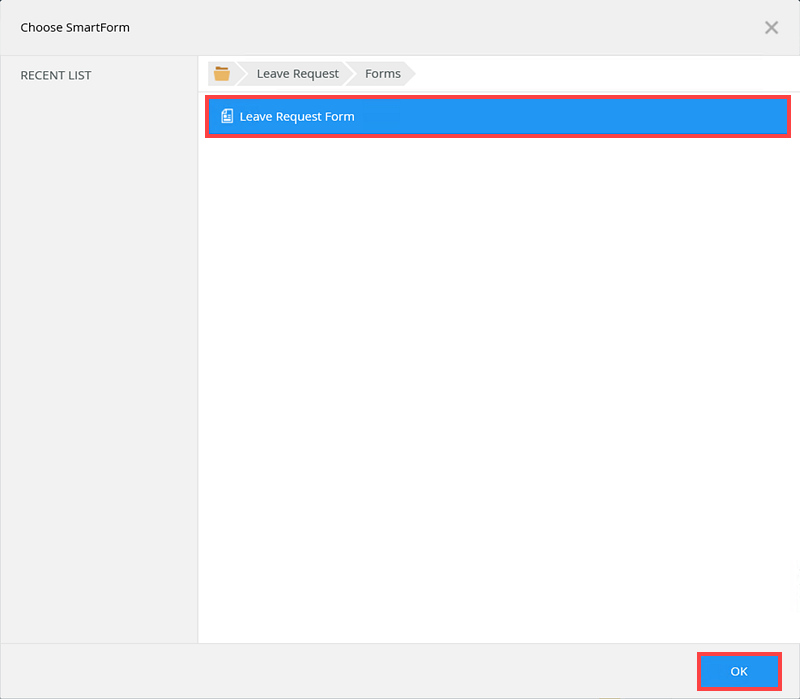
- On the Choose SmartForm screen , select the Leave Request Form and click OK.
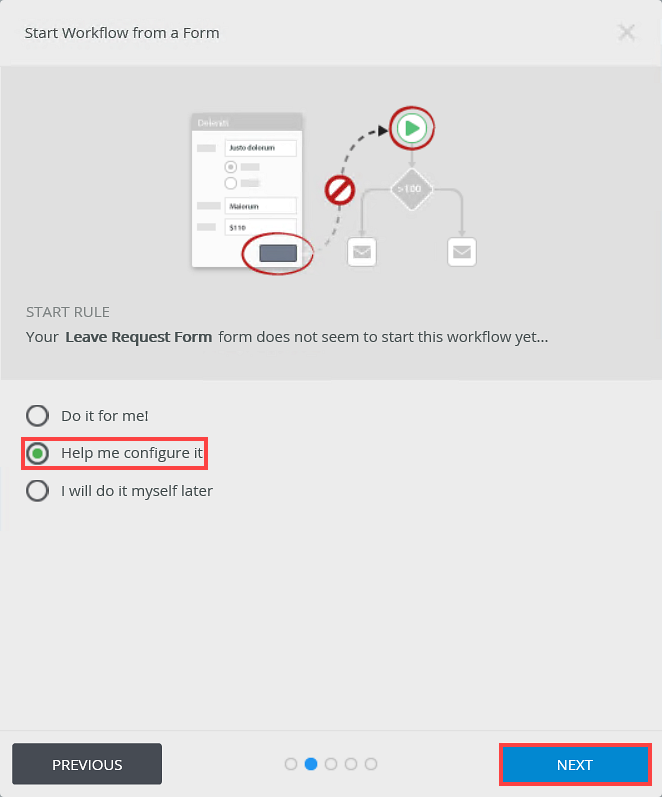
- Click Next on the Start Workflow from a Form screen.
-
Select the Help me configure it option and click Nexton the Start Workflow from a Form screen.
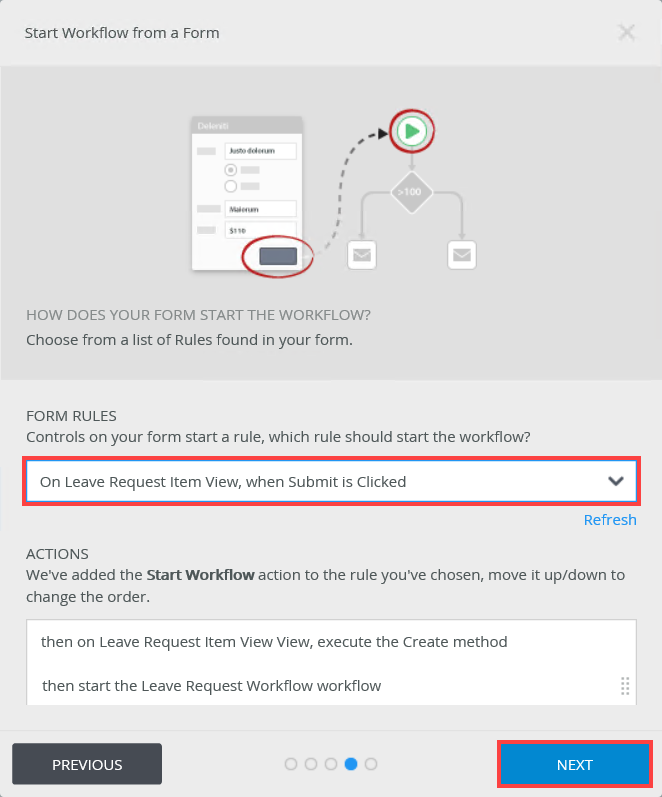
Click Next again
- Select the On Leave Request Item View, when Submit is Click option from the Form Rules section and click Next.
- Click Save and Finish.
- Click OK.
- Select the Leave Request Form and click Design Workflow.
- Add and Configure a Task and Decision Steps
- Add a Task step from the Toolbox to the canvas.
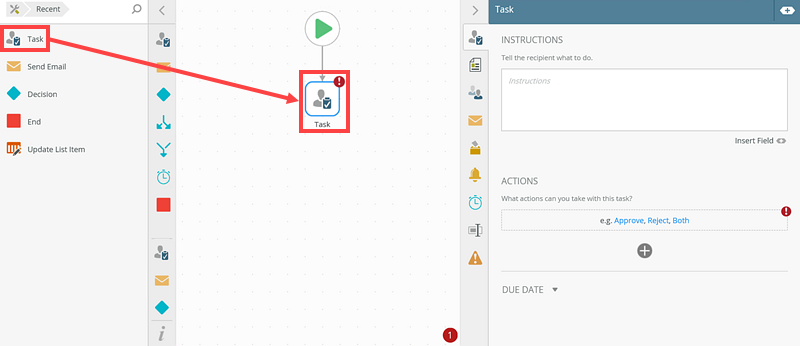
- In the Actions section select Both. Rename the Task step to HR Approval.

- Add a Decision step to the canvas and connect it to the HR Approval Task step.

- Add a Task step from the Toolbox to the canvas.
Add Send Emails steps and configure the "To" section with roles
The step below explains how to configure the Send Email steps with roles.
-
Add Send Email steps and add the UM User Email property to the To section.
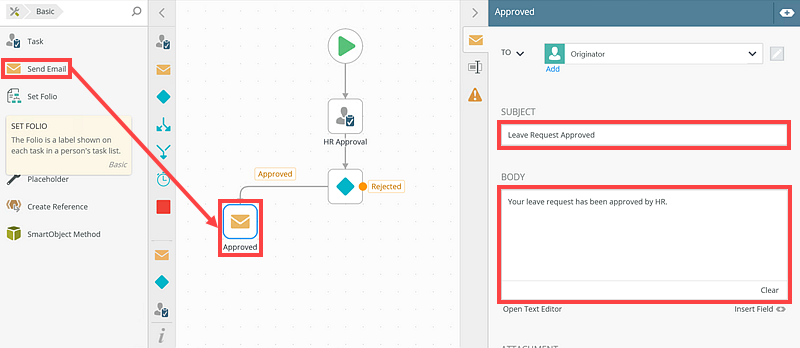
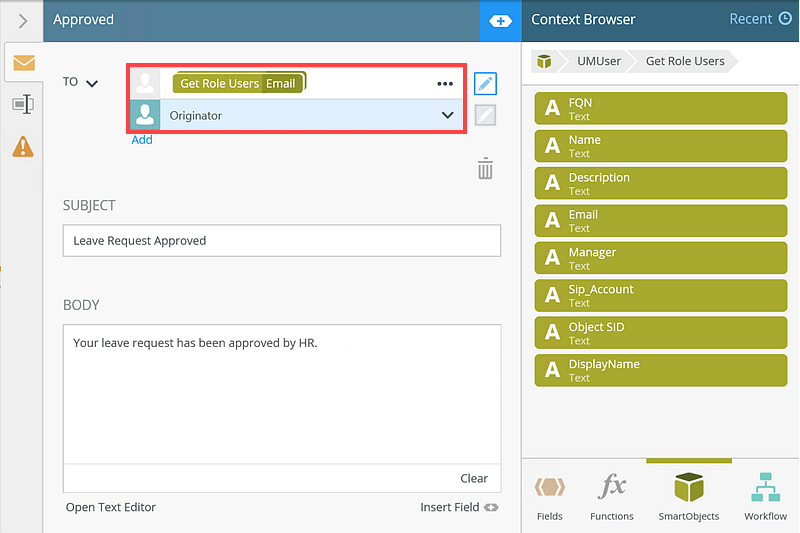
- Add a Send Email step to the Approved decision. Rename the Send Email step to Approved. Configure the Subject and Body sections.
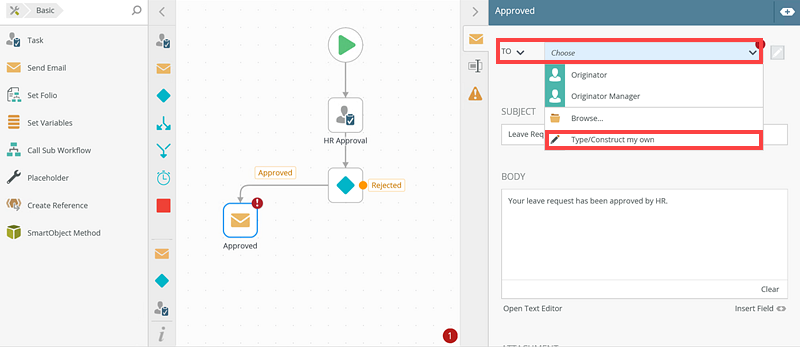
- On the To section, select the Type/Construct my own option.
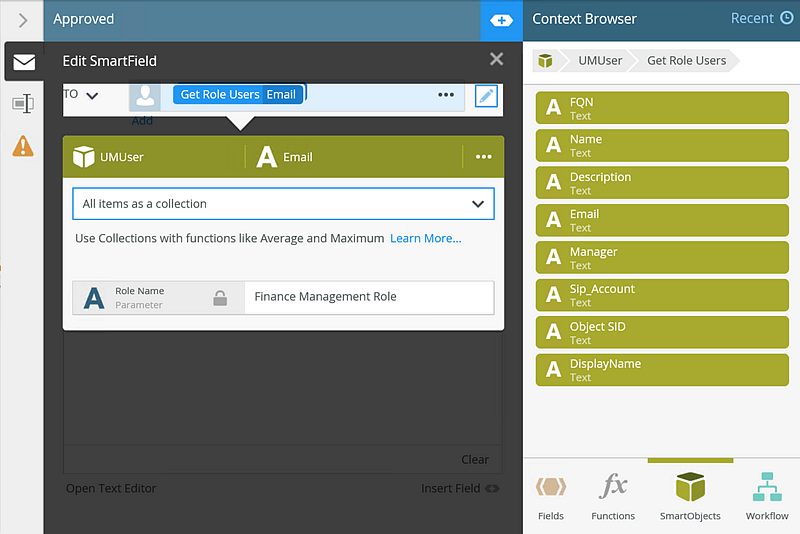
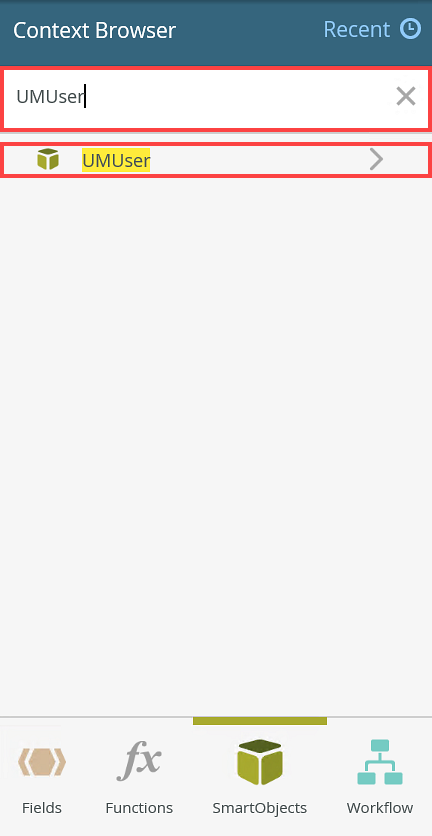
- Expand the Context Browser section and select the SmartObjects tab.
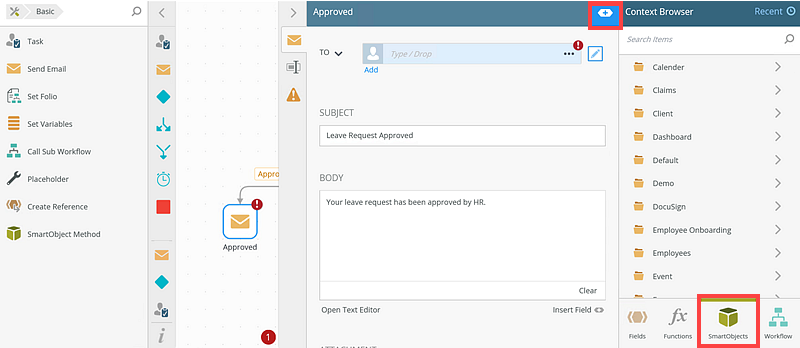
- Search for the UMUser SmartObject and select it.
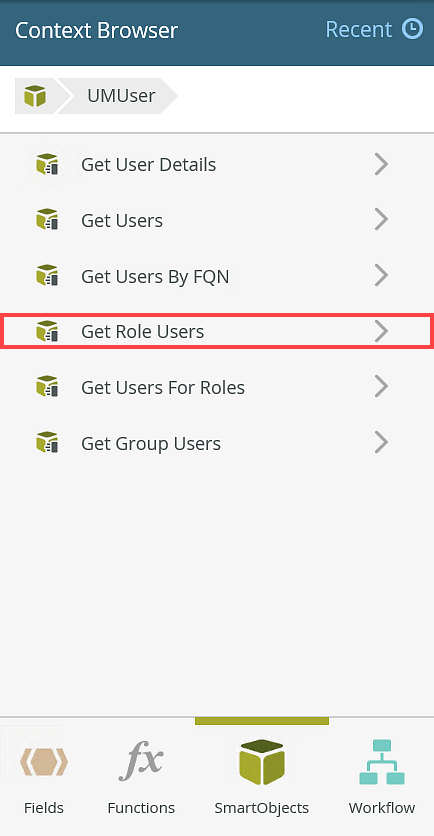
- Select the Get Role Users option.
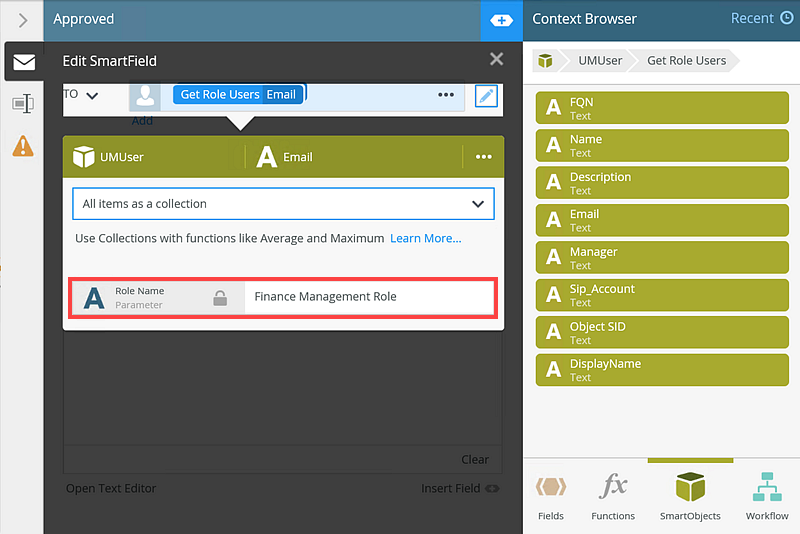
- Select the Email option and drag it to the To section. Select the All items as a collection option. This configures the email to be sent to all users in the role.

- Type the name of the role you want the email to be sent to in the Role Name section. In this scenario we send the email to the Finance Management Role.
 Ensure you create your roles prior to configuring the Send Email steps. See the Roles section in Management for more information.
 - Add another To option and select the Originator option. This ensures the user who submitted the Leave Request also gets sent the Approved or Rejected email.
- Repeat the above mentioned steps for the Rejected decision.
- Deploy the Leave Request Workflow.
- Add a Send Email step to the Approved decision. Rename the Send Email step to Approved. Configure the Subject and Body sections.
-
Test the Scenario
In the following scenario Codi submits a leave request which is sent to the HR department for approval. Once approved or rejected, Codi and the her managers in the Finance department will receive an approved or rejected email. The Finance managers are part of a role called Finance Management Role. The emails from the approved or rejected request are sent to all members of the Finance Management Role and Codi.
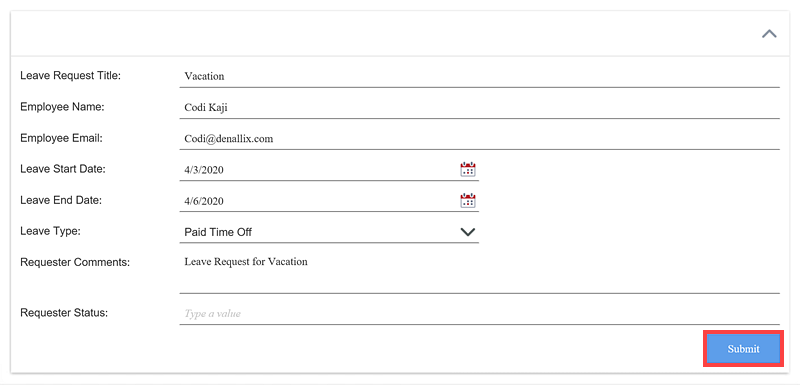
- Codi completes the Leave Request form and clicks Submit.
- The leave request is approved by the HR department.
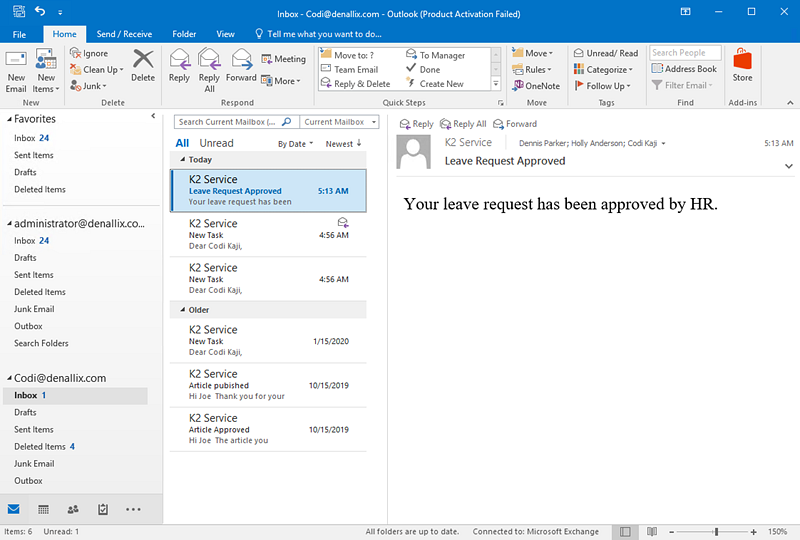
- Codi receives the approval email.
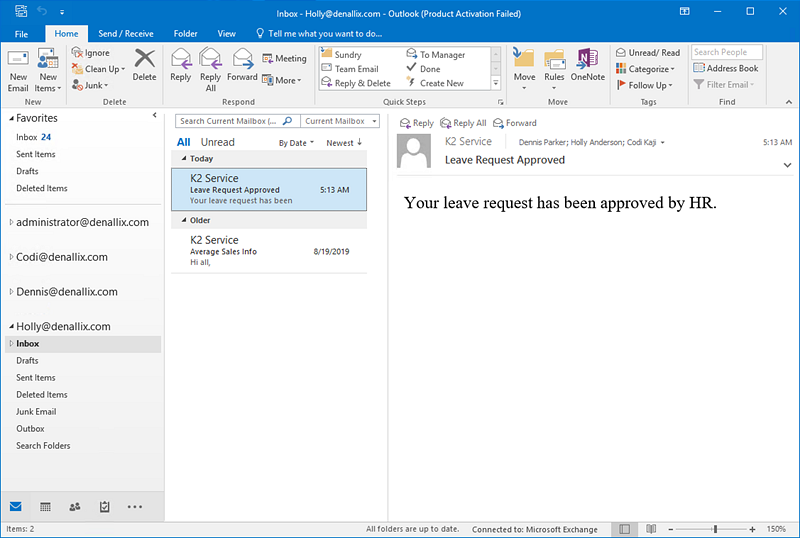
- Members of the Finance Management Role (Holly and Dennis) also receive the approval email.

- Codi completes the Leave Request form and clicks Submit.
Review
In this how to you created a leave request application with a SmartObject, View, Form, and a Workflow. When the Leave Request form was submitted and approved or rejected, the emails for the approved or rejected request were sent to the originator and to members of a role.