How To: Create a PDF file using the PDF Converter in an Advanced SmartObject
This article illustrates one method for converting an existing web page into a PDF file. This conversion applies to a single web page. For instructions on how to save a SmartForm and its content to a PDF format, see Save as PDF Control. See Using the PDF Converter for more information about the PDF Converter and considerations.
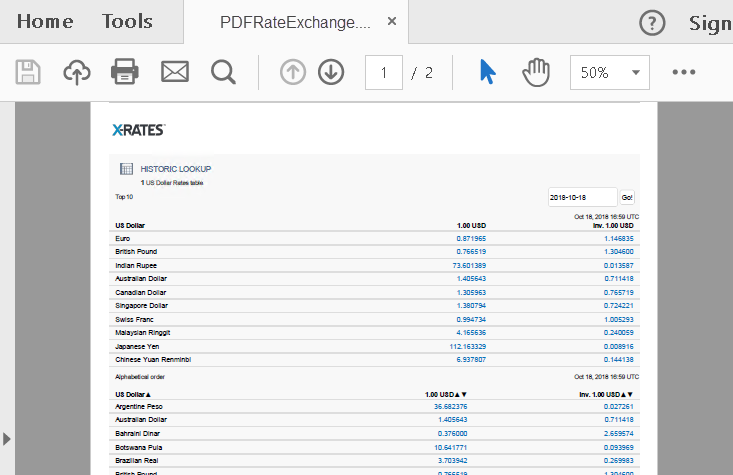
A PDF file created from a web page
Scenario
You work for a company with a global presence. Each month, you submit an expense claim for travel costs you incurred. Since you travel out of the country, you must convert expenses to US dollars. Your company requires you to provide proof of currency exchange rates. To accomplish this, you have created a workflow that saves a currency exchange rate web page to a PDF format, which you attach to your expense claim.
Steps
In this scenario, you create two data sources: one to perform the PDF conversion and one to store the converted file. You create a workflow that ties the conversion steps together and sends the PDF file as an email attachment.
Setup Steps
The following steps set up the scenario from start to finish. If you want to skip the setup steps and view the topic step, go to Configure a SmartObject Method Step with the Create PDF from URL Method.
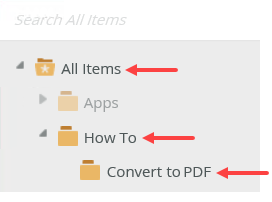
- In the Designer, create a new SmartBox SmartObject called MyPDFFile. In addition to the default ID property, add a new property called PDF with a data type of File. This SmartObject stores the PDF files. (Optional: create categories in the Designer for this demonstration. How To > Convert to PDF)
- Launch the Designer.If you do not know how to access the Designer, see Accessing Sites.
- Click Browse. To keep your work organized, create the following categories: How To > Convert to PDF. To create the first category, right-click the All Items heading and select New Category.
- Right-click the Convert to PDF category and select New SmartObject.
- Name the SmartObject
MyPDFFile
and confirm the SmartBox option is selected. Click Create.
- Add one property called
PDF
then change the data type to File. Click OK.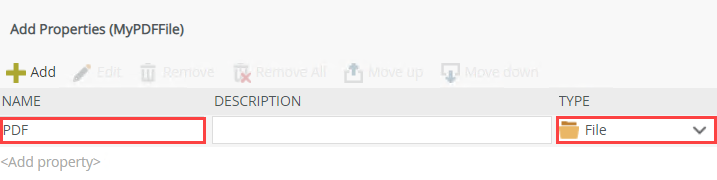
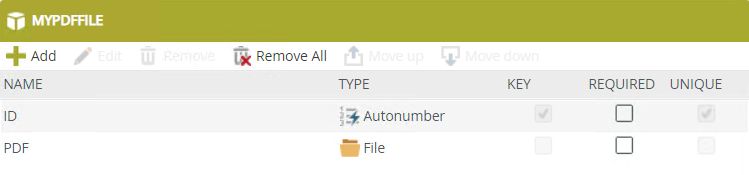
- Click Finish (near the upper right corner of your screen) to save and exit the SmartObject.
Your MyPDFFile SmartObject properties should look like the image below.
- Launch the Designer.
-
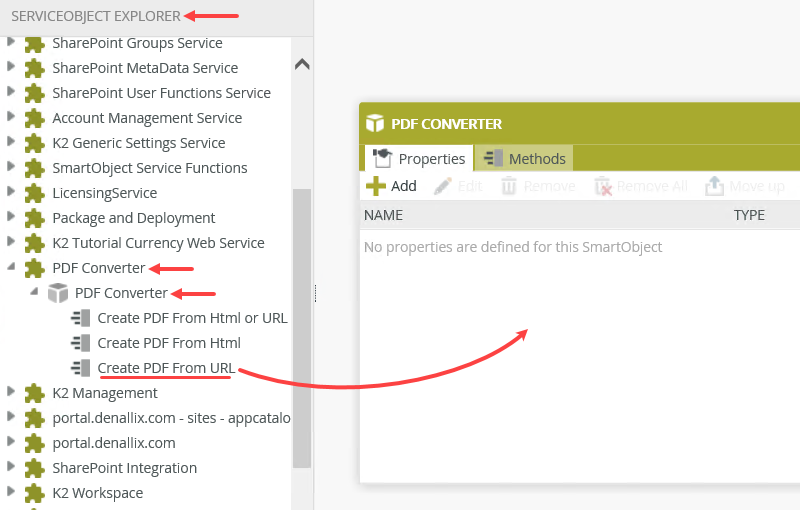
Create an Advanced SmartObject called PDF Converter. From the Service Object Explorer, add the PDF Converter > PDF Converter > Create PDF from URL method to the new SmartObject. Create All properties.
The second SmartObject is an advanced data source that uses an existing method from the PDF Converter Service Object. This method creates a PDF file from a web page URL, then saves the file to the MyPDFFile SmartObject.
- Right-click the PDF Converter category and select New SmartObject.
- Name the SmartObject
PDF Converter
then select the Advanced SmartObject option. Click Create.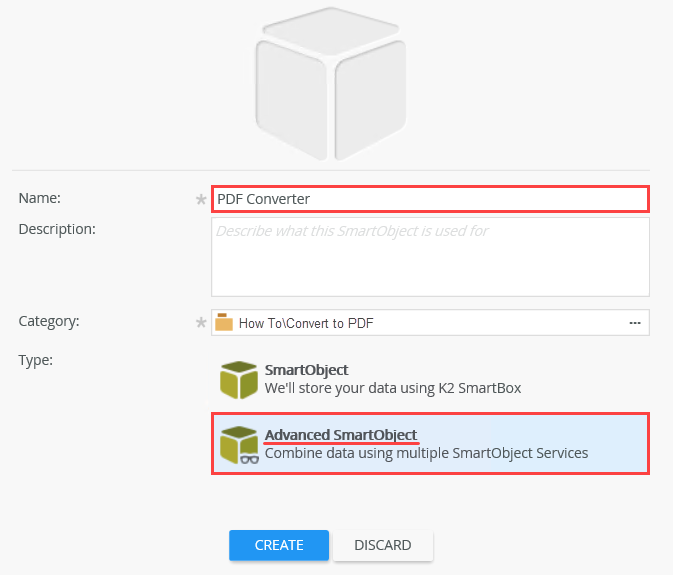
- From the ServiceObject Explorer on the left side of your screen, locate PDF Converter. Expand the nodes and drag the Create PDF from URL method onto the design canvas.
- On the Add Method > Details screen, keep the default settings and click Next.

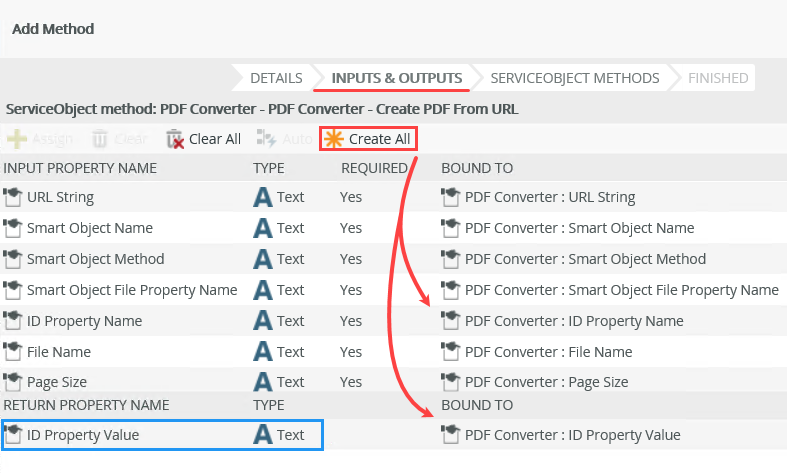
- On the Inputs & Outputs screen, click Create All. This action creates the existing service object properties in your new SmartObject. Click Next.Notice the Return Property, ID Property Value. The PDF file is created and saved to the MyPDFFile SmartObject. While configuring the workflow, you save the ID of this SmartObject record to a variable. This way, you can use the ID to locate the correct file to attach to an email. Notice, however, the return property is a text data type, whereas record IDs are usually integers. You convert this text value to an integer so you can use it to locate the correct record.
- On the ServiceObject Methods screen, you see the new method created in your SmartObject. Click Finish.
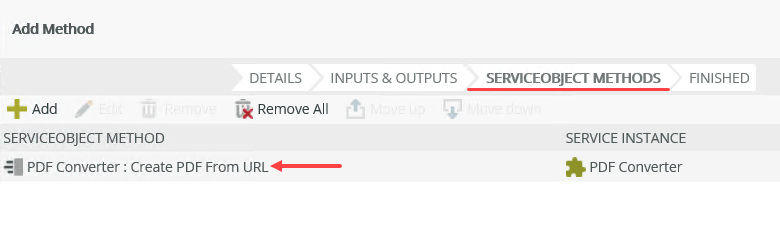
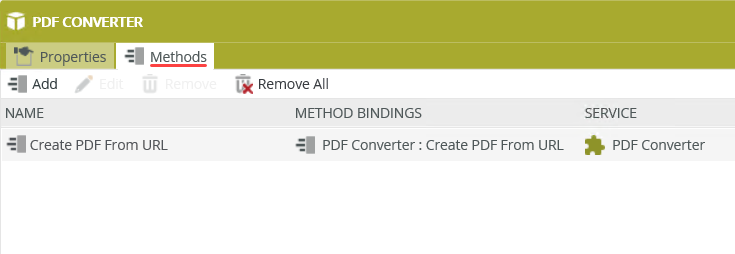
- Your SmartObject (Methods) should look like the image below. Click Finish to save and exit the SmartObject.
For this SmartObject, you do not add properties. Instead, you use the properties and methods from a system service object. Methods are protocols for interacting with data. For example, create, update, and delete are common methods used in SmartObjects. For this demonstration, you use a method that converts a web page to a PDF file, then saves the file to a SmartObject. This method already exists in the PDF Converter and is ready to use.
- From the Convert to PDF category, add a new workflow named Convert URL to PDF.
- You are ready to create and configure the workflow. Right-click the Convert to PDF category and select New Workflow.
- Name the workflow
Convert URL to PDF
then click Create.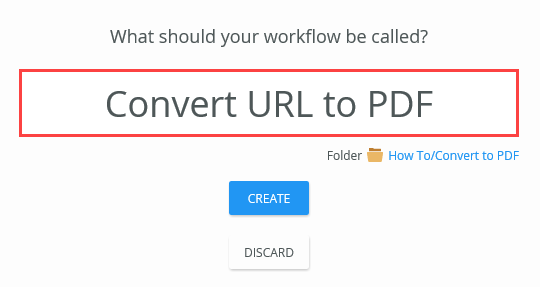
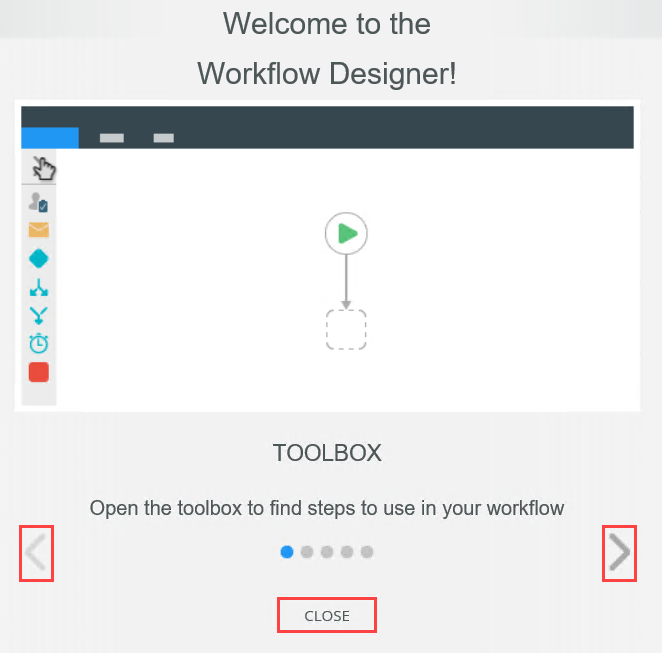
You see a Welcome screen with an interactive panel. You can click the right and left arrows to learn more about the workflow designer. Click Close to proceed to the design canvas.
Configure a SmartObject Method Step with the Create PDF from URL Method
The following steps demonstrate adding and configuring a SmartObject Method step using the Create PDF from URL method. You also learn how to add and configure a Send Email step with the generated PDF file as an attachment.
- Add a SmartObject Method step to the empty placeholder. For the SmartObject, select PDF Converter. For the Method, select Create PDF from URL. Use the table below as a guide for Input Mappings, Variables, and Output Mappings. Rename the step Convert to PDF.
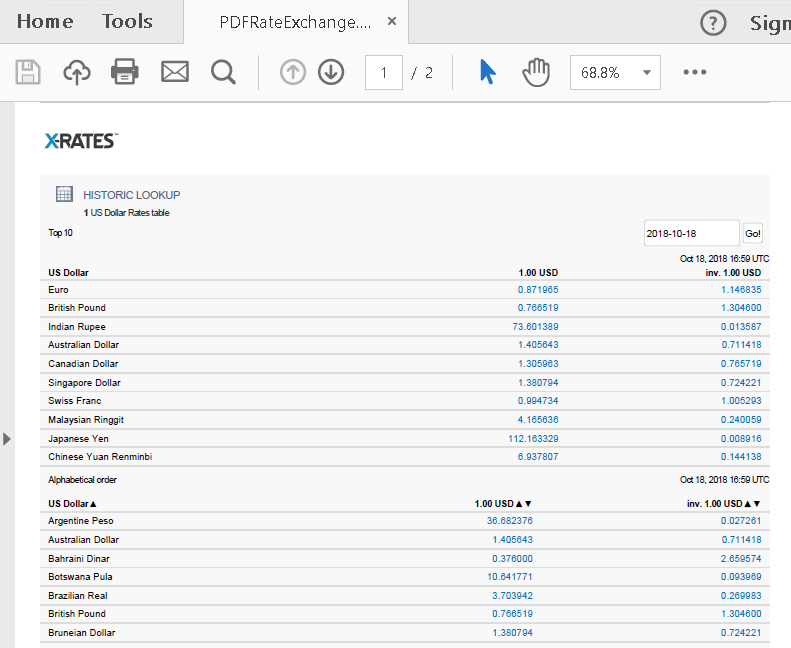
Property Value Notes Input Mappings URL String *https://www.x-rates.com/historical/?from=USD
&amount=1*Enter the sample exchange rate URL. This web page displays a table of currency rates for the current date. If you copy and paste the sample URL, make sure it pastes exactly as shown. In some cases, the ampersand (&) passes as (&). Leaving it in this format causes the workflow to fail. SmartObject Name MyPDFFile This is the SmartObject that stores generated PDF files. SmartObject Method Create You use the create method to add a new PDF file. SmartObject File Property Name PDF This is the property in the MyPDFFile SmartObject that contains the saved file. ID Property Name ID The SmartObject auto-number for each record. File Name PDFRateExchange This is the name of the PDF file as it's saved to the SmartObject. This entry can be any value you want, it is not bound to system settings. Page Size A4 The system has reference page sizes. A4 refers to 8.5 x 11. For information on page sizing, see the Considerations section in the Save as PDF Control user guide. Page Orientation Portrait Variables (Expand the Context Browser for this setting) Add new IDString You return the ID of the current record to this variable. You reference it in the next step. Output Mappings Map to Data Fields Selected ID Property Value IDString You save the ID of the current PDF Files SmartObject record to the IDString variable. You use this variable to attach the PDF file to the email. - From the Toolbox > Basic node, drag a SmartObject Method step into the empty placeholder below the Start step.
- Select the SmartObject Method step, then expand the Configuration Panel.
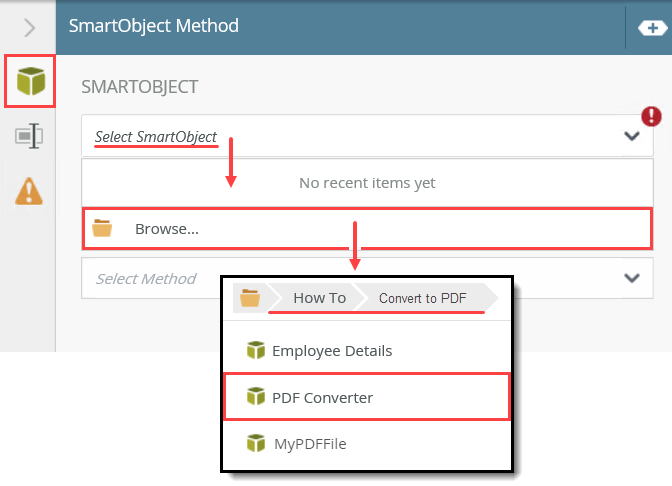
- For the SmartObject, click the Select SmartObject bar, then click Browse. Navigate to and select the PDF Converter SmartObject. In the image below, the PDF Converter SmartObject is found in the How To > Convert to PDF category. Your screen may be different depending on where you saved your SmartObjects. Click OK.
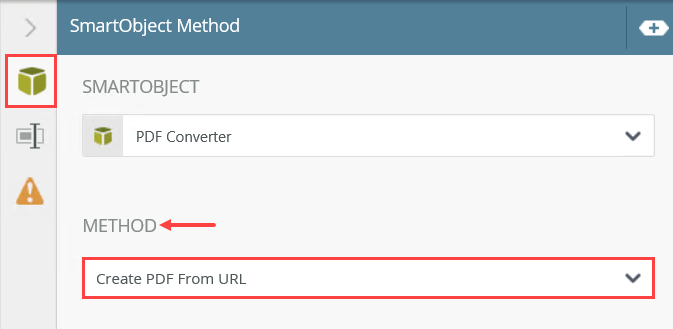
- For the Method, select Create PDF from URL.
- Complete the Input Mappings > Properties using the table below as a guide. There is a reference image below the table.
Property Value Notes Input Mappings URL String *https://www.x-rates.com/historical/?from=USD
&amount=1*Enter the sample exchange rate URL. This web page displays a table of currency rates for the current date. If you copy and paste the sample URL, make sure it pastes exactly as shown. In some cases, the ampersand (&) passes as (&). Leaving it in this format causes the workflow to fail. SmartObject Name MyPDFFile This is the SmartObject that stores generated PDF files. SmartObject Method Create You use the create method to add a new PDF file. SmartObject File Property Name PDF This is the property in the MyPDFFile SmartObject that contains the saved file. ID Property Name ID The SmartObject auto-number for each record. File Name PDFRateExchange This is the name of the PDF file as it's saved to the SmartObject. This entry can be any value you want, it is not bound to system settings. Page Size A4 The system has reference page sizes. A4 refers to 8.5 x 11.. For information on page sizing, see the Considerations section in the Save as PDF Control user guide. Page Orientation Portrait 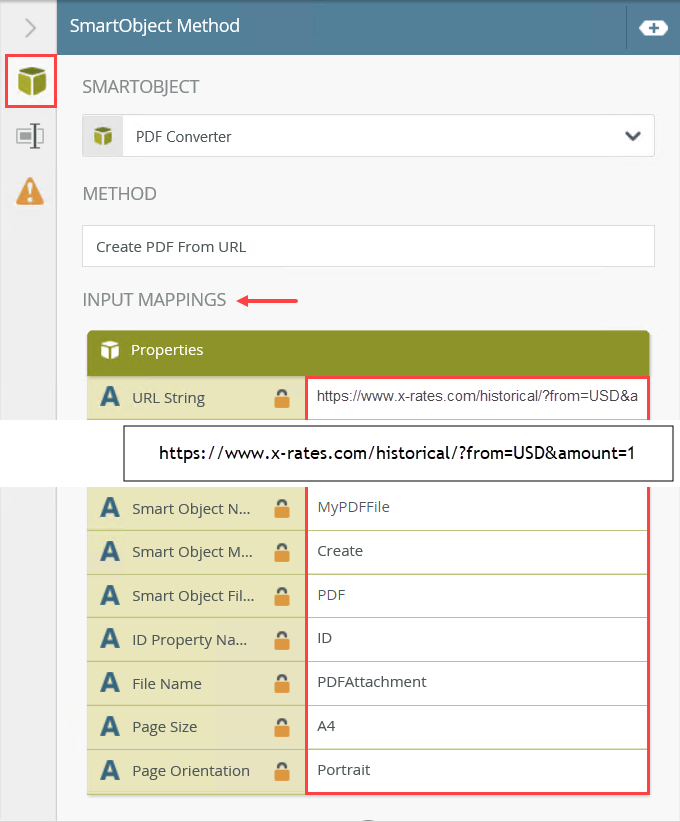
- Expand the Context Browser.The Context Browser contains references, variables, functions, and SmartObject properties. At runtime, references and variables are replaced with live data. For example, the ID reference is replaced with the ID of the current record.
- In the Variables section, click Add. Name the variable
IDString.
Click the canvas to set the value. Collapse the Context Browser by clicking the slider once again.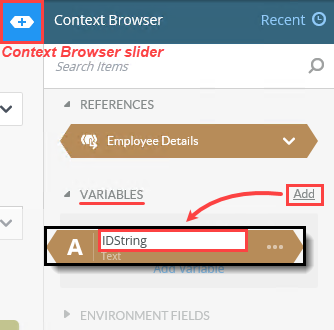
- Scroll down to the Output Mappings section. Select Map to Data Fields, then click the Add(+) icon. Check the box for ID Property Value. (Recall when setting up the PDF Converter SmartObject, this is the property for the return value.)
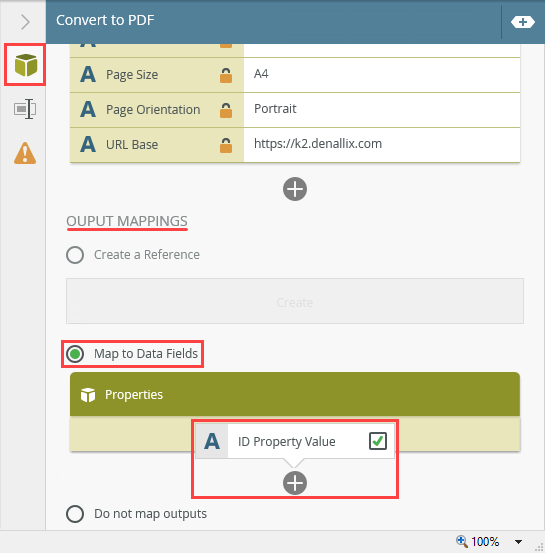
- Click the down arrow for the value box. Select IDString. You have mapped the ID of the record just created to a variable. You use this variable later to attach the file to an email.

- Select the Properties tab. Change the step name to
Convert to PDF
then collapse the Configuration Panel.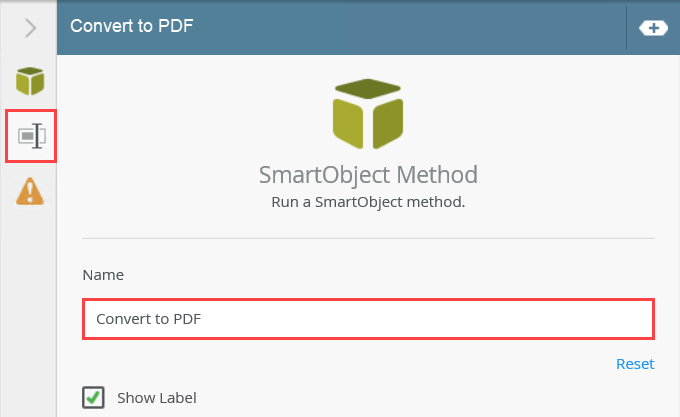
Notice the red warning badge on the SmartObject Method step. This badge indicates there are required settings in the Configuration Panel. When you expand the panel, you see the same badge next to the required settings.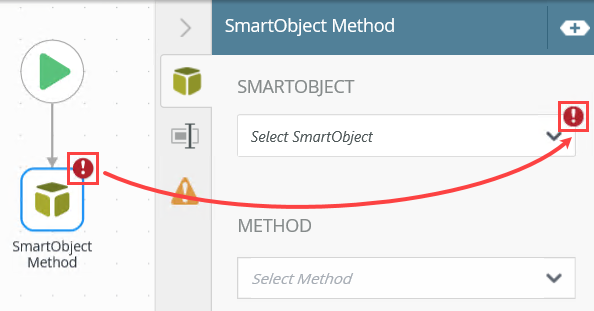
After you select the method, you see a series of required properties for Input Mappings. You must provide values for each property.
Next, you create a new variable that stores the ID of the record just created in the MyPDFFile SmartObject. You need this ID to locate the correct file when you attach it to an email.
- From the Toolbox > Basic node, drag a SmartObject Method step into the empty placeholder below the Start step.
- Add a Send Email step and connect it to the Convert to PDF step. Enter content for the Subject line and message Body. For the Attachment, add the PDF property from the MyPDFFile SmartObject > Load method. Use the To Integer function to convert the IDString variable to an integer for the SmartField ID value.
For convenience, you attach the new PDF file to an email and send it to the person who started the workflow. This way, they do not have to download and save the file.
- From the Toolbox > Basic node, drag a Send Email step below the Convert to PDF step. Connect the two steps.
- Select the Send Email step and expand the Configuration Panel.
- Keep the To value as Originator. This sends the email to the person who submits the form (you!). For the Subject line, enter
PDF Exchange Rate Attached
then for the message Body, enter
Attached is today's currency exchange rate.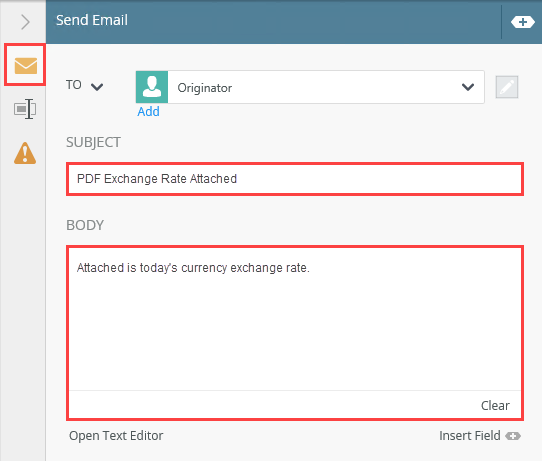
- On this same screen, scroll down until you see the Attachment section. Click the Add Attachment link.
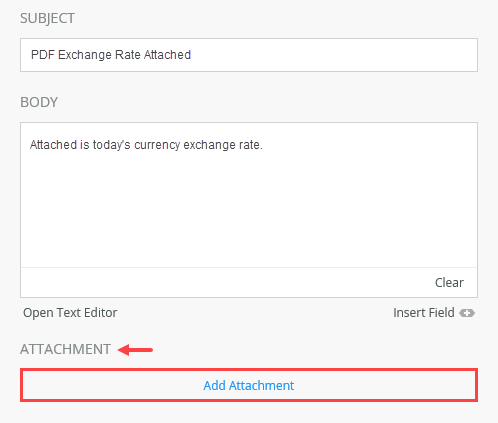
- The Attachment bar becomes active. Expand the Context Browser.
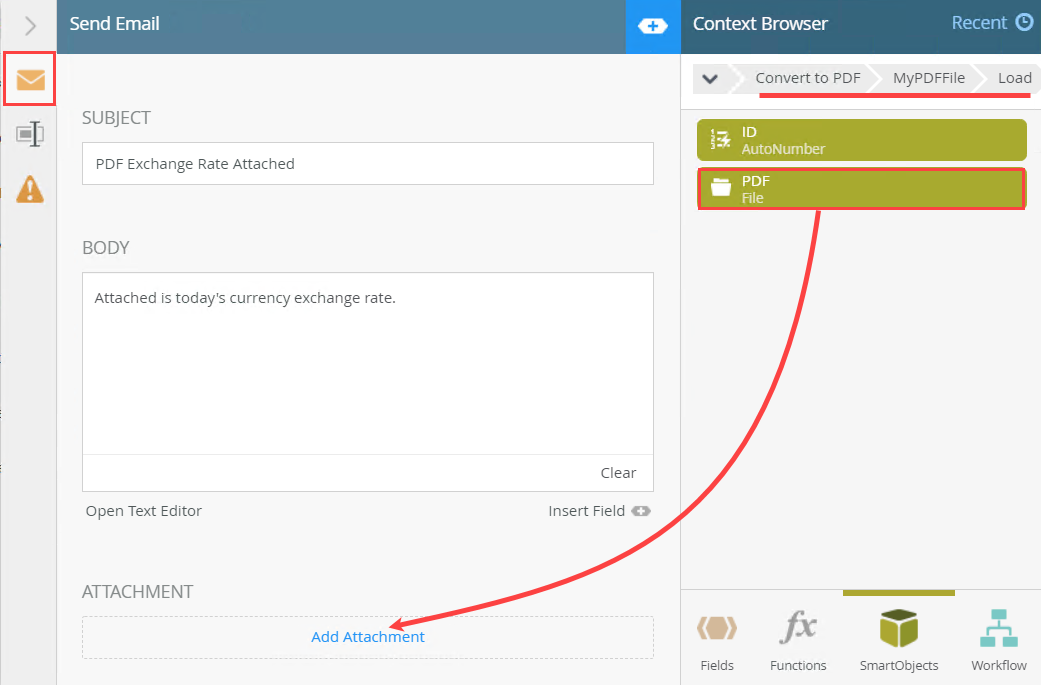
- You begin by adding a variable that references the saved PDF file. At runtime, the variable is replaced with the file from the current MyPDFFile record. Click the SmartObjects tab.

- Navigate to the MyPDFFile SmartObject. Your menu structure may not match the image below, depending on where you created and saved your SmartObjects.
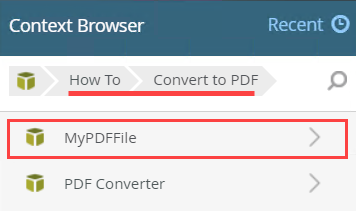
- Expand the SmartObject, then expand the Load node. Drag the PDF property into the Attachment box.
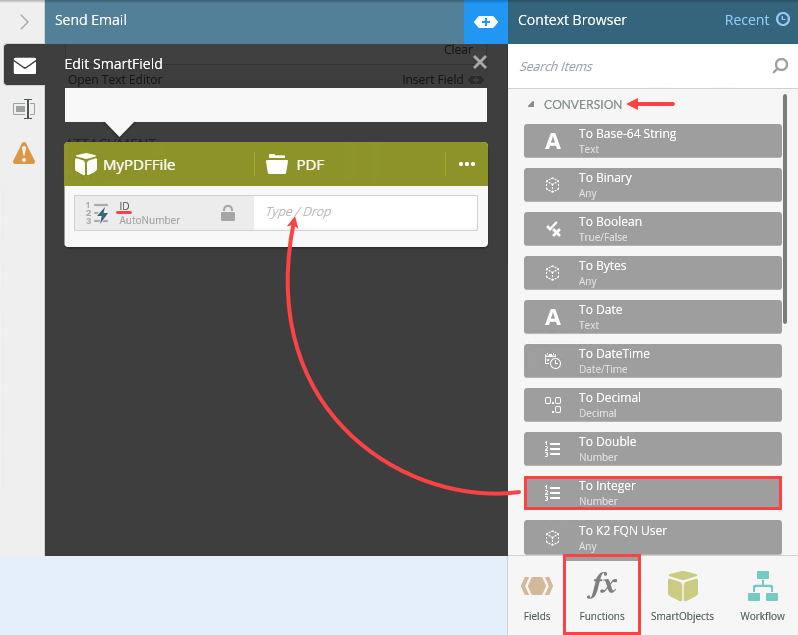
- The Edit SmartField screen opens.You've added the PDF property, but you must specify which file to add; you want the file for the current record. Remember that the ID of the current record is saved in the IDString variable. However, the value in the IDString variable is a text data type and you need it to be an integer, as SmartObject record IDs are integers. The solution is to convert the IDString text value to an integer.
Click the Functions tab. Expand the Conversion node, then drag the To Integer function into the ID text box.
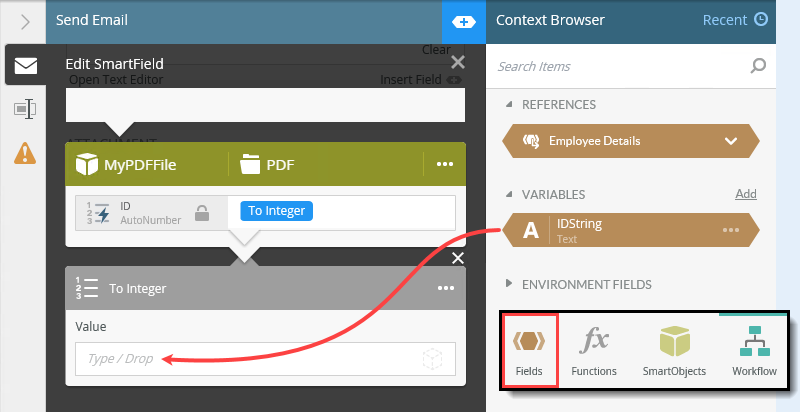
- Click the Fields tab. Drag the IDString variable into the To Integer > Value text box.
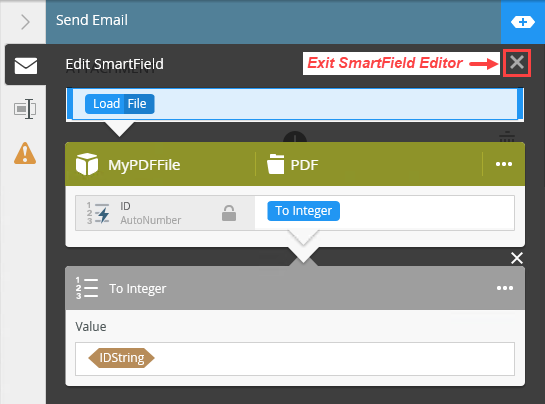
- Exit the SmartField editor by clicking the Exit icon (X).
- Collapse the Configuration Panel. You have completed the configurations for this demonstration. In the next steps, you deploy the workflow, then test your work!
To return to the main Toolbox menu, click the Toolbox icon in the breadcrumb bar.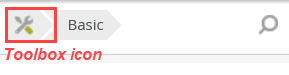 To connect steps, hover over the border of the first step until you see a handle. Click and drag the handle into the second step. Click the canvas to set the line.
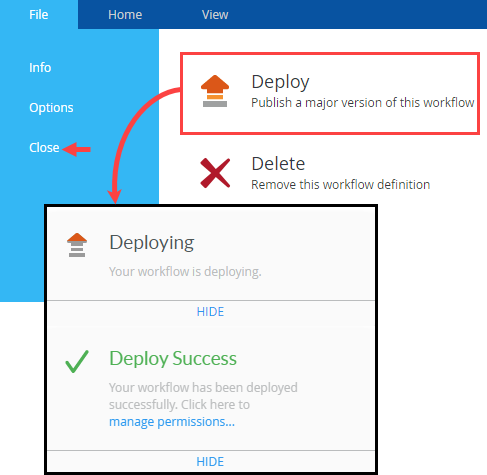
- Deploy the Convert URL to PDF workflow.
Before you can use the workflow, you must deploy it. Deploying the workflow publishes it and makes it available for use. If you make any changes to the workflow, you must deploy it again so that the changes are updated on the server.Click File > Deploy. When you see the success dialog, click File > Close to return to the Designer. (Since this is a demonstration, you do not need to configure permissions.)
- To test the application, open the Management site and start a new instance of the Convert URL to PDF workflow. Confirm you receive an email with the PDFRateExchange file attached. The attachment should reflect today's exchange rate.
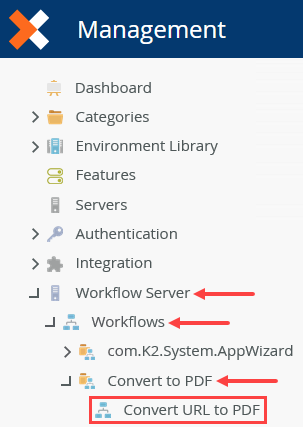
- In a separate browser tab, launch the Management site.If you do not know how to access the Management site, see Accessing Sites.
- From the menu, expand the Workflow Server > Workflows node. Navigate to the Convert URL to PDF workflow. The image below reflects the Convert to PDF category; your screen may be different, depending on where you saved your workflow.
- Select Convert URL to PDF. In the central pane, click the Start New icon.
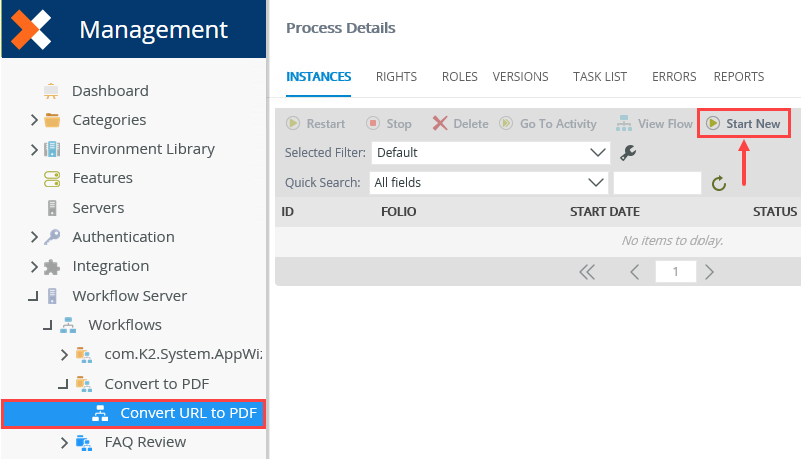
- On the Start Options screen, click Start (near the bottom of the screen.) Click OK when you see the confirmation dialog.
- Open your email client. Confirm you see an email with the PDF file attached.
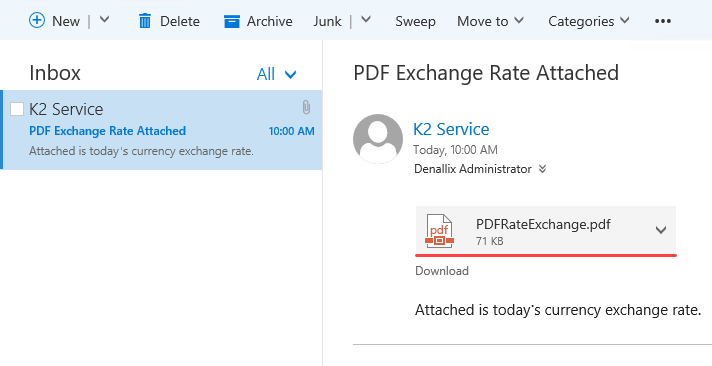
- Open the attachment. You should see the rate exchange web page in PDF format.
- In a separate browser tab, launch the Management site.
Review
There are many uses for converting a web page to a static PDF file, such as providing backup documentation, capturing a page on a specific date, and for archival storage. PDF Converter methods allow you to save web pages as PDF files on demand. You can incorporate these methods in a workflow, then configure a rule to start the workflow at the click of a button. Expanding on this concept, you might include the URL as a variable instead of hardcoding it in the SmartObject Method properties. Finally, you learned how to attach a saved file using a conversion function to retrieve the current record.
For instructions on how to save a SmartForm and its content to a PDF format, see Save as PDF Control.