How To: Test an Application
Prior to releasing any application for use, you should take the time to thoroughly test it. First, you want to identify any errors that might occur so that you can fix them. Second, you want to look at the flow of the application and the usability of your forms.
Submitting a leave request
Scenario
To test your sample application, you submit a test leave request, then take action on it as your manager. The form should submit without error and your manager should receive a task notification email with a link to open the approval form. After making a decision to approve or reject the request, the manager should submit the form, again without error. Finally, you should receive an email with the correct decision made by the manager.
Steps
From the Designer, launch the Leave Request Form using the Runtime URL. Submit at least one leave request. Open your manager's Workspace (Desktop) and confirm the Inbox contains a task notification email for this request. Launch the form in the central pane. Select either Approved or Rejected, then submit the form.
- From the Designer, check-in all forms and views. Use the Runtime URL to launch the Leave Request Form. Complete the form fields, then submit the request.
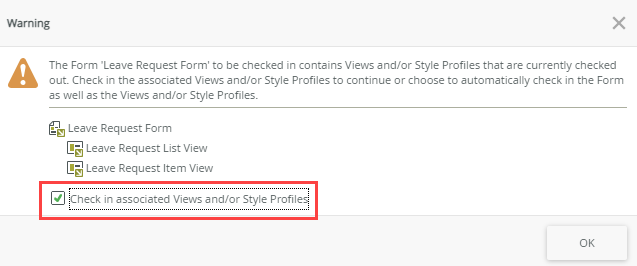
- Begin by checking in all views and forms. Just like the workflow, you want to publish the latest version to the server. Right-click the Leave Request Form. Select Check In. You see a pop-up about checking in all associated views. Check the box to Check in associated Views and/or Style Profiles, then click OK.
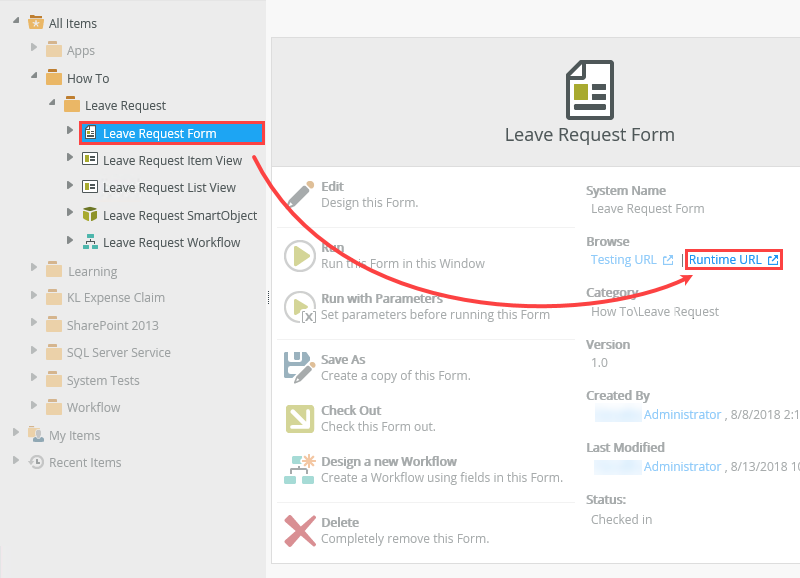
- Select the Leave Request Form. Click the Runtime URL found in the central pane. This is the URL to the Leave Request Form that you can use on web pages and in emails. This is a live link on the server for the Leave Request Form.
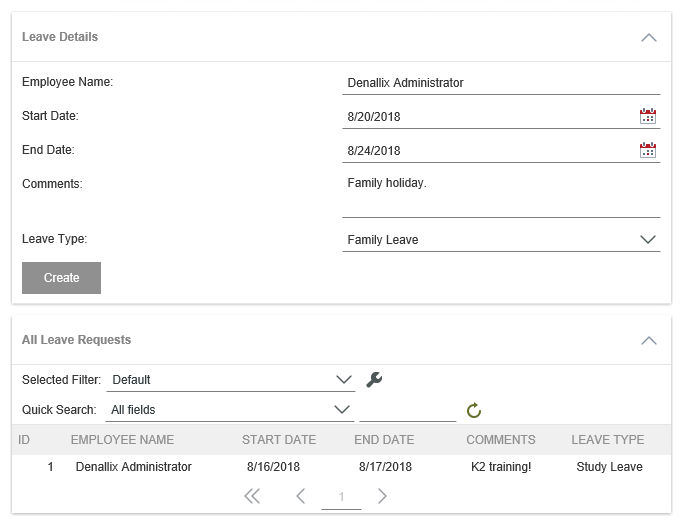
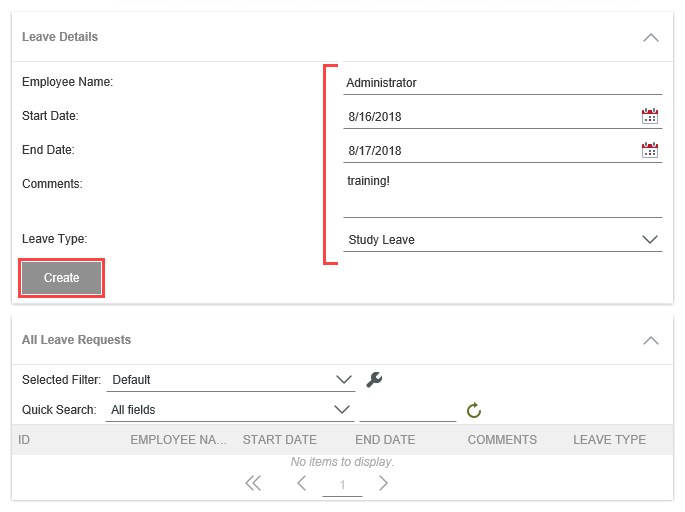
- Complete the fields in the Leave Details view, then click Create to save and send your request. Close the browser window after the form submits. (You won't have a visual indication the form submitted. After clicking the Create button, if you don't see any errors, your workflow started.)
- Launch another instance of the Leave Request Form using the Runtime URL. This time, you should see the first leave request displayed in the All Leave Requests view. Remember, this view lists all saved leave requests from the Leave Request SmartObject. Close the browser window as you don't need to submit this form.
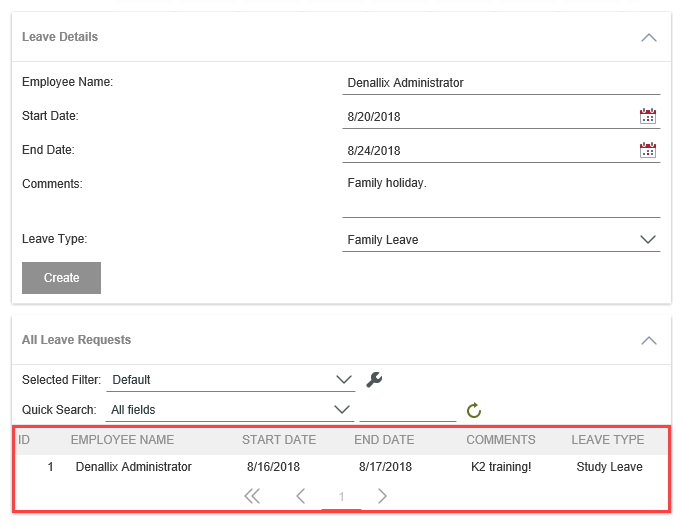
The form launches in your browser. Notice your two views: the Leave Details view contains the leave details and the All Leave Requests view displays saved leave requests. (The All Leave Requests view should not have any records displayed just yet since you have not submitted any requests.)
- Begin by checking in all views and forms. Just like the workflow, you want to publish the latest version to the server. Right-click the Leave Request Form. Select Check In. You see a pop-up about checking in all associated views. Check the box to Check in associated Views and/or Style Profiles, then click OK.
- The next step is to action the request as the requester's manager. The manager is the task recipient and must decide whether to approve or reject the leave request. Launch Workspace (Desktop) (logged in as the manager). If you do not know how to open Workspace (Desktop) from your environment, see the article, Accessing Sites.
- Next, you test the manager approval task step. You open the form logged in as the requester's manager, then action the request by selecting and submitting either Approved or Rejected.
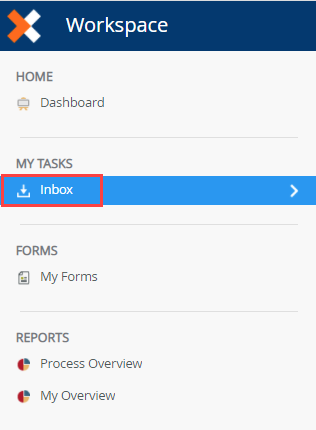
- Open the manager's Workspace.
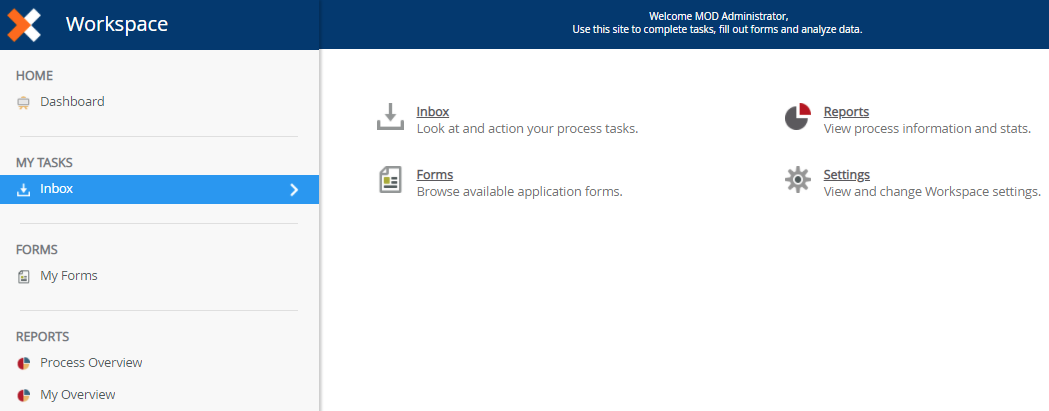
- Click the Inbox link to open the task notification emails.
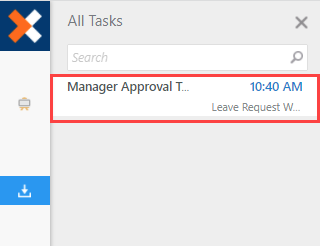
- Click the Manager Approval Task email to launch the form in the central pane.
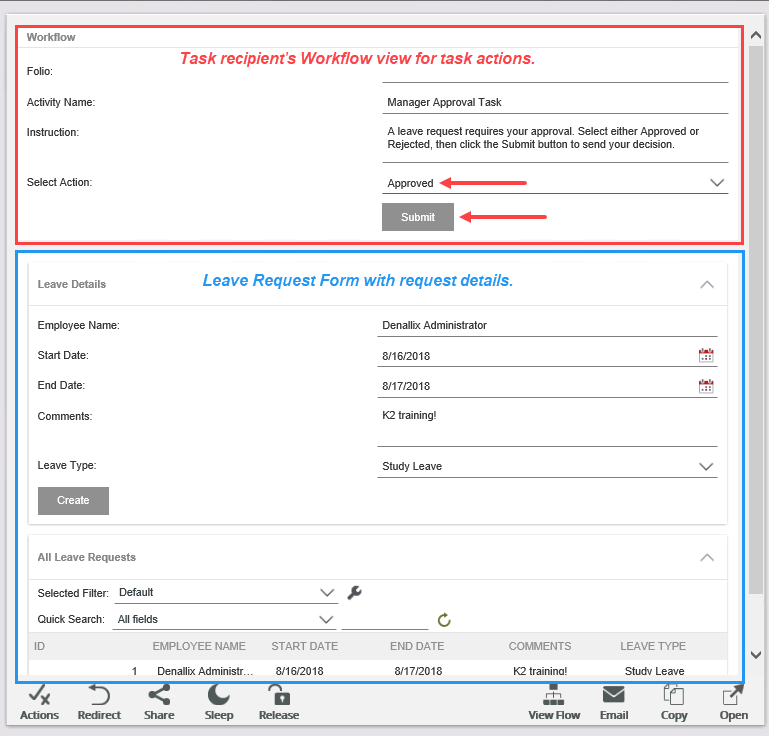
- In the central pane, you see the Leave Request Form with the leave details and the list of saved requests. At the top of the form is a new view, the Workflow task view. This view is added into the form for task steps. This view displays your instructions along with a drop-down list of the actions you can take. Review the request form, then select either Approved or Rejected for the Action. Click the Submit button to save and send your decision. Click OK when you see the confirmation dialog. Close the browser.
-
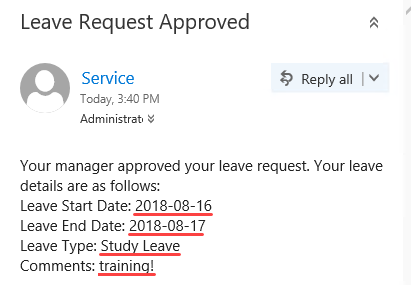
The final test is to confirm the leave requester received an email with the manager's decision. Open the leave requester's email, then confirm you see an email with the correct decision depicted.
- The last steps of the workflow are Send Email steps, which you configured for the Approved and Rejected outcomes. Open the leave requester's email, then confirm there is an email indicating the correct decision from the manager. Notice the details return live data in place of the Context Browser references.
- The last steps of the workflow are Send Email steps, which you configured for the Approved and Rejected outcomes. Open the leave requester's email, then confirm there is an email indicating the correct decision from the manager. Notice the details return live data in place of the Context Browser references.
Review
Concluding this How-To series, you learned how to build a simple leave request application from start to finish. You began by building a SmartBox SmartObject as your data source for storing submitted leave requests. You built two views: an item view to capture the leave details and a list view to display saved leave requests. You added both views to a form, completing the user interface. You then focused on the process automation by building the workflow which contains a user task step as well as system steps. Testing your application demonstrates how all the components work together for an automated solution to a common business process.